How to Universal Cooling Fan Mounting Kit: Essential Guide
Quick Summary
Installing a universal cooling fan mounting kit is straightforward with the right steps. This guide breaks down the process for homeowners, ensuring a secure and effective fan setup for improved airflow and comfort. Follow along for a simple, DIY-friendly solution.
Hey there, DIY enthusiasts! Md Meraj here. Ever feel like a room just doesn’t get enough airflow, or perhaps you’ve got a new fan you’re eager to install but the mounting seems a bit tricky? It’s a common hurdle, especially when you’re looking at those universal mounting kits. They promise versatility, but sometimes that can feel a little daunting. Don’t worry, though! I’ve helped countless homeowners tackle these projects, and I’m here to walk you through using a universal cooling fan mounting kit step-by-step. We’ll make sure your fan is installed safely and securely, so you can enjoy better air circulation in no time. Let’s get started!
What is a Universal Cooling Fan Mounting Kit?
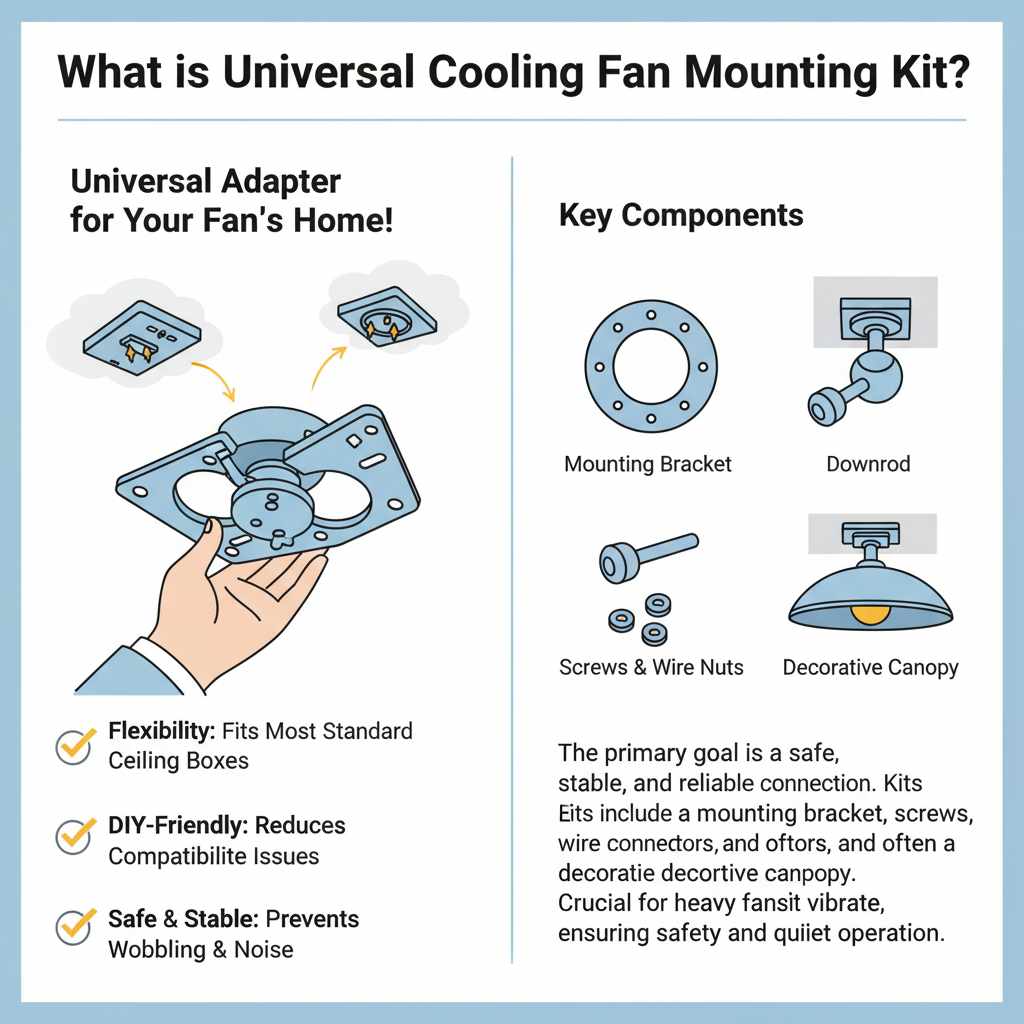
A universal cooling fan mounting kit is a set of hardware designed to attach a ceiling fan to various types of ceiling electrical boxes and mounting configurations. Think of it as a universal adapter for your fan’s home! These kits are fantastic because they offer flexibility. Instead of needing a specific type of bracket for every single ceiling box, a universal kit usually includes several different components or adjustable features that allow it to fit securely in most standard situations. This is a huge win for DIYers, as it means you’re less likely to run into compatibility issues when installing a new fan or replacing an old one.
The primary goal of a universal mounting kit is to provide a safe, stable, and reliable connection between your fan and the ceiling structure. This is crucial because ceiling fans can be heavy, and they also vibrate when in operation. A secure mount prevents wobbling, reduces noise, and, most importantly, ensures the fan doesn’t detach from the ceiling. These kits typically come with a mounting bracket, screws, wire connectors, and sometimes even a decorative canopy to cover the wiring and mounting hardware.
Why Use a Universal Mounting Kit?
The beauty of a universal cooling fan mounting kit lies in its adaptability and convenience. Here’s why it’s often the go-to choice for many homeowners and DIYers:
- Versatility: As the name suggests, these kits are designed to work with a wide range of ceiling electrical boxes. This is especially helpful if you’re unsure about the exact type of box installed in your ceiling or if you’re installing a fan in a location that might have an older or less common box.
- Cost-Effectiveness: Buying a universal kit can often be more economical than purchasing separate mounting hardware or dealing with specialized brackets. It simplifies the purchasing process, too – one kit covers many possibilities.
- Ease of Installation: While installation always requires care, universal kits are typically designed with DIYers in mind. They often come with clear instructions and common hardware sizes, making the process less intimidating.
- Safety and Stability: A well-designed universal kit provides a robust connection, ensuring your fan is securely mounted. This is vital for preventing accidents and ensuring the fan operates smoothly without excessive wobbling. A stable mount contributes significantly to the longevity of your fan.
- Component Compatibility: Many ceiling fans come with a basic mounting system. However, if you’re installing a fan in a new location or replacing an older fixture, a universal kit ensures you have all the necessary parts to adapt to your existing ceiling structure.
Tools and Materials You’ll Need
Before you begin, gather these essential tools and materials. Having everything ready makes the installation process much smoother and safer. Remember, safety first!
Essential Tools:
- Screwdriver Set: You’ll likely need both Phillips and flathead screwdrivers in various sizes. A magnetic tip can be a lifesaver for holding screws in tight spots.
- Wire Strippers/Cutters: For preparing the electrical wires.
- Voltage Tester: Absolutely crucial for ensuring the power is off before you start working with electrical wiring. A non-contact voltage tester is quick and easy to use. You can find reliable ones from brands like Klein Tools or Fluke.
- Pliers: Useful for gripping, bending, or cutting wires, and sometimes for tightening nuts.
- Ladder: A sturdy ladder that allows you to comfortably and safely reach your ceiling. Ensure it’s placed on a stable surface.
- Safety Glasses: Protect your eyes from dust, debris, or falling objects.
- Work Gloves: To protect your hands.
- Drill (Optional but Recommended): Can speed up the process of driving screws, especially if your ceiling box is made of thicker material.
- Stud Finder: If you’re mounting a new electrical box or need to ensure the existing one is securely attached to a joist.
- Adjustable Wrench: May be needed for tightening certain nuts or bolts.
Materials Included in Most Universal Kits:
- Mounting Bracket: The main component that attaches to the electrical box.
- Screws and Washers: For securing the bracket to the electrical box and sometimes for attaching the fan to the bracket.
- Wire Connectors (Wire Nuts): For safely joining electrical wires.
- Canopy Ring/Cover: To hide the mounting hardware and wiring at the ceiling.
- Grounding Screw: For the safety ground wire.
Additional Materials (May Vary):
- Ceiling Electrical Box: If you don’t have one or the existing one isn’t fan-rated. It’s essential to use a box specifically designed to support the weight and vibration of a ceiling fan. Metal boxes are generally preferred for ceiling fans. You can find fan-rated boxes at most hardware stores. For guidance on electrical boxes, the Code Check Electrical website offers great resources.
- Hanging Ball/Hook: Sometimes integrated into the bracket, other times a separate piece.
- Ceiling Fan: Of course!
Step-by-Step Installation Guide
Let’s get this fan mounted! We’ll break it down into manageable steps. Remember to always refer to the specific instructions that came with your universal mounting kit and your ceiling fan, as designs can vary.
Step 1: Safety First – Turn Off the Power!
This is the most critical step. Go to your home’s main electrical panel (breaker box) and locate the breaker that controls the circuit for the room where you’ll be installing the fan. Flip it to the OFF position. To be absolutely sure, use your voltage tester at the existing light fixture or wiring location to confirm there is no power. Test all wires.
Step 2: Remove the Old Fixture (If Applicable)
If you’re replacing an old light fixture or fan, carefully remove it. Unscrew the canopy, disconnect the wiring (usually by unscrewing wire nuts), and then detach the fixture from its mounting bracket. Keep any screws or hardware you might need.
Step 3: Inspect and Prepare the Electrical Box
Look at the electrical box in the ceiling. Is it securely attached to a ceiling joist? Does it feel sturdy? For a ceiling fan, you absolutely need a “fan-rated” electrical box. These are designed to handle the weight and vibration. If your box is plastic or feels flimsy, you’ll need to replace it with a fan-rated metal box. The National Electrical Code (NEC) requires ceiling fans to be mounted to boxes specifically designed for this purpose. You can find guidance on selecting the right box from resources like the Electrical Know How website.
If your box is fan-rated and secure, proceed to the next step. If you need to replace it, you’ll need to remove the old box and install the new one, ensuring it’s firmly attached to a ceiling joist or a fan brace.
Step 4: Install the Universal Mounting Bracket
Your universal mounting kit will likely have a metal bracket. This bracket needs to be attached to the fan-rated electrical box in your ceiling. Your kit might come with several different bracket styles or adjustable slots. Choose the one that best fits your box.
- Align the mounting bracket with the screw holes on your electrical box.
- Use the screws provided with the mounting kit (or sometimes the electrical box itself) to securely fasten the bracket to the box. Make sure it’s snug and doesn’t move.
- Some brackets have a central hook or a specific slot for the fan’s hanging ball to rest in. Ensure this is oriented correctly according to your fan’s instructions.
Here’s a quick comparison of common electrical box types you might encounter:
| Box Type | Suitability for Ceiling Fans | Notes |
|---|---|---|
| Standard Plastic Box | No | Not designed for the weight or vibration of fans. |
| Standard Metal Box (not fan-rated) | No | May not be securely attached to a joist or strong enough. |
| Fan-Rated Metal Box (Surface mount) | Yes | Designed for fan support, screws directly into joist or brace. |
| Fan-Rated Metal Box (Pancake style) | Yes | Shallow box, good for tight spaces, mounts directly to joist. |
| Fan-Rated Brace (Adjustable) | Yes | Installs between joists, provides a sturdy mounting point. |
Step 5: Assemble the Fan Motor and Downrod
While the bracket is being installed, you can start assembling the fan motor and the downrod (the pipe that hangs the fan from the ceiling). Follow your fan’s manual carefully for this. This usually involves feeding the fan’s wires through the downrod, attaching the downrod to the motor housing, and securing it with pins and screws.
Once the downrod is attached, slide the decorative canopy and any canopy rings over the downrod. These will be used later to cover the mounting hardware and wiring at the ceiling.
Step 6: Hang the Fan Motor Assembly
Now it’s time to lift the assembled fan motor and hang it onto the mounting bracket. Most universal mounting brackets have a hook or a special slot designed to hold the fan securely while you make the electrical connections. Carefully lift the fan and seat the hanging ball on the end of the downrod into the bracket’s groove or onto its hook. This allows the fan to hang freely, giving you both hands to work on the wiring.
Step 7: Make the Electrical Connections
This is where your wire strippers, wire nuts, and voltage tester are essential. Ensure the power is still OFF!
- Ground Wires: Connect the bare copper (or green) ground wire from the ceiling box, the ground wire from the mounting bracket, and the ground wire from the fan motor together using a wire nut.
- Neutral Wires: Connect the white neutral wire from the ceiling box to the white neutral wire from the fan motor using a wire nut.
- Hot Wires: Connect the black hot wire from the ceiling box to the black wire from the fan motor using a wire nut. If your fan has separate wires for light and fan motor (e.g., a blue wire for the light), you’ll connect the ceiling’s hot wire to both the fan’s black and blue wires (or follow your fan’s specific wiring diagram). If you have a separate switch for the fan and light, the wiring will be more complex, and you might need to consult an electrician or a detailed wiring guide.
For a standard setup, you’ll typically be connecting:
- Ceiling Ground to Bracket Ground to Fan Ground
- Ceiling White to Fan White
- Ceiling Black to Fan Black (and potentially Fan Blue for light)
Tuck all the wired connections neatly up into the electrical box. Make sure no bare wire is exposed outside of the wire nuts.
Step 8: Secure the Fan to the Mounting Bracket
Once the wiring is complete and tucked away, you’ll secure the fan motor assembly to the mounting bracket. Your universal kit and fan manual will have specific instructions for this. It often involves lifting the fan off its temporary hook/slot and aligning the motor housing with the bracket. You might need to screw the motor housing directly to the bracket, or there might be a locking mechanism. Ensure it is firmly seated and secured.
Step 9: Attach the Canopy
Now, slide the decorative canopy up towards the ceiling. This canopy is designed to cover the electrical box, the mounting bracket, and all the wiring. It typically attaches to the mounting bracket or the fan motor housing with screws. Make sure it sits flush against the ceiling and covers everything it’s supposed to.
Step 10: Install the Fan Blades
This step is usually done after the motor is mounted, as it’s easier to handle the motor when it’s attached to the ceiling. Attach the fan blade brackets (arms) to the fan blades, and then attach the assembled blades to the fan motor. Again, follow your fan’s specific instructions for the best way to do this.
Step 11: Install the Light Kit (If Applicable)
If your fan has a light kit, now is the time to install it. This usually involves connecting a few wires (often a plug-in connector) and then attaching the light fixture assembly to the bottom of the fan motor. Install light bulbs and any globes or shades.
Step 12: Restore Power and Test
With everything securely installed, it’s time to test! Go back to your electrical panel and flip the breaker back ON. Turn on the fan using its pull chains or wall control. Test all speeds and the light kit. Check for any wobbling or unusual noises. A little bit of motor hum is normal, but excessive shaking or clunking means something needs to be rechecked.
Troubleshooting Common Issues
Even with the best guides, sometimes things don’t go perfectly. Here are a few common issues and how to address them:
-
Fan Wobbles Excessively:
- Check that all screws securing the mounting bracket to the electrical box are tight.
- Ensure the electrical box itself is securely fastened to a joist.
- Make sure all fan blade screws and blade iron screws are tight.
- Check that the fan canopy is securely attached.
- Some fans come with a balancing kit. If wobbling persists after checking all connections, use the balancing kit according to its instructions.
-
Fan Doesn’t Turn On:
- Verify the power is on at the breaker.
- Double-check all wire connections. Ensure wire nuts are securely in place and no wires have come loose.
- Test the wall switch or pull chains.
- If your fan has a remote, ensure the battery is good and it’s synced correctly.
-
Light Kit Not Working:
- Check the light bulb.
- Ensure the wires for the light kit are properly connected (often a blue wire from the fan to the light kit).
- If using a remote, check its settings for the light.
-
Fan Makes Unusual Noises:
- Check for loose screws on blades, blade irons, or the motor housing.
- Ensure the canopy is snug against the ceiling.
- Sometimes, the downrod can rub against the canopy if not installed correctly, causing noise.
If you’ve tried these steps and are still having trouble, don’t hesitate to consult the fan manufacturer’s support or a qualified electrician. Safety is always the priority.

Frequently Asked Questions (FAQ)
Q1: Do I really need a special “fan-rated” electrical box?
A1: Yes, absolutely. Standard electrical boxes are not designed to support the weight and vibration of a ceiling fan. A fan-rated box is securely attached to a ceiling joist or a specialized brace, ensuring a stable and safe mount. Using a non-rated box can lead to fan failure, damage, or even serious injury.
Q2: Can I use a universal mounting kit with any ceiling fan?
A2: Universal mounting kits are designed for compatibility with most standard ceiling fans. However, always check the specifications of both your fan and the mounting kit to ensure they are compatible. Some very large or uniquely designed fans might require specific mounting hardware.
Q3: How tight should I make the mounting bracket screws?
A3: You should tighten the screws until the mounting bracket is snug and secure against the electrical box. Avoid overtightening, which could strip the screws or damage the box. The bracket should not move or flex when you apply pressure to it.
Q4: What if my ceiling fan is very heavy?
A4: If you have a particularly heavy fan, ensure you are using the strongest possible fan-rated electrical box and that it is firmly attached to a ceiling joist or a heavy-duty fan brace. Some kits are more robust than others; look for kits rated for heavier loads if available.
Q5: How do I know if my ceiling fan is properly balanced?
A5: A properly balanced fan will run smoothly without noticeable wobble. If you notice wobbling, first check that all blade screws and mounting bracket screws are tight. If the wobble persists, use the balancing kit that often comes with the fan, following its instructions carefully.
Q6: Can I install a ceiling fan on a sloped or vaulted ceiling?
A6: Yes, but you will likely need a special angled ceiling adapter or a longer downrod. Ensure your universal mounting kit is compatible with angled installations or that you purchase the necessary adapter. The fan should hang straight down from the ceiling.
Conclusion
You’ve done it! By following these steps, you’ve successfully learned how to use a universal cooling fan mounting kit to securely install your ceiling fan. Remember, the key to a successful DIY project is preparation, attention to detail, and prioritizing safety, especially when dealing with electrical work. A well-mounted fan not only improves the comfort of your home but also adds a great aesthetic touch.
Don’t be discouraged if your first attempt takes a little longer than expected. Every home is different, and every installation is a learning experience. The confidence you gain from tackling projects like this yourself is incredibly rewarding. So, enjoy the improved airflow and the satisfaction of a job well done. Keep those tools handy, and happy DIYing!