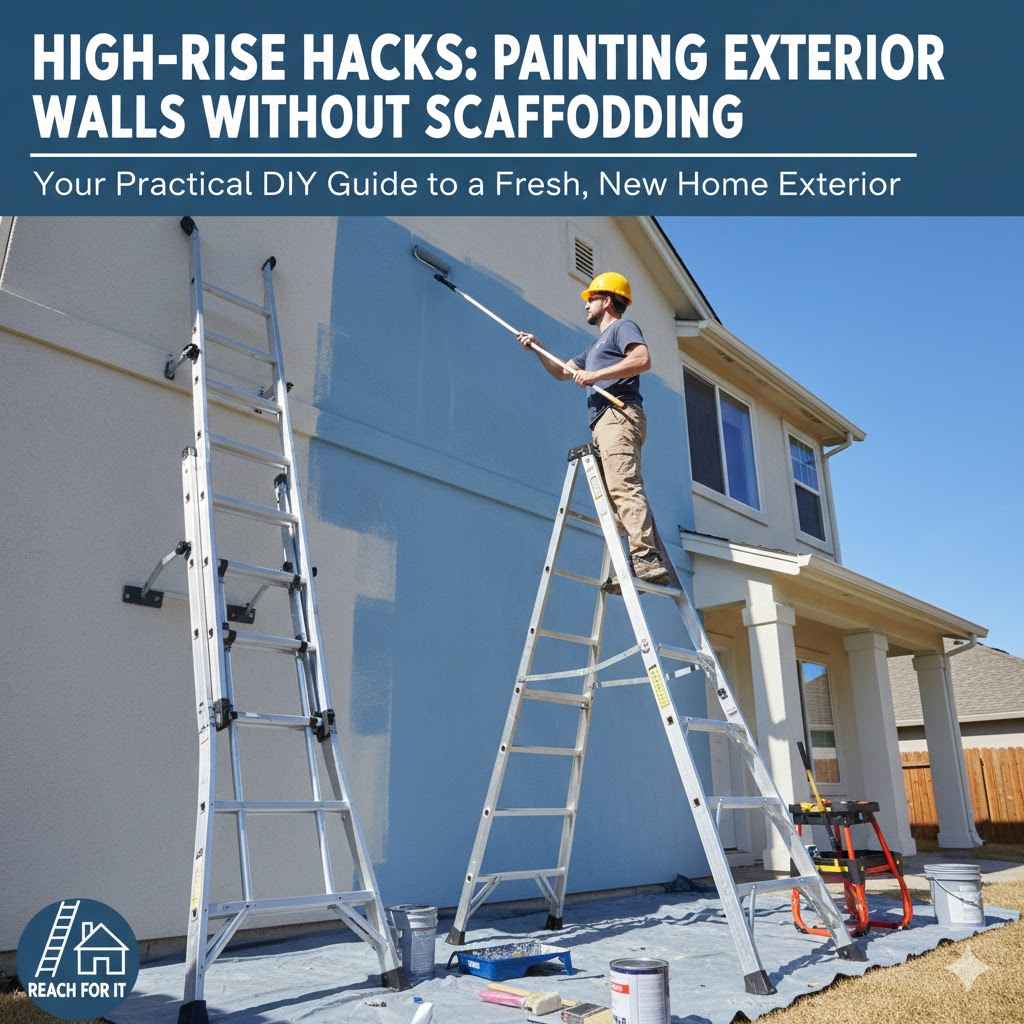
Painting Exterior Walls Without Scaffolding: A Practical Guide
Figuring out How to Paint the Outside of a House Without Scaffolding can seem tricky. Many people want to spruce up their homes but are unsure where to start. Scaffolding can be expensive and a hassle. This guide will walk you through easy steps to paint those hard-to-reach areas safely and effectively. We’ll explore various tools and techniques, ensuring you get a great result without breaking the bank or putting yourself at risk. Ready to begin your painting project? Let’s get started!
Choosing the Right Tools for Your Paint Job
Picking the correct tools is super important for a successful paint job. When you’re painting a house exterior without scaffolding, your choices become even more vital. You need to consider reach, safety, and the quality of the finish. A little planning upfront can save you a lot of trouble later. This section will look at the essential tools and equipment that will help you achieve a professional-looking result from the ground.
Extension Poles for High Reaches
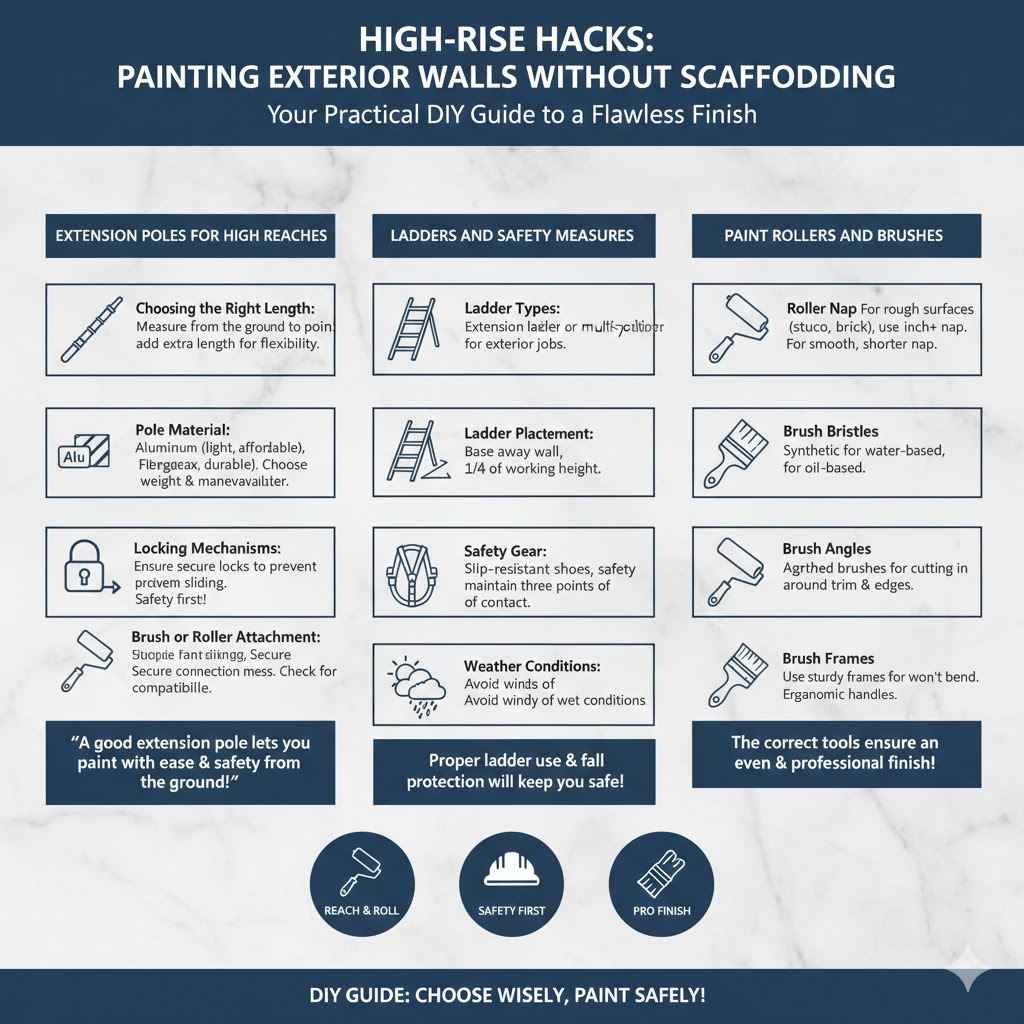
Extension poles are the superstars of painting without scaffolding. They attach to paint rollers or brushes and let you reach high areas from the ground. They are available in various lengths, typically extending up to 12 feet or more. The type of material used for the extension pole will affect its sturdiness and weight. Aluminum poles are lightweight and affordable, while fiberglass poles are more durable and rigid. Make sure to choose one that feels balanced and easy to handle when fully extended. Look for poles with locking mechanisms that securely hold the extension at your desired length. A good extension pole will let you paint the upper portions of your house with ease and safety.
- Choosing the Right Length: Decide how high you need to reach. Measure the distance from the ground to the highest point you need to paint. Add extra length to your extension pole to give yourself some flexibility and control. Remember that a longer pole may be harder to control.
- Pole Material: As mentioned, aluminum is light and cheap, but fiberglass is stronger and more durable. Consider the weight and how easy the pole is to maneuver when deciding.
- Locking Mechanisms: Make sure the pole locks securely at any length. Cheap mechanisms can slide and become a safety issue.
- Brush or Roller Attachment: Ensure the attachment mechanism is secure. A loose connection will create a mess.
Ladders and Safety Measures
While extension poles are your primary tool, ladders are still necessary for closer work and detailing. Using the correct ladder and following safety protocols is critical. Always have a spotter or someone to hold the ladder steady. Always check the ladder for any damage before use. Ensure the ladder’s feet are on a solid, level surface. Proper ladder use and fall protection will keep you safe during your project.
- Ladder Types: Choose the right ladder. For most exterior painting jobs, an extension ladder or a multi-position ladder is best.
- Ladder Placement: Place the ladder at the correct angle. The base should be away from the wall at a distance equal to a quarter of the ladder’s working height.
- Safety Gear: Wear slip-resistant shoes and consider using a safety harness if you’re working at heights. Always keep three points of contact on the ladder.
- Weather Conditions: Do not use ladders in windy or wet conditions.
Paint Rollers and Brushes
The type of roller or brush you use affects the finish. For exterior walls, choose rollers designed for rough surfaces like stucco or brick. These rollers have a thicker nap to hold more paint and get into crevices. For brushes, pick exterior-grade brushes with durable bristles to withstand the elements. Angled brushes are great for cutting in around windows and doors. Making the correct choice will ensure an even and professional paint job.
- Roller Nap: The nap is the thickness of the roller cover. For rough surfaces, use a nap of 1 inch or more. For smoother surfaces, use a shorter nap.
- Brush Bristles: Choose brushes with synthetic bristles for water-based paints and natural bristles for oil-based paints.
- Brush Angles: Angled brushes help cut in around trim and edges. They are helpful for getting paint into tight areas.
- Roller Frames: Use sturdy roller frames that won’t bend or flex under pressure. Look for ergonomic handles.
Preparing Your House for Painting Without Scaffolding
Proper preparation is key to a good paint job. This is the stage where you set the stage for success. Cleaning the surface, fixing any damage, and protecting areas you don’t want to paint are all critical steps. Skipping this step can lead to paint peeling, bubbling, and a less-than-stellar result. Let’s explore each area of preparation and what to watch out for.
Surface Cleaning and Repair
Before any paint touches your house, clean the surface to remove dirt, mildew, and loose paint. Use a pressure washer to clean the exterior walls, but be careful not to damage the surface. You can also hand-wash with a scrub brush and a mixture of water and mild detergent. Check for any cracks, holes, or other damage and repair them before painting. This may involve patching cracks with caulk, filling holes with exterior filler, or replacing damaged siding. Repairing any problems now will ensure your paint job lasts longer and looks great.
- Pressure Washing: A pressure washer removes dirt and old paint. Use a low setting to avoid damaging siding or brick.
- Scraping and Sanding: Scrape away loose paint and sand any rough areas. This creates a smooth surface for the new paint.
- Caulking and Filling: Use caulk to seal cracks and gaps around windows and doors. Fill holes and dents with exterior filler, then sand smooth.
- Mildew Removal: Use a mildew cleaner to remove mildew. Rinse the surface thoroughly after cleaning.
Protecting Your Surroundings
Protecting your surroundings helps you avoid accidental paint splatters. Cover plants, windows, doors, and anything else you don’t want to paint with drop cloths or plastic sheeting. Use painter’s tape to protect trim and edges. Pay close attention to areas close to the ground, where paint can easily land. Planning for and executing these steps will make the painting process smoother and the clean-up easier.
- Drop Cloths: Use drop cloths to protect the ground, bushes, and other plants. Canvas drop cloths are durable and reusable.
- Plastic Sheeting: Use plastic sheeting to cover windows, doors, and anything else near the painting area. Tape it securely.
- Painter’s Tape: Use painter’s tape to protect trim, windows, and other areas that should not be painted.
- Protective Gear: Wear safety glasses and gloves to protect your eyes and skin from paint.
Priming the Surface
Priming the surface is a critical step, especially when painting exterior walls. Primer provides a good base for the paint to adhere to, which helps it last longer. It seals the surface, ensuring the paint doesn’t get absorbed unevenly. Primer also helps cover stains and creates a more uniform finish. If the surface is weathered or has significant repairs, priming is especially important. When properly prepared, priming sets the stage for a great result.
- Primer Types: Choose an exterior primer that matches the paint you’ll be using (latex or oil-based).
- Application: Apply primer with a roller or brush, just as you will with paint. Make sure to get even coverage.
- Drying Time: Allow the primer to dry completely before applying paint. Follow the manufacturer’s directions for drying times.
- Spot Priming: Spot prime areas where repairs have been made. Prime the entire surface for optimal results.
Techniques for Painting Those High Areas
Now that your house is prepped, it’s time to tackle the painting. Working without scaffolding requires the right techniques. You’ll need to use your extension pole efficiently and safely. Mastering these techniques ensures you get even coverage and minimize the need to constantly move ladders. This section will look at the best ways to apply paint to those out-of-reach areas.
Using Extension Poles Effectively
Extension poles are the primary tool for painting without scaffolding. Hold the pole steady and move smoothly to avoid drips and uneven coverage. Practice to get used to the feel of the pole and learn how to control it. Use the right roller or brush to hold the right amount of paint. Consider using an angled brush for cutting in around edges and trim. Proper use of an extension pole is the key to a professional finish.
- Pole Control: Hold the pole firmly with both hands to ensure stability and control.
- Even Strokes: Apply the paint in even strokes, overlapping each pass slightly.
- Paint Amount: Don’t overload the roller or brush with paint. This reduces drips and unevenness.
- Angle of Attack: Keep the roller or brush at the right angle to the wall for best coverage.
Cutting In Around Trim and Edges
Cutting in around trim, windows, and doors creates a clean, professional finish. Use an angled brush to carefully paint along edges. Work slowly and methodically, holding the brush steady to avoid getting paint where it shouldn’t be. You might need to use a ladder for specific parts, but practice and patience will get you the best results. A steady hand and attention to detail make a real difference.
- Brush Selection: Use an angled brush for precise control when cutting in.
- Paint Application: Dip the brush in the paint only about an inch to prevent drips.
- Steady Hand: Hold the brush steadily to avoid shaking.
- Overlap: Overlap the painted edge slightly with the roller to achieve a seamless finish.
Tips for Safety and Efficiency
Prioritize safety by following safety protocols to paint without scaffolding. Always wear protective gear, including safety glasses and gloves. Take breaks to avoid fatigue. If you are working at heights, always have a spotter to hold the ladder or provide support. Plan your painting in manageable sections to make the process more efficient. These tips will help you complete your project safely and effectively.
- Work in Sections: Paint small sections at a time. This helps you manage the work.
- Avoid Overreaching: Always keep a safe distance from your work. Do not overreach from a ladder.
- Weather Awareness: Avoid painting on windy or extremely hot days. This can affect paint drying and application.
- Breaks: Take breaks to prevent fatigue. This will reduce mistakes and improve safety.
Making the Most of Your Exterior Painting Project
To get the best results, you need to understand how to maintain your work. This means understanding how long paint takes to dry, how many coats to use, and how to fix mistakes. These points and steps will help your house look great for years. They’ll also help you deal with any problems that arise. Focusing on these details will result in a professional-looking finish.
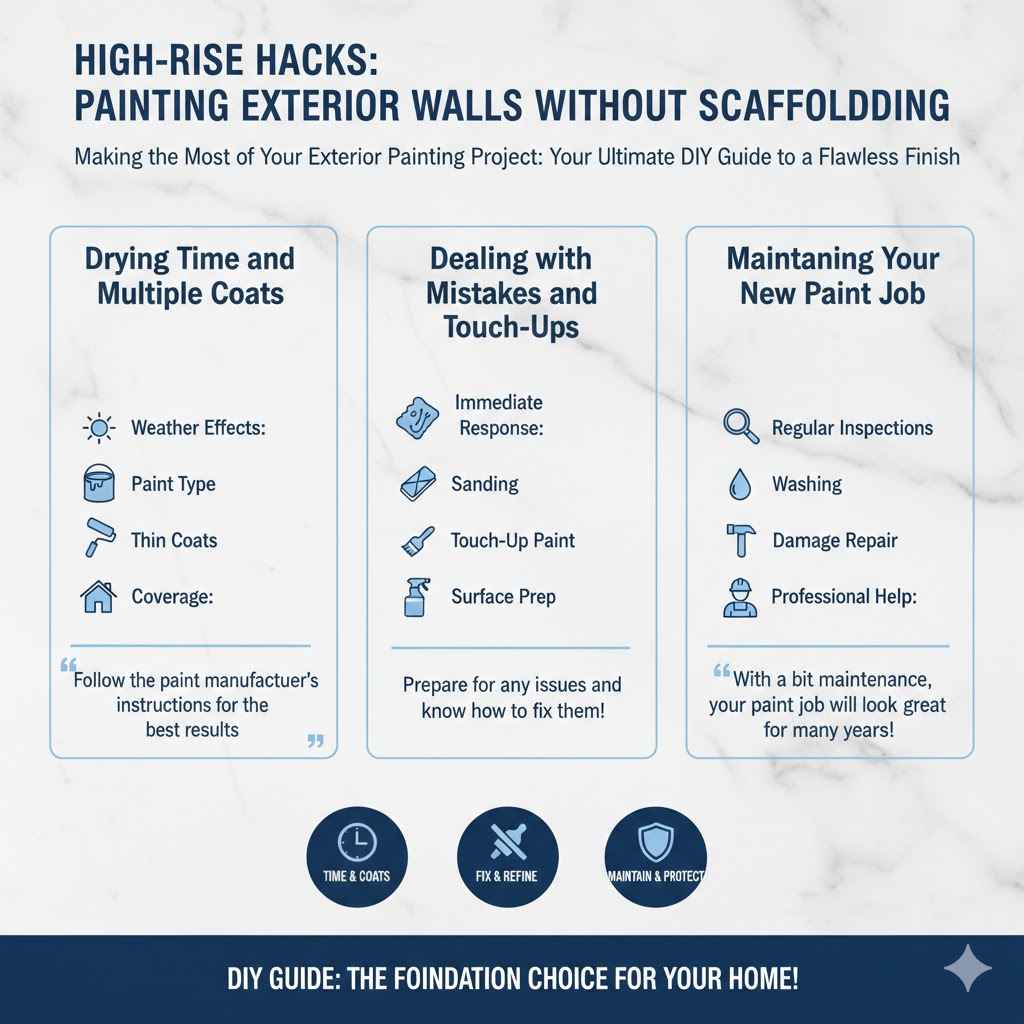
Drying Time and Multiple Coats
Drying time is critical. Allow each coat to dry completely before applying the next. The drying time depends on the type of paint, the weather conditions, and how thick the coat is. Applying multiple coats will give better coverage, a deeper color, and longer-lasting protection. Follow the paint manufacturer’s instructions for the best results, typically waiting a few hours to a full day between coats, depending on the paint and weather.
- Weather Effects: Hot, humid weather can affect drying times. Allow extra time.
- Paint Type: Different paint types will have different drying times. Check the label.
- Thin Coats: Apply thin, even coats to minimize drying time and prevent runs.
- Coverage: The more coats, the better the coverage. Two coats are generally recommended for best results.
Dealing with Mistakes and Touch-Ups
Even the most careful painters make mistakes. Don’t worry, they are easy to fix. If you get paint where it shouldn’t be, wipe it off immediately with a damp cloth or use mineral spirits. If paint drips or runs, sand it down when it’s dry and touch it up. For minor imperfections, a little bit of touch-up paint is all you need. Prepare for any issues and know how to fix them to get great results.
- Immediate Response: Act quickly to wipe up paint spills or splatters while they’re still wet.
- Sanding: Sand away runs and drips after the paint has dried, and touch up the area.
- Touch-Up Paint: Keep a little touch-up paint on hand for minor imperfections or scratches.
- Surface Prep: Always prepare the surface before applying touch-up paint to ensure a good bond.
Maintaining Your New Paint Job
Maintaining your new paint job will make your investment last longer. Regularly inspect your house for any problems. Wash the exterior walls as needed to remove dirt and mildew. Address any chips, cracks, or other damage immediately to prevent it from getting worse. With a bit of maintenance, your paint job will look great for many years.
- Regular Inspections: Check your house for cracks, peeling, or other problems, at least once a year.
- Washing: Wash your house with a mild detergent and water to remove dirt, mildew, and other debris.
- Damage Repair: Fix any damage immediately to prevent it from getting worse.
- Professional Help: Consider hiring a professional to inspect and maintain your paint job.
Frequently Asked Questions
Question: What’s the best type of paint for the outside of a house?
Answer: Exterior latex paint is generally a great choice for houses. It’s durable, flexible, and resists fading. It also cleans up with water.
Question: How do I choose the right color?
Answer: Choose colors based on the style of your house and your personal preferences. Get samples and try them on a small section before committing to the whole house.
Question: Can I paint the outside of my house in any weather?
Answer: Try to avoid painting in windy or very hot weather. Paint needs the right conditions to dry properly. Check the paint label for temperature and humidity suggestions.
Question: What do I do if I get paint on a window?
Answer: If the paint is wet, wipe it off with a damp cloth immediately. If it’s dry, you can usually scrape it off with a razor blade or use a paint remover.
Question: How long does a typical exterior paint job last?
Answer: A typical exterior paint job can last from 5 to 10 years, depending on the quality of the paint, the preparation, and the weather conditions.
Final Thoughts
Painting the outside of your house without scaffolding is achievable with careful planning and the right methods. You’ve explored tools, preparation, and techniques to help you. We’ve gone over extension poles, the importance of a clean surface, and how to get even coverage. Remember to prioritize safety and take your time. With these tips, you can transform your home’s exterior without the expense or hassle of scaffolding. So, get ready to tackle your painting project, and enjoy the satisfaction of a beautifully painted house exterior. Your home will thank you, and you’ll love the results!