Polyurethane Using a Torch: Mastering the Technique
Yes, you can use a torch to pop bubbles on polyurethane, especially when using two-part pour-on poly finishes. It’s important to avoid bubbles in the can as well.
Polyurethane is a popular choice for finishing wood surfaces due to its durability and protection properties. However, during the application process, bubbles may form on the surface, leading to an uneven finish. Using a torch to pop these bubbles is a common technique that can help achieve a smooth and flawless polyurethane finish.
We will explore the process of using a torch to eliminate bubbles on polyurethane, the best practices for applying polyurethane, and tips for achieving a professional-quality finish on your woodworking projects.
Benefits Of Using A Torch
When it comes to applying polyurethane, using a torch can offer several benefits that contribute to achieving a flawless finish. By mastering the technique for bubble-free finishes and understanding the proper application methods, you can ensure a professional-quality outcome for your woodworking projects.
Mastering The Technique For Bubble-free Finishes
One of the key advantages of using a torch when applying polyurethane is the ability to eliminate bubbles that may form during the finishing process. By carefully passing the torch over the surface, the heat helps the bubbles rise to the top and pop, resulting in a smooth and bubble-free finish. This technique is particularly useful when working with two-part pour-on polyurethane finishes, as it allows for precise control over the removal of bubbles, ensuring a flawless result.
Ensuring Each Heading Adheres To Html Syntax
It’s essential to ensure that each H3 heading adheres to HTML syntax to maintain proper structure and formatting within the content. By following HTML syntax guidelines, you can enhance the readability and organization of the information presented, making it easier for readers to navigate and comprehend the content effectively.
Techniques For Applying Polyurethane With A Torch
Applying polyurethane with a torch can be a useful technique to pop bubbles that appear on the surface. It is especially handy when using two-part pour-on poly finishes. However, it is important to avoid bubbles in the can and apply the polyurethane thinly and evenly with a natural-bristle brush.
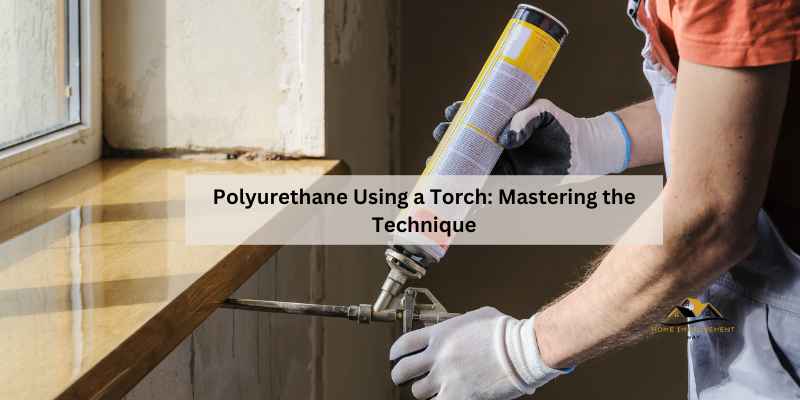
Sealing The Surface With A Blow Torch
Seal the Surface: Thin your oil-based polyurethane with two parts polyurethane and one part mineral spirits.
Brush Technique: Brush the sealer on with a natural-bristle brush using long, even strokes.
Coating Process: Keep a wet edge by overlapping each pass until the surface is completely coated.
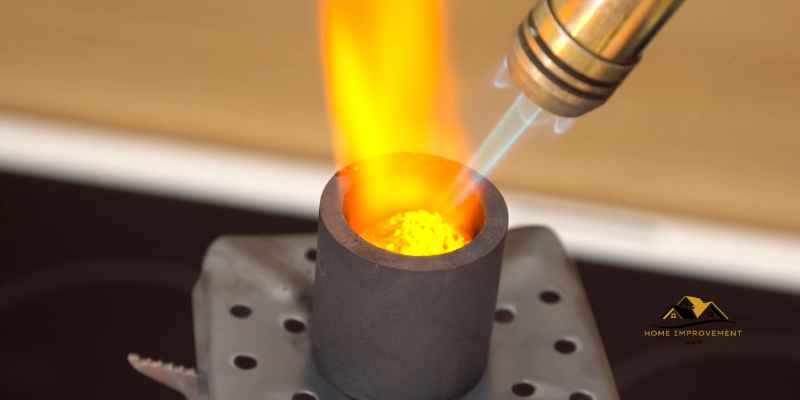
Removing Bubbles With A Torch
- Quick Solution: Pass a torch over the bubbles to make them rise to the surface and pop instantly.
- Effective for Pour-on Finishes: Ideal for two-part pour-on poly finishes to eliminate bubbles efficiently.
- Prevention Tip: Avoid bubbles in the can by using proper techniques while handling polyurethane.
Common Issues And Solutions
When using a torch to apply polyurethane, bubbles can form on the surface. To eliminate them, quickly pass the torch over the affected area to make the bubbles rise and pop. It’s crucial to avoid bubbles in the can before applying.
Using a blow torch can provide an instant solution for a smooth finish.
Fixing Polyurethane Flaws With A Torch
Correcting Bubble, Puddles, Runs, And Brush Marks
Common Issues and Solutions:
Polyurethane application can sometimes result in flaws like bubbles, puddles, runs, and brush marks. These issues can be effectively addressed by using a torch during the application process.
Fixing Polyurethane Flaws With A Torch
- Quickly pass a torch over the surface to make bubbles rise and pop.
- Especially useful for two-part pour-on poly finishes.
- Preventing bubbles in the can is crucial.
Correcting Bubble, Puddles, Runs, And Brush Marks
- Use a blow torch while the polyurethane is still wet to create a smooth finish.
- Light the torch and fan it over the surface to eliminate bubbles instantly.
- Address issues like puddles, runs, and brush marks by carefully applying heat with the torch.
Comparing Oil-based Vs. Water-based Polyurethane
Polyurethane is a popular finish for wood surfaces due to its durability and protective properties. When it comes to choosing between oil-based and water-based polyurethane, it’s essential to understand the differences in their application and finish.
Application
Oil-based Polyurethane:
- Requires longer drying time between coats
- Often applied with a natural-bristle brush
- Thick consistency may require thinning with mineral spirits
Water-based Polyurethane:
- Dries faster, allowing for quicker recoating
- Commonly applied using synthetic brushes or foam applicators
- Does not usually require thinning
Finish
Oil-based Polyurethane:
- Amber hue that deepens with age
- Enhances the natural beauty of wood
- May yellow over time
Water-based Polyurethane:
- Clear and maintains the natural color of wood
- Minimal yellowing or color change over time
- Less odor during application
Preparation And Best Practices

Importance Of Proper Wood Preparation
Before applying polyurethane using a torch, it is crucial to prepare the wood surface properly. This ensures a smooth and durable finish.
Sanding Between Coats For A Smooth Finish
Sanding between coats is essential to achieve a flawless finish. It helps in leveling the surface and removing imperfections.
Advanced Techniques
When working with polyurethane, employing advanced techniques is crucial for achieving a flawless finish. This involves utilizing innovative methods to address imperfections and ensure a professional result. Let’s explore some advanced techniques for working with polyurethane using a torch.
Stripping Polyurethane Flaws
Before reapplying polyurethane, it’s essential to address any flaws in the existing finish. Using a torch, carefully heat the affected areas to soften the polyurethane. Once softened, gently scrape off the flawed sections using a putty knife or scraper. Take care not to damage the underlying surface during this process. After removing the flawed polyurethane, thoroughly sand the area to create a smooth and even surface for reapplication.
Reapplying Polyurethane After Corrections
After stripping away the flawed polyurethane, it’s time to reapply the coating using the torch technique. Begin by ensuring that the surface is clean and free of any debris. Then, carefully apply a new coat of polyurethane, using long, even strokes to achieve a consistent finish. As the polyurethane is applied, utilize the torch to eliminate any bubbles that may form on the surface. Move the torch smoothly over the coated area to remove bubbles and achieve a flawless result.
Creative Applications
Unleash your creativity with polyurethane and a torch! When it comes to innovative uses, the possibilities are endless. From torch-burned wood finishes to precise removal techniques, polyurethane can transform your projects into unique works of art.
Torch-burned Wood For Unique Finishes
Transform ordinary wood into extraordinary masterpieces with the art of torch-burning. By carefully applying a torch to the surface of wood, you can achieve stunning charred effects that add depth and character to your creations. This technique is perfect for adding a rustic touch to furniture, wall art, or decorative accents.
Using A Flame Thrower For Polyurethane Removal
Say goodbye to stubborn polyurethane coatings with the power of a flame thrower. By applying controlled heat to the polyurethane surface, you can effectively remove old finishes and prepare the surface for a fresh application. This method ensures a clean and smooth finish, saving you time and effort in refinishing projects.
Frequently Asked Questions
Can You Use A Torch To Pop Bubbles On Polyurethane?
Yes, you can use a torch to pop bubbles on polyurethane by quickly passing over the surface. It’s especially useful for two-part pour-on poly finishes. However, preventing bubbles in the can is also important.
How Do You Get The Smoothest Polyurethane Finish?
To get the smoothest polyurethane finish, follow these guidelines: 1) Use a natural-bristle brush and thin the polyurethane with two parts polyurethane and one part mineral spirits. 2) Apply with long, even strokes and maintain a wet edge. 3) Avoid bubbles by using a torch to pop them as soon as they appear.
4) Sand between coats and apply a second coat for better results. 5) Properly prepare the wood surface before applying polyurethane.
Can You Use Heat On Polyurethane?
Yes, you can use heat on polyurethane to pop bubbles and achieve a smooth finish. A torch can be used to quickly pass over the surface to help bubbles rise and pop. This method is especially helpful with two-part pour-on poly finishes.
What’s The Best Way To Apply Polyurethane?
To apply polyurethane, thin it with two parts polyurethane and one part mineral spirits. Use a natural-bristle brush in long, even strokes, keeping a wet edge. Avoid bubbles by overlapping each pass until the surface is completely coated.
Conclusion
Using a torch to remove bubbles in polyurethane is a quick and effective technique. However, it is important to avoid creating bubbles in the can when pouring the polyurethane. Using the right brush and thinning the polyurethane can also help achieve a smooth finish.
Remember to remove all sanding dust before applying polyurethane and sand between coats. Overall, with proper technique and preparation, using a torch to remove bubbles can result in a flawless polyurethane finish.