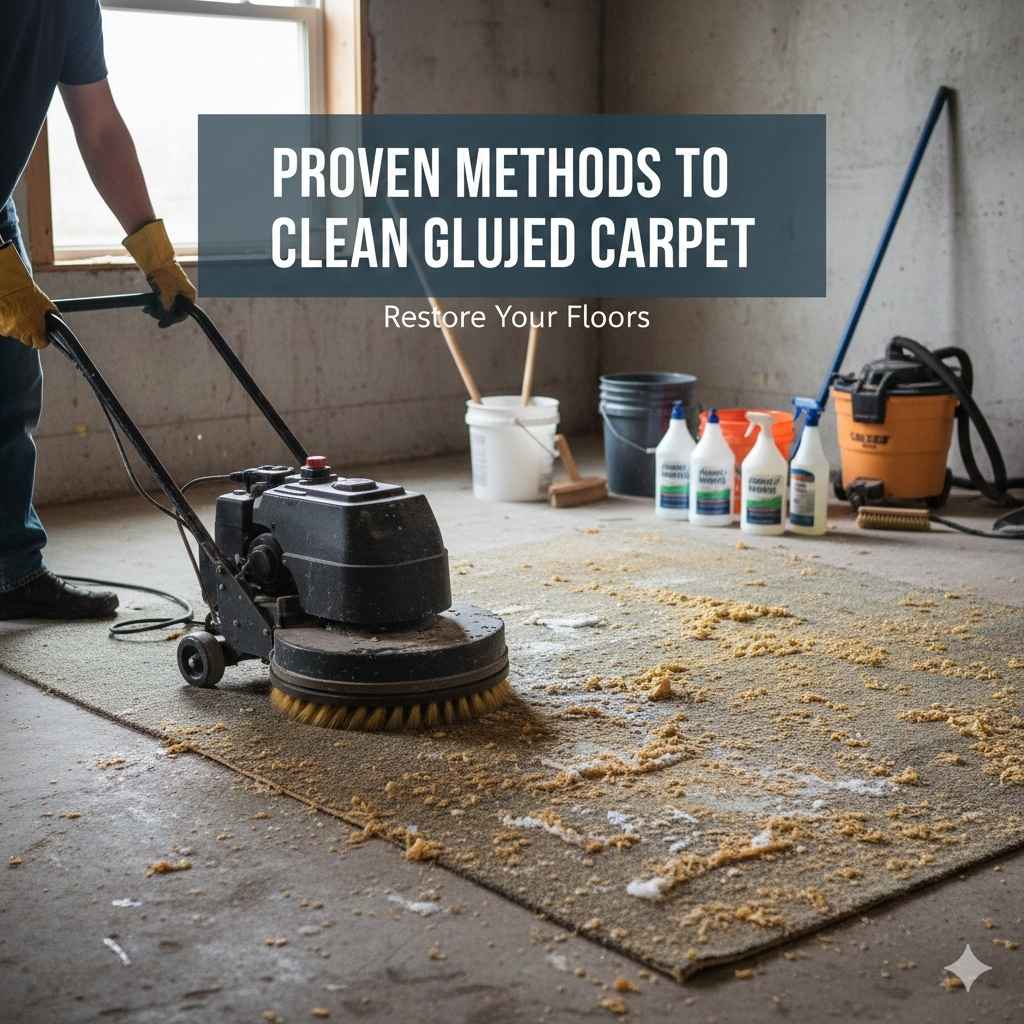
Proven Methods To Clean Glued Carpet
Proven methods to clean glued carpet involve gentle scraping, using specialized adhesive removers (like citrus-based solvents), and applying heat strategically to soften the residue. Always test methods on a small area first for safety and effectiveness.
We’ve all been there. You’re ripping up old carpeting, feeling great about the DIY upgrade, and then—BAM!—the stubborn, gooey remnants of carpet glue remain stubbornly stuck to your subfloor. It feels impossible to remove, right? Don’t worry! Dealing with old adhesive is one of the most common roadblocks in home renovation, but it’s absolutely manageable. With a few simple tools and proven techniques, you can clean that glued-down carpet residue and get your floor ready for its beautiful new covering. This guide walks you through safe, effective steps so you can finish your project with confidence.
Why Carpet Glue Sticks Like the Dickens
Before we start scraping, let’s briefly chat about why carpet glue is such a persistent problem. Carpet adhesive is designed to be strong! It needs to create a powerful, permanent bond between the carpet backing and the subfloor (which might be wood, concrete, or plywood).
Modern adhesives are often water-based, making them easier to work with than old solvent-based glues, but they still dry incredibly hard and uneven. Removing this solidified material without damaging the underlying subfloor is the key challenge for every DIYer.
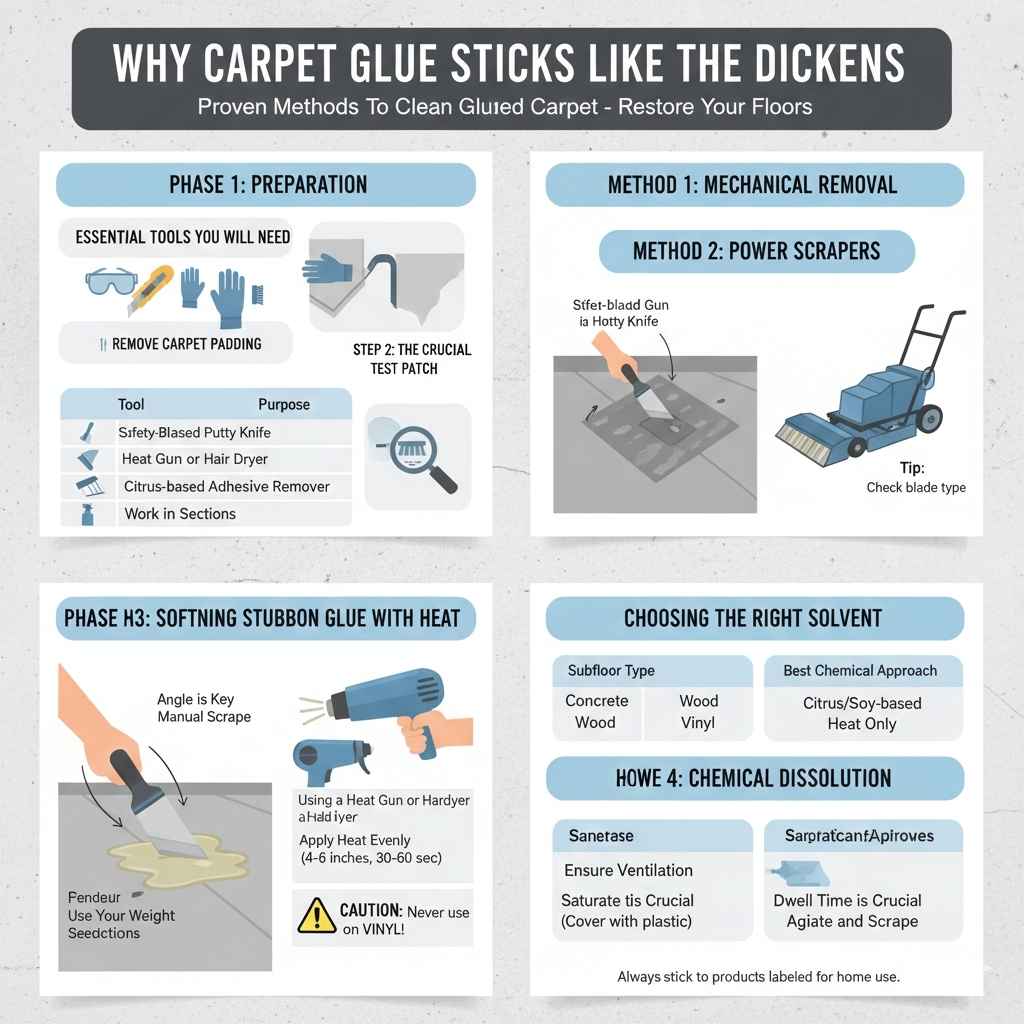
Phase 1: Preparation – Safety First and Initial Assessment
As your friendly home improvement guide, I always stress safety. Working with scrapers, solvents, and heat requires preparation. We want great results without any hassle.
Essential Tools You Will Need
Gathering the right tools makes this job much faster. Think of this like setting up your workshop before cutting wood—preparation is everything!
| Tool | Purpose |
|---|---|
| Safety Glasses & Gloves | Protect eyes from debris and skin from chemicals. |
| Stiff-bladed Putty Knife or Floor Scraper | For scraping off large, loose chunks. |
| Heat Gun or Hair Dryer | To soften hard, stubborn adhesive spots. |
| Citrus-based Adhesive Remover (e.g., Goo Gone Pro, Soy-based removers) | The primary chemical agent for dissolving residue. |
| Stiff-bristled Nylon Brush | For scrubbing the loosened residue. |
Step 1: Remove the Carpet Padding and Backing
You should only be left with the thin layer of glue stuck to the actual subfloor. If you still have thick padding or the carpet backing glued down, remove that first.
Cut the remaining carpet into manageable strips using a sharp utility knife.
Peel up the carpet. If it’s a small area, you can often just pull it; for larger areas, you might need to use a pry bar or the edge of your floor scraper to get an initial edge started.
Step 2: The Crucial Test Patch
This is step number one for any good DIYer! Before applying any solvent or heat to the entire floor, you must test your method on an inconspicuous spot—maybe near a baseboard or in a closet. This confirms two things:
1. The cleaner or heat won’t discolor or damage your subfloor.
2. The method actually works on your specific type of old glue.
Phase 2: Mechanical Removal – Scraping It Off
For many types of glue, especially if the carpet was recently installed, mechanical removal is your first and best line of attack. This saves you money on solvents and keeps harsh chemicals away from your concrete or wood subfloor.
Method 1: The Manual Scrape (For Smaller Areas)
If you are only dealing with a few square feet of stubborn glue, grab your putty knife.
- Angle is Key: Hold your floor scraper or stiff putty knife at a shallow angle (about 20 to 30 degrees) relative to the floor. This allows the blade to get under the glue rather than digging into the floor itself.
- Use Your Weight: Push forward firmly. If the glue is brittle, it should chip away. If it’s gummy, you might only get thin layers.
- Work in Sections: Tackle a small, 1-foot square area at a time. Trying to do too much at once leads to frustration and uneven results.
Method 2: Power Scrapers (For Large Rooms)
If you have a whole room, manual scraping is exhausting. Renting or buying a powered floor scraper tool is worth the investment. These machines vibrate or oscillate aggressively, moving quickly across the floor and peeling up the adhesive.
Tip: Read the instructions carefully! These tools are powerful. Make sure you are using the right blade for your subfloor material (wood needs gentler blades than concrete). For more information on choosing the right floor prep tools, resources like those from construction equipment rental agencies often have great maintenance and usage guides.
Phase 3: Softening Stubborn Glue with Heat
Sometimes the glue has cured rock-hard, and scraping only produces dust and frustration. This is where controlled heat comes into play. Heat softens the polymer in the adhesive, making it pliable again so you can scrape it up easily.
Using a Heat Gun or Hair Dryer
This method works well for targeted, stubborn spots. Caution: Never use a heat gun on vinyl flooring, as it will melt instantly! It is generally safe on wood or concrete subfloors, but keep the heat moving.
- Set the Temperature: If using a heat gun, start on a medium setting. If using a hair dryer, use the highest setting possible.
- Apply Heat Evenly: Hold the heat source about 4 to 6 inches above the glue spot. Move it constantly in a circular motion for about 30 to 60 seconds. You should see the glue start to look shiny or slightly melted—this means it’s softening.
- Scrape Immediately: As soon as the glue softens, quickly use your stiff putty knife to scrape the gooey mess away. Work fast, as it will cool and re-harden quickly.
- Repeat: If it gets hard again before you finish the spot, reapply heat.
Phase 4: Chemical Dissolution – Using Adhesive Removers
When scraping and heat fail to get the thin, stubborn film left behind, it’s time for chemistry. For DIY projects, I highly recommend starting with eco-friendly, citrus-based, or soy-based removers. They work surprisingly well, smell much better than harsh chemicals, and are safer around your home.
Choosing the Right Solvent
The best cleaner depends heavily on your subfloor material:
| Subfloor Type | Best Chemical Approach | Why? |
|---|---|---|
| Concrete | Citrus/Soy-based removers or Mineral Spirits (if necessary) | Concrete is durable and less prone to chemical damage. |
| Plywood/Wood | Citrus/Soy-based removers (Gentle Application) | Harsh solvents like paint thinner can stain or warp untreated wood. |
| Vinyl/Resilient Flooring | Avoid chemical solvents entirely. Use heat only. | Chemicals will destroy the existing vinyl. |
How to Apply Adhesive Remover
This process requires patience—you must let the chemical do the hard work.
- Ensure Ventilation: Open all windows and run fans. Even “safe” solvents can release strong fumes. Wear your gloves and safety glasses.
- Saturate the Area: Pour or spray the adhesive remover directly onto the residue. You want enough product to soak into the glue, not just sit on top. Consult the product directions for coverage recommendations.
- Dwell Time is Crucial: This is where most beginners rush things! Cover the treated area with plastic sheeting (like painter’s plastic or a heavy garbage bag). This traps the solvent vapors and prevents the cleaner from evaporating, giving it time to penetrate the glue. Let it sit for the time specified on the container—often 30 minutes to several hours.
- Agitate and Scrape: Remove the plastic. Use your stiff nylon brush or scraper to vigorously agitate the softened glue. It should now lift away much easier, often coming off in rolled-up balls or thick sludge.
- Repeat if Necessary: If the glue is still sticky, apply more remover, cover it, and let it dwell longer.
For professionals working on concrete, sometimes stronger solvents like methylene chloride are used, but these are generally not recommended for homeowners due to extreme safety hazards. Always stick to products labeled for home use, such as those found at major home improvement stores.
Special Considerations for Different Subfloors
The material underneath your carpet glue makes a big difference in how you clean it.
Cleaning Glue Off Concrete Floors
Concrete is tough! It’s porous, which means glue soaks in a little, but it can handle strong scraping and tougher chemicals.
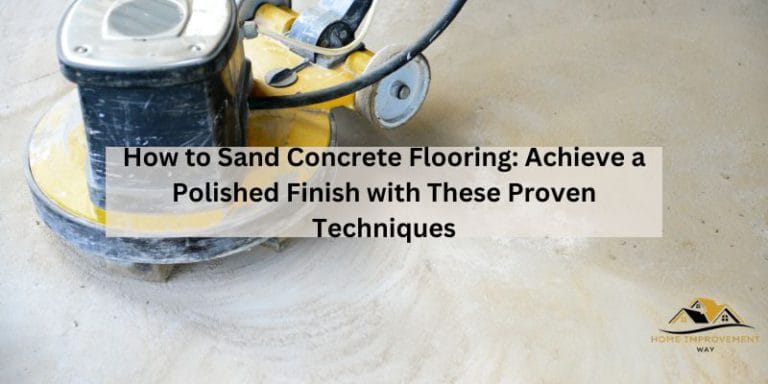
High Power: Feel free to use heavier scrapers or even a floor grinder with a sanding pad attachment (for very thick, persistent residue).
Moisture Warning: If you plan to install new glue-down flooring (like tile or sheet vinyl) over concrete, you must ensure all traces of the old adhesive and any chemical residue are completely removed. Moisture left trapped under new flooring can lead to mold or adhesive failure. You may need a professional moisture test after cleaning.
Cleaning Glue Off Plywood or Wood Subfloors
Wood requires a gentler approach because aggressive scraping can gouge the surface, and harsh solvents can damage the wood structure.
Heat is Best: Focus heavily on the heat method (Phase 3) to soften the glue, allowing you to use a lighter touch with your scraper.
Avoid Over-Wetting: If using a liquid remover, wipe it on sparingly and scrub immediately. Do not let large puddles of solvent sit on the wood for extended periods, as this can cause the wood to swell or warp.
Sanding as a Final Step: Once the bulk of the glue is gone, you can often use a pole sander (or an orbital sander with 60 or 80-grit sandpaper) to lightly smooth out any remaining faint stains or thin layers of residue.
Phase 5: The Final Clean-Up and Preparation
You’ve scraped, you’ve scrubbed, and you’ve chemically treated the area. Now we need a perfectly clean surface ready for the next layer of flooring.
Removing Chemical Residue and Dust
Any leftover cleaning solution or fine glue dust needs to be neutralized and removed.
1. Wipe Down: Mix a solution of warm water and a few drops of mild dish soap. Dampen (do not soak) a clean cloth or sponge and wipe down the entire area where you applied the cleaner. This helps lift residual glue and cleaner.
2. Rinse and Dry: Use a cloth dampened only with clean water to wipe away the soap residue. Allow the floor to dry completely. For concrete, this might take 12 to 24 hours, depending on humidity. Wood dries faster.
3. Vacuum Thoroughly: Use a shop vacuum to suck up all the dust, small flakes, and dried glue residue. Run the vacuum over the entire surface multiple times.
Assessing the Surface for New Installation
Your subfloor should now be relatively smooth and clean. If you are installing new glue-down carpet or vinyl, the surface must meet specific manufacturer standards.
A good final test is the “hand test”: Run your bare hand or a clean white sock across the entire area. If you feel bumps, ridges, or sticky spots, go back and spot-treat those areas. Unevenness in the subfloor will telegraph right through soft new flooring materials.
For professional insights into subfloor prep standards, checking resources from flooring manufacturers (like those supported by industry bodies such as the National Wood Flooring Association or the Ceramic Tile Education Foundation) can give you technical guidelines on acceptable residue levels.
Troubleshooting Common Glued Carpet Removal Headaches
Even with the best plan, problems pop up. Here are solutions for the toughest scenarios.
Problem: The Glue is Extremely Hard and Black (Old Mastic)
Old black adhesives, often found under older, budget carpets, were solvent-based and incredibly tough.
Solution: Mechanical removal (power scraping) is often necessary here. If that fails, you may need a heavy-duty commercial stripper designed specifically for mastic, ensuring you work in a very well-ventilated area and use excellent Personal Protective Equipment (PPE).
Problem: The Glue Residue is Thin and Waxy, Not Thick Goo
This is often the leftover primer or the thinnest layer that the scraper couldn’t grab.
Solution: This is perfect for the chemical method. Apply a strong citrus solvent, let it dwell under plastic for several hours, and scrub with a stiff brush. A bit of light sanding afterward usually finishes the job perfectly.
Problem: I Scraped Too Hard and Damaged My Plywood
If you gouged the wood, don’t panic!
* Solution:** If the gouges are shallow (less than 1/16 inch deep), you can fill them with a wood filler appropriate for subfloors. Once dry, sand the filled area flush before applying your new flooring. If the damage is deep, you might need to cut out and replace that section of plywood to ensure a flat surface.

FAQ: Beginner Questions About Cleaning Glued Carpet Residue
Q1: Can I just leave a little bit of glue residue behind?
A: Only if you are installing a new, thick carpet with padding on top of a very durable subfloor like concrete. If you are installing tile, laminate, luxury vinyl plank (LVP), or thin carpet, any remaining glue will create bumps and compromise the new floor’s adhesion or stability. It’s best practice to remove it all.
Q2: Is boiling water effective for removing carpet glue?
A: Boiling water can sometimes soften very fresh, water-based glue, similar to a heat gun. However, using boiling water on wood subfloors is risky as it can warp the wood quickly. It’s generally safer and more controlled to use a dedicated heat gun or hair dryer.
Q3: How long does the whole removal process usually take?
A: This varies widely based on the glue type and room size. For a standard 10×12 room with modern adhesive, expect 4–8 hours of work using a mix of scraping and light chemical treatment. Extremely old, hard mastic can take days.
Q4: Can I use a pressure washer on concrete subfloors to clean glue?
A: While effective on concrete, using a high-powered pressure washer can drive excessive moisture deep into the concrete slab, potentially causing hydrostatic pressure issues or moisture retention problems that will ruin new floor installations. It is safer to stick to mechanical or chemical removal.
Q5: What is the absolute easiest way to remove the glue?
A: The easiest method is often a combination approach: aggressive scraping while the residue is still slightly warm from the room temperature, followed by a heavy application of a citrus-based remover left under plastic sheeting overnight. This minimizes your active scrubbing time.
Conclusion: Ready for Your Next Project!
Taking on the task of cleaning stubborn carpet glue can feel like the hardest part of any flooring replacement project. Remember, you have the blueprint now! By starting with careful preparation, moving methodically through mechanical scraping, using controlled heat to soften the tough spots, and employing patient chemical removal when necessary, you can conquer that adhesive. Take your time, prioritize safety, and don’t be afraid to let the tools and chemicals do the heavy lifting for you. With a smooth, clean subfloor beneath your feet, you’ve already laid the foundation for a beautiful, lasting new floor. Go get that project done—you’ve got this!