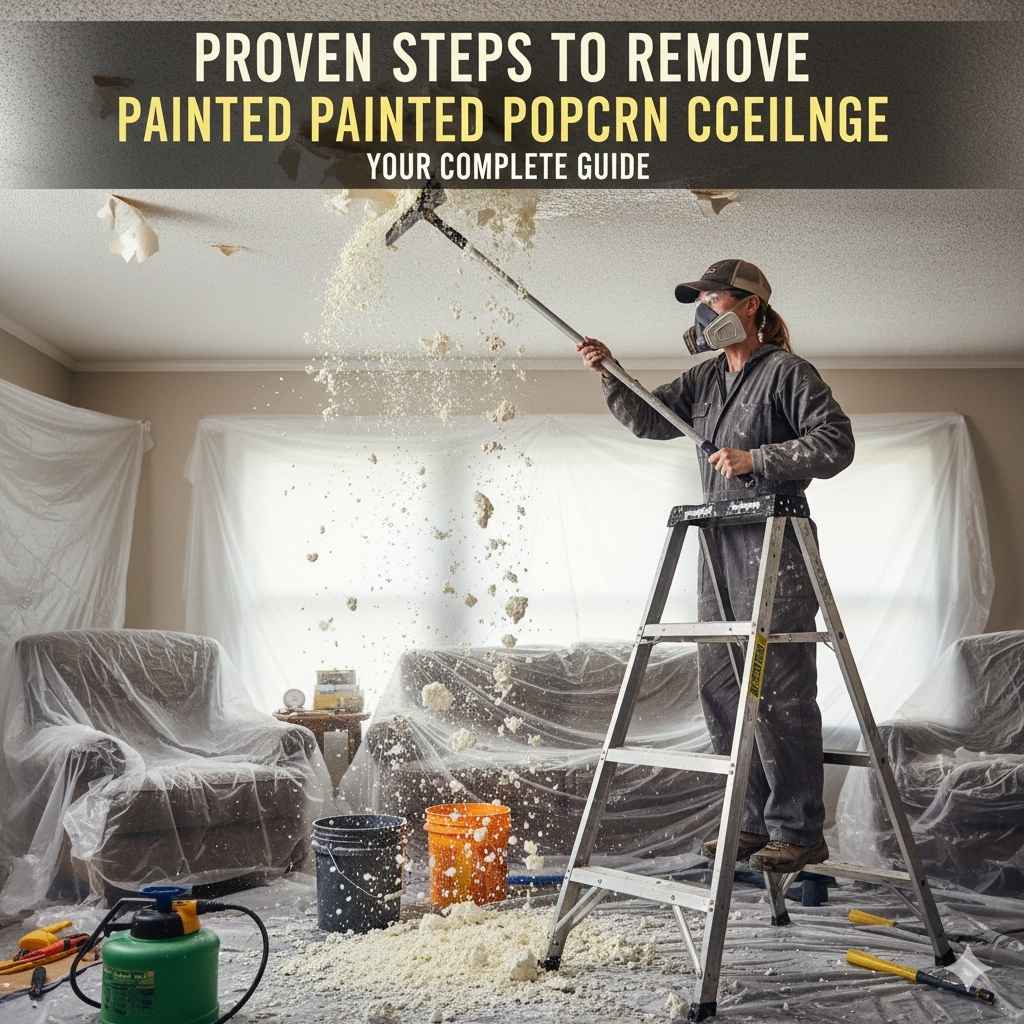
Proven Steps To Remove Painted Popcorn Ceiling
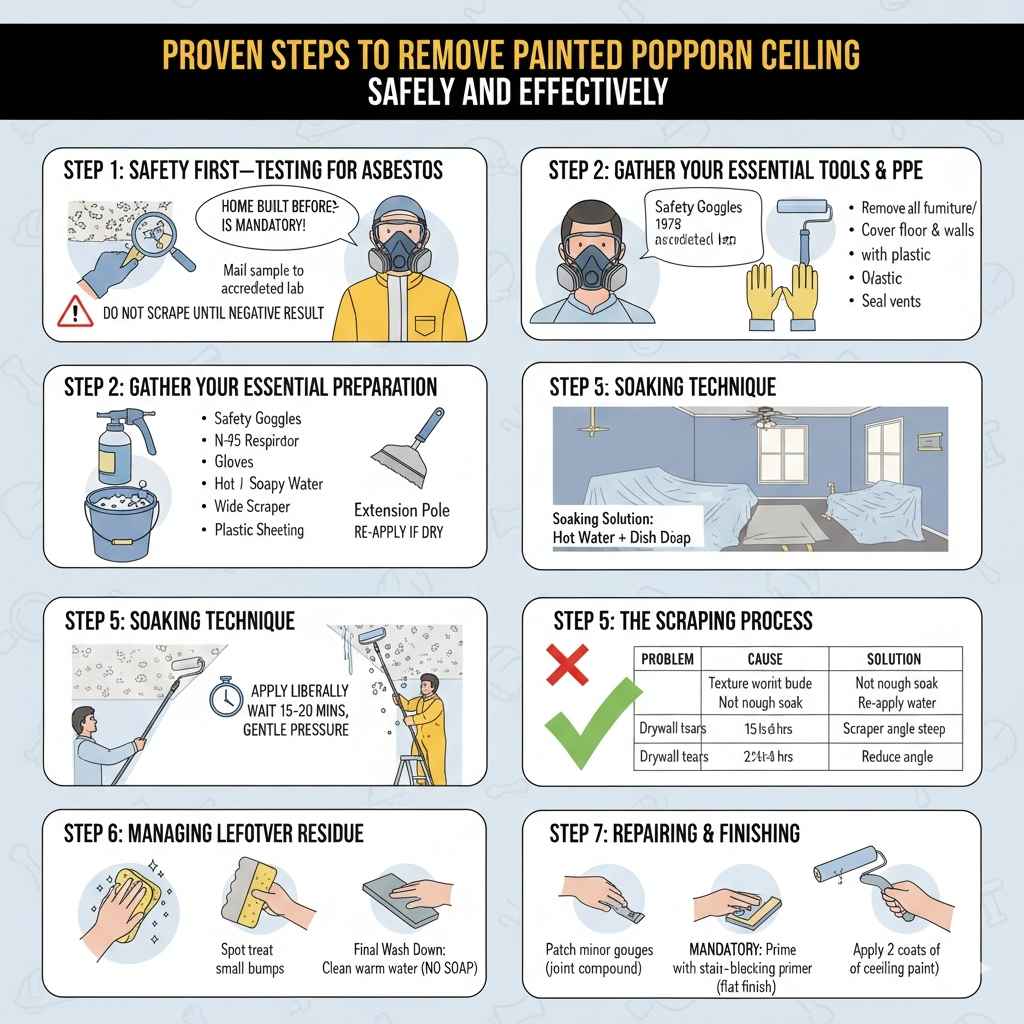
To remove a painted popcorn ceiling, you must first confirm the absence of asbestos if built before 1978. Then, thoroughly wet the painted texture with a mixture of hot water and dish soap, let it soak, and gently scrape it off with a wide putty knife. Proper protection and patience are key for a smooth, professional-looking finish.
That bumpy, dated popcorn ceiling—often called acoustic texture—can really drag down the look of a room. When someone added a coat of paint over it, the job gets trickier! The paint locks the texture in place, making removal seem impossible. Don’t worry; I’ve helped many folks tackle this exact headache. With the right preparation and simple tools, you can reveal a smooth, modern ceiling without calling in the big-ticket contractors. We will walk through every safe, step-by-step process to get that painted texture down.
Proven Steps To Remove Painted Popcorn Ceiling Safely and Effectively
Dealing with painted popcorn ceiling requires a slightly different approach than removing unpainted versions. The paint acts like a sealer, preventing simple water saturation. However, a little elbow grease and the right softening technique make all the difference. Safety first, always!
Step 1: Safety First—Testing for Asbestos
This is the most crucial first step, especially if your home was built before 1978. Popcorn ceiling texture applied before 1978 often contained asbestos, a serious health hazard when disturbed. Painting over it doesn’t remove the risk if you start scraping.
Why Testing is Non-Negotiable
If you disturb asbestos-containing material (ACM), tiny fibers can become airborne and cause severe respiratory issues. For DIY peace of mind and safety, you must know what you are dealing with.
If your house was built:
- Before 1978: Testing is mandatory. Do not skip this.
- After 1980: The risk is extremely low, but testing provides 100% confirmation.
How to Get Your Sample Tested
You can purchase affordable asbestos testing kits online or at many home improvement stores. These kits guide you on safely taking a small, fingernail-sized sample. You then mail this sample to an accredited laboratory for analysis. While you wait for results (usually a few days), proceed with preparation, but absolutely no scraping should occur until you have a negative result.
For guidance on safe testing procedures, the Environmental Protection Agency (EPA) offers resources on asbestos management, which stresses careful sampling: EPA Asbestos Information.
Step 2: Gather Your Essential Tools and Protective Gear
A successful removal job relies on having the right gear before you start. Since we are dealing with water and scraping, protection for yourself and your room contents is vital.
Personal Protective Equipment (PPE)
Never start without these items. They protect you from falling debris, dust, and chemicals.
- Safety Glasses or Goggles (Must seal around the eyes)
- N-95 Dust Mask or Respirator (If testing is pending or for cleanup)
- Gloves (Heavy-duty work gloves)
- Long Sleeves and Pants (To minimize skin exposure)
Scraping and Soaking Tools
You will need tools for protection, wetting, and removal:
- Garden Sprayer or Pump Sprayer: Essential for wetting the ceiling. A cheap pump sprayer works great.
- Hot Water & Dish Soap: The softening agent. Hot water helps the soap penetrate the paint layer.
- Extension Pole & Roller/Brush: For applying the soaking mixture evenly.
- Wide Putty Knife or Ceiling Scraper: A 4-inch to 6-inch wide, flexible blade is ideal. Avoid sharp edges that dig into drywall.
- Plastic Sheeting and Painter’s Tape: For protecting floors and walls.
- Step Ladder or Scaffolding: Sturdy support for reaching the ceiling safely.
Step 3: Complete Room Preparation (The Unsung Hero of the Project)
Preparation takes time, but it saves hours of frustrating cleanup later. Imagine having to peel plastic off of furniture because you rushed this stage—it happens!
Protecting the Area
Popcorn ceiling removal is messy, even when done perfectly. Expect water and texture chunks to fall everywhere.
- Remove Everything: Take down light fixtures, ceiling fans, smoke detectors, and any wall hangings. Turn off the breaker supplying power to the room you are working in and tape over the switches.
- Cover the Floor: Use thick plastic sheeting (6 mil recommended). Tape the plastic securely to the baseboards using quality painter’s tape. Overlap sections of plastic if necessary and run the plastic several feet up the walls if possible to catch stray splatter.
- Seal Vents: Cover HVAC vents and returns tightly with plastic and tape so debris doesn’t fall into your system.
Prepare Your Soaking Solution
Since the paint seals the texture, plain water often beads up and runs off. We need a surfactant (soap) to break the surface tension.
Mix a bucket of very hot water with a generous amount of mild dish soap—about a capful per gallon. You want the water hot, as heat helps penetrate the paint bond. We are aiming to soften the bond between the paint/texture layer and the drywall paper underneath.
Step 4: The Soaking Technique for Painted Ceilings
This step is where patience truly pays off. For unpainted ceilings, a quick spray often works. For painted surfaces, we need deep saturation.
Saturate, Wait, and Repeat
Work in small, manageable sections, perhaps 4 feet by 4 feet, so the area doesn’t dry out before you get to scrape it.
- Apply Generously: Using your roller or brush, apply the hot, soapy water liberally over the designated section. Don’t just mist it; drench the area until it is visibly saturated.
- The Soaking Wait: This is the hardest part for eager DIYers. Let the water sit for at least 15 to 20 minutes. The goal is for the water to seep through the paint and reach the adhesive holding the texture on.
- Re-Apply: If the surface starts looking dry or if it’s a particularly thick coat of paint, apply a second coat of the soaking solution. Keep it damp!
Tip from the Workshop: If the texture still doesn’t budge after multiple soaks, it might mean very thick paint or a water-resistant type. You might need to use a specialized drywall stripper solution available at hardware stores, following the manufacturer’s safety directions precisely.
Step 5: The Scraping Process—Gentle and Steady
Now it’s time for the satisfying part—seeing the texture come down! Remember, the goal is to remove the texture without tearing the paper layer of your drywall.
Mastering the Scraper Angle
If you hold your scraper like a shovel, you will dig into the drywall paper. We want a shallow angle.
- Use a wide putty knife (4–6 inches) for better coverage and less gouging.
- Hold the scraper at a very shallow angle, almost flat against the ceiling—maybe 15 to 20 degrees.
- Apply gentle, steady pressure and push the scraper under the softened texture. You should feel it slide under the material.
- If it resists, stop! That spot needs more water soak time. Do not force it, or you will gouge the drywall underneath.
Scraping Technique Summary
| Problem | Cause | Solution |
|---|---|---|
| Texture won’t budge | Not enough soaking time or paint is too thick. | Re-apply hot soapy water; wait another 15 minutes. |
| Drywall paper tears | Scraper angle is too steep or too much pressure. | Reduce the angle (keep it flatter) and use lighter, consistent pressure. |
| Water dripping constantly | Over-saturation causing runoff. | Focus on a smaller area next time, and allow more dwell time before scraping. |
Once you remove a section, immediately place the debris into a heavy-duty garbage bag. Don’t let it sit on the plastic floor covering, as that creates a slipping hazard and makes cleanup harder.
Step 6: Managing Leftover Texture and Water Residue
After scraping the main bumps off, you will almost certainly be left with small, stubborn spots and a thin residue film, especially where the paint was heaviest.
Spot Treating Stubborn Spots
For the tiny remaining bumps, re-wet the area, often requiring more soaking than the initial removal. Use a smaller, slightly stiffer scraper if needed, but treat these spots individually. If a spot refuses to come off with water and scraping, sometimes sanding lightly after it dries can knock down the high points, but only tackle this after the ceiling is completely dry.
The Final Wash Down
Once all the texture is off, the ceiling will look patchy, dull, and probably slightly uneven due to varying moisture absorption. You must wash the ceiling to remove all soap residue and lingering particles.
- Mix a fresh batch of clean, warm water (no soap this time).
- Using a clean sponge or a large, soft rag attached to a mop handle, gently wipe down the entire ceiling surface. This evens out the moisture and cleans off the stickiness.
- Rinse the sponge frequently in a separate bucket of clean water.
- Allow the ceiling to dry completely, which might take 24 to 48 hours depending on humidity.
Step 7: Repairing and Finishing the Smooth Ceiling
Once dry, inspect the ceiling under good light. Because you had to scrape, there might be minor imperfections—small gouges, slight unevenness, or “flashing” (where the exposed drywall paper dries differently than the original paint areas).
Patching Minor Damage
For small scrapes or divots:
- Use a lightweight joint compound (drywall mud).
- Apply a thin layer over the damage using a drywall knife. Let it dry completely.
- Lightly sand the patched area with fine-grit sandpaper (220 grit). Avoid aggressive sanding, as you don’t want to sand through the paper layer again.
Priming is Mandatory
This is the most critical finishing step. You now have a mix of original ceiling paint, possibly exposed bare drywall paper (if you scraped too aggressively), and areas you patched. If you paint directly over this without priming, you risk the remaining texture spots flashing through, or worse, the new paint absorbing unevenly.
Use a high-quality, oil-based or specialized stain-blocking primer (like a shellac-based primer if dealing with heavy water stains, though PVA primers often suffice for general drywall sealing). This step seals everything so your final paint layer looks uniform. A primer ensures the entire surface accepts the topcoat evenly.
The Final Top Coat
Apply two coats of your chosen ceiling paint. A flat or ceiling-specific paint is best, as it minimizes the appearance of any subtle surface imperfections you couldn’t eliminate.
Frequently Asked Questions (FAQ) About Painted Popcorn Removal
Q1: Can I just paint over the popcorn ceiling instead of removing it?
Yes, you can paint over it. However, paint adds weight, seals the texture permanently, and might actually highlight flaws under certain lighting because the texture becomes harder and more reflective. Removing it offers a truly smooth, modern finish.
Q2: How long does it take a beginner to remove painted popcorn ceiling from one standard room?
For a beginner working alone in a 10×12 room, budget for two full days. Day one is preparation, soaking, and scraping. Day two is residue cleanup, drying, patching, and priming. Rushing the soaking process will significantly increase the scraping time.
Q3: What if the texture comes off easily after wetting, but the paint stays behind?
This means the paint layer was bonded well to the texture material, but the texture material wasn’t bonded well to the ceiling itself. Continue soaking the remaining paint/texture layer. If it’s just thin paint film remaining, you may need to gently sand it smooth once dry, or apply a heavy-duty primer followed by two top coats, accepting a very subtle shadow.
Q4: Can I use a steam cleaner instead of soaking with soap and water?
Steam cleaning is a very effective method for removing painted popcorn ceilings because the heat combined with moisture aggressively breaks down the paint bond. If you own a steamer with a flat attachment, it can speed up the process significantly, often requiring less scraping force. Ensure you wear appropriate protective gear against the hot steam.
Q5: Is it cheaper to hire a professional or do this myself?
For a homeowner willing to do the labor, DIY is significantly cheaper. Professionals charge high rates due to the mess, time commitment, and the liability of asbestos testing (if required). Your main costs will be materials (plastic, soap, sandpaper, primer, paint) versus paying labor rates.
Q6: Do I need special primer if the ceiling was previously painted?
Yes, specialized primer is highly recommended. Standard drywall primer may not adequately adhere to the old layer of paint that was underneath the texture. Use a high-quality bonding primer or a shellac-based sealer to ensure your new paint coats adhere uniformly and prevent old paint spots from bleeding through.
Considering Alternatives to Full Removal
While this guide focuses on proven removal steps, sometimes the project scope is too large, or the ceiling structure is too fragile. It’s good to know your other options before committing to days of scraping.
Alternative Options Table
| Method | Pros | Cons | Best For |
|---|---|---|---|
| Scraping (As detailed above) | Permanent, modern smooth finish; most DIY-friendly with right prep. | Extremely messy; labor-intensive; risk of drywall damage. | Homeowners seeking a perfect, smooth surface. |
| Skim Coating | Creates a smooth finish over the texture. | Requires high skill to apply evenly; multiple thin coats needed; messy dust. | Skilled DIYers comfortable with joint compound work. |
| Drywall Overlay (New Drywall) | Instantly smooth; hides all flaws; structurally sound. | Thickens the ceiling height slightly; requires framing/fastening knowledge; more material cost. | Ceilings with severe damage or structural concerns. |
Skim coating—applying several thin layers of joint compound—is a viable alternative, especially if the painted texture is very thin. However, achieving that perfect, uniform flatness requires practice, often leading beginners back to the scraping method for better long-term results.
The Importance of Ventilation During the Process
Even when you are certain there is no asbestos, the sheer amount of debris and dust created during scraping and sanding requires excellent airflow.
Ventilation Checklist:
- Keep all windows in the room open wide.
- Use high-velocity fans pointed out of the windows to create negative pressure, pulling dust out of the room rather than letting it circulate or drift to other parts of the house.
- Keep doors closed to the rest of the house to contain any stray airborne particles until you are done sanding the final patches.
Remember the goal: we want the dust and moisture out of the work area as quickly as possible.
Conclusion: Enjoying Your Updated Look
Tackling a painted popcorn ceiling removal might seem like a huge undertaking from the start, but I promise you, it is achievable. The success of this project hinges entirely on two things: confirming safety (asbestos check) and proper preparation (lots of soaking). Don’t rush the waiting period when the water is softening that stubborn paint layer. If you respect the prep work, the scraping itself becomes surprisingly manageable, and you will have avoided significant contractor costs.
Take your time, work in small squares, wear your PPE, and celebrate each section you conquer. Soon, you will be standing back, admiring a clean, flat ceiling ready for any modern finish you desire. You have the steps, you have the know-how—now go confidently tackle that outdated texture!