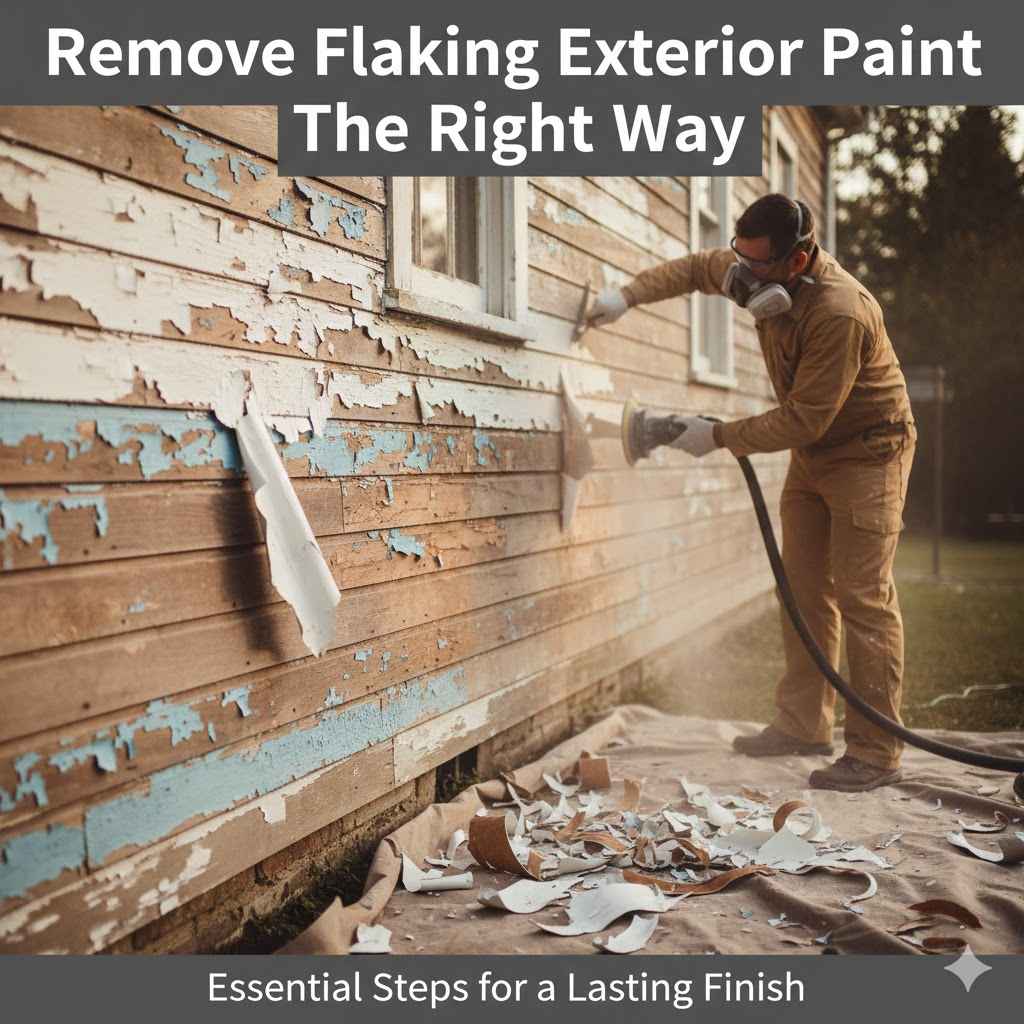
Remove Flaking Exterior Paint The Right Way
It’s common to see paint peeling on the outside of your home. This happens for many reasons, like weather or age. For beginners, knowing how to handle it can feel tricky.
You want to fix it right the first time. This guide will show you how to remove flaking exterior paint the right way. We will break it down into simple steps so you can get a great finish.
Let’s get started on making your home look its best again.
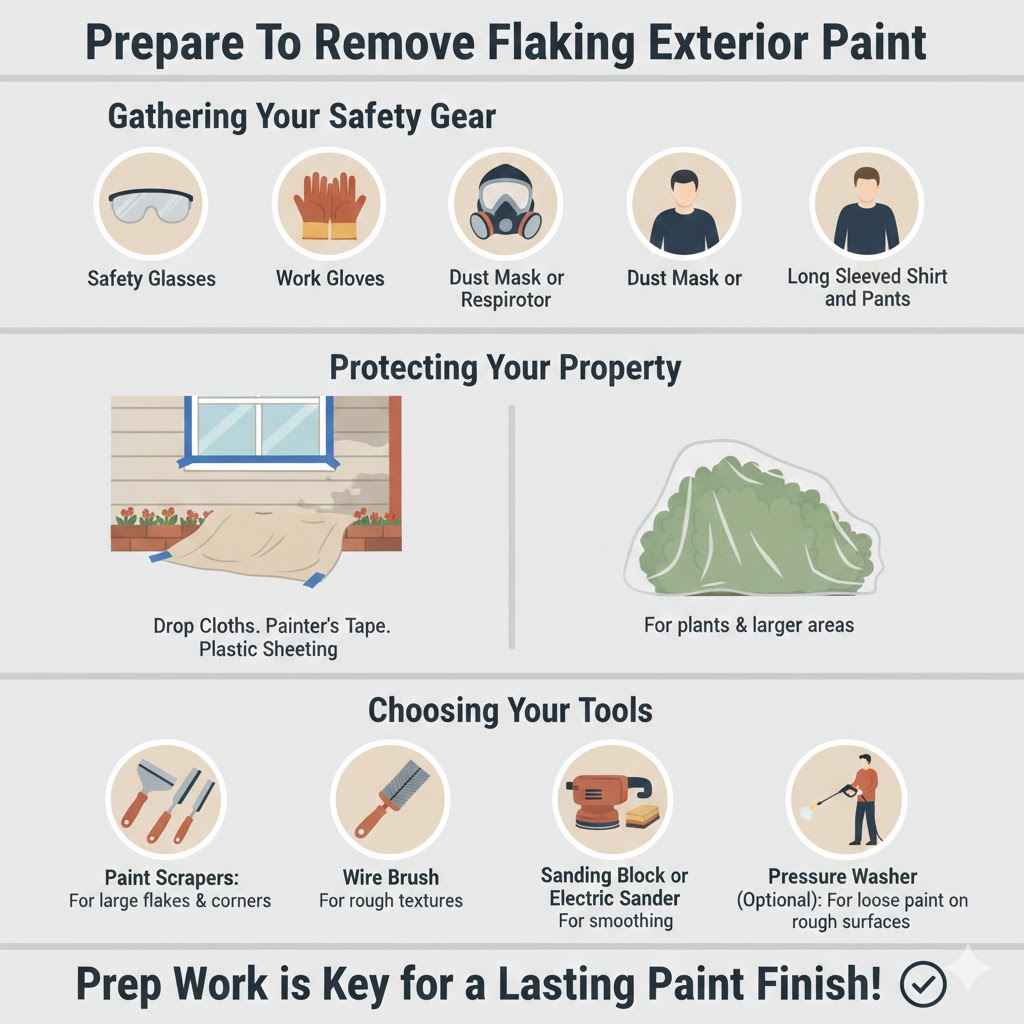
Prepare To Remove Flaking Exterior Paint
Getting ready is the most important step when you want to remove flaking exterior paint the right way. A good preparation makes the actual work much easier and safer. It also ensures the new paint will stick well and last longer.
This means thinking about safety gear, covering up areas you don’t want to paint, and gathering all your tools. Taking your time here prevents problems later.
Gathering Your Safety Gear
Safety comes first. When you are scraping old paint, tiny paint chips can fly around. Some old paints might even have lead in them.
You do not want to breathe that in or get it in your eyes. So, you need to wear the right things.
- Safety Glasses. These protect your eyes from dust and debris. Make sure they fit snugly.
- Work Gloves. Gloves protect your hands from scrapes and splinters. They also give you a better grip on your tools.
- Dust Mask or Respirator. A good mask stops you from inhaling paint dust. For older homes, consider a respirator rated for lead dust if you suspect lead paint.
- Long Sleeved Shirt and Pants. This covers your skin. It stops paint chips from getting on you and causing irritation.
Protecting Your Property
You don’t want to get paint chips or scraped paint all over your windows, plants, or walkways. Covering things up will save you a lot of cleaning later. It keeps your yard looking tidy and protects surfaces from damage.
- Drop Cloths. Use canvas or plastic drop cloths to cover patios, decks, and flower beds. Weigh them down with bricks or paint cans so they don’t blow away.
- Painter’s Tape. Use good quality painter’s tape to mask off windows, door frames, and trim. This tape is designed to stick well but also remove cleanly without damaging paint.
- Plastic Sheeting. For larger areas or delicate plants, heavy-duty plastic sheeting can offer extra protection. Secure it with tape.
Choosing Your Tools
Having the right tools makes the job faster and cleaner. Different tools work better for different types of peeling paint. Having a variety will help you tackle any situation.
- Paint Scrapers. A flat scraper is good for large, loose flakes. A putty knife can get into corners. A carbide scraper is very sharp and removes paint quickly.
- Wire Brush. This is great for getting into rough textures or smaller chipped areas. It also helps to roughen the surface for better primer adhesion.
- Sanding Block or Electric Sander. After scraping, sanding smooths the surface. Use medium-grit sandpaper (around 80-120 grit) for initial smoothing and fine-grit (180-220 grit) for finishing.
- Pressure Washer (Optional). A pressure washer on a low setting can help remove loose paint, especially on rough surfaces. Be careful not to damage the wood or siding.
How To Remove Flaking Exterior Paint The Right Way
Now that you are prepared, it is time to get to work. Removing flaking paint properly is key to a good paint job. This process involves carefully taking off the loose paint without damaging the good paint underneath.
It requires patience and the right technique.
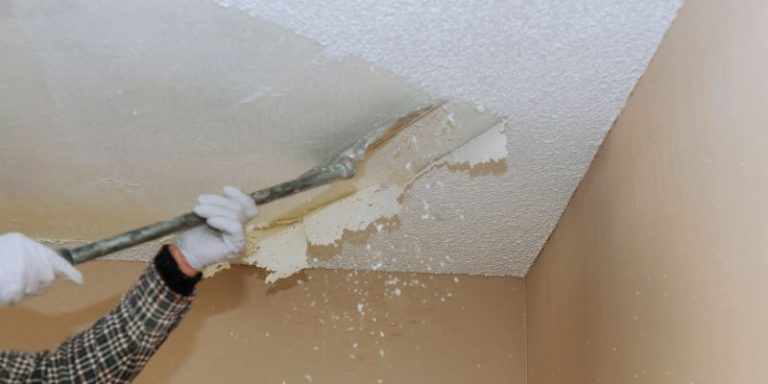
Scraping Away Loose Paint
This is the main part of removing the old paint. You want to get rid of anything that is loose or bubbling. The goal is to create a smooth edge where the old paint meets the new.
This helps the new paint blend in better.
- Start with a scraper. Hold the scraper at a low angle, about 15-30 degrees, against the surface. Gently push it under the edge of the peeling paint.
- Work in small sections. Don’t try to scrape a huge area at once. Focus on lifting off only the paint that is clearly loose.
- Feather the edges. As you scrape, try to create a smooth transition from the scraped area to the well-adhered paint. This means scraping until the edge of the old paint is thin and smooth. If you leave a thick edge, the new paint will show the bump.
- Use a wire brush for small areas. For tight spots or textured surfaces, a wire brush can dislodge stubborn flakes.
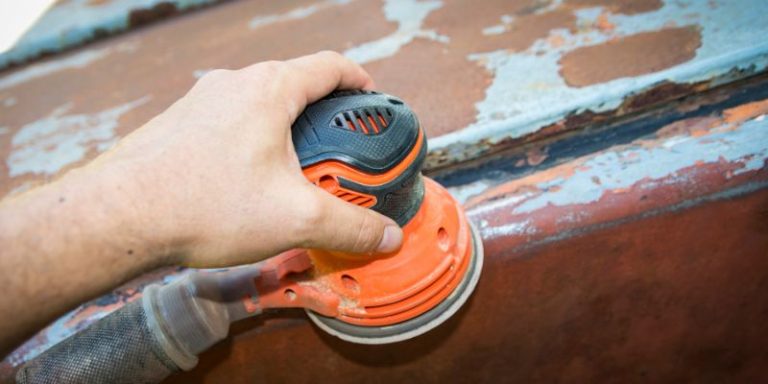
Sanding For Smoothness
After you have scraped off all the loose bits, the surface might still feel rough. Sanding is vital to make it smooth. This step ensures that the new paint will not have bumps or ridges showing through.
- Begin with medium-grit sandpaper. Use an 80 to 120 grit sandpaper on a sanding block or an orbital sander. Sand the scraped areas and the feathered edges.
- Smooth out all rough spots. Pay attention to any areas where the paint was chipped or where you scraped. You want a consistent surface.
- Use fine-grit sandpaper for finishing. Once the surface is mostly smooth, switch to a finer grit, like 180 or 220. This will further refine the surface and prepare it for primer.
- Clean up dust after sanding. Use a broom and then a damp cloth or tack cloth to remove all sanding dust. This is very important for primer and paint adhesion.
Cleaning The Surface Thoroughly
Before you can prime or paint, the surface must be perfectly clean. Any dirt, dust, or grime will prevent the new paint from sticking properly. This can lead to peeling again soon.
- Wash the walls. Use a garden hose to rinse off loose dirt and debris. For tougher grime, a mild detergent and water solution can be used. A soft brush can help scrub away dirt.
- Rinse well. Make sure to rinse away all soap. Any residue will affect paint adhesion.
- Allow to dry completely. It is crucial that the surface is bone dry before applying primer. This can take 24-48 hours depending on the weather.
Repairing Damaged Surfaces Before Painting
Sometimes, the peeling paint is a sign of a bigger problem. The surface itself might be damaged. Fixing these issues before you paint will ensure your new paint job lasts.
It prevents future problems and makes your home look its best.
Addressing Rot and Mildew
Water damage can cause paint to peel. If you find rotten wood or mold and mildew, these need to be dealt with. They will keep coming back if you paint over them.
- Identify the source of moisture. Look for leaks, poor drainage, or condensation. Fix these problems first.
- Remove rotted wood. Cut out any rotten sections of wood. You will need to
- Treat mildew. Mix one part bleach with three parts water. Apply this solution to the affected areas with a sponge or brush. Let it sit for a few minutes, then rinse thoroughly. Wear protective gear when working with bleach.
- Allow surfaces to dry completely. Any repairs involving wood or moisture treatment need to dry out fully before proceeding.
Filling Cracks and Holes
Small gaps and holes can let water into the wall. Filling these makes the surface smooth and protects the underlying material. This step is a key part of preparing for a lasting paint job.
- Use exterior-grade filler. For wood siding, use an exterior wood filler or putty. For stucco or concrete, use an appropriate patching compound.
- Apply filler with a putty knife. Press the filler firmly into the crack or hole. Make sure it fills the space completely.
- Smooth the filler. Level the filler with the surrounding surface using the putty knife. For larger holes, you might need to apply filler in layers, allowing each layer to dry.
- Sand smooth once dry. After the filler has dried completely (follow product instructions), sand it smooth with fine-grit sandpaper. This ensures a seamless finish.
Priming For A Solid Foundation
Primer is like a special coat of paint that prepares the surface for the topcoat. It helps the new paint stick better and covers up any stains or marks. It also seals any exposed wood or patched areas.
- Choose the right primer. Use a high-quality exterior primer. For bare wood or repaired areas, use a primer specifically designed for these surfaces. If you suspect lead paint, use a primer that seals lead paint.
- Apply primer evenly. Use a brush or roller to apply a thin, even coat of primer over the entire area you scraped and sanded. Make sure to cover all patched areas and bare wood.
- Allow primer to dry. Follow the manufacturer’s instructions for drying time. This is usually a few hours.
- Lightly sand the primer if needed. Once dry, a light sanding with fine-grit paper can help create an even smoother surface for the topcoat. Wipe away dust.
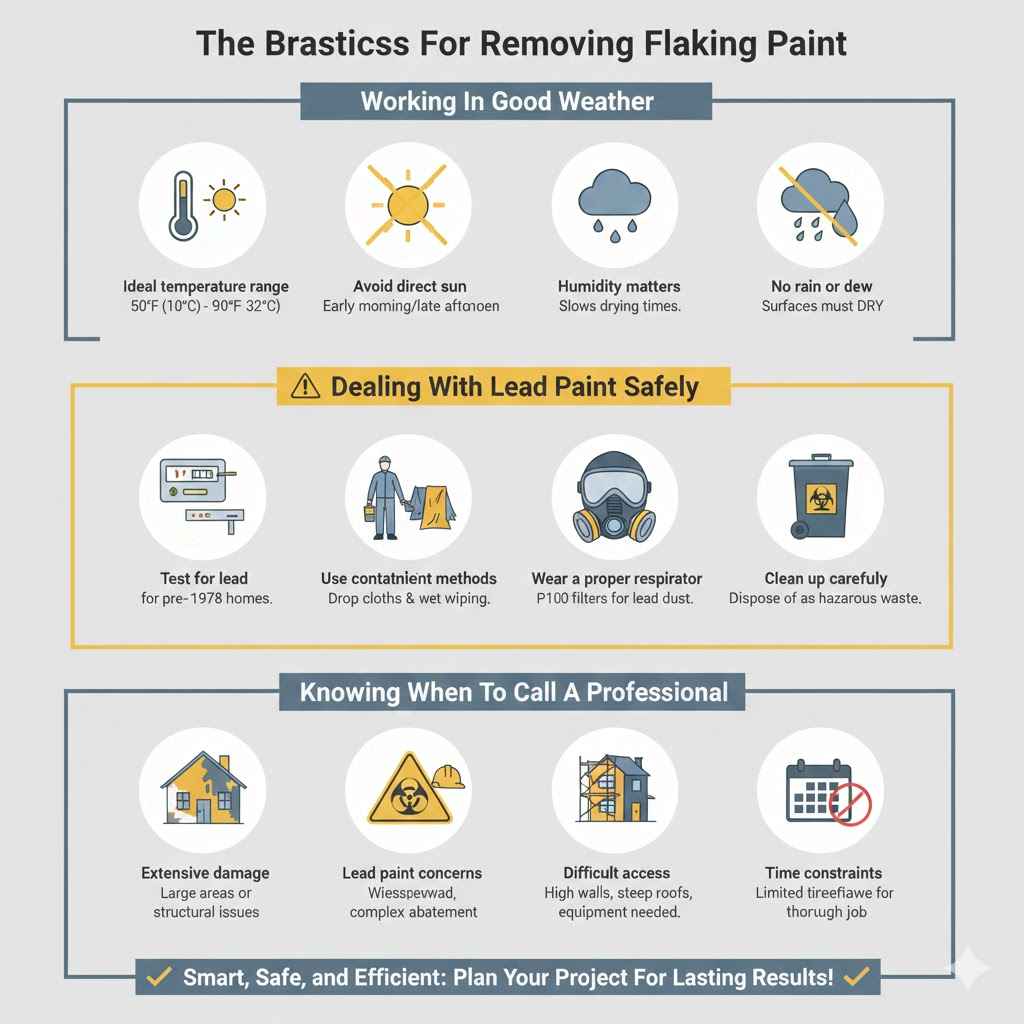
Best Practices For Removing Flaking Paint
When you work on projects like removing flaking exterior paint the right way, certain tips can make a big difference. These best practices save you time, improve the quality of your work, and ensure your efforts last longer. They are about being smart and efficient.
Working In Good Weather
The weather plays a huge role in how well your paint removal and preparation work goes. Trying to scrape paint when it’s too cold or too wet can make the job harder and less effective.
- Ideal temperature range. Most exterior paints and primers perform best when applied in temperatures between 50°F (10°C) and 90°F (32°C). This also applies to scraping and sanding.
- Avoid direct sun. Working in direct, hot sun can cause paint to dry too quickly during application or make scraping difficult as it softens. Early morning or late afternoon is often best.
- Humidity matters. High humidity can slow down drying times significantly for primers and paints. It can also make it harder for scraped paint dust to settle.
- No rain or dew. Never work on surfaces that are wet from rain or morning dew. Water trapped under new paint can cause it to peel quickly. Always ensure surfaces are completely dry.
Dealing With Lead Paint Safely
If your home was built before 1978, there’s a good chance the paint contains lead. Lead paint is hazardous if it flakes and becomes dust. You must take extra precautions.
- Test for lead. You can buy lead test kits at hardware stores. If the test is positive, assume all paint layers contain lead until proven otherwise.
- Use containment methods. When scraping or sanding lead paint, use drop cloths that extend far out from the work area. Consider using a lead-safe vacuum cleaner.
- Wear a proper respirator. A respirator with P100 filters is essential for protecting yourself from lead dust. Regular dust masks are not sufficient.
- Clean up carefully. Wet wiping is the best way to clean up lead dust. Dispose of all debris according to local regulations for hazardous waste.
Knowing When To Call A Professional
While many tasks can be done yourself, some situations are best left to the experts. This ensures the job is done safely and correctly, especially if there are challenging conditions.
- Extensive damage. If a large portion of your home’s exterior paint is peeling, or if there is significant structural damage, a professional painter can handle the scale of the job.
- Lead paint concerns. If you are dealing with widespread lead paint and are uncomfortable with the safety measures required, hiring a certified lead abatement professional is wise.
- Difficult access. Homes with very high walls, steep roofs, or complex architectural features may require specialized equipment like scaffolding or lifts, which professionals are equipped to use.
- Time constraints. If you have a limited timeframe or lack the necessary time to complete the job thoroughly, a professional can ensure it gets done efficiently and correctly.
Frequently Asked Questions
Question: What is the best tool for scraping peeling paint
Answer: For large, loose flakes, a flat paint scraper works well. For tight spots, a putty knife is useful. A carbide scraper is very sharp and efficient for faster removal.
Question: How long should I wait before painting after scraping
Answer: After scraping and sanding, clean the surface thoroughly. Allow it to dry completely, which can take 24-48 hours. Then, apply primer and let it dry according to the manufacturer’s instructions before painting.
Question: Can I power wash my house to remove peeling paint
Answer: A power washer on a low setting can help remove loose paint, especially on rough surfaces like wood or stucco. However, be very careful not to damage the siding or force water into cracks.
Question: How do I know if my old paint has lead
Answer: Paint applied before 1978 often contains lead. You can buy inexpensive lead test kits at hardware stores to check specific areas. If you find lead, extra safety precautions are needed.
Question: Do I need to prime bare wood after scraping
Answer: Yes, it is highly recommended to prime any bare wood exposed after scraping. Primer seals the wood, helps the topcoat adhere, and provides a uniform surface.
Summary
Removing flaking exterior paint the right way involves careful preparation, safe scraping, thorough sanding, and diligent cleaning. Address any underlying damage and always use primer. Following these steps ensures your new paint job looks great and lasts for years.
You can achieve a professional look with patience and the right methods.