Stained Wood Kitchen Island Ideas: Proven Styles
Stained wood kitchen islands offer timeless beauty and warmth, proving that simple finishes can create stunning focal points. Explore proven styles to find the perfect stained look for your kitchen, blending durability with classic design.
Choosing the right look for your kitchen island can feel like a big decision. You want something that’s not only beautiful but also stands up to daily use. Stained wood is a fantastic option because it highlights the natural grain and adds a rich, inviting feel to your kitchen. But with so many shades and styles, where do you begin? Don’t worry, I’m here to help you navigate the world of stained wood kitchen islands. We’ll look at popular styles that are proven to work, making it easy for you to pick a design that you’ll love for years to come. Let’s dive into some gorgeous ideas that will inspire your next woodworking project!
Why Choose Stained Wood for Your Kitchen Island?
Stained wood is a perennial favorite for kitchen islands, and for good reason! It offers a unique blend of natural beauty, durability, and versatility that paint often can’t match. Unlike paint, stain soaks into the wood, revealing its intricate grain patterns and natural character. This creates a depth and warmth that can make your kitchen feel more inviting and sophisticated. Plus, stains come in an incredible range of colors, from light, airy washes to deep, dramatic hues, allowing you to customize your island to perfectly complement your existing kitchen décor.
From a practical standpoint, stained wood is often easier to repair than painted surfaces. Minor scratches or wear can sometimes be touched up by reapplying a bit of stain, blending seamlessly with the existing finish. This makes it an excellent choice for a high-traffic area like a kitchen island. When you’re looking for a finish that’s both beautiful and resilient, stained wood is a proven winner. It’s a choice that speaks to craftsmanship and timeless appeal.
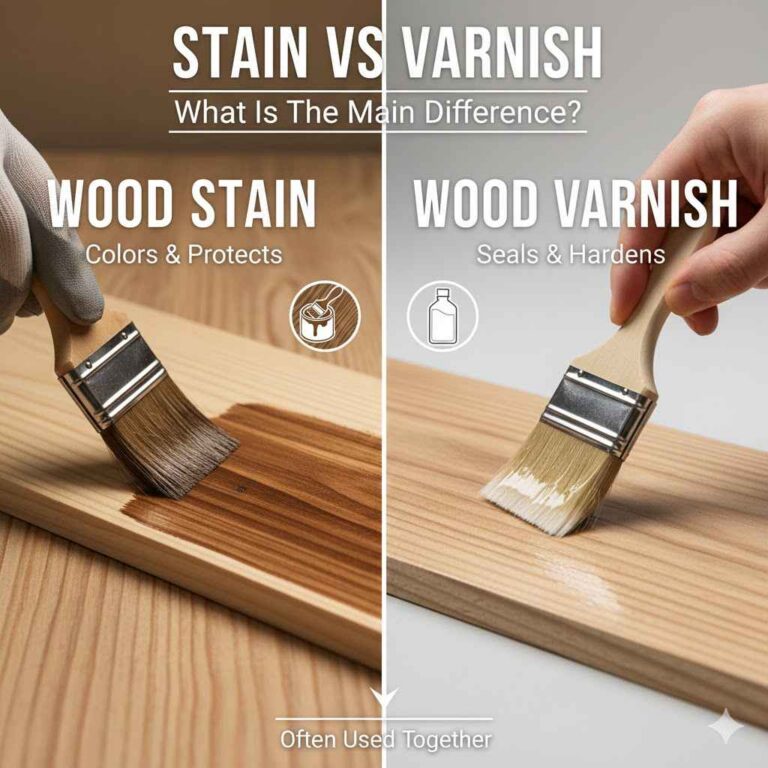
Understanding Wood Stains: A Beginner’s Guide
Before we explore specific styles, it’s helpful to understand a bit about wood stains themselves. Stains aren’t paint; they’re colorants that penetrate the wood’s surface, enhancing its natural beauty. The type of stain you choose, and the wood it’s applied to, will significantly impact the final look. Here’s a quick rundown:
- Oil-Based Stains: These are very popular for furniture and cabinetry. They penetrate the wood well, offering rich color and good durability. They typically require mineral spirits for cleanup and can take longer to dry.
- Water-Based Stains: These stains dry faster and are easier to clean up with soap and water. They tend to raise the wood grain more, so sanding between coats is often necessary for a smooth finish. They can sometimes look less rich than oil-based stains, but advancements have improved their performance significantly.
- Gel Stains: Gel stains are thicker and sit more on the surface of the wood. This makes them ideal for tricky applications or for achieving a more uniform color on different wood types without blotching. They are great for beginners as they offer more control.
- Dye Stains: These are transparent and color the wood deeply. They don’t obscure the grain and can create very vibrant, intense colors. They are less forgiving and can cause blotching if not applied carefully.
The wood species itself plays a huge role. Pine, for example, is prone to blotching, so using a pre-stain wood conditioner is highly recommended. Hardwoods like oak and maple take stain more evenly and can handle a wider variety of finishes. Knowing your wood and stain type is the first step to achieving that perfect stained wood kitchen island.
Proven Stained Wood Kitchen Island Styles
Now, let’s get to the exciting part: the styles! These ideas are popular because they offer a great balance of aesthetics and practicality, and they work beautifully with stained wood finishes.
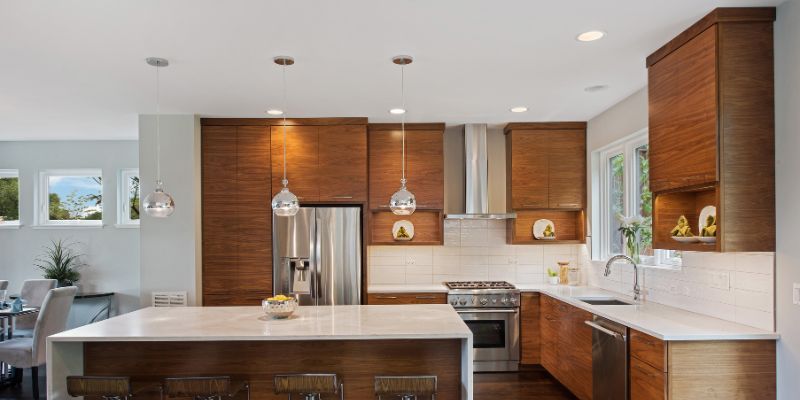
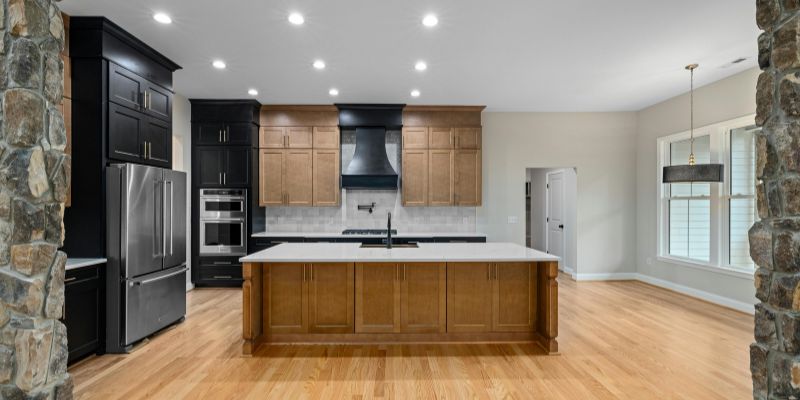
1. The Classic Farmhouse Island
This style is all about rustic charm and solid construction. Farmhouse islands often feature sturdy legs, sometimes with a subtle turned detail, and a substantial wooden top. The beauty of the stained wood here is key, showcasing rich browns, warm grays, or even a deep, aged-looking black stain. They exude a welcoming, traditional feel that’s perfect for families.
- Wood Type: Pine, oak, or reclaimed wood are excellent choices.
- Stain Colors: Medium to dark brown stains (like walnut, pecan, or mahogany), weathered grays, or even a deep charcoal.
- Key Features: Thick butcher block or solid wood top, sturdy legs (often square or slightly tapered), sometimes with a lower shelf for extra storage.
- Why it works: The natural variations in stained wood complement the rustic aesthetic, and the robust design means it can handle heavy use.
2. The Modern Shaker Island
Inspired by the Shaker furniture tradition, this style is characterized by clean lines and simple, functional design. A stained Shaker island often features a flat-panel or subtly raised-panel base with a smooth, stained wood top. It’s about understated elegance and practicality.
- Wood Type: Maple, cherry, or birch work wonderfully.
- Stain Colors: Light to medium natural wood tones (like honey, natural oak, or light walnut), or a sophisticated medium-dark stain.
- Key Features: Simple, flat-front cabinet doors or drawers, clean edges, a smooth top (can be butcher block or a solid wood slab), often with a minimalist hardware choice.
- Why it works: The stained wood highlights the craftsmanship of the clean lines, offering a sophisticated yet approachable look that fits well in contemporary or transitional kitchens.
3. The Industrial Loft Island
This style blends the warmth of wood with the raw, edgy feel of industrial design. Think metal accents, exposed hardware, and a robust, often darker stained wood. These islands can incorporate elements like metal legs, a steel frame, or even a concrete-look top paired with a rich wood base.
- Wood Type: Oak, hickory, or even a distressed pine can work well.
- Stain Colors: Dark browns, espresso, charcoal gray, or even a black stain.
- Key Features: Metal legs or base, butcher block or plank-style wood top, visible joinery or hardware, often a more open design with shelving.
- Why it works: The contrast between the dark, stained wood and metal elements creates a strong visual impact. The stained wood adds much-needed warmth to the typically cool industrial palette.
4. The Coastal Retreat Island
For a lighter, airier feel, the coastal style is perfect. Stained wood in this context leans towards lighter, more muted tones, often with a slightly weathered or bleached appearance. Think of the natural tones of driftwood or sand.
- Wood Type: Pine, poplar, or lighter hardwoods like ash.
- Stain Colors: Light grays, whitewashed finishes, bleached oak tones, or very pale natural wood stains.
- Key Features: Beadboard or shaker-style panels, lighter wood tops, often paired with white or light-colored cabinetry.
- Why it works: The lighter stained wood evokes a relaxed, beachy vibe without sacrificing the natural appeal of wood. It keeps the space feeling bright and open.
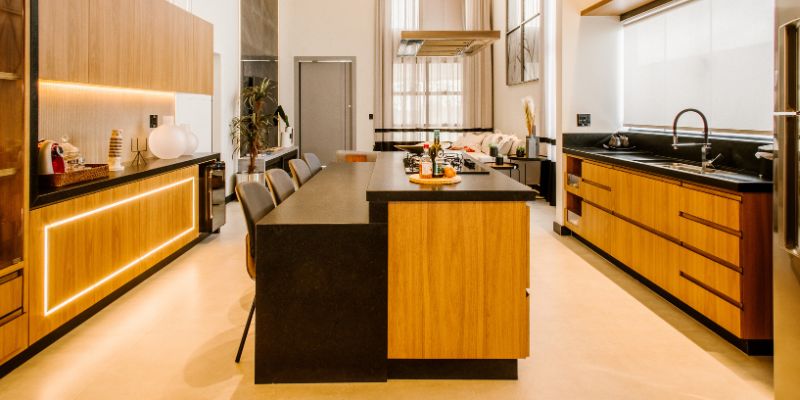
5. The Rustic-Modern Blend Island
This style marries the best of both worlds: the warmth and texture of natural wood with the clean lines and simplicity of modern design. A stained wood island in this category might have a sleek profile but feature a heavily grained wood with a rich, deep stain.
- Wood Type: Walnut, white oak, or even rift-sawn red oak.
- Stain Colors: Medium to dark walnut, rich espresso, or a sophisticated deep brown.
- Key Features: Clean, minimalist design, often a thicker slab-style top, simple leg designs or a pedestal base, minimal ornamentation.
- Why it works: The stained wood adds character and depth to otherwise minimalist designs, preventing them from feeling too stark or cold. It’s about showcasing the wood itself as the main decorative element.
Table: Stain Color vs. Wood Type Impact
Understanding how different stains look on various wood species is crucial for achieving your desired aesthetic. Here’s a simplified guide:
| Wood Species | Best for Stains | Typical Result with Medium Brown Stain | Notes |
|---|---|---|---|
| Pine | Light to Medium | Can be blotchy; requires pre-stain conditioner. Results in a warm, sometimes rustic look. | Softwood, prone to dents. Grain is prominent. |
| Oak (Red/White) | All | Rich, pronounced grain; medium brown stain looks classic and warm. White oak takes stain slightly more evenly. | Hardwood, durable, prominent grain. Very popular for furniture. |
| Maple | All (with care) | Smooth, even finish. Medium brown stain looks sophisticated and clean. Can be blotchy without conditioner or gel stain. | Hardwood, fine grain, very durable. Takes finishes well but can be tricky with liquid stains. |
| Cherry | Light to Medium | Develops a beautiful, deep patina over time. Medium brown stain highlights its natural reddish tones. | Hardwood, beautiful grain that darkens with age. |
| Walnut | Light to Medium | Deep, rich brown tones are inherent. Lighter stains can offer a striking contrast. | Hardwood, known for its deep, luxurious color and grain. Expensive but stunning. |
Remember, always test your stain on scrap pieces of the same wood you’ll be using for your island. This is the best way to see how the color will turn out.
Creating Your Stained Wood Kitchen Island: Key Considerations
Building or refinishing a kitchen island is a rewarding project. Here are some tips to ensure success:
1. Wood Selection
As we’ve seen, the type of wood you choose is fundamental. For a beginner, oak or maple are often good choices due to their stability and evenness in taking stain. If you’re on a budget, pine is accessible, but be prepared to use a pre-stain conditioner to avoid blotchiness. For a truly premium look, walnut is unparalleled but comes at a higher cost. Consider the durability you need – for a countertop that will see heavy use, a hardwood is usually preferable.
2. Surface Preparation is Crucial
This is the most important step for a flawless finish.
- Sanding: Start with a coarser grit sandpaper (like 80 or 100 grit) to remove any old finish or imperfections, then progress through finer grits (120, 150, 180, and finally 220 grit). Sand in the direction of the wood grain.
- Cleaning: After sanding, thoroughly wipe down the wood with a tack cloth or a clean, damp cloth to remove all dust. Any dust left behind will show up in your finish.
- Pre-Stain Conditioner: For blotch-prone woods like pine or birch, applying a pre-stain wood conditioner is essential. Follow the product’s instructions carefully.
For more on proper sanding techniques, check out resources from the Woodworking Network.
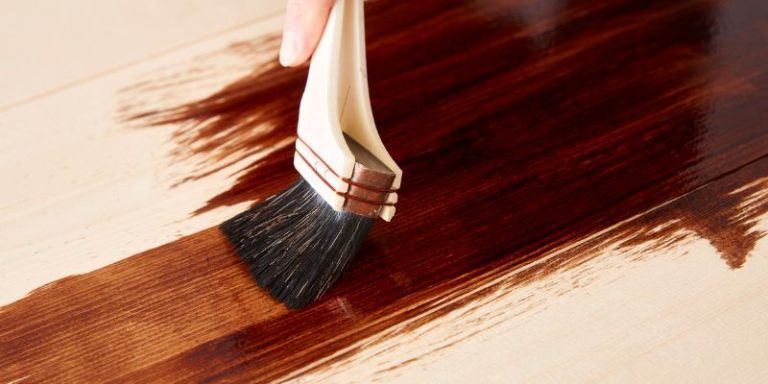
3. Applying the Stain
Work in a well-ventilated area, preferably with consistent temperature and humidity.
- Application: Apply the stain evenly with a good quality brush, rag, or foam applicator. Work in manageable sections.
- Wiping: Allow the stain to penetrate for the time recommended on the product label (usually 5-15 minutes). Then, wipe off the excess stain with a clean, lint-free cloth, again following the direction of the wood grain. The longer you leave the stain on before wiping, the darker the color will be.
- Drying: Let the stain dry completely, which can take anywhere from 6 to 24 hours depending on the stain type and environmental conditions.
4. Sealing and Topcoating
Once the stain is dry, you need to protect it. A clear topcoat will not only shield the stain from wear and tear but also enhance its appearance.
- Polyurethane: This is a very durable and common choice for kitchen islands. It comes in oil-based (more amber tone, durable) and water-based (clearer, faster drying) formulas.
- Varnish: Similar to polyurethane, offering excellent protection.
- Lacquer: Dries very quickly but is less durable than polyurethane.
- Oil Finishes: Such as Tung oil or Danish oil, can offer a more natural, in-the-wood feel but require more frequent reapplication.
Apply multiple thin coats of your chosen topcoat, allowing adequate drying time between each. Lightly sand with very fine-grit sandpaper (320 or 400 grit) between coats for a smoother finish, and always wipe away dust with a tack cloth.
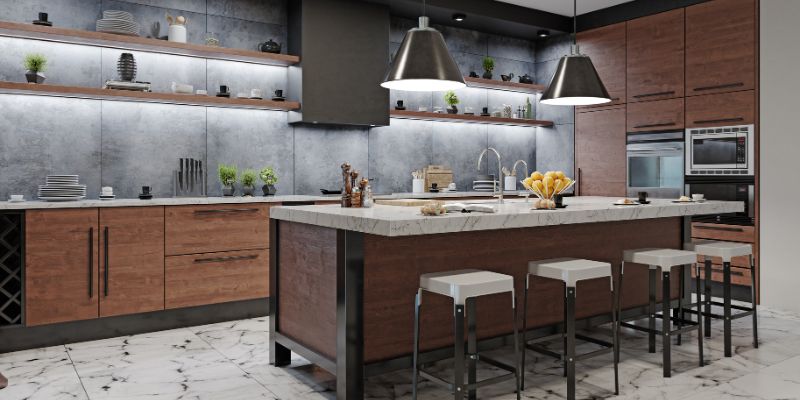
Table: Stain Application Steps
Here’s a simplified process for applying stain:
| Step | Description | Key Tools/Materials |
|---|---|---|
| 1. Prepare Surface | Sand wood smooth, clean dust thoroughly. Apply pre-stain conditioner if needed. | Sandpaper (various grits), tack cloth, pre-stain conditioner (optional) |
| 2. Apply Stain | Apply stain evenly with a brush or rag. Work in sections. | Stain, brush/rag/applicator |
| 3. Wipe Off Excess | Wipe away excess stain with a clean cloth after recommended penetration time. | Clean, lint-free rags |
| 4. Allow to Dry | Let the stain dry completely as per product instructions. | Time! |
| 5. Apply Topcoat | Apply thin, even coats of polyurethane or other protective finish. | Topcoat (polyurethane, varnish, etc.), brush |
| 6. Sand Between Coats | Lightly sand with fine-grit paper after each topcoat dries. Clean dust. | Fine-grit sandpaper (320+), tack cloth |
| 7. Final Coat | Apply the final coat of finish. | Topcoat |
For a comprehensive guide on finishing techniques, the Popular Mechanics guide on staining wood is an excellent resource.
Ideas for Stained Wood Kitchen Island Table with Legs
When thinking about a stained wood kitchen island, the “table with legs” design is incredibly versatile. It offers a lighter, more open feel than a solid cabinet base and can be adapted to many styles. Here are some specific ideas:
- Trestle Base Island: A sturdy trestle base, often with chunky wooden legs connected by a central support, gives a strong, rustic, or farmhouse feel. Stained in a warm oak or a deep walnut, this looks fantastic.
- Tapered Leg Island: For a more mid-century modern or transitional look, consider an island with legs that taper towards the floor. Stains in lighter to medium natural tones or even a sophisticated gray complement this style beautifully.
- Industrial Pipe Legs: Pair a beautifully stained wood top with industrial-style pipe legs. This combination is striking and fits perfectly in modern or industrial kitchens. A dark espresso or charcoal stain on the wood provides a great contrast to the metal.
- Simple Square Legs: For a clean, Shaker-inspired or contemporary look, simple square legs offer a solid foundation. Stains that highlight the wood grain, like natural maple or a medium oak, work best here.
- Turned Leg Island: Add a touch of traditional elegance with turned wooden legs. These can be stained in richer tones like cherry or mahogany for a classic, refined look.
The beauty of a table-style island is its adaptability. You can choose the leg style, the wood type, and the stain to perfectly match your kitchen’s aesthetic. Whether you want a statement piece or a subtle, functional addition, a stained wood island with legs is a fantastic choice.
Frequently Asked Questions (FAQs)
Q1: What is the best stain color for a kitchen island?
The “best” color is subjective and depends on your kitchen’s overall design. However, medium to dark brown stains like walnut, pecan, or espresso are very popular because they are forgiving with spills and wear, and they offer a timeless, warm look. Lighter grays or natural wood tones are great for a more modern or coastal feel.
Q2: Can I use any wood for a stained kitchen island?
While you can use most woods, some are better suited for kitchen islands due to durability and how they accept stain. Hardwoods like oak, maple, cherry, and walnut are excellent choices for both the island base and the countertop. Softer woods like pine are more budget-friendly but require more care in preparation (especially pre-stain conditioner) and are more prone to dents and scratches.
Q3: How do I prevent blotchiness when staining wood?
Blotching occurs when stain is absorbed unevenly by the wood, often on woods like pine, birch, or cherry. The most effective solution is to apply a pre-stain wood conditioner before staining. Sanding smoothly and using a gel stain or a dye stain can also help achieve a more uniform color.
Q4: How many coats of stain should I apply?
Typically, one coat of stain is sufficient to achieve the desired color. If you want a deeper, richer color, you can apply a second coat after the first has dried, but be aware that this can sometimes lead to a more “painted-on” look rather than a natural wood grain appearance. Always wipe off excess stain after the recommended penetration time for the most natural result.
Q5: What’s the best finish to protect a stained wood kitchen island?
For a kitchen island, durability is key. A high-quality polyurethane (oil-based or water-based) is an excellent choice. It provides a tough, water-resistant barrier. Multiple thin coats are recommended, with light sanding between coats for maximum smoothness and adhesion. For a more natural look, a durable oil-based varnish or a specialized butcher block finish can also be used, though they may require more maintenance.
Q6: How do I clean and maintain a stained wood kitchen island?
For daily cleaning, use a soft, damp cloth. Avoid harsh chemicals or abrasive cleaners, as these can damage the finish. For tougher messes, a mild dish soap diluted in water can be used, but always wipe down with a clean, damp cloth afterward to remove any residue, and then dry the surface thoroughly. Reapply a protective finish (like polyurethane or wax) periodically, as needed, to maintain its luster and protection.
Conclusion
Stained wood kitchen islands are more than just furniture; they are the heart of the kitchen, offering both functional workspace and a beautiful aesthetic. From the rustic charm of farmhouse designs to the sleek lines of modern styles, there’s a stained wood island to suit every taste and kitchen. By understanding wood types, choosing the right stain, and focusing on proper preparation and finishing, you can create a stunning and durable centerpiece for your home. Whether you’re building from scratch or refinishing an existing piece, embracing the warmth and character of stained wood will undoubtedly elevate your kitchen’s style. So, gather your materials, take your time, and enjoy the process of bringing your perfect stained wood kitchen island to life!