What Are The Disadvantages Of Engineered Wood Flooring? A Complete Homeowner’s Guide
Engineered wood flooring’s main drawbacks involve potential moisture damage, limited refinishing opportunities compared to solid wood, and the risk of delamination if poor quality is chosen or installed incorrectly. Understanding these issues helps homeowners make a confident, long-term choice for their space.
Hey there, DIY friend! I’m Md Meraj, and I know picking new floors can feel like navigating a maze. Engineered wood looks fantastic, often costs less upfront, and seems like the perfect solution. But, just like any building material, it has a few hidden catches. Knowing these downsides upfront saves you headaches later on. We want your floors to look great for years! Don’t worry; we’ll break down every disadvantage simply. We’ll cover moisture sensitivity, wear layers, and what happens when things go wrong. Ready to become an engineered wood expert? Let’s dive in and see what we need to watch out for!
Why Understanding Engineered Wood Downsides Matters for DIY Success
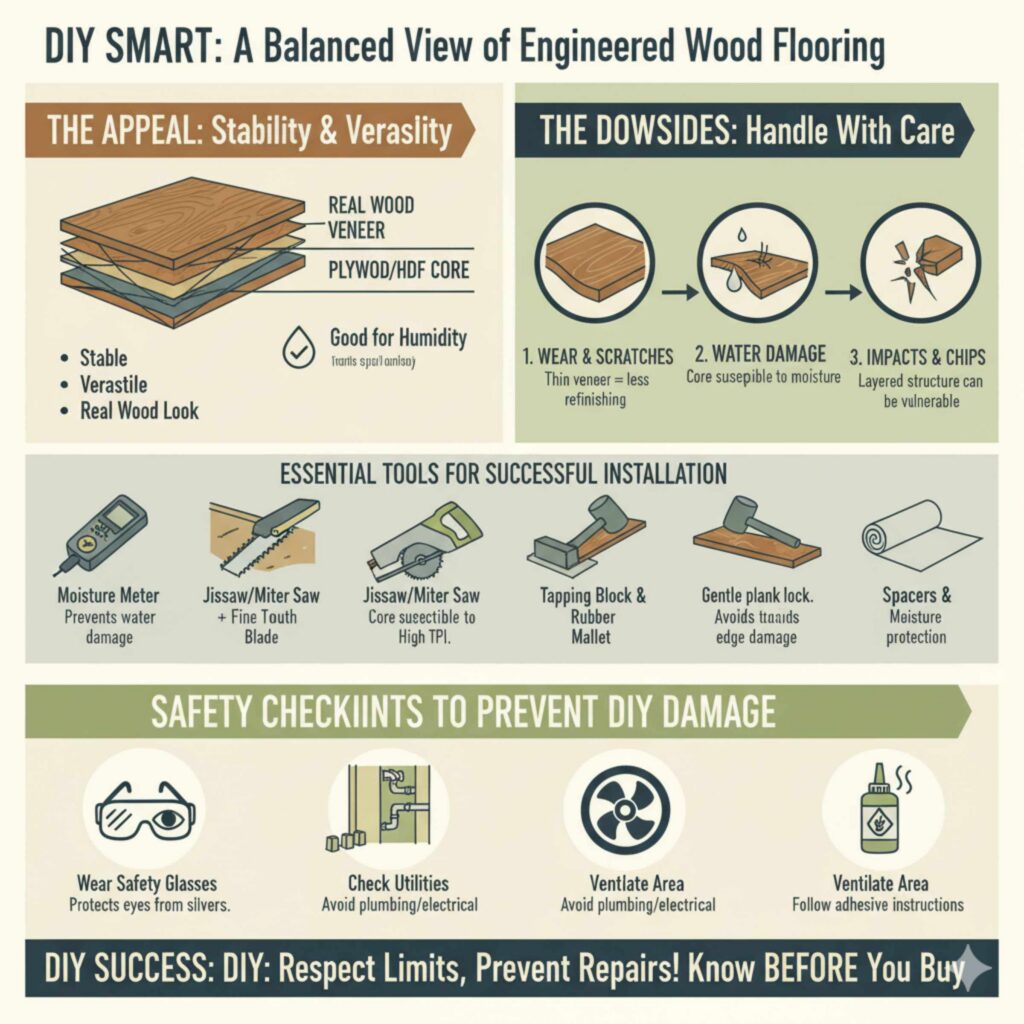
As a homeowner tackling renovations, confidence is key. Engineered wood flooring is popular because it’s stable and versatile. It’s made of a real wood veneer glued on top of layers of plywood or high-density fiberboard (HDF). This structure makes it better than solid wood in humid spots. However, that layered construction is exactly where some problems hide. If you don’t respect its limits—especially regarding water and wear—you might face repairs sooner than expected. We need to treat this material right so it lasts! This guide helps you see the whole picture before you click “buy.
The Core Disadvantages of Engineered Wood Flooring
Let’s look straight at the things that can cause trouble down the road. These aren’t scare tactics; they are points to check off your inspection list before you buy.
1. Vulnerability to Excessive Moisture and Humidity
This is often the biggest worry with engineered wood. While it handles humidity better than solid wood, it’s not waterproof.
The Danger of Swelling and Warping
Because the core layers (often plywood or HDF) absorb water differently than the thin top veneer, moisture causes uneven expansion.
HDF Core Swelling: If water sits on the surface or humidity gets too high (often above 55-60%), the core material can swell significantly. This often leads to buckling or cupping where the edges rise higher than the center of the plank.
Delamination Risk: Water penetration can weaken the adhesive holding the layers together. This separation is called delamination, and once it starts, it’s usually permanent.
Installation Location Matters: You must be extra careful installing engineered wood in basements or over concrete slabs, as ground moisture is a constant threat. Always use a proper vapor barrier, even when the manufacturer suggests it’s optional.
Quick Tip for Moisture Control:
Always monitor the relative humidity (RH) in the room where the flooring is installed. Tools like a simple hygrometer are cheap insurance! For professional standards, you can check guidelines from organizations like the National Wood Flooring Association (NWFA).
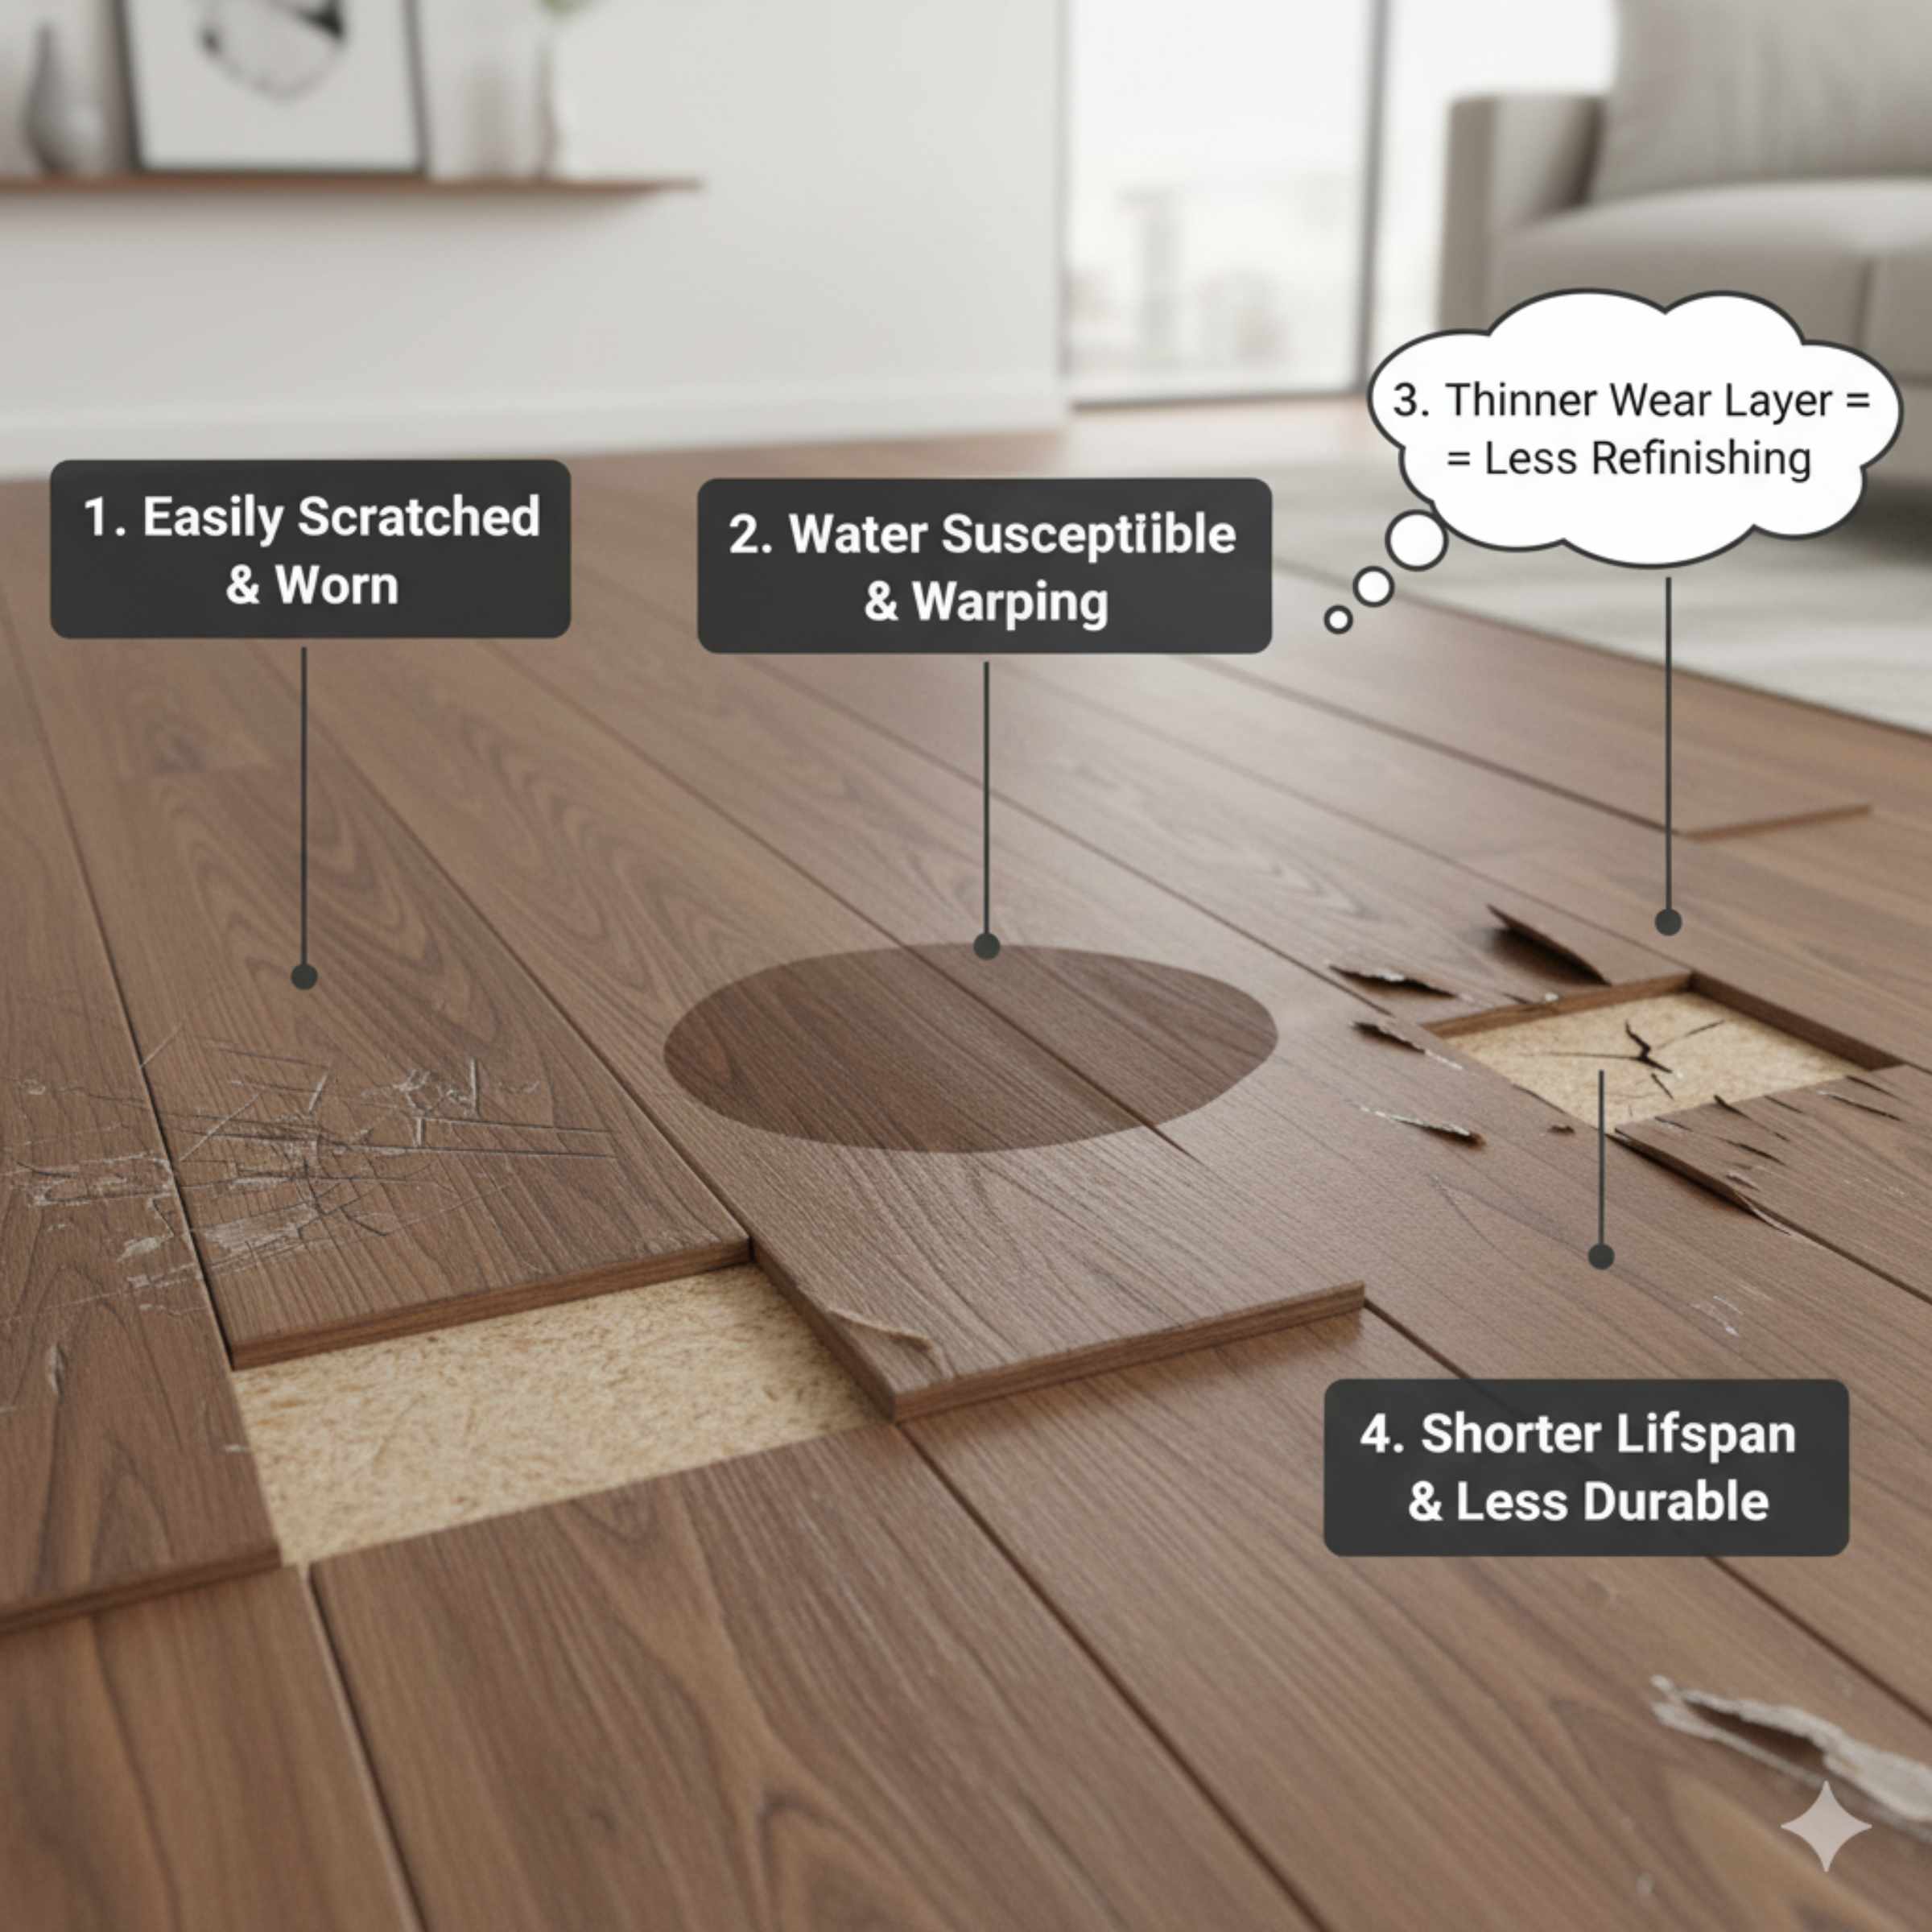
2. Limited Refinishing Potential
This is a huge difference between engineered wood and its solid wood cousin. Refinishing is the process of sanding down the surface to remove scratches and wear, allowing you to re-stain or re-seal the wood.
The Thin Wear Layer Issue
The real wood layer on top of engineered flooring—the wear layer—is very thin, sometimes just 1/8th of an inch or less.
Solid Wood: Can be sanded and refinished multiple times over its lifespan (sometimes 4–5 times).
Engineered Wood: Can typically only be sanded and refinished once, or sometimes not at all, depending on the thickness of the veneer.
If you choose an engineered product with a very thin wear layer (often seen in budget-friendly options), you might only get one good sanding out of it before you hit the plywood or HDF core layer. Once you hit the core, the floor is ruined and must be replaced. This shortens the overall lifespan compared to solid wood.
3. Risk of Delamination (Layer Separation)
As mentioned before, delamination is when the layers peel apart. While manufacturing processes are much better now, it still happens due to specific issues:
Poor Adhesives: Cheaply made products might use lower-quality glues that break down under temperature or humidity fluctuations.
Installation Errors: If the subfloor isn’t prepped correctly, or if glue-down products aren’t fully adhered, gaps can form, allowing air and moisture intrusion that leads to separation.
Direct Sunlight: Extreme, sustained heat from intense, direct sunlight (especially through large windows) can sometimes dry out the adhesives too quickly or cause rapid temperature swings, leading to failure between the layers.
4. Quality Varies Drastically Between Brands
Not all engineered wood is created equal. This is a major disadvantage for the beginner because it’s hard to tell the difference just by looking at a small sample board.
What to Watch Out For:
Veneer Thickness: A good quality floor will have a wear layer of at least 3mm (about 1/8 inch) if you plan on ever refinishing it. Cheaper versions might be 0.5mm to 1mm thick.
Core Material: Plywood cores are generally more stable and water-resistant than HDF cores. HDF is more susceptible to permanent swelling if it gets wet.
Warranties: Poor quality is often reflected in short warranties. A good manufacturer stands behind their product with a long warranty covering structural integrity (but remember, warranties often void if installation guidelines aren’t strictly followed!).
5. Higher Initial Cost Than Laminate or Vinyl Plank
While engineered wood is usually cheaper than premium solid hardwood, it is significantly more expensive than its main competitors: laminate and Luxury Vinyl Plank (LVP).
For budget-conscious DIYers, the higher initial material cost can be a deterrent, especially when LVP offers incredible water resistance today. You pay a premium for the realwood surface, but you need to balance that cost against the reduced lifespan compared to solid wood.
A Comparative Look: Engineered vs Solid Wood Drawbacks
To put things in perspective, here is a quick rundown comparing the typical downsides of both types of real wood flooring.
| Disadvantage Area | Engineered Wood Flooring | Solid Hardwood Flooring |
|---|---|---|
| Moisture Resistance | Moderate; sensitive to standing water and high humidity. | Low; swells and warps easily with moisture changes. |
| Refinishing Potential | Limited (0 to 2 times, depending on veneer thickness). | High (can be refinished many times). |
| Subfloor Requirements | Versatile (can often be installed over concrete). | Limited (requires wood subfloor). |
| Longevity/Lifespan | Generally 20–40 years (based on wear layer). | Often 75+ years with proper care. |
| Cost Per Square Foot | Mid-to-High range. | Mid-to-Very High range. |
Installation Pitfalls That Can Ruin Engineered Floors
Even the best engineered wood floor will fail if installed poorly. For the DIY enthusiast, knowing these critical installation weak points is vital for project success.
A. Not Allowing for Acclimation
Wood is a natural material. Before you even open the boxes, the planks must sit in the room where they will be installed for several days (usually 48–72 hours, check your manufacturer’s instructions!).
Why it Matters: This allows the wood to reach equilibrium with the room’s temperature and humidity. If you install wood that is too wet or too dry for the environment, it will shrink or swell after installation, leading to unsightly gaps or buckling later on. This is a common cause of early warranty voidance.
B. Improper Subfloor Preparation
Your subfloor must be flat, clean, and dry. Unevenness is a major enemy of click-lock engineered floors.
Gapping and Locking Issues: If the subfloor is bumpy, the locking mechanisms on the planks won’t engage fully. This causes the planks to separate underfoot pressure or the locking tongues to break.
Moisture Barrier Omission: As noted earlier, forgetting a vapor barrier over concrete slabs guarantees moisture problems moving up into your new floor.
C. Gluing Down Over Damp Concrete
When glue-down installations are used over concrete, the adhesive must be moisture-cured urethane specifically rated for that application.
If you use the wrong adhesive, or if the concrete slab has not been properly tested and sealed against moisture vapor transmission (MVTR), the glue will fail, and the planks will lift. Always test concrete moisture according to ASTM F1859 standards before gluing.
The Aesthetic Downsides: Appearance Limitations
While engineered wood offers beautiful real wood veneers, there are some visual limitations to be aware of compared to premium solid wood.
1. Limited Plank Width Availability
Modern design loves wide plank flooring (8 inches or more). While engineered wood manufacturers are producing wider planks, very wide, long planks are much more common and structurally reliable in solid wood. Wide engineered planks can sometimes be more prone to cupping if the core layers aren’t perfectly balanced or if they encounter humidity spikes.
2. Repetitive Grain Patterns in Lower Grades
Because engineered flooring uses a limited number of large tree harvests to create veneers, if you buy budget-grade material, you might notice the same knot pattern or grain repetition across several planks. This lack of randomness makes the floor look less authentic than a high-grade, random-patterned solid wood floor.
3. Color Fading from UV Exposure
Like all real wood products, engineered flooring can fade or change color when exposed to constant, direct sunlight. While finishes offer UV protection, very intense, long-term exposure will cause noticeable color variation between the sunny and shaded areas of the room. This is natural, but it can be jarring if one section fades much faster than another.
When Engineered Wood Becomes a Worse Choice Than Alternatives
Knowing when notto use engineered wood is just as important as knowing its flaws. Here are scenarios where you should probably choose LVP, tile, or solid wood instead.
Scenario 1: High-Traffic, High-Wear Areas Prone to Scratches
If you have large dogs with sharp nails or frequently move heavy furniture without coasters, the thin wear layer of engineered wood might not survive.
Better Alternative: Luxury Vinyl Plank (LVP) has a thick, highly durable wear layer that resists scratches much better than thin wood veneer.
Scenario 2: Areas That Will See Standing Water
Bathrooms, laundry rooms, or below-grade areas prone to flooding should never use engineered wood.
Better Alternative: Porcelain tile or high-quality LVP are truly waterproof options that will not swell or delaminate if submerged.
Scenario 3: Planning for Multiple Future Refinishes
If you are installing floors in a home you plan to live in for 50+ years and want to completely change the look several times, engineered wood limits your options.
Better Alternative: A thicker solid hardwood floor gives you the most flexibility for aesthetic changes over the decades.
Scenario 4: Extreme Temperature Fluctuations
Areas like cabins or sunrooms that experience huge temperature swings between seasons are tough on any wood product. While engineered wood is more stable than solid, constant expansion and contraction can still lead to seam failure or delamination over many years.
Tools and Safety Tips for Avoiding Engineered Wood Disadvantages
As your woodworking mentor, I want you to approach this job confidently. By using the right tools and safety measures, you minimize the risk of installation errors that cause the disadvantages we discussed.
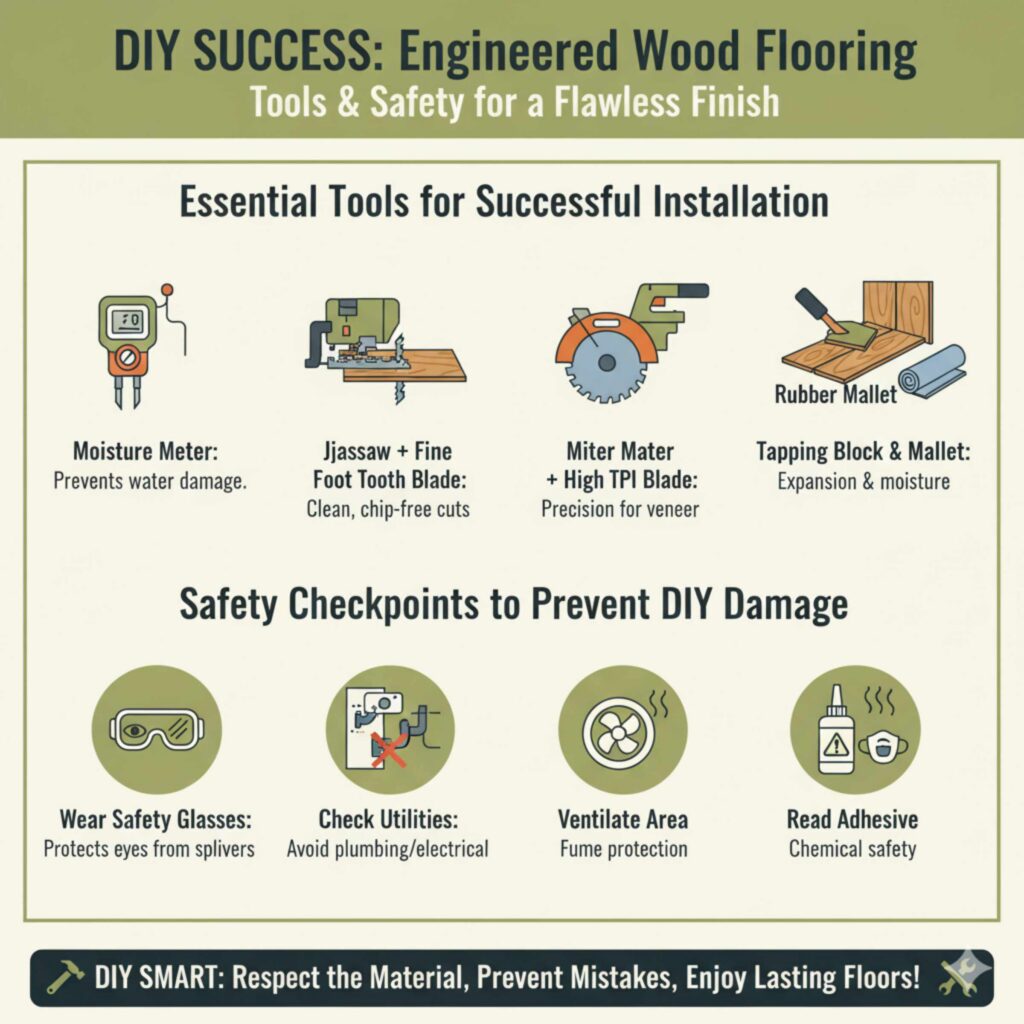
Essential Tools for a Successful Installation
- Moisture Meter: Absolutely non-negotiable for checking subfloor moisture levels (concrete or wood). This prevents moisture-related failure.
- Jigsaw or Miter Saw with Fine Tooth Blade: Use a blade with a high TPI (teeth per inch) to ensure clean, chip-free cuts on the veneer layer.
- Tapping Block and Rubber Mallet: Essential for gently locking click-lock planks together without damaging the edges. Never hit the plank directly!
- Full Range of Spacers: Used during acclimation and installation to ensure you maintain the required expansion gap around all walls.
- High-Quality Vapor Barrier (If required): Use only the barrier recommended by your flooring manufacturer for glue-down or floating installations over concrete.
Safety Checkpoints to Prevent DIY Damage
Wear Safety Glasses: Always wear eye protection when cutting wood, especially when sawing veneer, as small slivers can fly off.
Check Utilities: If nailing or screwing into a subfloor, use caution to avoid hitting plumbing or electrical lines hidden beneath.
Follow Manufacturer’s Glue/Adhesive Instructions: Adhesives often have strong fumes. Ensure you have excellent ventilation when working with any chemical adhesive or sealant used for installation.
FAQ: Beginner Questions About Engineered Wood Downsides
Q1: Can engineered wood flooring warp permanently?
Yes, it can. If engineered wood is exposed to standing water or sustained high humidity (above 65% RH for long periods), the core layers can swell irreversibly, causing cupping or buckling that cannot be flattened out once dried.
Q2: How do I know if my engineered floor can be refinished?
Check the specifications sheet from the manufacturer. Look for the “wear layer thickness.” If it is 3mm (about 1/8 inch) or thicker, it likely can be sanded once or twice. If it is 1mm or less, assume it cannot be refinished.
Q3: Is it safe to install engineered wood in a bathroom?
Generally, no. While it is more water-resistant than solid wood, standard engineered wood is not designed for the high, direct moisture found in bathrooms or under sinks. Use tile or LVP in wet areas.
Q4: What is the easiest way to spot delamination on my floor?
Delamination usually appears as bubbles, raised edges, or peeling where the top veneer layer separates from the core layer beneath it. This is often caused by poor installation or excessive moisture intrusion.
Q5: Does engineered wood cost more to install than solid wood?
Installation costs can vary. If you are floating the floor (not gluing or nailing), DIY installation is relatively simple. However, glue-down engineered wood installation requires specialized adhesives and precise subfloor prep, which can sometimes make the labor cost similar to, or slightly less than, solid hardwood installation.
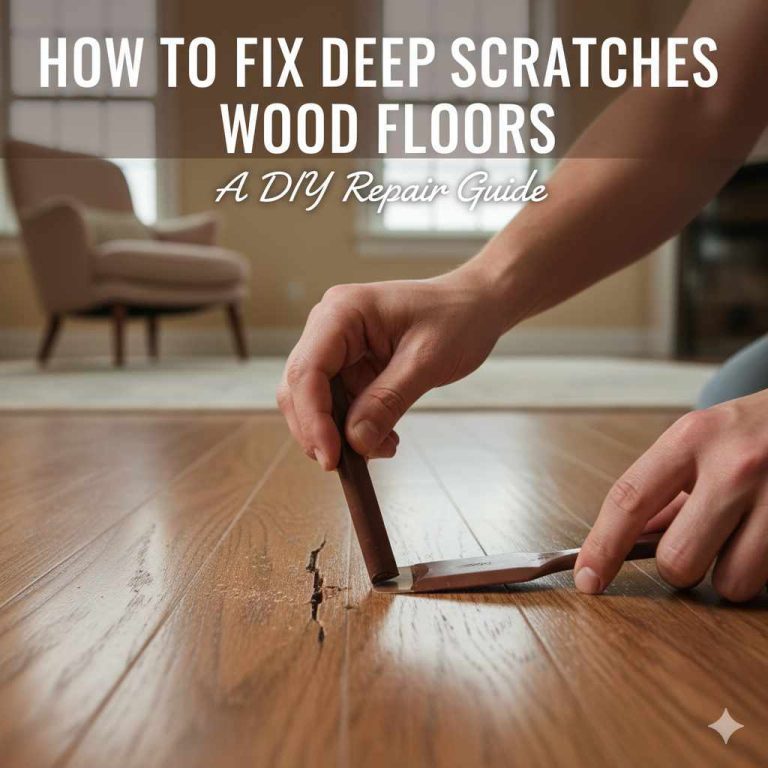
Q6: If my engineered wood scratches, can I just spot-repair it easily?
Small surface scratches on the veneer can often be masked using touch-up kits designed for hardwood floors. Deep scratches that penetrate the veneer into the core, however, usually require replacing the entire plank, which is easier with a click-lock floating floor than a glued floor.
Conclusion: Making the Confident Choice
Choosing your flooring is a big step, and recognizing the disadvantages of engineered wood flooring isn’t about choosing against it; it’s about choosing wisely*. You now know that the main hurdles are moisture sensitivity, limited sanding life, and the critical importance of buying high-quality veneer.
If you are installing in a busy area with moderate humidity, and you are willing to invest in a reputable brand with a thick wear layer, engineered wood can be a fantastic, durable, and beautiful choice for your DIY home project. Remember my guidance: respect the moisture, plan for the future refinishing life, and ensure your subfloor prep is perfect. Follow these steps, and you’ll build a confident, long-lasting floor you’ll be proud of for years to come! Happy building!