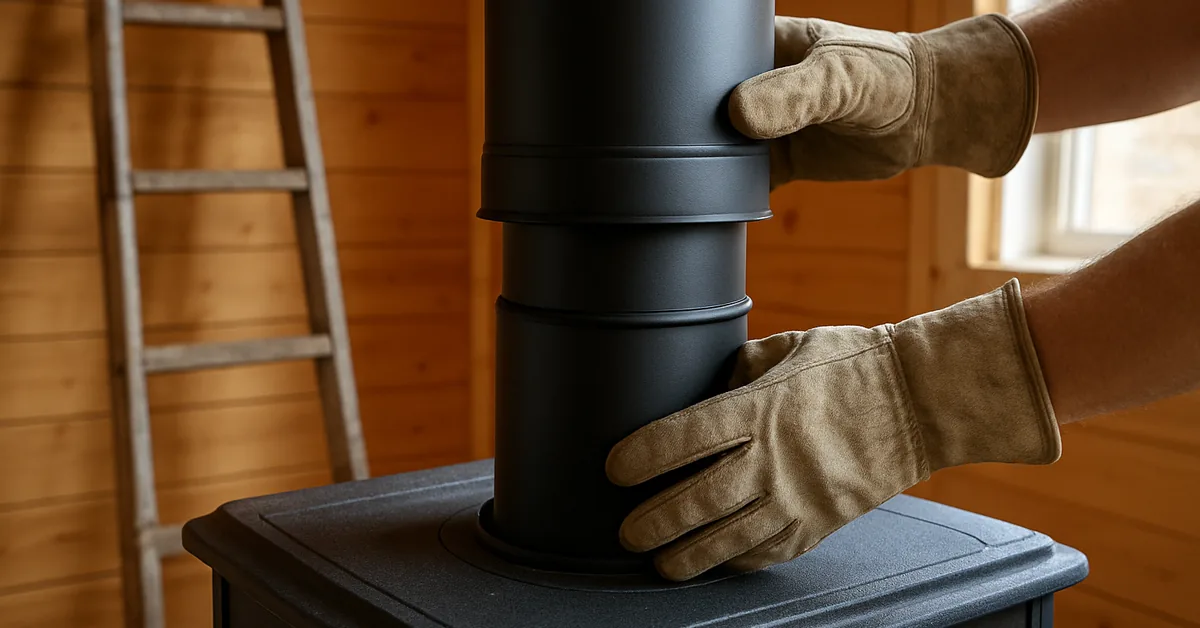
How to Install Wood Stove Pipe (NFPA 211 Clearances)
Wood stove pipe installs in a fixed order: single-wall pipe from the stove collar, then double-wall (insulated) pipe through any wall or ceiling, since single-wall needs 18 inches of clearance and double-wall typically needs only 6. Skipping that transition to insulated pipe, or undersizing clearance, is what actually starts chimney fires, not the stove itself. This guide covers assembling both pipe types, passing through a cathedral ceiling, roof flashing, and the exact NFPA 211 clearances your inspector will check.
Affiliate disclosure: Home Improvement Way is reader-supported. As an Amazon Associate, we earn from qualifying purchases made through links on this page, at no extra cost to you.
Quick Answer
Connect single-wall pipe to the stove collar with three sheet metal screws per joint (crimped end down), switch to double-wall insulated pipe before any wall or ceiling penetration, support vertical runs every 6–8 feet, slope horizontal runs 1/4 inch per foot upward, and keep the chimney at least 3 feet above the roof and 2 feet above anything within 10 feet.
Why Installing Your Wood Stove Pipe Correctly Matters
Installing wood stove pipe isn’t just about getting smoke out of your house; it’s a critical safety step. Proper installation prevents fires, ensures your stove works efficiently, and keeps your home healthy. When pipe sections aren’t sealed right, or when the pipe is too close to flammable materials, you create serious risks. Plus, a well-installed system means your stove will heat your home better, saving you fuel and money. We want your stove to be a source of comfort, not concern, so let’s make sure it’s done right from the start.
Understanding Your Wood Stove Pipe System
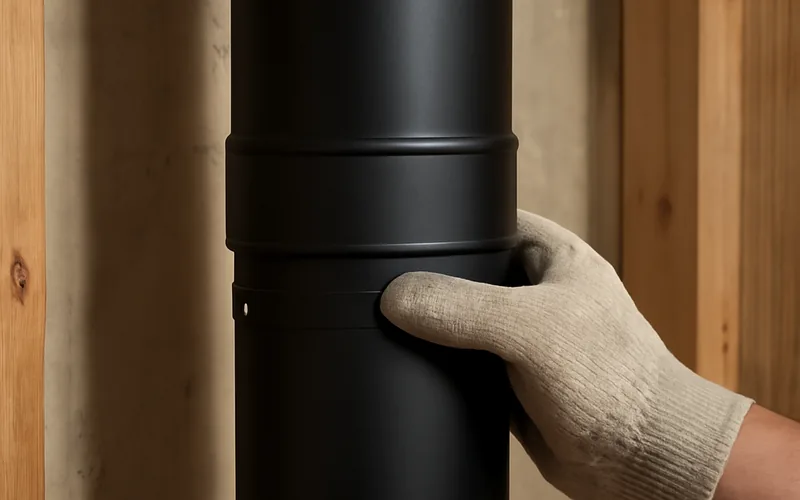
Before we grab any tools, it’s helpful to know the different types of pipe you’ll be working with. Most wood stove installations use two main types:
- Single-Wall Stove Pipe: This is the black, smooth pipe you’ll connect directly to your wood stove. It’s durable but requires significant clearance from combustible materials. Think of it as the direct path from the stove to the chimney system.
- Double-Wall (Insulated) Chimney Pipe: This is the silver, often corrugated pipe that carries smoke through your living space and out of your home. It has an air gap or insulation between two layers of metal, which greatly reduces the required clearance from walls, ceilings, and floors. This is a major safety feature and often a code requirement for passing through rooms.
You’ll also encounter various fittings like elbows (for bends), storm collars (to seal joints at the roof), ceiling support boxes (to support the pipe and provide a firebreak at the ceiling), and roof flashing (to seal the pipe where it exits the roof). Understanding these components will make the installation process much smoother.
Essential Tools and Materials You’ll Need
Having the right tools makes any DIY project easier and safer. For installing wood stove pipe, here’s a good list to get you started:
Tools
- Tape Measure
- Pencil or Marker
- Drill with various bits (including pilot hole bits and screwdriver bits)
- Screwdrivers (Phillips and flathead)
- Sheet Metal Screws (specifically designed for stove pipe, often #8 or #10, 1/2 inch length is common)
- Tin Snips or Aviation Snips (for minor adjustments if needed)
- Level
- Caulking Gun
- High-Temperature Silicone Sealant (rated for stove pipes)
- Stud Finder (if going through walls or ceilings)
- Reciprocating Saw or Drywall Saw (if cutting through ceiling or wall materials)
- Safety Glasses
- Work Gloves
- Ladder (stable and appropriate height)
- Dust Mask
Materials
- Single-wall stove pipe sections
- Double-wall (insulated) chimney pipe sections
- Appropriate elbows (if needed for direction changes)
- Ceiling Support Box (if passing through a ceiling)
- Roof flashing kit (specific to your roof type)
- Storm Collar
- Chimney Cap
- High-temperature stove cement or sealant (for sealing the stove collar to the pipe)
- Wall Thimble (if passing through a wall, especially a combustible one)
- Support brackets or ceiling braces (as required by code and manufacturer)
Step-by-Step Guide: How to Install Wood Stove Pipe
Let’s break down the installation process into manageable steps. Remember, safety is paramount, and following manufacturer instructions and local codes is non-negotiable. This guide covers a common scenario of installing pipe through a ceiling, which might be a cathedral ceiling or a standard one.
Step 1: Planning Your Pipe Route and Measuring
This is the most crucial step. You need to figure out the best path for your pipe from the stove to the outside. Consider these points:
- Minimize Bends: Each bend reduces the efficiency of your stove. Aim for the shortest, straightest run possible.
- Clearances: This is where double-wall pipe is a lifesaver. Check the manufacturer’s manual for the required clearances for both single-wall and double-wall pipe from any combustible materials (wood framing, drywall, insulation, etc.). Codes are strict on this! Single-wall pipe commonly needs 18 inches of clearance, while double-wall (insulated) pipe typically needs only 6 inches from walls and 8 inches from ceilings — always confirm the exact figure on your specific pipe’s UL listing, since it varies by manufacturer.
- Support: The pipe needs to be supported every 6 to 8 feet for vertical runs — check your specific pipe manufacturer’s spacing requirement — and at every joint for horizontal runs.
- Roof Exit: Plan where the pipe will exit your roof. This needs to be a safe distance from any obstructions like trees or other parts of your house, and well above any roof peaks according to NFPA 211 standards (National Fire Protection Association).
Once you have your route, measure carefully. Measure the distance from the stove collar to where the pipe will exit the room, accounting for any elbows. Then, measure the height needed to reach the roof and exit according to code. Always add a little extra for adjustments.
Step 2: Preparing the Stove and First Pipe Section
Ensure your wood stove is in its final position. Attach the first section of single-wall stove pipe to the stove collar. This usually involves sliding the crimped end of the pipe (the end that’s slightly smaller in diameter) into the stove collar or the collar of the next pipe section. Secure it with at least three sheet metal screws, evenly spaced around the joint. These screws help prevent the pipe from separating and allow smoke to escape if there’s a blockage, rather than escaping into your home.
Some stove manufacturers recommend using high-temperature stove cement or sealant where the single-wall pipe meets the stove collar. Apply this according to the product’s instructions to create a tight seal.
Best Stove Pipe Connector Kit Pick
DuraVent DVL 6” Double-Wall Pipe Connector Kit – $185.49
The exact double-wall connector pipe this guide’s Step 3 and Step 4 walk through assembling — crimped ends, air-gap insulation, and the reduced clearance that makes passing through a ceiling or living space safe.
- Best for: Connecting the stove to a ceiling support box or wall thimble
- Why we picked it: Reputable brand, matches the 6-inch sizing most residential wood stoves use
- Main drawback: Higher upfront cost than single-wall pipe
Other supplies this installation needs
 Option 1 High-Temp Furnace Cement – $9.22
|
 Option 2 6” Wall Thimble – $33.99
|
 Option 3 24” Ceiling Support Box – $177.10
|
As an Amazon Associate we earn from qualifying purchases.
Step 3: Assembling Vertical Pipe Sections (Through Ceiling)
If you’re going through a ceiling, you’ll likely need a ceiling support box or a wall thimble designed for passing through floors and ceilings. This component provides fire protection and support.
Installing a Ceiling Support Box:
- Locate and Cut the Opening: Using your planned route, mark the ceiling for the opening. The size of the opening will be dictated by the ceiling support box you are using, which will have specific dimensions. Use a stud finder to ensure you are not cutting into any joists or other structural elements unless the support box is specifically designed to integrate with them. You may need to cut away some drywall or plaster.
- Install the Support Box: Follow the manufacturer’s instructions for installing the ceiling support box. It will typically rest on the ceiling joists and create a firebreak. Ensure it’s level and securely fastened.
- Assemble Pipe Above the Box: Begin assembling your double-wall chimney pipe above the ceiling support box. The first section of double-wall pipe will connect to the top of the support box.
- Add Subsequent Pipe Sections: For each section of double-wall pipe, slide the crimped end of the lower pipe section over the un-crimped end of the upper pipe section. This ensures that any condensation or creosote flows down into the stove, not out of the joints.
- Secure Joints: Secure each joint with three sheet metal screws. These screws prevent the pipe sections from pulling apart under their own weight or due to expansion and contraction from heat.
- Continue Upwards: Continue adding pipe sections, ensuring they are plumb (perfectly vertical) using your level.
Step 4: Installing Horizontal Pipe Sections (If Applicable)
Horizontal runs should be kept as short as possible — no more than two 90-degree elbows, with no more than 3 feet of unsupported horizontal pipe between supports. Every horizontal section must slope upwards towards the chimney at a rate of at least 1/4 inch per foot. This slope is crucial for allowing smoke and gases to rise naturally.
Horizontal sections also need proper support. Use wall brackets or other approved support systems to hold the pipe securely and prevent sagging. Again, ensure clearances are maintained from any combustible materials. Each joint on a horizontal run should also be secured with screws.
Step 5: Assembling Pipe Through Walls (If Applicable)
If your pipe needs to pass through an exterior wall, you’ll use a wall thimble. This is a crucial safety device that creates a proper fire-safe opening.
- Mark and Cut the Opening: Determine the location and size of the opening needed for the wall thimble, considering the required clearances from combustible materials on both sides of the wall. Use a level and stud finder to guide your cuts.
- Install the Wall Thimble: Securely install the wall thimble according to the manufacturer’s instructions. It needs to be firmly attached to the wall structure.
- Connect Pipe: Connect your double-wall pipe to the thimble. You may need to trim pipe sections to fit. Ensure the connection is secure and sealed if required by the thimble manufacturer.
Step 6: Reaching the Roof and Installing Roof Flashing
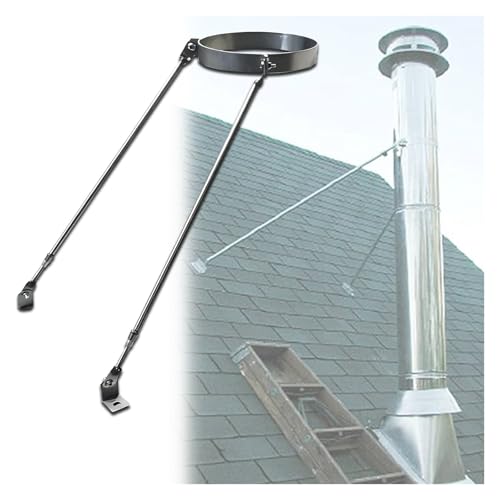
As your pipe extends upwards, you’ll need to support it externally if it’s not entirely supported by the structure. Use approved chimney pipe brackets or supports installed on the exterior of your home.
When the pipe reaches its exit point through the roof, you’ll install roof flashing. This is a critical waterproofing and fire-safety component.
- Position the Pipe: Ensure the pipe exits the roof at the correct height and location as per code and manufacturer guidelines.
- Install Roof Flashing: Slide the roof flashing over the chimney pipe. The flashing has a base that is designed to integrate with your roofing material (shingles, metal, etc.) and a collar that fits snugly around the pipe. You’ll need to lift shingles or modify the roofing material to accommodate the flashing base. Secure the flashing base to the roof deck according to roofing best practices and the flashing manufacturer’s instructions.
- Install Storm Collar: Place a storm collar over the flashing collar and slide it down until it rests about 1-2 inches above the flashing. Apply a bead of high-temperature silicone sealant around the top edge of the storm collar where it meets the pipe to create a watertight seal.
Step 7: Installing the Chimney Cap
The chimney cap sits on top of the highest section of your chimney pipe. It serves several important purposes:
- Keeps Out Rain and Snow: Prevents precipitation from entering the chimney.
- Keeps Out Animals: Stops birds, squirrels, and other critters from nesting in your chimney.
- Prevents Sparks: Many caps have a spark arrestor mesh to prevent embers from escaping and potentially starting a fire on your roof.
Attach the chimney cap securely to the top of the chimney pipe, usually with screws or a clamp mechanism provided by the manufacturer.
Step 8: Final Checks and Sealing
Before you light your first fire, do a thorough inspection:
- Check all Joints: Ensure every single joint is secured with screws and that the crimped end of the pipe is always covering the un-crimped end (unless at the stove collar).
- Verify Clearances: Double-check all clearances between the pipe and any combustible materials. Use a tape measure and consult the manufacturer’s manual and local codes.
- Inspect Seals: Make sure all seals (at the stove, at the ceiling support, at the roof flashing, and around the storm collar) are intact and properly applied.
- Support is Sound: Confirm that all pipe supports and braces are firmly in place and adequate for the weight and configuration of the pipe.
- No Obstructions: Ensure the chimney cap is clear and that there are no obstructions in the chimney system.
A good resource for clearances and installation requirements is the International Code Council (ICC), which develops the model building codes most local jurisdictions adopt. For roof height specifically, NFPA 211 and IRC Section R1003.9 set the “3-2-10” rule: the chimney must extend at least 3 feet above the point where it exits the roof, and at least 2 feet higher than any part of the roof or obstruction within a 10-foot horizontal radius.
Table: Clearance Requirements (General Guidelines)
These are general guidelines. Always refer to your specific stove and chimney pipe manufacturer’s installation manual and your local building codes for exact requirements. Codes can vary significantly by location.
| Pipe Type | Clearance to Combustible Materials (Typical Minimum) | Notes |
|---|---|---|
| Single-Wall Stove Pipe | 18 inches | Can be reduced with approved heat shields (consult manufacturer). Primarily used for the connection directly to the stove. |
| Double-Wall (Insulated) Chimney Pipe | 6 inches (typical) | 8 inches to ceilings. Designed for passing through living spaces and ceilings. Always check manufacturer specs for specific models. |
| Wall Thimble (for passing through wall) | Varies by thimble type | Must be rated for the type of pipe used and maintain required clearances from wall structure. |
| Ceiling Support Box | N/A (Creates a firebreak) | Provides support and maintains clearance where pipe passes through ceiling. |
📊 NFPA 211 and IRC Section R1003.9 require a chimney to extend at least 3 feet above its roof exit point and at least 2 feet higher than any part of the roof or obstruction within a 10-foot horizontal radius — Source: International Code Council, IRC Section R1003.9. Inspectors check this measurement directly, so plan your roof exit point before cutting anything.
“The step people skip is checking whether their pipe is actually rated to leave the living space — double-wall connector pipe looks similar to Class A chimney pipe, but running the wrong one through an attic is exactly how clearance gets undersized without anyone noticing.”
“Stove Pipe” vs. “Chimney Pipe”: Why the Terms Get Mixed Up
Searches for installing a “wood stove chimney pipe” usually mean one of two different products, and mixing them up is a real safety issue, not just semantics. The connector pipe covered in this guide — single-wall near the stove, double-wall (insulated) through the room — is rated for use inside living spaces but is not designed to pass through an attic, roof, or outdoors.
Class A chimney pipe is a heavier, all-fuel rated pipe built with thicker insulation, required anywhere the system passes through an attic, roof, or exterior wall to the outside. It typically only needs about 2 inches of clearance to combustibles, but it must be listed and installed per its manufacturer’s instructions — connector pipe (even double-wall) is not a substitute once you’re outside the living space or passing through the attic.
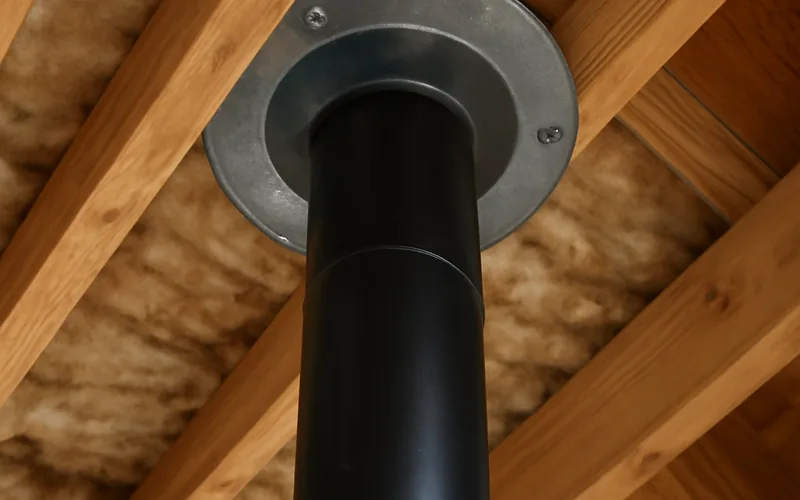
Installing Wood Stove Pipe Through a Cathedral Ceiling: Special Considerations
Installing pipe through a cathedral ceiling presents some unique challenges and requires careful attention to detail. The main goal is to maintain proper clearances and ensure structural integrity.
- Access: Cathedral ceilings can be high, making access for installation and future maintenance more difficult. Ensure you have a stable ladder and consider safety harnesses if working at significant heights.
- Structural Support: You’ll need to securely attach a ceiling support box or a specialized cathedral ceiling support. These often require framing modifications or strong attachment points to the rafters or ceiling structure.
- Insulation: Be extremely mindful of insulation in the cathedral ceiling space. Double-wall pipe is essential here to maintain safe clearances from any insulation material.
- Roof Penetration: The exit point on the roof will require careful flashing to prevent leaks, especially on sloped surfaces. Ensure the flashing is installed correctly to shed water effectively.
- Wind and Weather: Exposed chimney sections on the exterior of a house need to be robustly supported and able to withstand wind and weather conditions.
When in doubt, consulting a professional installer or your local building inspector is highly recommended for installations involving cathedral ceilings.
FAQ: Your Wood Stove Pipe Installation Questions Answered
How far apart should I space my support brackets for vertical pipe runs?
Generally, support brackets are needed every 6 to 8 feet for vertical runs of double-wall chimney pipe, per common manufacturer installation instructions. Always check your specific pipe manufacturer’s manual and local codes, as exact spacing varies by brand.
Can I use regular screws to assemble my stove pipe?
No, you must use sheet metal screws specifically designed for stove pipe. These are typically self-tapping and are crucial for securely joining pipe sections and preventing them from separating.
What is the difference between single-wall and double-wall pipe?
Single-wall pipe is a single layer of metal and requires significant clearance from combustibles. Double-wall pipe has two layers with an air gap or insulation between them, significantly reducing the required clearance and increasing safety.
How do I know if my pipe is installed correctly through the ceiling?
A correctly installed ceiling pass-through will use a UL-listed ceiling support box or a similar fire-rated assembly. It should maintain the manufacturer’s specified clearance from any combustible materials and be securely fastened to the framing.
Do I need a professional to install my wood stove pipe?
While many DIYers successfully install their own wood stove pipe, it’s a critical safety component. If you are unsure about any step, especially concerning codes or clearances, it is highly recommended to consult a certified chimney sweep or professional installer. It’s a small price to pay for peace of mind and safety.
How do I seal the connection between the stove and the first pipe?
Most manufacturers recommend using a high-temperature stove cement or sealant. Apply a bead around the stove collar or the crimped end of the pipe before joining them. Secure the joint with screws as well.
What happens if my pipe isn’t sealed properly?
Improperly sealed pipe joints can allow smoke and carbon monoxide to leak into your home, which is extremely dangerous. They can also reduce the efficiency of your stove and create fire hazards if hot gases escape near combustible materials.
Conclusion: Enjoying Your Warm and Safe Home
You’ve done it! By following these steps, you’ve successfully navigated the process of installing your wood stove pipe. Remember, taking your time, prioritizing safety, and consulting the manufacturer’s instructions and local codes are the keys to a successful and safe installation. A properly installed pipe system ensures your wood stove will provide efficient, cozy warmth for years to come, giving you peace of mind on even the coldest nights. Enjoy the ambiance and the heat your new system brings!
Sponsored / affiliate links. As an Amazon Associate I earn from qualifying purchases. I may earn additional commission from eligible campaigns.