What Happens If You Don’t Glue PVC Pipes? Essential Guide
Don’t glue PVC pipes? Expect leaks, pressure loss, and structural failure. Proper cementing ensures a watertight, secure connection vital for plumbing, irrigation, and many DIY projects. This guide explains why and how to get it right.
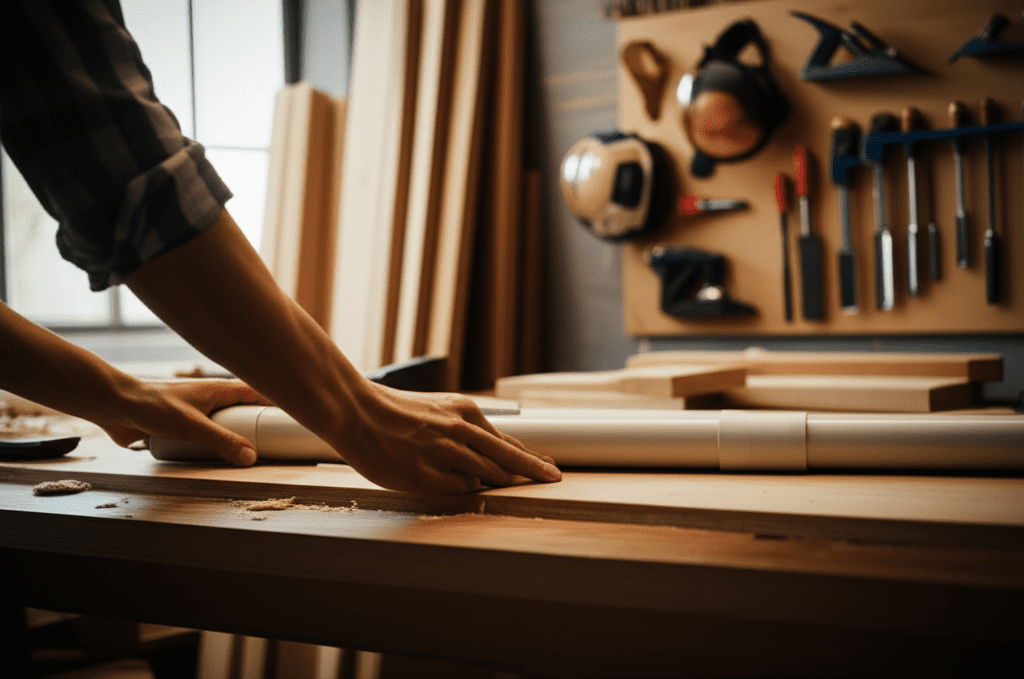
Hey there, fellow builders! Ever found yourself staring at a pile of PVC pipes, ready to assemble a project, and wondered if that special PVC cement is really necessary? You’re not alone! Many of us, especially when starting out, might think a snug fit is enough. But when those pipes start carrying water or air, or when they bear any kind of load, skipping the glue can lead to some serious headaches. It’s like building a sturdy shelf without screws – it might hold for a bit, but it won’t last. Don’t worry, though! We’re going to break down exactly what happens if you skip this crucial step and how to ensure your PVC projects are as strong and reliable as they can be. Stick around, and we’ll make sure your next PVC build is a watertight success!
Why PVC Cement is Your Best Friend for Pipe Connections
PVC, or Polyvinyl Chloride, is a fantastic material for all sorts of projects, from simple garden irrigation systems to complex plumbing. It’s durable, affordable, and easy to work with. But to make it truly effective in these applications, the pipes need to be joined securely. This is where PVC primer and cement come in. They’re not just fancy glues; they’re chemical solvents that actually fuse the PVC material of the pipe and fitting together. This process creates a bond that is often stronger than the pipe itself.
Think of it like welding metal, but for plastic! The primer softens the surface of the PVC, and the cement then melts the surfaces just enough to create a molecular bond as they dry. This fusion means no leaks, no wiggle room, and a connection that’s built to last. Skipping this step means you’re essentially just pushing pipes together, which is a recipe for disaster when pressure or movement is involved.
What Happens If You Don’t Glue PVC Pipes Together? The Unfortunate Reality
So, what’s the worst that can happen if you decide to skip the PVC cement? Let’s dive into the consequences. These can range from minor annoyances to major structural failures, depending on the application.
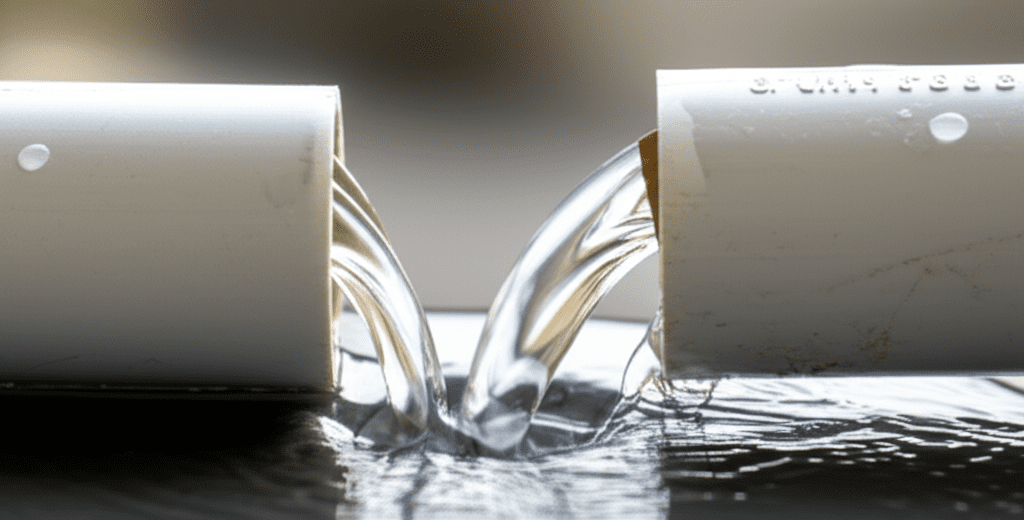
1. Leaks, Leaks Everywhere!
This is the most immediate and obvious problem. Without a fused bond, the joint between two PVC pipes or a pipe and a fitting is not watertight. Even a seemingly tight push-fit can allow water to seep out.
In plumbing: This means water damage to your walls, floors, and belongings. Mold and mildew can start to grow in damp areas, leading to health problems and costly repairs.
In irrigation: Your precious water will be wasted, draining into the soil around the pipes instead of reaching your plants. This makes your watering system inefficient and can lead to uneven watering.
In other projects: Even if you’re not carrying water, air pressure can escape, rendering pneumatic systems or DIY vacuums useless.
2. Loss of Structural Integrity and Pressure
PVC pipes often need to withstand pressure, whether it’s from water flow, air, or even just the weight of the material they’re supporting.
Pressure Systems: If you’re building an air compressor line, a water pressure system, or anything that relies on holding pressure, unglued joints will simply blow apart. The friction fit isn’t strong enough to contain the force.
Load Bearing: If your PVC pipes are part of a structure, like a greenhouse frame, a shelving unit, or a DIY cart, unglued joints will likely sag, deform, or collapse under load. The pipes can slide out of the fittings, compromising the entire structure.
3. Ingress of Contaminants
When you have leaks, it’s not just water escaping; other things can get in.
In water systems: Dirt, debris, insects, and bacteria can enter the pipes through unglued joints, contaminating your water supply. This is especially critical for potable water systems.
In other systems: For projects like dust collection or air filtration, unglued joints will allow air (and dust!) to leak out, reducing the system’s effectiveness.
4. Shortened Lifespan of Your Project
Even if a project seems to work initially without glue, the constant stress on the unsealed joints will lead to premature failure. Vibration, temperature changes, and the inherent pressure within the system will slowly loosen the connections, exacerbating leaks and structural weaknesses. You’ll find yourself constantly having to re-seat pipes or patch up leaks, making your project more of a maintenance headache than a functional asset.
5. Ineffectiveness in Specific Applications
Some applications absolutely require a fused joint for the system to function as intended.
Drainage: While drainage systems typically operate under gravity, not pressure, a proper seal is still essential to prevent leaks into surrounding soil or structures and to maintain the integrity of the pipe run. Unsealed joints can allow soil to infiltrate the pipes, causing blockages.
Sump Pumps and Well Systems: These rely on holding pressure and preventing backflow. Unglued joints would be catastrophic, leading to system failure and potential damage.
When Can You Potentially Get Away Without Glue? (Spoiler: Very Rarely!)
As Ashraf Ahmed, I always advocate for doing things the right way the first time. However, for the sake of completeness, let’s consider those extremely rare scenarios where a temporary, low-stress application might not immediately fail without glue. This is generally not recommended for any application that carries liquids or air under pressure, or any structural component.
Here are some hypothetical situations, with strong caveats:
Temporary, Non-Critical Displays: Imagine a very temporary, purely decorative structure that doesn’t hold anything and isn’t under any stress. For instance, a simple PVC frame for a fabric banner that will only be up for an hour at an event. Even then, a gust of wind could topple it.
Very Low-Pressure Air Flow (with caution): Perhaps a fan blowing through a series of loosely connected pipes for a non-critical effect, where a slight air leak isn’t a problem. Think of a simple Halloween decoration that moves air around without any pressure build-up.
Important Note: Even in these scenarios, using the correct primer and cement is always the best practice for reliability and safety. The cost and effort are minimal compared to the potential problems of a failure. For any serious project, gluing is non-negotiable.
The Right Way: How to Properly Glue PVC Pipes
Now that we understand why gluing is essential, let’s make sure you know how to do it correctly. It’s a straightforward process, but attention to detail makes all the difference.
Tools and Materials You’ll Need:
PVC Pipes and Fittings: Ensure they are the correct type and size for your project.
PVC Primer: A solvent that cleans and softens the PVC surface. It often comes in a can with an applicator. Many primers are colored purple, but clear primers are also available.
PVC Cement (Glue): This is the actual solvent that fuses the pipes. It comes in different types (e.g., regular, heavy-duty, all-weather) depending on your application and temperature. Always choose a cement appropriate for the type of PVC (Schedule 40, Schedule 80, etc.) and the intended use (potable water, drainage, etc.).
Deburring Tool or Utility Knife: To clean up rough edges after cutting.
Measuring Tape: For accurate pipe lengths.
Pipe Cutter or Saw: For clean, square cuts.
Rag or Paper Towels: For wiping excess primer and cement.
Gloves: To protect your hands from solvents.
Safety Glasses: Essential for eye protection.
Ventilation: Work in a well-ventilated area.
Step-by-Step Guide to Gluing PVC:
1. Prepare Your Workspace: Ensure good ventilation. Lay down drop cloths or old newspapers to protect surfaces from primer and cement drips. Have all your materials and tools ready.
2. Cut the Pipe: Measure and cut your PVC pipe to the required length. Use a proper PVC cutter or a fine-tooth saw for a clean, square cut. A square cut ensures the pipe seats fully into the fitting.
3. Deburr and Clean the Pipe Ends: After cutting, there will likely be rough edges or burrs on the inside and outside of the pipe. Use a deburring tool or a utility knife to remove these. Smooth the inside edge so it doesn’t impede flow and the outside edge so it seats properly into the fitting. Wipe away any dust or debris.
4. Dry Fit the Components: Before applying any chemicals, assemble the pipes and fittings without glue. This allows you to check the fit, confirm measurements, and understand the assembly sequence. Mark the pipe and fitting with a line or arrow to ensure you reassemble them in the same orientation after applying the chemicals. This is crucial for proper alignment.
5. Apply Primer:
Open the primer can and dip the applicator into the can.
Apply a liberal coat of primer to the outside of the pipe end (about 1-2 inches from the end) and to the inside of the fitting socket.
Work quickly, as the primer evaporates. Ensure even coverage. The primer should slightly soften the surface of the PVC, giving it a dull appearance.
6. Apply Cement:
Immediately after priming (while the surface is still wet from the primer), open the PVC cement.
Apply a medium-thick, even coat of cement to the outside of the pipe end, covering the same area that was primed.
Apply a thinner, even coat of cement to the inside of the fitting socket, again covering the area that was primed.
7. Join the Pipe and Fitting:
Insert the pipe into the fitting socket with a slight twisting motion (about a quarter turn). This helps to spread the cement evenly.
Push the pipe fully into the fitting until it bottoms out.
Hold the joint firmly for about 15-30 seconds. This prevents the pipe from backing out of the fitting as the cement begins to set.
8. Wipe Away Excess: Use a clean rag to wipe away any excess cement that squeezes out around the joint. This gives a cleaner appearance and prevents potential issues.
9. Allow Proper Cure Time: This is a critical step often overlooked by beginners. The cement needs time to cure and create a strong bond. Cure times vary depending on the type of cement, temperature, and humidity.
Handling Strength: The joint will typically have enough strength to be moved carefully after a short period (e.g., 30 minutes to 1 hour, depending on conditions).
Full Cure: For the joint to reach its maximum strength and be ready for pressure testing or full use, it needs significantly longer. This can range from several hours to 24 hours or more. Always check the cement manufacturer’s instructions for specific cure times.
Here’s a general guideline for cure times, but always refer to the product label:
| Application | Temperature (°F) | Handling Strength (Minutes) | Maximum Operating Pressure (Hours) | Full Cure (Hours) |
|---|---|---|---|---|
| Drain, Waste, Vent (DWV) | 60-100 | 5-10 | 2 | 16 |
| Pressure Systems (e.g., water, irrigation) | 60-100 | 30-60 | 2-12 (depending on pressure) | 24 |
| Lower Temperatures (e.g., 30-50°F) | 30-50 | Double Handling Strength time | Double Max Pressure time | Double Full Cure time |
Note: These are general guidelines. Always consult the specific product’s data sheet for precise cure times.
10. Test Your Work: Once fully cured, test your connections. For water systems, slowly introduce water and check for any leaks. For other systems, test with air pressure or the intended load.
Understanding Different Types of PVC Cement and Primer
Not all PVC cements are created equal. Choosing the right one is crucial for a successful and durable bond.
Primer:
Regular Primer: Cleans and softens the PVC surface. Usually purple or clear.
Cleaner/Primer: Combines cleaning and softening in one step. Often clear.
Primer-less Cement: Some cements are formulated to clean and soften sufficiently on their own, especially for DWV applications. However, using a primer is generally recommended for a more robust bond, especially in pressure applications or challenging conditions.
PVC Cement:
Regular Setting: For general purpose use, suitable for most common temperatures.
Medium Setting: Evaporates slower, giving you more working time, ideal for larger diameters or less-than-ideal temperatures.
Heavy Duty / Extra Heavy Duty: Designed for larger diameter pipes, higher pressures, or damp conditions.
All-Weather: Formulated to work in a wider range of temperatures, including cooler conditions.
Low VOC (Volatile Organic Compound) Cements: Environmentally friendlier options with reduced emissions.
Specific Application Cements: Some cements are formulated for specific uses, like potable water systems or specific types of plastic. Always check the label.
Important Consideration: Always use primer and cement from the same manufacturer if possible, as they are often formulated to work together. Ensure the cement is rated for the type of PVC you are using (e.g., Schedule 40, Schedule 80) and the application (e.g., DWV, pressure).
Common Mistakes to Avoid When Gluing PVC
Even with the right tools and steps, a few common mistakes can sabotage your PVC connections. Let’s be aware of them!
Not Cleaning or Deburring: This is a big one. Rough edges and debris prevent the pipe from seating fully and can create pathways for leaks.
Skipping the Primer: While some “primer-less” cements exist, primer ensures a proper chemical fusion. For anything beyond basic DWV, primer is your best bet for a strong, leak-proof joint.
Insufficient Primer or Cement: Not applying enough solvent means the surfaces won’t soften or fuse correctly. Apply a good, even coat.
Too Much Primer or Cement: Over-application can sometimes degrade the PVC too much, weakening the joint. Use enough for coverage, but don’t drown the pipe.
Not Joining Quickly Enough: The primer starts to evaporate immediately. You need to apply the cement and join the pipe while the surfaces are still wet with primer for the best fusion.
Not Holding the Joint: The pipe can push itself out of the fitting as the cement begins to set if you don’t hold it firmly for the recommended time.
Not Allowing Adequate Cure Time: This is perhaps the most common mistake. Rushing the process and putting the system under pressure or load before the cement is fully cured will almost guarantee failure. Patience is key!
Using the Wrong Type of Cement: Using a DWV cement for a pressure line, or a cement not rated for your pipe schedule, can lead to weak or failed joints.
When Is It Okay to Use Push-Fit or Mechanical Couplings?
While solvent cementing is the standard for permanent PVC connections, there are some instances where push-fit or mechanical couplings might be a suitable alternative, particularly for temporary setups or repairs where cementing isn’t feasible.
Push-Fit Couplings: These fittings often have O-rings or other sealing mechanisms that create a watertight seal when the pipe is pushed into them. They are quick and easy to install, requiring no special tools or chemicals.
Pros: Speed, ease of use, no drying time, reusable (sometimes).
Cons: Generally more expensive than standard fittings and cement, may not be suitable for high-pressure applications or extreme temperatures, O-rings can degrade over time.
Best for: Temporary repairs, low-pressure systems, situations where cementing is difficult or not allowed.
Mechanical Couplings (e.g., Fernco, Mission Couplings): These are typically used for joining pipes of different materials or for repairs where precise alignment is difficult. They use a rubber sleeve and clamps to create a seal.
Pros: Versatile for different pipe materials, forgiving of misalignment, quick installation.
Cons: Can be bulky, may not be suitable for all pressure ranges, can be more expensive.
* Best for: Joining dissimilar pipes (e.g., PVC to cast iron), repairing damaged pipe sections, low-pressure or gravity-fed systems.
Key takeaway: For any permanent, pressure-bearing, or critical application in PVC plumbing or construction, solvent cementing is the superior and recommended method. Push-fit and mechanical couplings have their place but are generally considered less robust for long-term PVC-to-PVC connections.
Frequently Asked Questions About Gluing PVC Pipes
Here are some common questions beginners have about working with PVC pipes and cement:
Can I use regular glue like super glue or epoxy on PVC pipes?
No, it’s strongly advised against. Regular glues are not designed to chemically fuse PVC. They rely on adhesion, which won’t create a strong enough bond to withstand water pressure or structural stress. PVC cement contains solvents that actually melt the plastic surfaces, creating a molecular bond that is far superior and necessary for reliable PVC connections. For more on this, check out resources from the Plastics Make Perfect initiative, which details the properties of various plastics.
How long does PVC cement take to dry?
PVC cement doesn’t exactly “dry” like typical glue; it cures through a chemical process. It achieves handling strength relatively quickly (minutes to an hour), allowing you to move the assembly carefully. However, it needs much longer to cure fully and reach maximum strength, typically 24 hours or more, especially for pressure applications. Always check the manufacturer’s label for specific cure times based on temperature and humidity.
What’s the difference between primer and cement?
Primer is a solvent that cleans the PVC surfaces and softens them slightly, preparing them to bond. Cement is also a solvent-based adhesive that melts the softened PVC surfaces, allowing them to fuse together as the solvents evaporate. Think of primer as the prep work and cement as the bonding agent that creates the actual weld.
Can I reuse PVC cement if the can has been open for a while?
It’s generally not recommended. Once opened, the solvents in PVC cement begin to evaporate, and the cement can thicken and lose its effectiveness. If the cement has become noticeably thick, gummy, or solidified, it’s best to discard it and open a fresh can. Using old, ineffective cement will result in weak or failed joints.
What if I get PVC cement on my skin or clothes?
PVC cement contains strong solvents, so it’s important to protect yourself. If it gets on your skin, wash it off immediately with soap and water. If it gets on clothing, try to wipe it off quickly with a rag before it dries; once dry, it can be very difficult to remove. Always work in a well-ventilated area and wear gloves and safety glasses.
Can I use PVC cement in cold weather?
Standard PVC cement can be less effective in cold temperatures because the solvents evaporate too quickly, and the PVC doesn’t soften as well. For colder conditions (typically below 40°F or 4°C), you should use “all-weather” or “low-temperature” PVC cement, which is formulated to work in these environments. You might also need to extend cure times. Always check the product’s specifications for the recommended temperature range.
How do I know if I used enough primer and cement?
You’ll know you’ve used enough if the primer visibly softens the surface of the PVC (it might look slightly dull or wet), and the cement creates a smooth, wet layer on both the pipe and inside the fitting. When you join them, a small bead of cement should squeeze out around the joint. If there’s no squeeze-out, you likely didn’t use enough cement or didn’t seat the pipe fully. If the joint looks dry, re-prime and re-cement immediately if possible, or be prepared for a weaker bond.
Conclusion: Glue Your PVC for a Solid Build
As you can see, skipping the glue on PVC pipes is a gamble that rarely pays off. From leaks and structural failures to inefficient systems and potential contamination, the risks far outweigh any perceived time or cost savings. Properly preparing, priming, cementing, and allowing adequate cure time for your PVC joints is fundamental to building reliable, durable, and safe projects.
Whether you’re building a simple garden hose splitter, a complex irrigation system, or a sturdy rack for your workshop, taking the time to follow the proper cementing procedure will ensure your work stands the test of time and performs as expected. Remember, a strong bond is the foundation of any successful PVC project. So grab that primer and cement, follow these steps, and build with confidence! Happy building, everyone!