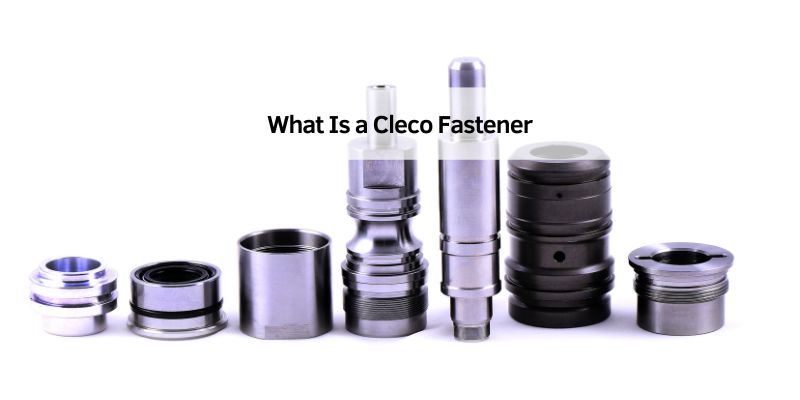
What Is a Cleco Fastener
Hey there! If you’ve ever poked around an auto shop or watched someone work on a race car or airplane, you might’ve noticed these colorful little pins called Cleco fasteners. I sure did when I was helping a buddy restore a vintage Mustang, and I was curious—what are these things? At first, I thought they were just fancy rivets, but after diving into automotive and sheet metal projects, I’ve learned Cleco fasteners are so much more.
They’re like the unsung heroes of precision work, holding metal pieces together like magic. I’ve used them to align panels on a car rebuild and even to build a custom fan shroud. They’ve saved me hours of frustration. So, if you’re wondering what a Cleco fastener is and how it can make your automotive projects easier, I’m excited to share my journey. This guide is packed with my hands-on experience, practical tips, and everything you need to know about these nifty tools. Let’s get started and unravel the mystery of Cleco fasteners!
What Exactly Is a Cleco Fastener?
A Cleco fastener is a temporary tool used to hold pieces of sheet metal together before you permanently join them. I first saw them in action when my friend was aligning fenders on his Mustang. They’re small, reusable pins that go into pre-drilled holes to keep metal sheets lined up perfectly for drilling, riveting, or welding. Think of them as a helping hand that holds everything steady while you work.
Clecos were invented by the Cleveland Pneumatic Tool Company, and they’re a staple in industries like automotive repair, race car building, and aerospace. I’ve used them on aluminum panels, but they also work on steel, fiberglass, and even some plastics. They come in different sizes and styles, each with a specific job. The best part? They’re easy to use and don’t damage your materials, making them perfect for precision work.
Why Cleco Fasteners Are a Game-Changer
When I started working on cars, I used clamps and vises to hold metal pieces together. It was a hassle—clamps slipped, and vises left marks. Then I discovered Clecos, and it was like finding a cheat code. They grip tightly, keep holes aligned, and don’t let parts shift. I used them to hold a hood panel in place while drilling for rivets, and the alignment was spot-on.
Clecos save time and reduce mistakes. They’re especially great for automotive projects like bodywork or custom fabrication, where precision is everything. Unlike tack welding, which can warp thin metal, or screws, which add weight, Clecos are temporary and leave no trace. I’ve also used them to test-fit panels before final assembly, which saved me from costly errors.
How Cleco Fasteners Work
Understanding how Clecos work blew my mind—it’s so simple yet clever! A Cleco fastener has a few key parts: a cylindrical body, a spring-loaded plunger, and locking jaws (or step-cut locks) with a spreader bar. You use special Cleco pliers to install them. Here’s how I do it:
I drill a small pilot hole through the metal sheets I want to join. Then, I squeeze the pliers to push the plunger, which compresses the jaws. I slip the Cleco into the hole, release the pliers, and the spring pulls the jaws back, expanding them to clamp the sheets together. The jaws grip the metal tightly, keeping everything aligned.
When I’m done, I squeeze the pliers again to remove the Cleco, and it pops out easily. I’ve used this process to align panels for welding, and it’s foolproof. The holes stay clean for permanent rivets or bolts later, or I weld them shut for a smooth finish.
Types of Cleco Fasteners
Not all Clecos are the same, and I’ve learned each type has its sweet spot. Here’s what I’ve used and seen in action:
- Plier-Operated Clecos: These are the most common. I use them for most automotive projects, like aligning fenders. They’re spring-loaded and need Cleco pliers to install. They’re quick and perfect for fast-paced work.
- Wing-Nut Clecos: These have a wing nut you tighten by hand. I used them for thicker steel panels on a truck bed—they provide more clamping force but take longer to install.
- Hex-Nut Clecos: Similar to wing-nut Clecos but with a hex nut for a wrench. I’ve used these in tight spaces where pliers won’t fit. They’re great for close-together holes.
- Side-Grip Clecos: These clamp edges without needing holes. I used them to hold a curved panel in place when I couldn’t drill yet. They’re super versatile.
- Speed-Nut Clecos: These are newer and great for composites or thin materials. I haven’t used them much, but I hear they’re popular for race car bodies.
Each type comes in sizes (like 3/32”, 1/8”, or 3/16”) to match hole diameters and material thickness. I keep a mix in my toolbox for different jobs.
Tools You Need to Use Cleco Fasteners
Clecos don’t work alone—you need a few tools to make them shine. Here’s what I use:
- Cleco Pliers: These are a must for plier-operated Clecos. I bought a pair for $15, and they’re worth their weight in gold. They compress the plunger to install or remove the fastener.
- Drill and Bits: You need precise pilot holes. I use high-speed steel bits sized for the Cleco (like 1/8” or 3/16”). A drill stop prevents drilling too deep.
- Cleco Fasteners: I started with a kit of 50 1/8” Clecos for $30. They’re color-coded by size—bronze for 3/32”, silver for 1/8”, and so on.
- Wrench (for Hex-Nut Clecos): A small adjustable wrench works for hex-nut types. I keep one handy for heavy-duty jobs.
- Storage Bag: Clecos are small and easy to lose. I use a zippered pouch to keep them organized.
I learned to buy extra drill bits—Clecos don’t have the hole size marked, and I’ve mixed up bits before. A good kit with pliers and fasteners is perfect for beginners.
Comparing Cleco Fasteners to Other Methods
Clecos aren’t the only way to hold metal together, but they’ve become my favorite. Here’s how they stack up against other methods I’ve tried:
| Method | Best For | Pros | Cons | Cost |
|---|---|---|---|---|
| Cleco Fasteners | Precision alignment, temporary holds | Precise, reusable, no damage | Needs pliers, pilot holes | $30–$50 for a starter kit |
| Clamps/Vises | General holding | Cheap, no holes needed | Can slip, leave marks | $10–$20 |
| Tack Welding | Temporary welds | Strong hold | Warps thin metal, cleanup needed | Free (if you weld) |
| Screws/Bolts | Permanent or semi-permanent | Strong, widely available | Adds weight, needs hardware | $5–$15 |
| Magnetic Fixtures | Ferrous metals | Quick setup | Less precise, magnetic interference | $20–$40 |
I used clamps before Clecos, but they slipped during a fender alignment, ruining my measurements. Clecos are pricier but worth it for their precision and ease.
Step-by-Step Guide to Using Cleco Fasteners
Here’s how I use Clecos for automotive projects, like aligning a car hood:
- Prepare the Materials: Clean and deburr the metal sheets. I use a wire brush to remove rust or dirt so the Clecos grip well.
- Drill Pilot Holes: Mark where you want the holes, then drill using a bit sized for your Cleco (like 1/8”). I use a drill stop to keep holes consistent.
- Insert the Cleco: Grab your pliers, place the Cleco in the jaws, and squeeze to compress the plunger. Slip it into the hole, then release. The Cleco clamps the sheets tightly.
- Check Alignment: I tug gently on the sheets to ensure they’re secure. If they move, I reposition the Cleco or add another.
- Work on the Project: Drill more holes, rivet, or weld while the Clecos hold everything. I used six Clecos to align a hood before riveting—it was perfect.
- Remove Clecos: Squeeze the pliers to release each Cleco. I store them in a bag to avoid losing them.
- Finish Up: Fill Cleco holes with rivets or weld them shut. I welded holes on a fan shroud for a smooth look.
This process takes minutes and ensures perfect alignment. I’ve done it dozens of times now, and it’s second nature.
Applications in Automotive Work
Clecos shine in automotive projects. Here’s where I’ve used them:
- Bodywork: Aligning fenders, hoods, or door panels before riveting or welding. I used Clecos to fit a new fender on my Mustang, and it was flush.
- Custom Fabrication: Building parts like fan shrouds or exhaust brackets. I used side-grip Clecos to hold curved panels for a custom bumper.
- Restoration: Holding replacement panels on vintage cars. I restored a 1967 Camaro and used Clecos to align patch panels perfectly.
- Race Car Building: Keeping lightweight panels aligned for aerodynamics. A friend used Clecos on his drag car’s aluminum body.
- Temporary Fixtures: Holding jigs or templates. I used Clecos to secure a template for drilling a roll cage mount.
They’re versatile and save time, especially when you’re juggling multiple panels.
Tips for Using Cleco Fasteners Effectively
Here’s what I’ve learned to make Clecos work like a charm:
- Use the Right Size: Match the Cleco to your hole size and material thickness. I used 3/32” Clecos for thin aluminum and 3/16” for thicker steel.
- Start with a Kit: A starter kit with 20–50 Clecos and pliers is enough for most projects. I got mine for $40 and added more later.
- Keep Pliers Handy: I clip my pliers to my belt for quick access. It speeds up installation.
- Check Hole Alignment: Misaligned holes weaken the hold. I double-check with a marker before drilling.
- Don’t Overtighten Hex-Nut Clecos: I stripped a hex nut once by cranking too hard. Tighten just enough to secure.
These tricks keep my projects smooth and stress-free.
Maintaining Your Cleco Fasteners
Clecos are durable, but they need care to last. I’ve had mine for years, and they’re still going strong. Here’s how I maintain them:
- Clean After Use: I wipe them with a rag to remove metal shavings or grease. A quick dip in degreaser works for stubborn grime.
- Lubricate the Plunger: A drop of light machine oil keeps the spring smooth. I do this monthly for heavy use.
- Store Properly: I keep mine in a zippered bag to avoid losing them. A toolbox drawer works too.
- Check for Wear: Look for bent jaws or weak springs. I replaced a worn Cleco once—it wasn’t clamping tightly.
- Avoid Abuse: Don’t use Clecos as pry bars (guilty!). It bends the jaws and ruins them.
With care, my Clecos have lasted through dozens of projects.
Common Mistakes to Avoid
I’ve made plenty of blunders with Clecos. Here’s what to watch out for:
- Using the Wrong Size: A 1/8” Cleco in a 3/32” hole won’t hold. I learned this when a panel slipped mid-project.
- Not Cleaning Materials: Dirt can make Clecos slip. I clean my metal sheets now to ensure a tight grip.
- Overloading Clecos: They’re strong but not invincible. I tried using one Cleco for a thick stack of metal, and it popped out.
- Losing Clecos: They’re small and roll away easily. I lost a few before getting a storage bag.
- Skipping Drill Stops: Drilling too deep can damage materials. I use a drill stop to keep holes precise.
Avoid these, and you’ll save time and frustration.
My Cleco Fastener Success Story
Last summer, I helped a friend build a custom aluminum fan shroud for his hot rod. We needed to align three curved panels perfectly before welding. I brought my Cleco kit—50 1/8” plier-operated Clecos and a pair of pliers. We drilled pilot holes, popped in the Clecos, and the panels stayed rock-solid while we welded. The shroud fit like a glove, and we finished in half the time it would’ve taken with clamps. My friend was amazed, and I felt like a pro. That project made me a Cleco believer, and now I use them for every sheet metal job.
Conclusion
Cleco fasteners are a must-have for anyone working on cars, from weekend warriors to professional fabricators. They’ve turned my messy, frustrating sheet metal projects into precise, satisfying work. Whether you’re aligning panels, building custom parts, or restoring a classic car, Clecos make it easier, faster, and more accurate. I’ve gone from fumbling with clamps to nailing perfect alignments, and I’m thrilled to share what I’ve learned.
Grab a Cleco kit, some pliers, and start experimenting. Your next automotive project will be a breeze, and you’ll wonder how you ever worked without them. Let’s get those panels aligned and make something awesome!
FAQs
What is a Cleco fastener used for?
It’s a temporary pin to hold sheet metal together before riveting or welding. I use them to align car panels for perfect fits.
Do I need special tools for Cleco fasteners?
Yes, you need Cleco pliers for plier-operated ones. I also use a drill with matching bits and sometimes a wrench for hex-nut Clecos.
Can Cleco fasteners be used on materials other than metal?
Absolutely! I’ve used them on fiberglass and plastic for race car bodies. Just match the Cleco size to the material.
How do I choose the right Cleco size?
Pick a Cleco that matches your hole size and material thickness. I use 1/8” for most automotive panels—check the grip range on the package.
Are Cleco fasteners reusable?
Yes, they’re built to be used over and over. I’ve reused mine for years with proper care and cleaning.
Can I use Clecos without drilling holes?
Side-grip Clecos don’t need holes—they clamp edges. I used them for a curved bumper when drilling wasn’t an option.
Where can I buy Cleco fasteners?
I got my kit online from tool suppliers or automotive shops. A starter kit with 20–50 Clecos and pliers costs about $30–$50.