What Is Recessed Lighting: Essential Guide
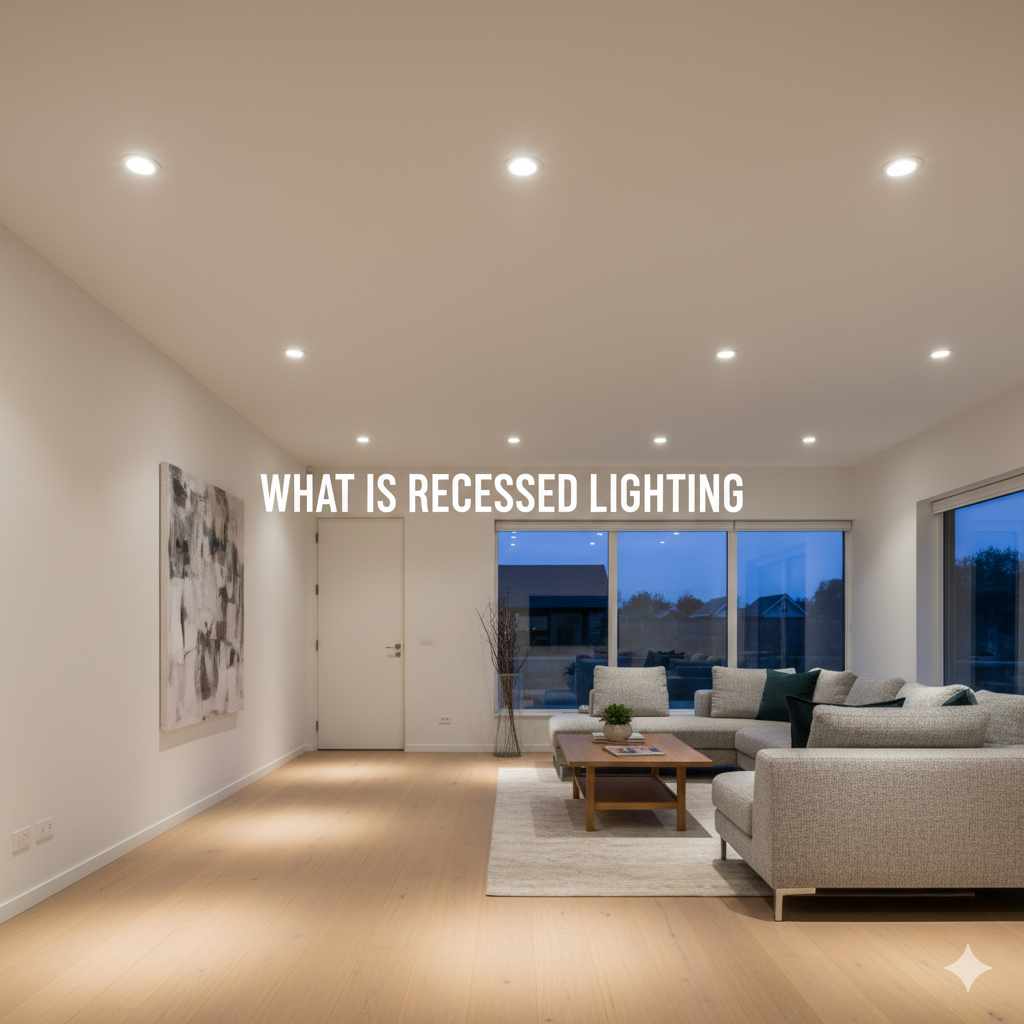
Recessed lighting, often called “can lighting,” is a popular, modern lighting solution that sits flush with your ceiling. It provides clean, unobtrusive illumination, making spaces feel larger and more polished. This guide will break down everything you need to know to choose and install it, making your home brighter and more beautiful.
Ever look up at a ceiling and see those sleek, almost invisible lights? That’s likely recessed lighting! It’s a fantastic way to brighten up any room without the visual clutter of traditional lamps or hanging fixtures. If you’ve ever felt your current lighting is a bit… much, or you’re aiming for a minimalist vibe, recessed lighting might be your perfect solution. It can be a bit confusing at first, but don’t worry! I’m here to walk you through exactly what it is, why you might want it, and how it all works, step-by-step. Let’s get your home looking its best!
What Is Recessed Lighting?
Recessed lighting, also commonly known as “can lighting” or “downlighting,” refers to light fixtures that are installed into a hollow space in the ceiling. The key characteristic is that the housing of the light is “recessed” or hidden within the ceiling structure, leaving only the trim and the light bulb visible on the surface. This creates a clean, minimalist look that doesn’t draw attention to the fixture itself, but rather to the light it casts.
Think of it like this: instead of a light hanging down or sitting on a surface, it’s neatly tucked away. This makes it incredibly versatile, fitting seamlessly into almost any décor style, from modern and contemporary to traditional. The primary goal is to provide functional, ambient, or accent lighting without obstructing the visual flow of the room.
The Basic Components of a Recessed Light Fixture
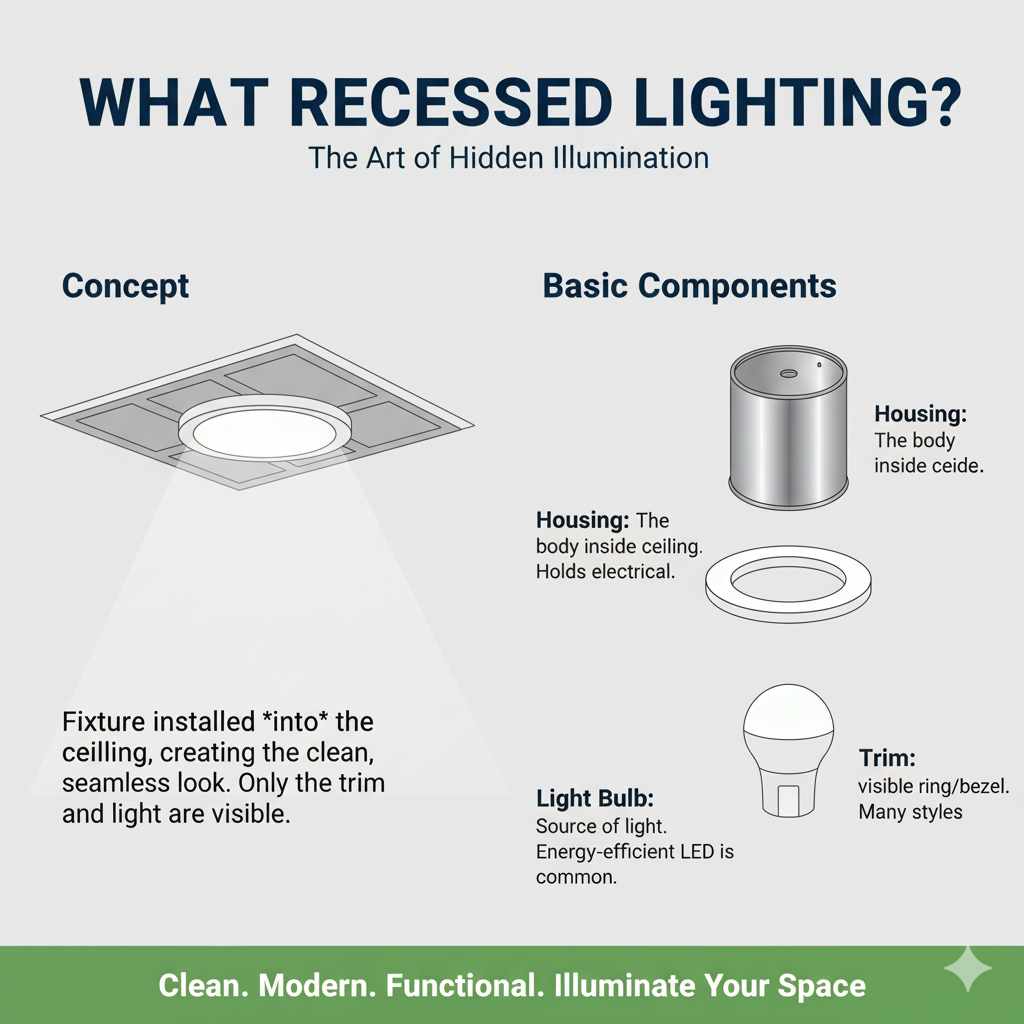
While the end result looks simple, a recessed light fixture is made up of a few key parts that work together:
- Housing: This is the main body of the fixture, the can that gets installed into the ceiling. It contains the electrical components and helps to direct heat away from the surrounding ceiling material. Housings come in different types depending on the installation needs (new construction, remodel, or IC-rated for direct contact with insulation).
- Trim: This is the visible part of the fixture that you see from below. It frames the opening in the ceiling and helps to conceal the housing. Trims come in a vast array of styles, finishes, and functions, such as baffle trims (reduce glare), eyeball trims (adjustable), and gimbal trims (directional).
- Light Bulb: This is the source of illumination. Traditionally, incandescent bulbs were used, but now LED bulbs are the most popular choice due to their energy efficiency, long lifespan, and variety of color temperatures.
Why Choose Recessed Lighting? The Benefits
Recessed lighting isn’t just a trend; it offers some really practical advantages that homeowners love. Let’s dive into why it’s such a popular choice for updating homes.
1. Sleek and Unobtrusive Aesthetics
This is often the biggest draw. Because the fixtures are built into the ceiling, they provide a clean, uncluttered look. This can make a room feel larger and more open, as there are no hanging fixtures to break up the visual space. It’s perfect for achieving a modern, minimalist design.
2. Versatile Lighting Options
Recessed lights can be used in many ways:
- Ambient Lighting: Spaced evenly across the ceiling, they provide general illumination for the entire room.
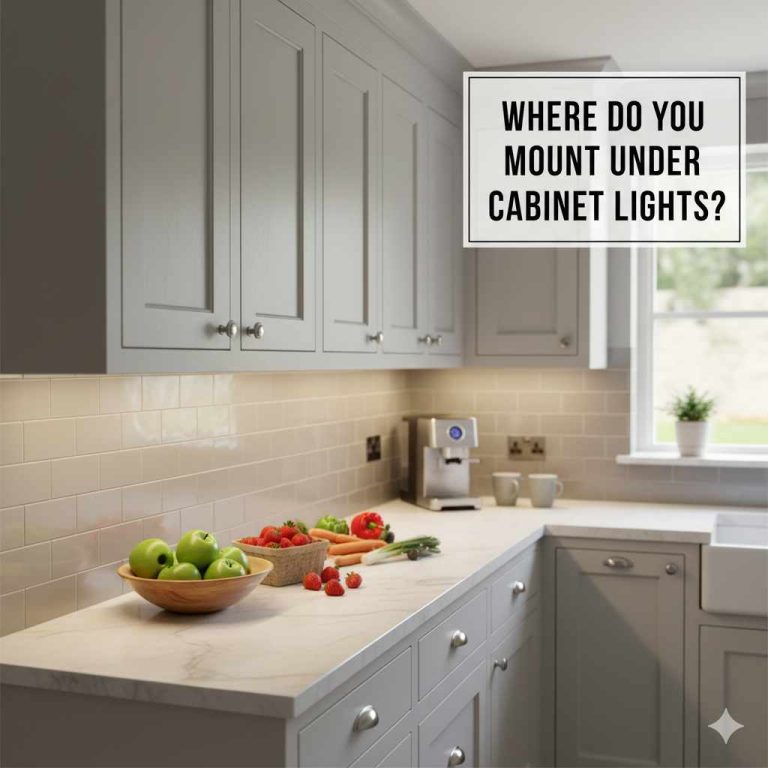
- Task Lighting: Focused over specific areas like kitchen countertops, reading nooks, or workspaces, they provide concentrated light where it’s needed most.
- Accent Lighting: Aimed at artwork, architectural features, or plants, they highlight specific elements in the room.
3. Enhanced Safety
For areas like staircases, hallways, or basements, recessed lighting can improve visibility and reduce the risk of trips and falls. By providing consistent, even light, it eliminates dark corners and shadows, making these spaces safer to navigate.
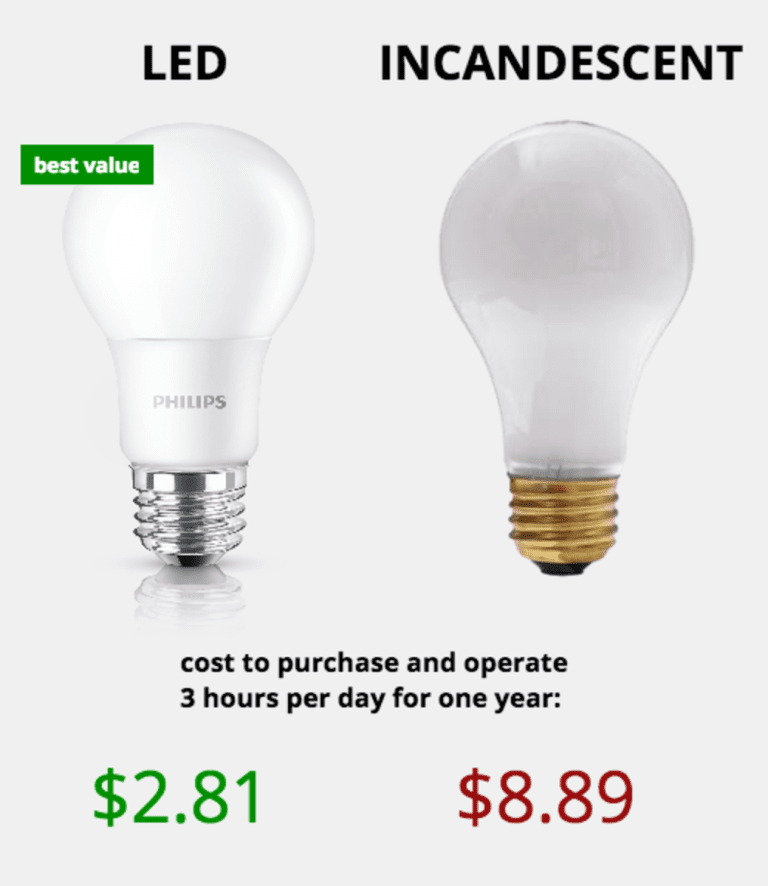
4. Energy Efficiency (Especially with LEDs)
When paired with LED bulbs, recessed lighting is incredibly energy-efficient. LEDs use significantly less electricity than incandescent bulbs, saving you money on your energy bills. They also last much longer, meaning fewer bulb replacements and less maintenance.
5. Increased Home Value
A well-designed recessed lighting system can be a significant selling point. It’s a modern upgrade that many homebuyers find attractive, potentially increasing your home’s market value.
Types of Recessed Lighting Housings
When you start looking into recessed lighting, you’ll notice different types of “cans” or housings. The type you choose depends on your ceiling and whether you’re building new or renovating an existing space. Understanding these will save you a lot of confusion!
1. New Construction Housings
These are designed for use when the ceiling is open, such as during the construction of a new home or a major renovation where the ceiling is being redone. They are typically secured directly to the joists and are built to withstand the construction process.
- Pros: Most robust, easiest to install in an open ceiling, offers the most flexibility in placement.
- Cons: Requires access to the ceiling joists, not suitable for existing finished ceilings.
2. Remodel Housings (or Old Work Housings)
These are designed for installation in existing finished ceilings where you don’t have access from above. They have a special clamping mechanism that allows them to be installed from below through a hole cut in the drywall. This is the most common type for DIYers updating a room.
- Pros: Can be installed in existing ceilings without attic access, great for updating a room.
- Cons: Can be a bit trickier to position precisely, may require more careful drywall cutting.
3. IC-Rated Housings (Insulation Contact)
These housings are specifically designed to be installed in direct contact with building insulation. This is crucial for safety, as it prevents the heat from the fixture from potentially igniting the insulation. If your ceiling has insulation, you must use IC-rated housings. Many remodel and new construction housings are available in IC-rated versions.
- Pros: Safe to install with insulation, prevents fire hazards.
- Cons: Can sometimes be slightly larger or more expensive than non-IC rated options.
4. Non-IC-Rated Housings
These housings require a clearance of at least three inches between the fixture and any insulation. If you choose these, you’ll need to ensure the insulation is pulled back from around the can during installation. This is less common for DIYers working in existing homes unless they are certain there’s no insulation or can easily manage the clearance.
- Pros: Can be more readily available or slightly cheaper in some cases.
- Cons: Requires careful attention to clearance from insulation, a potential fire hazard if installed incorrectly.
5. Airtight Housings
These fixtures are designed to minimize air leakage between the living space and the attic. This is important for energy efficiency, as it helps prevent conditioned air from escaping into the attic and unconditioned air from entering the home. Many IC-rated housings are also airtight.
- Pros: Improves energy efficiency, reduces drafts.
- Cons: May be slightly more expensive.
Important Note: Always check local building codes and manufacturer instructions. For safety, especially with electrical work and insulation, consulting a qualified electrician is highly recommended. The U.S. Department of Energy offers great resources on energy-efficient lighting choices: Energy Saver: Lighting Choices.
Types of Recessed Lighting Trims
The trim is the part you actually see, and it plays a big role in both the look and the function of your recessed lighting. Choosing the right trim can make a huge difference!
1. Baffle Trims
These have a ribbed or convoluted interior surface designed to reduce glare. They are excellent for general lighting and for reducing the harshness of the light, making them comfortable for living spaces and kitchens.
- Appearance: Often black or white ribbed interior.
- Best for: General ambient lighting, kitchens, living rooms, areas where glare reduction is desired.
2. Reflector Trims
These have a shiny, mirrored interior surface that reflects light downwards. They can provide a brighter light output than baffle trims and are available in various finishes like chrome, satin nickel, or white.
- Appearance: Smooth, reflective interior.
- Best for: General lighting, areas needing a brighter output, can be used for accenting.
3. Gimbal Trims (or Eyeball Trims)
These trims allow you to adjust the direction of the light. They have a swivel or gimbal mechanism that lets you pivot the light source to highlight artwork, architectural features, or specific areas of a room. You can often adjust them up to 30 degrees vertically and 360 degrees horizontally.
- Appearance: A visible socket and bulb that can be tilted and turned.
- Best for: Accent lighting, highlighting artwork or specific features, flexible lighting needs.
4. Lensed Trims
These trims have a glass or plastic lens covering the bulb. They offer protection for the bulb and can diffuse light for a softer effect. Some are designed for specific purposes, like shower trims (damp-rated) or wet-rated trims for outdoor soffits.
- Appearance: A sealed lens in front of the bulb.
- Best for: Bathrooms (damp-rated), kitchens, areas where dust or moisture might be a concern.
5. Decorative Trims
These come in various styles, like plaster frames that can be painted to blend seamlessly with the ceiling, or trims with decorative edges. They are more about adding a subtle design element.
- Appearance: Can be designed to be invisible or add a decorative touch.
- Best for: Designers seeking a specific aesthetic, blending into ornate ceilings.
When selecting a trim, consider the finish (white, black, nickel, bronze, etc.) to match your room’s décor, as well as the beam spread and any special features like adjustability or glare control.
Choosing the Right Bulb for Your Recessed Lights
The bulb is what actually produces the light, and what you choose impacts everything from energy use to the mood of your room. LED bulbs are the clear winner these days!
LEDs: The Modern Standard
LEDs (Light Emitting Diodes) are the go-to choice for recessed lighting for several compelling reasons:
- Energy Efficiency: They use up to 80% less energy than incandescent bulbs, saving you money.
- Long Lifespan: LEDs can last 25,000 to 50,000 hours, meaning you won’t be changing bulbs for years!
- Variety: Available in a wide range of brightness (lumens), color temperatures (Kelvin), and beam angles.
- Durability: More resistant to breakage than glass bulbs.
- Instant On: No warm-up time needed.
Key Bulb Specifications to Consider:
- Lumens (Brightness): This measures how much light a bulb produces. Higher lumens mean a brighter light. For general lighting, 800-1000 lumens per bulb is common, but this varies by room size and desired brightness.
- Wattage (Energy Use): For LEDs, wattage is low. Compare LEDs by lumens, not wattage. An 8-10 watt LED might produce the same light as a 60-watt incandescent.
-
Color Temperature (Kelvin – K): This describes the “warmth” or “coolness” of the light.
- 2700K-3000K: Warm white, similar to incandescent bulbs. Good for living rooms and bedrooms.
- 3500K-4000K: Neutral white. Great for kitchens, bathrooms, and offices.
- 5000K-6500K: Cool white or daylight. Best for task lighting, garages, or areas where you need crisp, bright light.
-
Beam Angle: This determines how wide the light spreads.
- Narrow Spot (10-25 degrees): For accent lighting.
- Spot (25-30 degrees): Good for highlighting artwork.
- Narrow Flood (30-40 degrees): Versatile, good for general lighting.
- Flood (50-60 degrees): Wider spread, good for ambient lighting in smaller rooms.
- Wide Flood/Very Wide Flood (70+ degrees): Covers a large area, good for spacious rooms.
- Color Rendering Index (CRI): This measures how accurately a light source reveals the true colors of objects. A CRI of 80+ is good, while 90+ is excellent for areas where color accuracy is important (like art studios or kitchens).
- Dimmable: If you want to control the brightness, ensure your LED bulbs and your dimmer switch are compatible. Look for “dimmable” on the packaging.
Many recessed lighting fixtures are designed to accept standard A19 bulbs (though often with a specific trim adapter), while others use integrated LED modules where the LED is built into the fixture itself. Integrated LEDs are very efficient and long-lasting, but if the LED fails, you usually replace the entire fixture.
How to Install Recessed Lighting (Beginner-Friendly Overview)
Installing recessed lighting can be a rewarding DIY project, but it involves working with electricity and your ceiling structure. Safety is paramount! If you’re not comfortable with electrical wiring, it’s always best to hire a licensed electrician. Here’s a general overview of the steps involved, assuming you’re using remodel housings in an existing ceiling:
Tools and Materials You’ll Likely Need:
- Recessed light housings (remodel, IC-rated if needed)
- Recessed light trims
- LED light bulbs
- Wire strippers/cutters
- Screwdriver set
- Utility knife or drywall saw
- Measuring tape
- Pencil
- Stud finder
- Safety glasses
- Work gloves
- Voltage tester (non-contact is easiest for beginners)
- Wire nuts
- Electrical tape
- Ladder
- Optional: Fish tape (for pulling wires)
Step-by-Step Installation Guide (Remodel Housing):
- Plan Your Layout: Decide where you want your lights. Consider room size, ceiling height, and where you need light (e.g., over task areas). Aim for even spacing for ambient light. A common rule of thumb is to place lights about 2-3 feet away from walls for ambient lighting. You can find online calculators or consult lighting design guides for specific spacing recommendations.
- Turn Off Power: This is the MOST IMPORTANT step. Go to your electrical panel and turn off the circuit breaker that controls the lights in the area where you’ll be working. Use a voltage tester to confirm the power is off at the existing light fixture location or where you plan to run new wiring.
- Locate Joists and Cut Holes: Use a stud finder to locate ceiling joists. Mark the center points for each light fixture, ensuring they are not directly over a joist. Trace the template provided with your housing onto the ceiling. Carefully cut out the holes using a drywall saw or utility knife.
- Run Electrical Cable: This is often the trickiest part. You’ll need to run electrical cable (typically 14/2 or 12/2 NM-B cable, depending on your circuit breaker amperage) from the power source (usually an existing junction box or switch) to each light location. This might involve working in the attic or using a fish tape to pull wires through walls and ceilings. Each housing will need to be connected in a series or parallel circuit, depending on your setup.
- Wire the Housing: Once the cable is run to the first hole, pull about 6-8 inches of cable through the opening. Remove the junction box cover on the recessed housing. Connect the wires from the cable to the corresponding wires in the housing using wire nuts: black (hot) to black, white (neutral) to white, and green or bare copper (ground) to the ground screw or wire. Tuck the wires neatly into the junction box and replace the cover.
- Install the Housing: Push the housing up into the hole. The remodel housing has spring-loaded clips or tabs. Push these tabs outward so they grip the back of the drywall, securing the housing firmly in place.
- Install the Trim and Bulb: Screw in your chosen LED bulb. Then, attach the trim. Most trims simply push up into the housing and have torsion springs or clips that hold them in place. Ensure it’s flush and secure against the ceiling.
- Repeat for All Fixtures: Follow steps 4-7 for each recessed light location.
- Restore Power and Test: Once all fixtures are installed, turn the power back on at the circuit breaker. Test each light to ensure it works correctly.
Professional Tip: For running new wiring, especially through walls or across joists, consult guides like those from This Old House or consider hiring an electrician. Incorrect wiring can be a serious fire hazard.
Recessed Lighting vs. Other Lighting Types
It’s helpful to see how recessed lighting stacks up against other common lighting options. Each has its place!
| Feature | Recessed Lighting | Pendant Lights | Track Lighting | Flush Mount Fixtures | Chandeliers |
|---|---|---|---|---|---|
| Aesthetics | Minimalist, clean, unobtrusive. Blends with ceiling. | Decorative focal point, adds style, can be statement pieces. | Modern, flexible, adjustable. Fixtures are visible. | Low profile, good for low ceilings, can be decorative or simple. | Ornate, grand, statement pieces. |
| Installation Complexity | Moderate to High (involves ceiling cuts, wiring). | Moderate (requires secure ceiling box, wiring). | Moderate (requires wiring, mounting track). | Easy to Moderate (replaces existing fixture, wiring). | Moderate to High (can be heavy, requires secure ceiling box, wiring). |
| Best Use Cases | General ambient, task, accent lighting. Modern/minimalist spaces. | Over islands, dining tables, entryways. Decorative accent. | Flexible accent, task, or general lighting. Art galleries, kitchens. | Hallways, bedrooms, closets, low ceilings. | Dining rooms, entryways, living rooms. Adds glamour. |
| Light Distribution | Can be directed (gimbals) or spread evenly. Good for full room coverage. | Directs light downwards, focused illumination below. | Directional, adjustable to specific points. | Generally diffuses light downwards and outwards. | Diffuses light in multiple directions, often upwards and downwards. |
| Flexibility | Fixed once installed (unless using adjustable trims). | Fixed in place. | High flexibility – heads can be moved along the track. | Fixed in place. | Fixed in place. |
| Cost (Fixture Only) | Moderate ($20-$100+ per fixture, depending on type). | Moderate to High ($50-$500+). | Moderate ($50-$300+ for track kit). | Low to Moderate ($30-$150+). | Moderate to Very High ($100-$1000+). |
Recessed lighting shines when you need a clean, pervasive light source that doesn’t dominate the room’s design. Pendants and chandeliers are great for adding personality and a focal point, while track lighting offers excellent adjustability.
Common Recessed Lighting Mistakes to Avoid
Even with the best intentions, a few common pitfalls can make recessed lighting look less than stellar. Let’s make sure you avoid them!
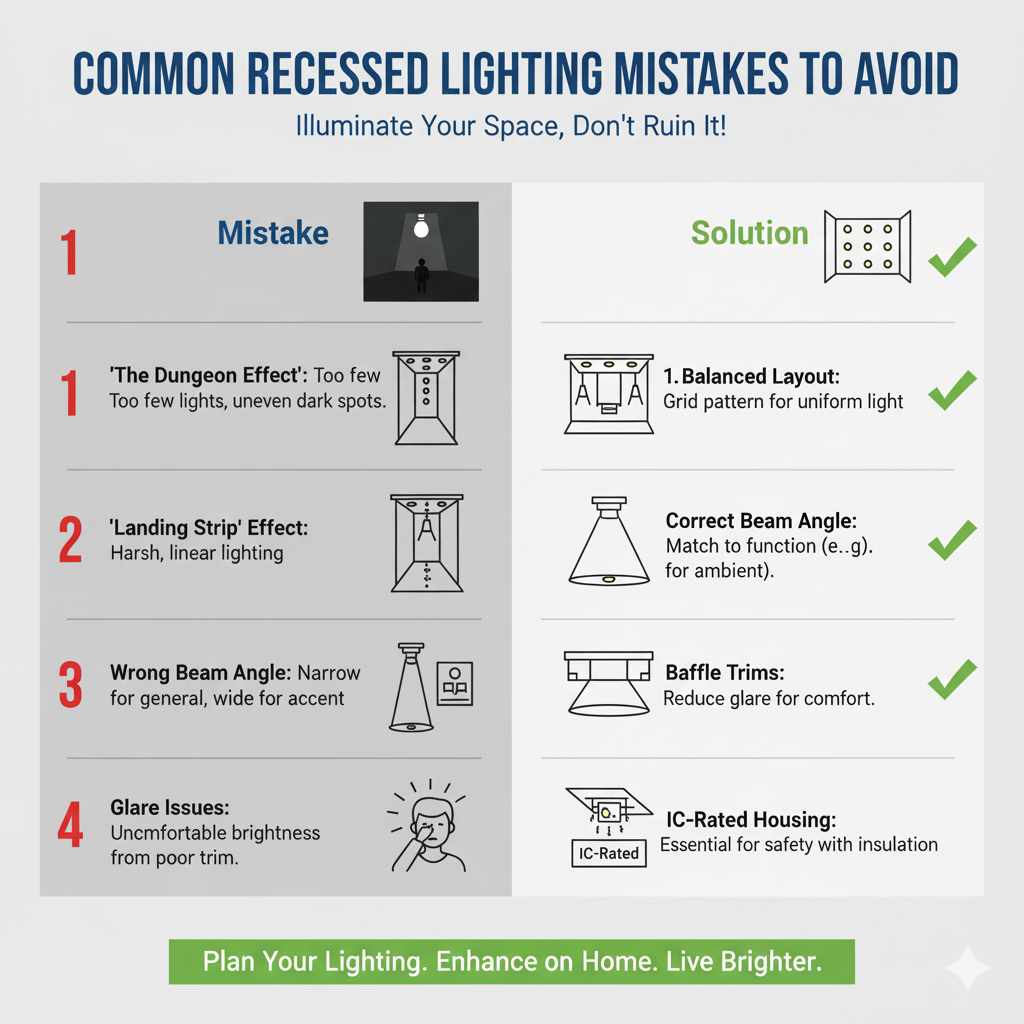
- “The Dungeon Effect”: Installing too few lights, or lights spaced too far apart, can leave rooms feeling dim and shadowy. This is especially true if the beam angle is too narrow for general lighting.
- The “Landing Strip” Effect: Lining up lights in a single row down the middle of a room can create harsh shadows and uneven lighting. Aim for a more balanced grid pattern.
- Wrong Beam Angle: Using a very narrow beam angle for general lighting will create hot spots and dark areas. Conversely, using a very wide beam for accent lighting won’t highlight your artwork effectively.
- Glare Issues: Using a basic reflector trim in a high-traffic area like a kitchen can be uncomfortable due to glare. Baffle trims or trims with better glare control are usually a better choice.
- Incorrect Housing Type: Not using IC-rated housings when insulation is present is a major fire hazard. Always match the housing to your ceiling type and insulation status.
- Over-Lighting: Too many lights can make a room feel stark and cold, rather than cozy. Plan your layout carefully based on the desired mood and function.
- Ignoring Color Temperature: Using cool, bluish light (5000K+) in a bedroom or living room can feel sterile. Opt for warmer tones (2700K-3000K) for relaxation.
A good layout plan and choosing the right trims and bulbs are key to avoiding these common mistakes. Remember, the goal is comfortable, functional, and attractive illumination.
Frequently Asked Questions About Recessed Lighting
Q1: How many recessed lights do I need for a room?
The number depends on the room size, ceiling height, and desired brightness. A common rule of thumb for general lighting is to divide the room’s length and width (in feet) by 2. This gives you the approximate spacing in feet between fixtures. For example, in a 10×12 room, you might space lights about 5 feet apart. Always consider task areas and adjust as needed.
Q2: Can I install recessed lighting myself?
Yes, many homeowners successfully install recessed lighting, especially using remodel housings. However, it involves electrical wiring and working in your ceiling. If you are not comfortable with electrical work or unsure about safety, it is highly recommended to hire a licensed electrician.
Q3: What is the difference between IC and non-IC rated recessed lights?
IC stands for “Insulation Contact.” IC-rated housings can be installed directly against building insulation, which is common in attics and ceilings. Non-IC rated housings require at least three inches of clearance between the fixture and any insulation to prevent overheating and fire hazards. Always use IC-rated housings if insulation is present.
Q4: How do I choose the right size recessed light housing?
Recessed light housings come in various diameters, most commonly 4-inch and 6-inch. Smaller 4-inch lights are great for accent lighting or smaller spaces, while 6-inch lights are standard for general ambient lighting. The choice often depends on ceiling height, room size, and the desired light spread.
Q5: Are recessed lights energy efficient?
Recessed lights themselves are just the housing. Their energy efficiency depends heavily on the type of bulb used. When paired with LED bulbs, they are extremely energy efficient, using significantly less electricity and lasting much longer than older incandescent or halogen options.
Q6: Can I put recessed lights in a bathroom?
Yes, but you must use fixtures rated for damp or wet locations. Look for trims and housings marked “damp-rated” for general bathroom use or “wet-rated” if they will be directly exposed to shower spray. This ensures they are protected from moisture and safe to use.
Q7: What is “canless” or wafer-thin LED recessed lighting?
Canless, or wafer-thin, LED lights are an alternative to traditional recessed fixtures. They are ultra-slim, don’t require a separate housing can, and are installed directly into the ceiling through a small hole. They are often easier and quicker to install, especially for DIYers, and are very energy efficient.
Conclusion
Recessed lighting is a powerful tool for transforming your home’s atmosphere and functionality. From its clean, modern aesthetic to its versatile lighting capabilities, it’s easy to see why it’s a favorite among homeowners and designers alike. By understanding the different types of housings, trims, and bulbs available, you can make informed choices that perfectly suit your needs and style.
Whether you’re aiming for a bright, well-lit kitchen, a cozy living room ambiance, or a dramatic display for your artwork, recessed lighting can help you achieve it. Remember to prioritize safety by turning off power before any electrical work and using the correct housing type for your ceiling conditions. If you ever feel unsure, don’t hesitate to call in a professional. With a little planning and the right approach, you can confidently bring the benefits of recessed lighting into your home, creating brighter, more beautiful, and more comfortable spaces for everyone to enjoy.