Can I Paint Pressure Treated Wood Right Away? Here’S Truth
No, you generally cannot paint pressure treated wood immediately. It needs time to dry out. Painting too soon traps moisture, causing paint to peel and bubble.
Most experts suggest waiting several weeks, and sometimes months, depending on weather conditions, before painting or staining.
Understanding Pressure Treated Wood
Pressure treated wood is lumber that has been chemically preserved. This process helps it resist rot and insect damage. It’s a great choice for outdoor projects.
The wood is placed in a special vat. Then, a strong vacuum pulls air out of the wood cells. Next, a preservative solution is forced deep into the wood under pressure.
This makes the wood much more durable. It can stand up to moisture and pests better than untreated wood. This is why it’s so popular for decks, fences, and other outdoor structures.
The chemicals used are usually copper-based. You might see a greenish tint to the wood. This is normal.
The treatment process pushes a lot of liquid into the wood. This liquid contains the preservatives. Because of this, the wood starts out very wet.
It can feel heavy and damp to the touch, even after it has been cut and is sitting at the store.
This high moisture content is the main reason you can’t just paint it. Think of it like trying to put a sticker on a wet surface. The sticker won’t stick well.
It will lift and peel. The same thing happens with paint on wet wood. The moisture inside the wood tries to escape.
As it does, it pushes the paint away. This leads to problems you really want to avoid.
Why Waiting is Crucial: The Drying Process
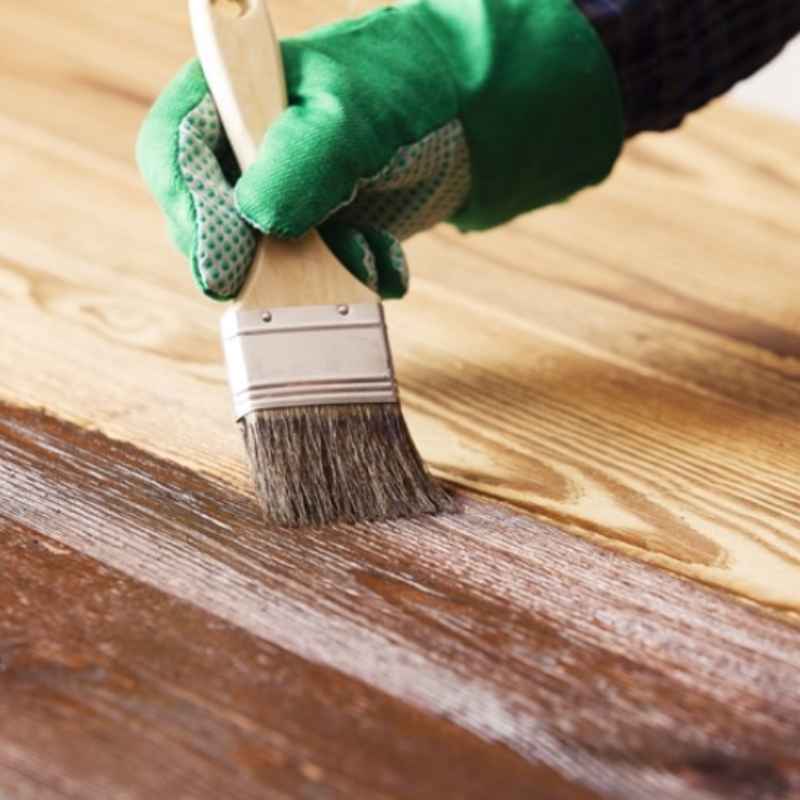
The key issue is moisture. Freshly treated wood can contain anywhere from 30% to 80% moisture. This is a lot!
Paint, stain, and sealers are designed to bond to dry wood. They can’t properly adhere when there’s so much water trapped inside.
When you paint or stain wet wood, the preservatives and water are held in. As the wood slowly dries over time, this trapped moisture needs to go somewhere. It will push its way out.
This outward pressure causes the paint or stain film to bubble and peel. You’ll see blisters form. Eventually, the coating will just flake off.
This leaves your wood unprotected and looking bad.
The drying process for pressure treated wood is slow. It depends on many things. The type of wood matters.
The amount of preservative used matters. But the biggest factors are the weather and where the wood is placed. Sun, wind, and dry air all help the wood dry out faster.
If the wood is in a shady, damp spot, it will take much longer.
Experts suggest a waiting period for a reason. It’s not just a suggestion. It’s a practical necessity to ensure your finish looks good and lasts.
Skipping this step is one of the most common mistakes people make. It can turn a beautiful new deck or fence into a source of constant repair work.
How to Tell If Your Wood is Dry Enough
This is the big question, right? How do you know for sure? There are a few ways to check.
The best method uses a moisture meter. These tools are relatively inexpensive. They are very accurate.
You simply press the pins of the meter into the wood. It gives you a digital reading of the moisture content. For most paints and stains, you want the wood to be at 15% moisture content or lower.
Some might even prefer 12%.
If you don’t have a moisture meter, there are other tests. They aren’t as precise, but they can give you a good idea. One common test is the “feel” test.
Touch the wood. Does it feel damp? Does it feel cold to the touch?
If so, it’s likely still too wet. Dry wood will feel neutral or even slightly warm in the sun. It won’t feel clammy.
Another test involves a piece of clear plastic. Tape a small piece of plastic sheeting, about 12 inches by 12 inches, tightly to the surface of the wood. Seal all four edges with painter’s tape.
Leave it there for 24 hours. After a day, remove the plastic. Look at the wood surface underneath.
If you see condensation or moisture droplets on the wood or the plastic, the wood is still releasing moisture. It needs more time to dry. If the wood and plastic are both completely dry, it’s a good sign it’s ready.
The color of the wood can also be a hint. When pressure treated wood is new, it often has a wet, dark look. As it dries, it will become lighter in color.
It might start to look more like natural, unfinished wood. It might even start to show some graying if it’s been exposed to the sun for a while. Graying is a sign of weathering, and weathering happens on dry wood.
How Long Does it Actually Take?
This is where things get a little fuzzy. There’s no single answer. It’s not like a clock that says “paint now.” The drying time for pressure treated wood varies a lot.
It can range from a few weeks to several months. Here’s what influences it:
Weather: Hot, dry, and windy conditions are your best friends for drying. Lots of sun helps. Cloudy, humid, or rainy weather slows things down significantly.
If you live in a place with a lot of rain, your drying time will be longer.
Wood Thickness: Thicker boards take longer to dry than thinner ones. A thick 2×10 deck board will hold moisture longer than a thin 1×4 fence picket.
Wood Species and Treatment Level: Different types of wood absorb and release moisture differently. The concentration of the preservative can also play a role. Some treatments are designed to dry faster.
How the Wood is Stored: Is it stacked with good air circulation? Or is it piled up tightly? Airflow is key to drying.
If the wood was recently treated and still has that “wet” look and feel, it needs time.
Season: Wood treated in the spring and summer will generally dry faster than wood treated in the fall or winter. The colder air holds less moisture.
Most manufacturers and paint companies recommend waiting at least 4-6 weeks. Some suggest up to 6 months for optimal results. If you’re unsure, err on the side of caution.
Waiting an extra few weeks is much better than having to redo the job in a year.
Drying Time Factors at a Glance
Sunlight: Helps dry wood faster.
Wind: Carries moisture away from the surface.
Humidity: High humidity slows drying.
Rain: Can re-wet the wood, resetting the clock.
Airflow: Good circulation is essential.
Surface Preparation: The Key to a Lasting Finish
Once your wood is dry, don’t rush to grab the paint can. Proper preparation is just as important as letting it dry. This step ensures the paint or stain has a clean, solid surface to stick to.
It makes your finish last much longer and look much better.
First, clean the wood. Pressure treated wood can get dirty. It can collect mold, mildew, and grime.
You’ll need a good wood cleaner or a deck cleaner. You can often find these at home improvement stores. Follow the product instructions carefully.
Usually, you’ll mix it with water. Then you apply it to the wood. You might need a stiff brush to scrub stubborn dirt or mildew.
After cleaning, rinse the wood thoroughly. Make sure no cleaner residue is left behind. Residue can affect how the paint adheres.
If there’s any existing paint or stain (maybe from a previous project you’re updating), you’ll need to remove it. Sanding is often the best way to do this. It also helps to roughen the surface slightly.
This creates a better “tooth” for the new paint to grip. Use medium-grit sandpaper, like 80 or 100 grit. Sand with the grain of the wood.
After cleaning and sanding, let the wood dry again. Even after cleaning, the wood will absorb some water. You want it to be completely dry before you apply any finish.
This might take a day or two, depending on the weather.
Inspect the wood for any rough spots or splinters. You can sand these down. Smooth surfaces lead to a smoother finish.
This is especially important if you’re painting. You don’t want splinters poking through your nice new paint job.
Surface Prep Checklist
- Clean the Wood: Use a cleaner designed for decks or wood.
- Scrub Away Dirt: Use a stiff brush for tough spots.
- Rinse Thoroughly: Remove all cleaner residue.
- Sand If Needed: Smooth rough spots or remove old finishes.
- Remove Dust: Wipe down the wood after sanding.
- Let it Dry: Ensure the wood is fully dry before painting.
Choosing the Right Paint or Stain
Not all paints and stains are created equal. For pressure treated wood, you need products designed for exterior use. They need to be able to withstand the elements.
They also need to be flexible enough to handle the wood expanding and contracting with changes in temperature and humidity.
For Painting: Look for high-quality exterior latex or acrylic-based paints. These are water-based and generally more flexible than oil-based paints. They also clean up easily with water.
Consider a paint specifically designed for decks or siding. These often have added durability and UV protection.
A good primer is often recommended, especially if your wood has a greenish tint or if you’re going from a dark color to a light one. A stain-blocking primer can help prevent any of the wood’s natural chemicals from bleeding through your paint. Apply a coat of primer.
Let it dry completely according to the manufacturer’s instructions.
Then, apply your top coat. You’ll likely need two coats of paint for full coverage and protection. Apply the paint in thin, even coats.
Avoid heavy application, which can lead to drips and peeling.
For Staining: If you prefer a more natural wood look, stain is a great option. You can choose between transparent, semi-transparent, or solid stains. Transparent stains let the wood grain show through the most.
Semi-transparent stains offer more color and hide some of the grain. Solid stains look very much like paint but allow the wood texture to show.
Again, use an exterior-grade stain. Look for products that offer UV protection. Stains soak into the wood rather than forming a film on top, so they are less prone to peeling.
However, they can wear away over time and may need reapplication more often than paint.
Important Note: Some older types of pressure treated wood used arsenic. Modern treatments do not. However, if you suspect you have very old wood, test for lead or arsenic before sanding.
You don’t want to inhale dust from those treatments. Modern treatments are safe to paint and stain after proper drying.
Paint vs. Stain for Pressure Treated Wood
Paint:
- Pros: Wide color choice, hides imperfections, durable finish.
- Cons: Can peel if not applied correctly, requires more prep.
- Best For: Creating a specific look, covering wood that isn’t perfectly attractive.
Stain:
- Pros: Enhances natural wood grain, easier to reapply, less prone to peeling.
- Cons: Limited color options (especially transparent), may wear faster than paint.
- Best For: Showcasing the wood’s natural beauty, simpler upkeep.
The Actual Painting Process
Once your wood is dry, clean, and prepped, and you’ve chosen your paint (and primer), it’s time to paint! Timing is important here too. You want to paint on a day that’s not too hot, not too cold, and not too humid.
Ideally, the temperature should be between 50°F and 80°F (10°C and 27°C).
Avoid painting in direct, hot sunlight. The paint can dry too quickly. This can cause lap marks.
It might also lead to poor adhesion. Try to paint on a cloudy day. Or paint in an area that’s shaded.
Also, check the weather forecast. You don’t want rain for at least 24 hours after you finish painting. This gives the paint time to cure.
Step 1: Apply Primer (If Using)
If you decided to use a primer, apply it evenly. Use a brush or roller. Make sure you cover the entire surface.
Let it dry completely. Check the primer can for specific drying times. Rushing this step can ruin the whole job.
Step 2: Apply the First Coat of Paint
Stir your paint well. Don’t shake it. Shaking can create air bubbles.
Use a good quality brush for cutting in edges and tight spots. Use a roller for larger, flat areas. Apply the paint in long, even strokes.
Work with the grain of the wood. Avoid overloading your brush or roller. Too much paint can lead to drips.
Don’t try to get perfect coverage with the first coat. It might look streaky or uneven. That’s normal.
The second coat will even things out. Let the first coat dry fully. Check the paint can for recommended drying times between coats.
This is usually a few hours.
Step 3: Apply the Second Coat of Paint
Apply the second coat just like the first. This coat should provide full, even coverage. If you notice any missed spots or thin areas, touch them up carefully.
Make sure the second coat blends smoothly.
Step 4: Allow for Curing
The paint will be dry to the touch relatively quickly. However, it takes much longer to fully cure. Curing is when the paint hardens completely.
During the curing process, the paint is more vulnerable. Avoid heavy traffic on decks. Be careful with furniture placement on painted surfaces.
Check the paint can for the full curing time. This can be several days to a week or more.
Mistakes to Avoid:
- Painting when it’s too cold or too hot.
- Painting when it’s humid or raining.
- Not letting primer or first coat dry completely.
- Applying paint too thickly.
- Not cleaning the wood properly first.
Quick Painting Tips
- Use quality tools: Good brushes and rollers make a big difference.
- Work in sections: This helps you maintain a wet edge and avoid lap marks.
- Brush strokes: Always paint with the grain of the wood.
- Two thin coats: Better than one thick coat for durability.
- Clean up immediately: Water-based paints are easy to clean if done right away.
Real-World Scenarios and Experiences
I remember building a deck for my own backyard a few years ago. I was so excited to get it done. The wood arrived, and it looked great.
It had that nice, fresh, treated wood smell. I really wanted to paint it a nice deep blue. I thought, “It’s summer, it’s sunny, it’s drying!” I ignored that little voice in my head that said, “Wait.”
I did the minimum prep. Wiped it down. And then I painted.
The first coat looked okay. I was so pleased with myself. I got the second coat on, and it looked even better!
I felt like I’d beaten the system. I’d saved myself weeks of waiting. Fast forward to the fall.
We had some cooler, wetter weather. I started noticing little bubbles forming on the deck boards. Then, they started to peel.
By the next spring, parts of the deck looked terrible. The paint was flaking off everywhere.
I was so annoyed. I’d wasted money on paint and my own time. It looked much worse than if I’d just left it bare for a season.
It taught me a hard lesson. That lesson was about patience and following the advice of experts. I ended up having to scrape and sand the whole deck.
Then I had to wait the proper amount of time. This time I used a moisture meter. It took almost three months!
But the second time I painted it, it lasted for years without a single peel. Experience really is the best teacher, even when it’s frustrating.
Common Misconceptions about Painting Treated Wood
There are a lot of myths out there about painting pressure treated wood. Let’s clear some of them up. This will help you avoid making the same mistakes others have.
Myth vs. Reality
| Myth: You can paint pressure treated wood as soon as it looks dry. | Reality: Surface dryness isn’t the same as internal dryness. Moisture meters are key for accurate checks. |
| Myth: All pressure treated wood is the same and dries at the same rate. | Reality: Drying times vary greatly based on weather, wood thickness, and treatment level. |
| Myth: If paint starts peeling, just paint over it again. | Reality: This usually makes the problem worse. You need to remove the loose paint and re-prep. |
| Myth: Any exterior paint will work fine. | Reality: High-quality, flexible exterior paints designed for wood are best. Primer is often needed. |
One big misconception is that the green color means it’s ready. That greenish or brownish tint is just the preservative. It doesn’t tell you about the moisture level inside.
Another common idea is that you can just paint over any old finish. That rarely works. You need a clean, sound surface for the new paint to stick.
People also think that if the wood is labeled “ready to paint,” it’s good to go. While some lumber yards might offer kiln-dried after treatment (KDAT) wood, which dries faster, it’s still not a guarantee. Always test.
Always wait longer than you think you need to. It’s a small price to pay for a job done right.
When is it Okay to Paint or Stain?
So, we’ve talked a lot about waiting. But when is it truly okay? You’re aiming for that 15% moisture content or less.
Use your moisture meter. If you don’t have one, rely on the plastic wrap test and the feel/color tests combined.
Consider the season. If you treated your wood in late fall or winter, it might still be too wet in the spring. You might need to wait through the summer.
If you treated it in spring, you might be able to paint by late summer or early fall. But always check first.
Think about your project. A fence post might dry out faster than a thick deck beam. A surface that gets full sun all day will dry faster than one that’s always in the shade.
These are all factors that play a role. If you can, try to expose the wood to as much sun and air as possible during the drying phase. Stack it with plenty of space between boards.
The most reliable advice is to wait until the wood has turned a uniform, lighter gray color and feels dry to the touch. Then, confirm with a moisture meter if you have one. If you get a reading of 15% or below, you’re likely good to go.
If you’re on the fence, wait another week. A bit of extra patience now saves a lot of headaches later.
What This Means for Your Project
Understanding this drying process is crucial for the success of your project. If you’re building a new deck, fence, or pergola, factor in the waiting time. You might need to plan your construction schedule around it.
For example, you might build the structure, then let it sit and dry for a few months before you paint or stain. Or, you might buy wood that’s already been kiln-dried after treatment (KDAT).
KDAT wood has been treated and then put through a special drying process. This significantly reduces the moisture content. It’s usually ready for finishing much sooner than standard pressure treated lumber.
However, KDAT wood can be more expensive and harder to find. And even with KDAT, it’s still wise to check the moisture content.
For existing projects, if you’re just refreshing the finish, you’ll still need to follow these rules. If the old paint is peeling, you must remove it. Then, assess the wood’s moisture content before applying new paint or stain.
Ignoring the wood’s condition will just lead to the new finish failing too.
The takeaway is simple: patience is a virtue when working with pressure treated wood. Don’t let enthusiasm or a deadline push you to skip the crucial drying and preparation steps. Your future self, enjoying a beautifully finished and long-lasting project, will thank you.
Quick Fixes & Tips for Painting Pressure Treated Wood
While there are no true “quick fixes” to bypass the drying time, here are some tips that make the process smoother:
- Invest in a Moisture Meter: This is the single best tool for knowing when your wood is ready. They are not overly expensive and will save you costly mistakes.
- Choose the Right Time of Year: Start your project in spring or early summer if possible. This gives the wood the best chance to dry over the warmer months.
- Airflow is Key: When letting wood dry, ensure it’s stacked with spacers. This allows air to circulate freely. Avoid leaning boards directly against each other.
- Don’t Rush Prep: Thorough cleaning and light sanding create a better surface for paint. It’s worth the extra effort.
- Use Quality Paint and Tools: Cheaper paint might seem like a saving, but it rarely holds up as well outdoors. The same goes for brushes and rollers.
- Read Product Labels: Always follow the manufacturer’s instructions for primers, paints, stains, and cleaners. They know their products best.
- Consider a Stain-Blocking Primer: Especially if your wood has a dark or uneven color, or if you’re painting a light color over it.
Frequent Questions About Painting Pressure Treated Wood
Can I paint pressure treated wood that is still a bit damp?
It is strongly advised not to paint pressure treated wood if it is still damp. Painting over wood with high moisture content will likely lead to the paint peeling, bubbling, or flaking off as the moisture escapes. Always wait until the wood is adequately dry.
A moisture meter reading of 15% or lower is ideal.
What is the recommended drying time for pressure treated wood before painting?
The recommended drying time varies greatly. It can range from 4 weeks to 6 months. Factors like weather, wood thickness, and the specific treatment process influence this.
It’s best to test the wood’s moisture content with a meter rather than relying on a set timeline.
How can I check if pressure treated wood is dry enough without a moisture meter?
You can use the plastic wrap test. Tape a piece of clear plastic to the wood for 24 hours. If you see condensation on the wood or plastic, it’s still too wet.
Also, touch the wood; it should feel dry and not cold or clammy. The color should be lighter, and the wood should no longer have a wet appearance.
Does the green color of pressure treated wood mean it’s ready to paint?
No, the green color is due to the wood preservatives and does not indicate the moisture content. Freshly treated wood is often dark green and very wet. As it dries, it lightens in color.
The color change is an indicator of drying, but not the definitive sign that it’s ready for paint.
Can I use any exterior paint on pressure treated wood?
While you can use most exterior paints, high-quality exterior latex or acrylic-based paints are recommended. These are more flexible and can better accommodate the natural expansion and contraction of wood. Using a primer, especially a stain-blocking one, is also highly advisable for better adhesion and a uniform finish.
What happens if I paint pressure treated wood too soon?
If you paint pressure treated wood too soon, the trapped moisture will try to escape. This creates outward pressure that forces the paint to bubble, blister, and eventually peel or flake off. This can happen within weeks or months of painting, leading to a poor appearance and the need for costly repairs.
Conclusion
Deciding when to paint pressure treated wood is a vital step. It’s about more than just wanting a quick finish. It’s about ensuring your project looks great and lasts for years.
Always prioritize drying time and proper preparation. Use the tools and tests available to confirm the wood’s moisture content. Patience now means a beautiful, durable result later.
Enjoy your project!
Sponsored / affiliate links. As an Amazon Associate I earn from qualifying purchases. I may earn additional commission from eligible campaigns.