How to Straighten a Leaning Fence Post (Frost-Line Depth)
Straightening a leaning wooden fence post usually just takes a lever, a few stakes, and 30-60 minutes – full removal is rarely necessary unless the base is rotted. But if the post keeps re-leaning every spring, the real cause may be frost heave, not loose soil: in cold climates, code requires posts set below the local frost line (36in deep for a 6ft fence in many areas), and a shallower post gets pushed up and out each winter freeze-thaw cycle. This guide covers three straightening methods, the frost-line depth rule, and when to replace instead of repair.
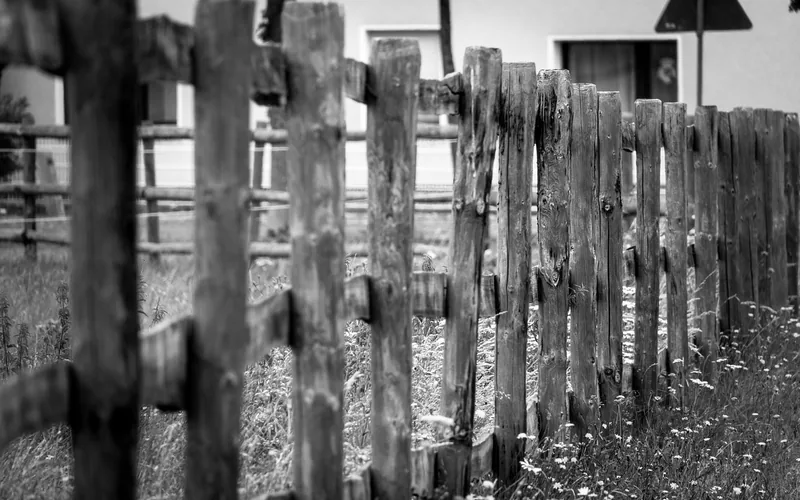
Why Your Fence Post Might Be Leaning
Before grabbing tools, it helps to understand why a fence post might be leaning – the root cause determines the best fix. Here are the most common culprits:
- Soil Erosion and Water Damage: Rain or melting snow washing away soil from the base leaves the post unsupported and prone to leaning.
- Freeze-Thaw Cycles (Frost Heave): In cold climates, water in the soil freezes and expands, pushing the post outward each winter – then settles as it thaws. This is a distinct, seasonal cause from erosion: it can worsen a correctly-installed post over 2-3 winter cycles, and it’s specifically worse each spring after a hard freeze.
- Uneven Ground Pressure: Extra pressure from a heavy gate, a slope, or a buried rock on one side.
- Rotten Base: Wood naturally degrades in contact with soil – a rotted base loses structural integrity.
- Improper Installation Depth: A post set shallower than the local frost line requirement is far more likely to heave and lean over time.
Tools and Materials You’ll Need
Most of these items are available at any hardware store:
- Shovel or Spade: For digging and moving soil.
- Post Puller or Lever Bar: Essential leverage to pull the post upright. A sturdy piece of lumber can work in a pinch.
- Stakes (Wooden or Metal): To temporarily brace the post once upright.
- Hammer: For driving stakes.
- Level: To ensure the post is perfectly vertical.
- Measuring Tape: To check post depth and height against the frost-line requirement.
- Gravel: For drainage and to help secure the post.
- Soil or Concrete Mix: To backfill the hole.
- Work Gloves and Safety Glasses.
- Optional: String and a plumb bob, a saw if the post needs trimming, and carriage bolts and washers for extra bracing.
Method 1: The Lever and Brace Technique (For Minor Leans)
This is the simplest and most effective method for posts that have only started to lean slightly – it uses basic leverage to gently persuade the post back into position.
- Expose the Base: Dig away the soil from the side the post is leaning outward, clearing about 6-12 inches around the base without destabilizing it further.
- Create Your Leverage Point: Wedge a post puller, lever bar, or strong scrap lumber firmly under the base – you may need to dig a small notch in the soil for a good grip.
- Apply Gentle Pressure: Place a sturdy block of wood or flat stone as a fulcrum under the lever, then press down – the post should start moving upright.
- Brace the Post: As you lift, place a stake on the opposite side of the lean and drive it in firmly, angled slightly away from the post. Two stakes on opposite sides gives better stability.
- Check with a Level: Adjust the stakes or leverage until the post is perfectly vertical.
- Backfill and Compact: Add a few inches of gravel for drainage, then backfill with soil, tamping it down firmly as you go.
- Secure the Braces: Leave the stakes in place a few days to a week for the soil to settle, or screw/nail them to the post for a more permanent brace.
Best No-Dig Repair Kit Pick
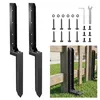
Sakerplus Fence Post Repair Kit – $39.99
A no-dig ground spike alternative to Method 1’s lever-and-brace approach – drives in beside the leaning post without excavating.
- Best for: minor-to-moderate leans without digging
- Why we picked it: purpose-built for exactly this repair, not improvised bracing
- Main drawback: won’t help if the post base is rotted
Compare more fence-post essentials
 Option 1 Quikrete Fast-Setting Mix, 50lb – $26.99
|
 Option 2 Ecoker T-Post Puller – $26.99
|
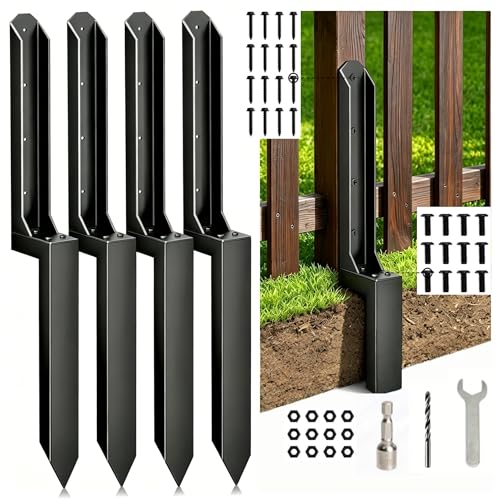
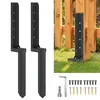 Option 3 PGGP H-Shaped Anchor Spike – $34.19
|
As an Amazon Associate we earn from qualifying purchases.
Method 2: The “Pull and Brace” Method with Rope or Chain (For Moderate Leans)
If the post is leaning more significantly, or you need more controlled pulling power, a rope or chain gives you extra leverage to pull the post straight and secure it.
- Secure the Rope/Chain: Wrap it securely around the post about 1-2 feet from the ground, tied tightly so it won’t slip.
- Anchor Your Pulling Point: Use another sturdy fence post or a heavy-duty anchor stake driven deep on the opposite side of the lean.
- Dig and Lever: Dig out soil on the side the post is leaning toward, and a bit on the opposite side so it can move freely. Place a fulcrum block under your lever.
- Apply Pulling Force: Lever under the post while a helper pulls the rope/chain toward the anchor – you’re pulling and lifting simultaneously.
- Brace and Secure: As the post nears vertical, brace it immediately with stakes and check plumb with a level.
- Reinforce the Base: Add gravel for drainage, then backfill with soil or concrete, sloping the top away from the post to shed water.
- Temporary Bracing Duration: Leave stakes in place at least a week, or until concrete has fully cured.
Method 3: The “Dig and Backfill” with Gravel (For More Stubborn Leans or Rot Prevention)
This method involves more digging but offers excellent stability and improved drainage – particularly useful if the original installation lacked proper drainage or didn’t reach the frost line.
- Dig Around the Post: Dig a wide circle around the base, deep enough to expose the entire base and a bit beyond.
- Loosen and Straighten: Lever the post upright, wiggling it loose from compacted soil if needed, then brace it as in Method 1.
- Add Gravel for Drainage: Fill the hole with coarse gravel down to the bottom, leaving 4-6 inches of space at the top for soil – this reduces future rot and heave from water saturation.
- Backfill with Soil: Compact thoroughly to create a firm base.
- Final Bracing and Checking: Confirm vertical with a level, and optionally add concrete at the top of the gravel layer, sloped away from the post.
When to Consider Replacing the Post
These methods work well, but replacement is the smarter long-term call when:
- Significant Rot: Soft, crumbly wood at the base has lost structural integrity – probe with a screwdriver or awl to check.
- Multiple Leaning Posts: Suggests a widespread soil, drainage, or installation-depth issue across the whole fence line.
- Severe Damage: Deep cracks, splits, or insect damage compromise the post’s strength.
- Long-Term Lean Stress: A post leaning for a long time may have split under stress and be too weakened to reliably straighten.
Replacing a post means digging out the old one and setting a new one below the local frost line – more involved, but it ensures years of stability. A wooden fence with properly-set posts rarely needs this kind of rework again.
Comparing Straightening Methods
| Method | Best For | Tools Needed | Difficulty | Pros | Cons |
|---|---|---|---|---|---|
| Lever and Brace | Minor leans (under 10-15 degrees) | Shovel, lever bar, stakes, hammer, level | Easy | Quick, simple, minimal digging | May not be strong enough for severe leans |
| Pull and Brace (Rope/Chain) | Moderate leans (15-30 degrees) | Shovel, rope/chain, anchor, lever bar, stakes, hammer, level | Medium | More pulling power, good control | Requires a strong anchor, more strenuous |
| Dig and Backfill with Gravel | Moderate to significant leans, or improved drainage | Shovel, lever bar, stakes, hammer, level, gravel | Medium | Excellent stability, prevents future water issues | More digging involved |
Tips for a Lasting Fix
- Proper Compaction: Loose soil is the enemy of a straight post – pack it firmly.
- Drainage is Key: Gravel at the base plus a slope away from the post keeps water from pooling and re-softening the ground.
- Meet the Frost Line: If replacing, set the new post below your local frost depth – a building inspector or the frost depth map above can confirm the number for your area.
- Consider Bracing: Permanent diagonal braces from the post to the ground or a horizontal rail add extra insurance.
- Regular Inspection: Check fence posts after heavy rain or a hard freeze – early detection saves work.
- Protect the Wood: A wood preservative or sealant on the base protects against moisture and rot. The Forest Products Laboratory (FPL), part of the U.S. Forest Service, publishes research on wood protection.
“In cold climates… you must dig at least to the frost line – a local building inspector can tell you how deep to go.”
Frequently Asked Questions (FAQ)
How deep should a fence post be set?
Set posts below your local frost line to prevent frost heave – in many areas that’s around 36 inches for a 6-foot fence, but it can range from near 0 inches in the Deep South to 60+ inches in the upper Midwest and Northeast. A general rule of thumb (one-third of the post’s above-ground length, plus 6 inches for gravel) works in warmer climates but isn’t a substitute for the code-required frost depth where winters are cold.
Can I straighten a fence post without digging it out?
Yes. The lever and brace technique is designed to straighten posts without full removal. If the post is severely rotted or damaged, though, digging it out and replacing it is the better call.
How long should I leave temporary braces on a straightened post?
At least a week, or longer if you used concrete and need it to fully cure. This lets the soil settle and firm up around the post for stable support.
What’s the best material to backfill a fence post hole with?
Gravel at the bottom for drainage, followed by well-compacted soil, works well. For maximum stability – especially on gate posts – a concrete mix is better. Always slope the surface away from the post to shed water.
My post is leaning because of rot. Can I just fix the lean and ignore the rot?
You can straighten a post with a rotted base, but it’s a temporary fix at best – the rot will keep spreading and weakening the post. Replacing severely rotted posts is the safer long-term move.
How can I prevent my fence posts from leaning in the future?
Set posts below the local frost line, use gravel for drainage, and compact the soil or concrete thoroughly. Sealing the wood and regularly checking for ground erosion around the base also helps.
Conclusion
Straightening a leaning wooden fence post rarely requires full removal – a lever and a few stakes handle most minor leans. If the post keeps re-leaning every spring, check whether it’s actually set below your local frost line before assuming the soil or bracing is at fault.
Sponsored / affiliate links. As an Amazon Associate I earn from qualifying purchases. I may earn additional commission from eligible campaigns.