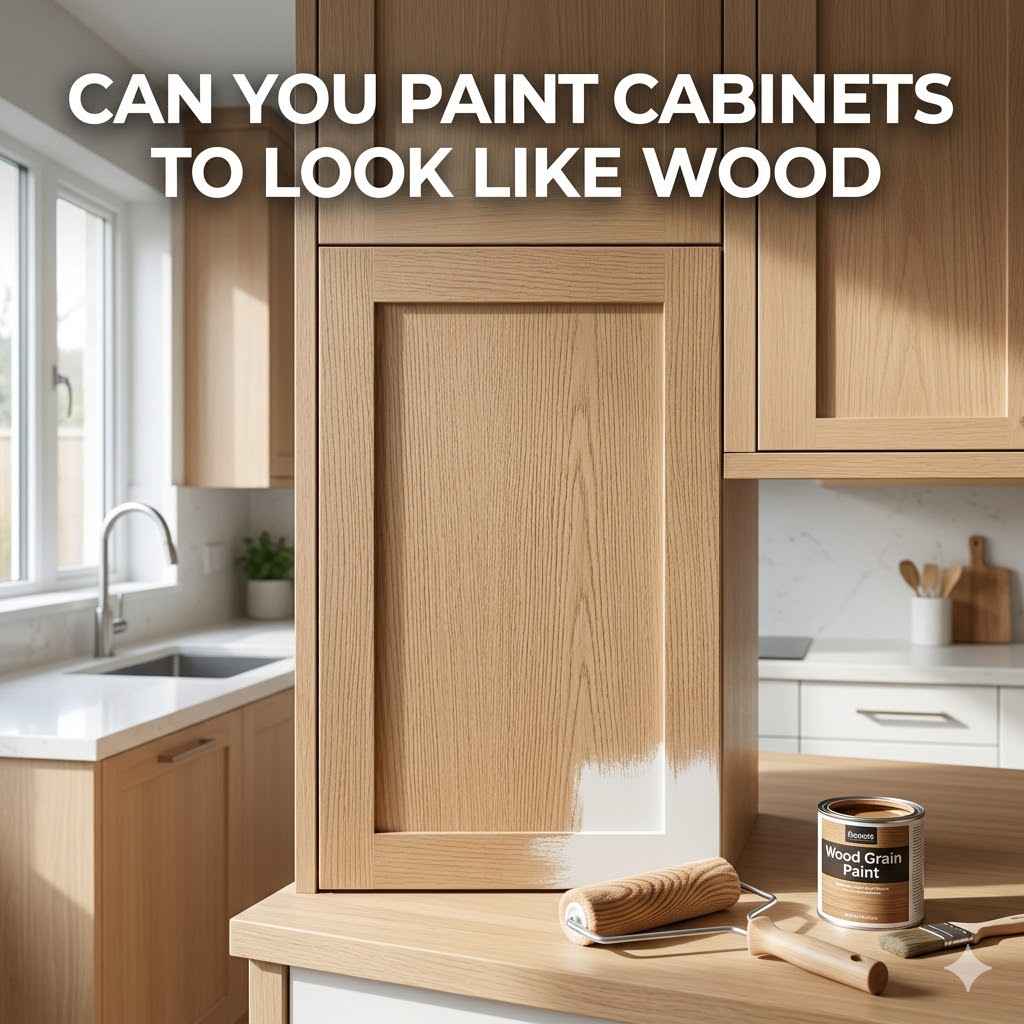
Can You Paint Cabinets To Look Like Wood
Lots of people wonder, “Can You Paint Cabinets to Look Like Real Wood?” It’s a popular idea because it can totally change how your kitchen or bathroom looks without replacing everything. For folks new to DIY, it might seem a little tricky. You want that beautiful, natural wood look, but you’re not sure if paint can really pull it off.
Don’t worry! This guide will show you exactly how to do it, step by step. We’ll make it simple so you can get amazing results.
Achieving A Realistic Wood Grain Effect
This section explores the methods and materials used to make painted cabinets mimic the natural appearance of real wood. It covers the essential techniques that bring depth, texture, and the characteristic lines of wood grain to flat cabinet surfaces. You’ll learn about special tools and paints that help create this illusion, making your cabinets look like they’re made from actual timber.
Understanding Wood Grain Patterns
Wood grain refers to the natural pattern of fibers that form in wood. Different types of wood have unique grain patterns. Some are straight and smooth, like maple, while others are wavy or swirly, like oak or cherry.
When we paint cabinets to look like wood, we’re essentially trying to recreate these natural lines and variations in color that make each piece of wood special. This involves understanding how light hits wood and how different wood species appear.
Mimicking wood grain isn’t just about drawing lines. It’s about creating the illusion of depth and natural variation. Think about how real wood has subtle differences in color, even within the same plank.
It has pores and knots that catch the light differently. The goal is to replicate this visual complexity using paint and special tools.
Here’s why this matters for your project:
- Visual Texture: Real wood has a subtle texture that reflects light. Achieving a similar visual texture with paint is key to making the finish look authentic. This can be done by layering colors and using specific application techniques that mimic the natural fibers.
- Color Variation: No two pieces of wood are exactly alike. Even within a single species, there are variations in color and tone. A convincing faux wood finish will incorporate these subtle shifts in color to avoid looking flat or artificial.
- Depth Perception: The lines of the wood grain create a sense of depth. When painting, the way you apply the graining tool and the colors you use can create an illusion of three-dimensional texture, making the painted surface appear more like real wood.
Essential Tools for Faux Wood Graining
To create a convincing faux wood look, you’ll need a few special tools. These tools help you apply paint in a way that imitates natural wood grain. They are designed to create realistic lines and textures that are hard to achieve with just a brush or roller alone.
Having the right tools makes the process much easier and leads to better results.
These tools are not overly complicated. Most are simple implements that help you move paint around in a specific way. For instance, graining tools often have rubber or silicone tips with patterns designed to simulate wood fibers.
Some people even use old combs or stiff brushes to create their own unique grain patterns.
- Graining Tools: These are specifically made to create wood grain effects. They come in various shapes and sizes, often with rubber or silicone heads that have a wood-like pattern. You drag them through wet paint to leave behind a grain-like impression.
- Stiff Brushes: Sometimes, a stiff-bristled brush can be used to create a rougher grain texture. You might use it to soften edges or add subtle variations to the main grain pattern. It’s good for breaking up solid color areas.
- Combs or Rakes: Specialized combs or even household combs with fine teeth can be used to drag through paint. They create fine, parallel lines that resemble the grain of certain woods. This is great for adding fine details to your finish.
- Sponge or Rags: These are useful for creating soft, blended effects. You can dab or wipe with a sponge to create subtle color variations or to soften harsh lines. Rags are good for wiping excess paint and creating a more weathered look.
Choosing the Right Paints and Finishes
The type of paint you use is super important for achieving a realistic wood look. You’ll typically need a few different types of products. A good base coat will create a solid foundation.
Then, you’ll use a glaze or a different color of paint to create the wood grain effect. Finally, a protective topcoat will seal everything in and give it a nice sheen.
The best paints for this job are usually water-based acrylics or latex paints. They dry relatively quickly, which is helpful when you’re working with glazes. Oil-based paints can also work, but they take longer to dry and can be harder to clean up.
The key is to find paints that allow you to work with them for a short period before they become too dry.
- Base Coat Paint: This is the main color of your “wood.” It should be a solid, opaque color that your grain pattern will show through. Choose a color that matches the wood species you want to imitate. For example, a warm brown for oak or a lighter beige for pine.
- Graining Paint or Glaze: This is the color you’ll use to create the actual wood grain lines. It’s often a darker, more translucent color than the base coat. A glaze is a clear medium mixed with paint. It makes the paint more transparent and gives you more time to work with it, allowing for smoother graining.
- Topcoat or Sealer: Once your graining is dry, you need to protect it. A clear topcoat, like polyurethane or a water-based sealer, will make the finish durable and easy to clean. It also adds the final sheen, which can be matte, satin, or glossy, depending on your preference.

The Step-By-Step Process For Faux Wood Cabinets
Now that you know what tools and paints you need, let’s walk through how to actually paint your cabinets to look like real wood. This process involves preparing your cabinets, applying your base coat, creating the grain effect, and finishing with a protective topcoat. Each step is designed to build upon the last, leading to a beautiful, realistic wood finish.
It’s important to take your time with each step. Rushing can lead to mistakes that are hard to fix. Preparation is especially crucial.
If your cabinets aren’t clean and smooth, your paint won’t adhere well, and the final finish won’t look its best. So, gather your supplies and get ready to transform your cabinets.
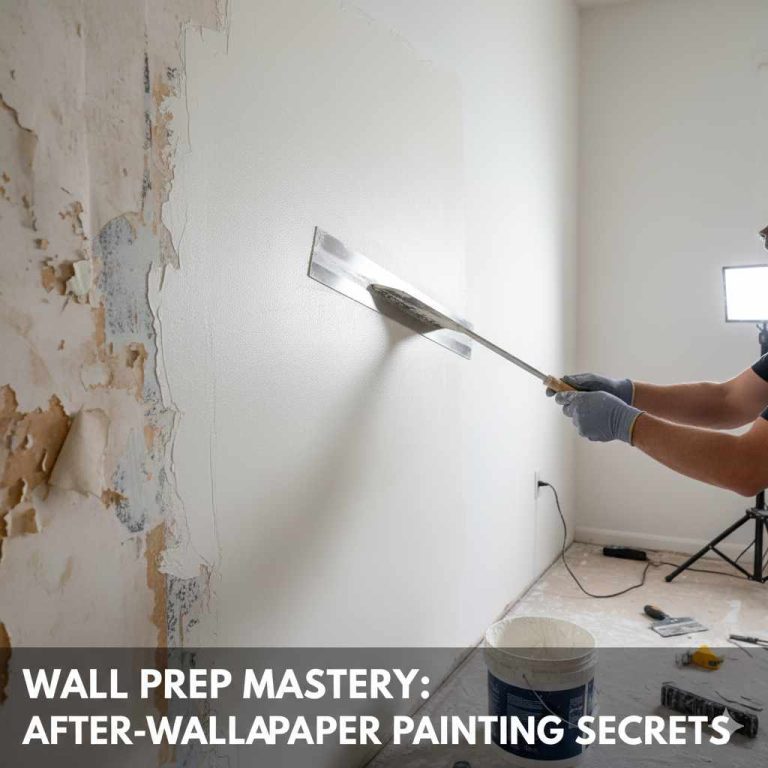
Preparation Is Key
Before you even think about painting, you need to prepare your cabinets. This means cleaning them thoroughly to remove grease, grime, and any old finishes. You might also need to lightly sand them to create a surface that the new paint can stick to well.
Cleaning is the first big step. Kitchen cabinets, especially, can get sticky with cooking grease. You can use a degreaser or a strong household cleaner.
Make sure to rinse them well afterward so there’s no residue. After cleaning, you’ll want to remove the cabinet doors and drawers so you can work on them easily.
Here’s a detailed breakdown of preparation:
- Clean Thoroughly: Use a good degreaser or a mixture of warm water and dish soap to wash all surfaces of the cabinets. Pay close attention to areas around knobs and handles, as these can accumulate a lot of grease.
- Rinse and Dry: Wipe down all surfaces with a clean, damp cloth to remove any soap or degreaser residue. Then, let them air dry completely. You can also use a clean, dry cloth to speed up the drying process.
- Light Sanding: For most cabinet surfaces, a light sanding with fine-grit sandpaper (around 150-220 grit) is enough. This scuffs up the surface just enough to give the primer and paint something to grip onto. If your cabinets have a glossy finish, sanding is especially important.
- Wipe Down Dust: After sanding, wipe down all surfaces with a tack cloth or a slightly damp cloth to remove all the sanding dust. This is a critical step to ensure a smooth finish without bumps or grit.
- Repair Imperfections: Fill any holes or dents with wood filler. Let it dry completely, then sand it smooth to match the surrounding surface.
Applying The Base Coat
Once your cabinets are prepped and clean, it’s time for the base coat. This is the color that will show through your wood grain. It’s important to apply this coat evenly.
A smooth, consistent base coat is essential for making the faux wood grain look realistic.
You can use a brush, roller, or even a sprayer for this step. Rollers are often a good choice for flat surfaces like cabinet doors, as they give a smooth, even finish without brush strokes. If you use a sprayer, you’ll get the smoothest finish, but it requires more setup and careful masking.
Tips for a perfect base coat:
- Apply Evenly: Use thin, even coats. It’s better to apply two thin coats than one thick one. This helps prevent drips and ensures a smooth finish.
- Work in Sections: If you are painting cabinets while they are still installed, work on one door or drawer front at a time. If you have removed them, paint all sides of the doors and drawer fronts, then let them dry completely before moving to the next step.
- Allow Proper Drying Time: Follow the paint manufacturer’s instructions for drying times between coats. This is crucial for the paint to cure properly and adhere well.
Creating The Wood Grain Effect
This is where the magic happens! You’ll use your graining tools and the darker glaze or paint to create the wood grain. The key here is to practice first.
Try it out on a piece of cardboard or scrap wood before you start on your actual cabinets. This will help you get a feel for the tools and the pressure needed.
When applying the glaze or graining paint, work in small sections. This is because glazes and some paints stay wet for a longer time, giving you a chance to create the grain effect before it dries. You want to apply the glaze thinly and evenly over the base coat.
Here’s how to get that grain:
- Apply Graining Color: Working in small sections, apply your graining paint or glaze over the dried base coat. You can use a brush or a roller for this. The goal is to cover the area smoothly.
- Drag Your Graining Tool: Immediately after applying the glaze, take your graining tool and gently drag it through the wet glaze. Start at one edge of the section and pull the tool across in a long, steady motion. You can vary the pressure to create different effects.
- Create Variations: Don’t make every line perfect and identical. Real wood has natural variations. You can overlap lines slightly, change the direction of your strokes occasionally, or use a different part of your tool to create knots or swirling patterns.
- Soften Edges: Use a soft brush or a rag to gently blend the edges of the grain lines. This helps to make the effect look more natural and less like painted lines.
- Repeat and Refine: Continue this process for all sections of your cabinets. Step back frequently to look at your work and make any adjustments while the glaze is still wet.
Consider this example:
- Scenario 1 Oak Grain: For an oak look, you might use a medium brown glaze over a light tan base coat. Use a wide graining tool with a wavy pattern. Drag it in long, sweeping motions, slightly overlapping each stroke. Use a smaller brush to add little dark marks for knots.
- Scenario 2 Pine Grain: For a pine effect, you might use a lighter, more golden glaze over an off-white base. Use a finer comb-like tool or a stiff brush dragged lightly to create straighter, more subtle lines.
Sealing and Finishing
After you’ve finished creating the wood grain on all your cabinets and the graining paint or glaze is completely dry, it’s time to seal everything. This step is vital for protecting your beautiful new finish. It will make your cabinets durable and easy to clean for years to come.
Choose a clear protective coating that matches the sheen you want. A satin or matte finish often looks more like natural wood than a high gloss finish, but this is a matter of personal taste. Make sure the topcoat is compatible with the paints you’ve used.
Here’s how to seal your cabinets:
- Apply Clear Topcoat: Use a high-quality clear coat, such as polyurethane or a water-based sealer. Apply it in thin, even coats. Again, avoid thick applications that can drip or pool.
- Allow Drying Between Coats: Most topcoats require drying time between applications. Follow the product instructions carefully. You may need two or three coats for adequate protection.
- Light Sanding Between Coats (Optional): For an exceptionally smooth finish, you can lightly sand with very fine-grit sandpaper (around 400 grit) between coats. Be very careful not to sand through the topcoat to the graining layer below. Wipe away all dust with a tack cloth after sanding.
- Reassemble Cabinets: Once the final coat of topcoat is completely cured (this can take several days, so check the product label), you can reattach your cabinet doors and drawers and put on new hardware if desired.
Common Challenges And How To Overcome Them
Even with the best guides, you might run into a few snags when painting cabinets to look like wood. It’s normal! The good news is that most problems have simple fixes.
Knowing what to expect can save you time and frustration. Let’s look at some common issues and how to solve them.
The most frequent problems usually involve the paint not looking quite right, or the grain not appearing as natural as you hoped. Sometimes, the colors might be too stark, or the lines too uniform. With a little practice and some specific tips, you can correct these issues and achieve the desired wood-like appearance.
Uneven Or Unrealistic Grain Lines
Sometimes, the lines you create with your graining tool might look too straight, too uniform, or just not natural. This can happen if you apply too much pressure, don’t move the tool smoothly, or if the glaze starts to dry too quickly.
The key to fixing this is often in the application and timing. If the glaze is still wet, you have more time to correct mistakes. If it has dried, you might need to reapply glaze to that section.
Practicing on scrap wood is the best way to avoid this problem.
Here’s how to tackle this:
- Practice Makes Perfect: Before touching your cabinets, practice on scrap wood or cardboard. Try different pressures and speeds with your graining tool. This helps you understand how the glaze reacts.
- Work Quickly but Smoothly: Apply the glaze in small sections and immediately start your graining. A steady, consistent motion is better than jerky movements.
- Soften Immediately: Use a soft brush or rag to gently soften the edges of the lines right after you make them. This blends the glaze and makes the grain look more organic.
- Embrace Imperfection: Remember that real wood isn’t perfectly uniform. Slight variations, occasional swirls, or a slightly darker spot can make the faux grain look more authentic.
- Use Multiple Tools: Sometimes, using a combination of tools can create a more varied look. For example, a wide tool for the main grain and a smaller brush or comb for finer details.
Color Mismatch
Getting the color right is crucial for a realistic wood look. If your base coat is too dark or too light, or if your graining color doesn’t complement it, the final result might not look like the wood you intended.
This is why choosing your paint colors carefully is so important. It’s often best to test your color combinations on scrap pieces first. You can also adjust the color of your glaze by adding a little more of the base color or a touch of a different pigment.
Solutions for color issues:
- Test Your Colors First: Always test your base coat and graining color combination on a piece of scrap wood or a spare panel. Let it dry completely to see how the colors truly look together.
- Adjust Glaze Translucency: If the grain color is too dark, you can make it more translucent by adding more clear glaze medium. If it’s too light, you might need to mix a new batch with more pigment or use a darker base coat.
- Consider Undertones: Think about the undertones of the wood you’re trying to mimic. For example, cherry wood has red undertones, while walnut has more brown. Matching these undertones will increase realism.
- Layering for Depth: Sometimes, a single layer of graining color isn’t enough. You might need to apply a very thin second layer of glaze in some areas to add depth and variation to the color.
Durability And Longevity Concerns
A common question is whether painted cabinets will hold up over time. Paint can chip or scratch, especially in high-traffic areas like kitchens. This is a valid concern, and it’s why proper preparation and finishing are so important.
The right combination of primer, paint, and a durable topcoat is your best defense against wear and tear. Using high-quality products and applying them correctly will ensure your cabinets look great for years.
To ensure durability:
- Use a Good Primer: A quality primer designed for cabinets will create a strong bond between the cabinet surface and your paint. This prevents peeling and chipping.
- Choose Durable Paint: Opt for a high-quality enamel paint that is designed for cabinets or furniture. These paints are formulated to be harder and more resistant to scuffs and stains.
- Apply Multiple Topcoats: As mentioned, don’t skimp on the topcoat. Multiple thin layers of a durable clear sealant provide excellent protection against scratches and moisture. Polyurethane is a popular and effective choice.
- Avoid Harsh Cleaners: Even with a good finish, avoid using abrasive cleaning pads or harsh chemical cleaners, as these can damage the paintwork over time. Mild soap and water are usually sufficient.
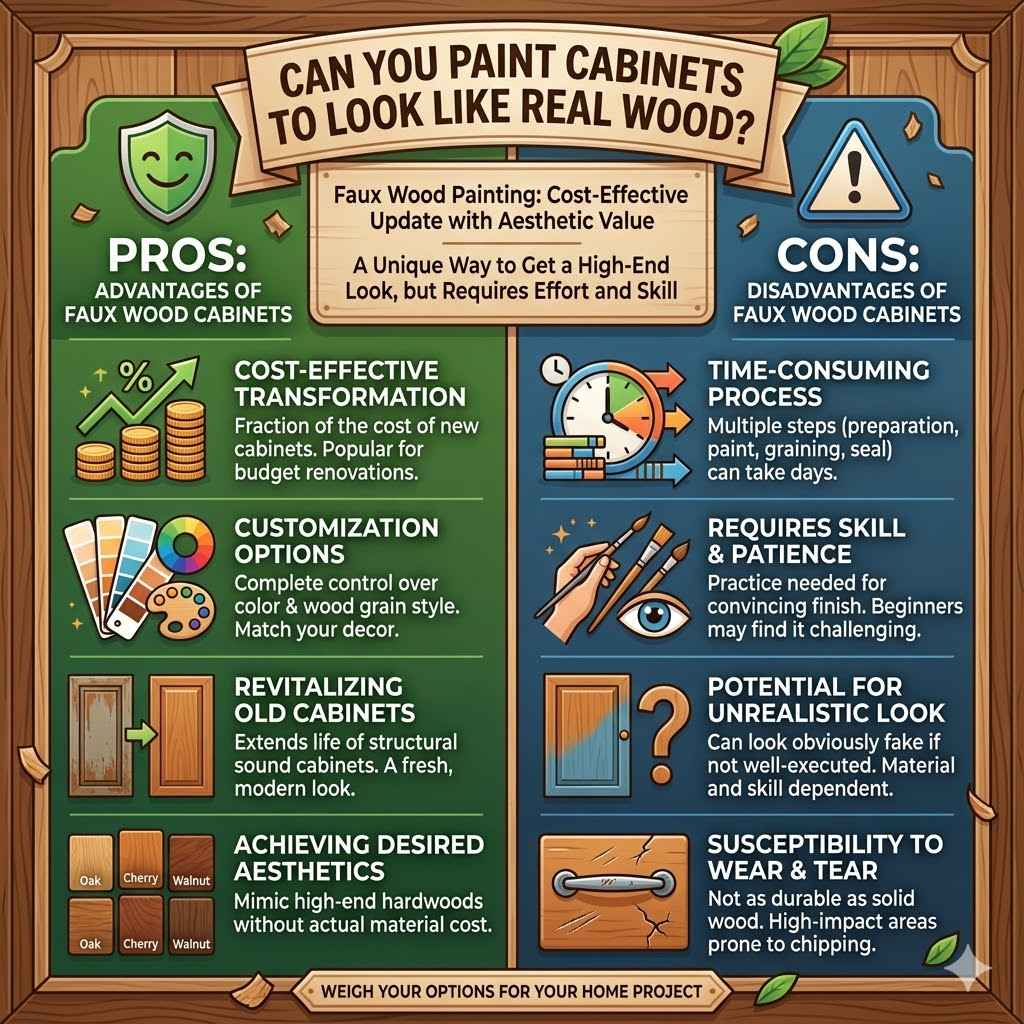
Can You Paint Cabinets to Look Like Real Wood Pros And Cons
Painting cabinets to look like real wood offers a unique way to update your kitchen or bathroom. It can be a cost-effective alternative to replacing cabinets. However, like any DIY project, there are advantages and disadvantages to consider.
Understanding these will help you make an informed decision about whether this is the right approach for you.
The main draw is the ability to achieve a high-end look without the high-end price tag. But it does require effort and patience. It’s not a quick weekend project for everyone, and the results depend heavily on skill and attention to detail.
Weighing these points will guide your choice.
Advantages Of Faux Wood Cabinets
There are many good reasons why people choose to paint their cabinets to look like wood. The most obvious is the aesthetic transformation. You can change the entire feel of a room with this technique.
It offers a lot of flexibility in terms of color and style.
Beyond the look, it’s often much more affordable than buying new wood cabinets. This makes it an accessible option for many homeowners looking to remodel or refresh their space on a budget. It’s a great way to give old cabinets a new life.
- Cost-Effective Transformation: Replacing kitchen cabinets can be incredibly expensive. Painting them to look like wood offers a dramatic visual upgrade for a fraction of the cost of new cabinetry. This makes it a popular choice for budget-conscious renovators.
- Customization Options: You have complete control over the color and style of wood grain you want to create. You can match your existing decor or choose a completely new look. This level of personalization is hard to achieve with pre-made cabinets.
- Revitalizing Old Cabinets: If your current cabinets are structurally sound but outdated in style or color, this technique is an excellent way to give them a fresh, modern look. It extends the life of your existing cabinetry.
- Achieving Desired Aesthetics: You can mimic the look of expensive hardwoods like oak, cherry, or walnut without the actual material cost. This allows you to achieve a high-end aesthetic that might otherwise be out of reach.
Disadvantages Of Faux Wood Cabinets
While the benefits are significant, it’s important to be aware of the potential downsides. The process itself can be time-consuming and requires a certain level of patience and skill. If you’re not comfortable with detailed DIY work, you might find it challenging.
Also, the longevity and exact look can vary. If not done perfectly, the painted finish might not fool everyone into thinking it’s real wood. And, unlike real wood, painted surfaces can be more susceptible to damage if not properly sealed and maintained.
- Time-Consuming Process: Creating a realistic wood grain effect is not a quick job. It involves multiple steps, including preparation, painting, graining, and sealing, which can take several days to complete, especially if you’re doing it yourself.
- Requires Skill and Patience: Achieving a truly convincing faux wood finish takes practice and a steady hand. Beginners might find it challenging to get the grain lines right, and mistakes can be difficult to correct without repainting.
- Potential for an Unrealistic Look: If not executed well, the painted finish might look obviously fake. The quality of the materials used and the skill of the applicator play a big role in how realistic the final result appears.
- Susceptibility to Wear and Tear: While a good topcoat protects the paint, it might not be as durable as solid wood. High-impact areas can still be prone to chipping or scratching over time if not treated with care.
Can You Paint Cabinets to Look Like Real Wood FAQ
Question: Do I need to remove my cabinet doors to paint them?
Answer: Yes, it is highly recommended to remove your cabinet doors and drawers. This allows you to paint them on a flat surface, ensuring an even finish and making it easier to reach all edges and sides. It also helps prevent paint drips onto your cabinets or surrounding areas.
Question: What is the best type of paint for faux wood graining?
Answer: Generally, water-based acrylic or latex paints are recommended for the base coat. For the graining effect, a translucent glaze mixed with acrylic paint is often used, as it allows you more working time. Always check the compatibility of your chosen products.
Question: How long does it take to paint cabinets to look like wood?
Answer: The entire process, including preparation, painting, drying, and sealing, can take anywhere from 3 to 7 days, depending on the size of your kitchen, your skill level, and the drying times of the products you use. It is not a project to rush.
Question: Can I paint over existing laminate cabinets to look like wood?
Answer: Yes, you can. The key is proper preparation. Thorough cleaning, light sanding, and using a good quality primer specifically designed for laminate or tricky surfaces are essential for the paint to adhere correctly.
Question: How do I clean my faux wood cabinets after they are painted?
Answer: Clean your faux wood cabinets with a soft cloth, mild soap, and water. Avoid abrasive cleaners, scrub brushes, or harsh chemicals, as these can damage the painted finish over time. Wipe up spills immediately.
Summary
So, can you paint cabinets to look like real wood? Absolutely. By carefully preparing your surfaces, choosing the right paints and tools, and following a step-by-step process, you can achieve a beautiful, realistic wood-like finish.
This DIY technique offers a budget-friendly way to transform your kitchen or bathroom, giving old cabinets a stunning new look.