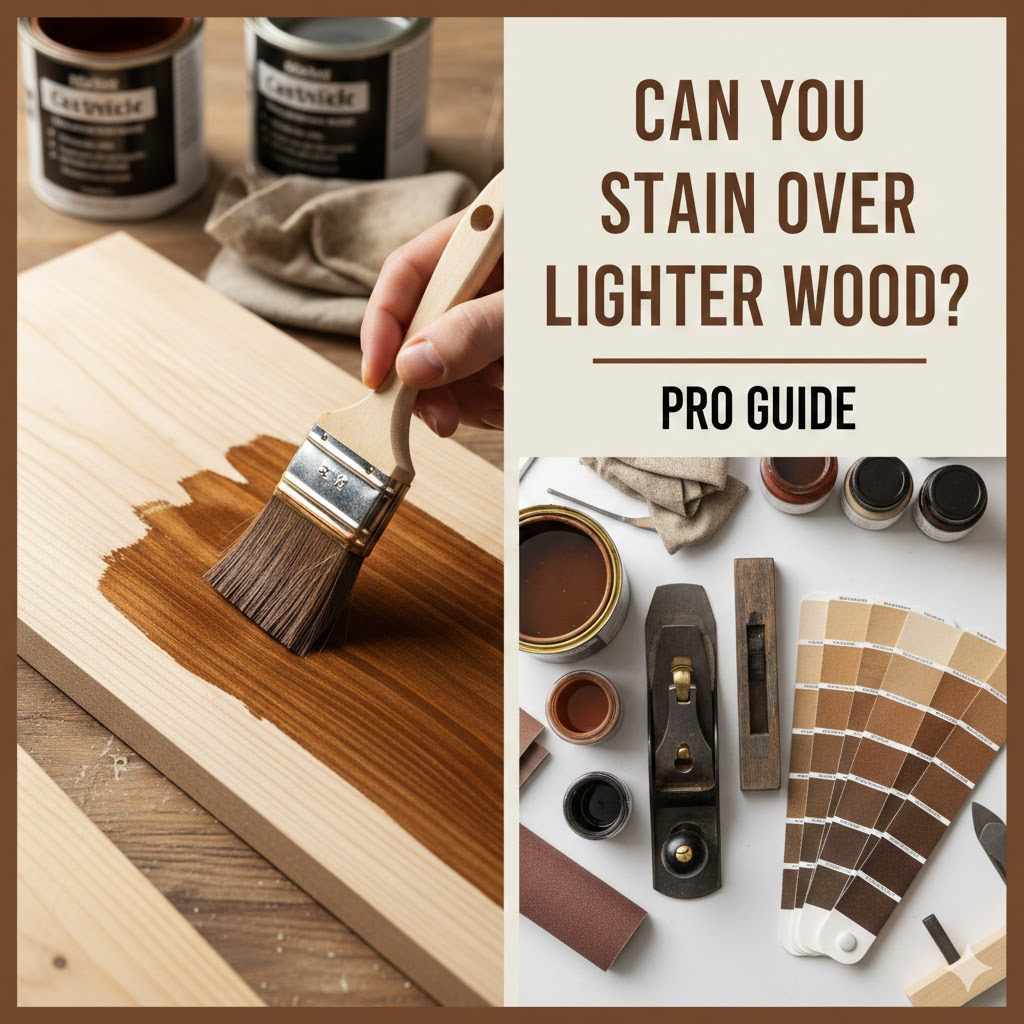
Can You Stain Over Lighter Wood Pro Guide
Many people wonder about staining lighter wood. They want to change its look but worry about messing it up. It might seem tricky to get a good finish.
This guide makes it easy. We will show you exactly how to do it step by step. You will learn the simple tricks to achieve a beautiful result.
Get ready to transform your wood projects.
Can You Stain Over Lighter Wood Pro Guide
Staining wood is a popular way to change its appearance. It can add color, depth, and protection. When you have lighter wood, the possibilities for staining are vast.
Many beginners find themselves asking, “Can you stain over lighter wood?” The answer is a resounding yes. Lighter woods are often more forgiving when it comes to staining. They readily accept new color.
This section will explore why lighter woods are great for staining and what makes the process successful. We will cover the basics of wood staining and how lighter tones behave.
The Basics of Wood Staining
Wood staining is the process of applying a coloring agent to wood. This agent penetrates the wood fibers. It changes the wood’s natural color.
Stains are different from paints. Paints sit on the surface. Stains soak in.
This allows the wood grain to show through. This gives wood a natural and rich look. Stains come in many types and colors.
You can find water-based, oil-based, and gel stains. Each has its own properties. Water-based stains clean up easily with water.
Oil-based stains offer deeper penetration. Gel stains are thicker and better for vertical surfaces.
The goal of staining is usually to enhance the wood’s natural beauty or to give it a new color. You might want to match existing furniture. Or you might want to create a specific look for a new project.
Understanding how a stain works is key to a good result. It soaks into the wood pores. The longer it sits, the darker the color can become.
Wiping off the excess stain controls the shade. This is a fundamental technique for managing stain intensity. It allows for a lot of creative control over the final appearance.
Why Lighter Wood is Ideal for Staining
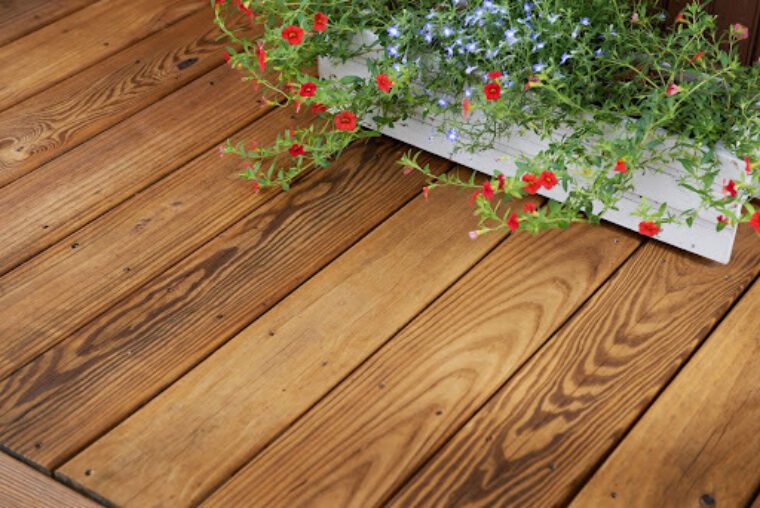
Lighter woods like pine, poplar, and birch are excellent candidates for staining. Their natural color is often pale or white. This pale base acts like a blank canvas.
It allows the stain color to show up vibrantly. Darker woods can sometimes mute stain colors. They already have a strong undertone.
Lighter woods don’t fight the stain color as much. This means you can achieve a wider range of colors. You can go from light honey tones to deep ebony.
The wood’s natural grain is also often more visible on lighter woods. This grain pattern adds character.
Another advantage is that lighter woods are generally less expensive. This makes them a great choice for practice projects. If you are new to staining, starting with a lighter wood is smart.
You can experiment with different colors and techniques. You are less likely to feel stressed about making a mistake. The wood itself is also often softer.
This can make it easier to work with and apply stain evenly. However, some softwoods like pine can have uneven grain. This can lead to blotchy staining if not prepared properly.
Proper preparation is vital for all wood types.
Common Challenges and How to Overcome Them
Even with lighter woods, challenges can arise. One common issue is blotching. This happens when the stain soaks into the wood unevenly.
Some areas become much darker than others. This is especially true with porous woods like pine. Another challenge is achieving a consistent color.
If you don’t prepare the wood correctly, you might end up with streaks or patches. These issues can be frustrating. But they are usually fixable with the right approach.
Understanding the causes helps prevent them.
Fortunately, most of these problems have simple solutions. For blotching, using a pre-stain wood conditioner is essential. This product seals the wood’s pores.
It helps the stain absorb evenly. This makes a huge difference. For consistent color, proper sanding and cleaning are key.
Always sand in the direction of the wood grain. Wipe away all dust before applying stain. Following these steps can prevent most common staining problems.
This ensures a smooth and beautiful finish for your project.
Preparing Your Lighter Wood for Stain
Proper preparation is the most critical step in staining any wood, especially lighter varieties. Skipping this phase can lead to uneven color, blotching, and a finish that doesn’t meet your expectations. Think of preparation as laying the groundwork for a beautiful outcome.
This section will detail the essential steps: cleaning, sanding, and conditioning the wood. Following these procedures will ensure that your lighter wood readily accepts the stain and showcases its natural beauty enhanced by your chosen color.
Cleaning the Wood Surface
Before you can even think about staining, the wood surface must be perfectly clean. Any dirt, grease, wax, or old finish can prevent the stain from penetrating evenly. This leads to patchy results.
For new wood, a simple dusting might be enough. If the wood has been sitting around, it might have accumulated dust or grime. You can use a tack cloth.
A tack cloth is a sticky cloth that lifts dust particles. It is much better than a dry rag. A dry rag can just push dust around.
For any old finishes or stubborn grime, you might need to use a mild cleaner. A solution of water and a little dish soap can work. Wipe the wood down with a damp cloth.
Then, immediately dry it with a clean, dry cloth. Make sure to work in the direction of the wood grain. This helps remove dirt effectively.
Let the wood dry completely before moving to the next step. Any moisture left in the wood can affect how the stain absorbs. So, patience here is a virtue.
Sanding for a Smooth Finish
Sanding is where you create the smooth surface that will receive the stain. It removes imperfections and opens up the wood grain. You need to start with a coarser grit sandpaper.
Then, you move to finer grits. For most staining projects, starting with 120-grit sandpaper is a good idea. This removes any rough spots or mill marks from the lumberyard.
Sand in the direction of the wood grain. Never sand against the grain. This can create visible scratches that will show up after staining.
After sanding with 120-grit, move to a 180-grit sandpaper. This will smooth out the marks from the coarser grit. For an even smoother finish, you can use 220-grit sandpaper as a final step.
This is especially good for woods that tend to blotch easily. The finer the sanding, the smoother the surface. After each sanding stage, it is crucial to remove all dust.
Use your tack cloth again. Lingering dust particles will get trapped in the stain. They will create a rough, bumpy texture.
Ensure the surface is completely dust-free.
Why proper sanding matters:
- Removes Imperfections: Sanding removes splinters, rough patches, and any surface defects that could affect the stain’s appearance. It ensures a clean slate for the coloring process.
- Opens Wood Pores: Sanding lightly opens up the wood’s natural pores. This allows the stain to penetrate more deeply and evenly. It leads to a richer, more consistent color.
- Creates a Smooth Surface: A smooth surface is essential for a professional-looking finish. It allows the stain to glide on evenly without catching on rough spots.
Using a Pre-Stain Wood Conditioner
For lighter woods, especially softwoods like pine or fir, a pre-stain wood conditioner is often a lifesaver. These woods have uneven densities in their grain. Some parts absorb stain much faster than others.
This causes blotching, where dark streaks appear. A wood conditioner is like a barrier. It evens out the wood’s absorbency.
It helps the stain go on uniformly across the entire surface. It is a small step that makes a massive difference.
Apply the wood conditioner according to the product’s instructions. Usually, you brush it on and let it sit for a short period, like 15-30 minutes. Then, you wipe off any excess.
Do not let it dry completely on the surface. Once the conditioner has done its job, you are ready to stain. You can apply the stain immediately.
The conditioner prepares the wood to receive the color evenly. This is crucial for achieving a professional-looking finish. It prevents the dreaded blotchy look that can ruin a project.
It is a must-have for many wood types.
When to use pre-stain conditioner:
- Softwoods: Pine, poplar, fir, and other softwoods are prone to blotching. A conditioner is highly recommended for these woods.
- Uneven Grain: If you notice that parts of your wood grain are much lighter or darker than others, a conditioner can help even things out.
- First-Time Stainers: If you’re new to staining, using a conditioner adds an extra layer of insurance against mistakes. It makes the staining process more forgiving.
Applying Stain to Lighter Wood
Now that your lighter wood is prepped and ready, it’s time for the exciting part: applying the stain. This is where your wood will begin to transform. This section will guide you through the process of applying stain effectively.
We will cover choosing the right stain, application methods, and controlling the color. Following these steps will ensure a beautiful and even coat of color that highlights the wood’s natural charm.
Choosing the Right Stain Type and Color
The type of stain you choose can affect the final look. Oil-based stains generally offer deeper penetration and richer color. They are also more durable.
Water-based stains dry faster and are easier to clean up. Gel stains are thicker and provide more control, making them great for preventing drips and blotching. They sit more on the surface but still penetrate.
For lighter woods, any of these can work well. Consider your project and your preference for application and cleanup.
Color choice is personal. With lighter wood, you have a wide palette. You can opt for natural wood tones like oak, walnut, or cherry.
These enhance the wood’s existing character. Or you can go for bolder colors like gray, blue, or even black. Test your chosen stain color on a scrap piece of the same wood.
This is very important. It shows you exactly how the stain will look. Lighting conditions can change color perception.
So, check it in the light where the finished piece will be.
Stain Types Comparison:
| Stain Type | Pros | Cons | Best For |
|---|---|---|---|
| Oil-Based | Deep penetration, rich color, durable | Longer drying time, requires mineral spirits for cleanup | Furniture, floors, items needing durability |
| Water-Based | Fast drying, easy cleanup with water, low odor | May not penetrate as deeply, can raise grain | Cabinets, shelves, general woodworking |
| Gel | Good control, minimal drips, consistent color, good for upright surfaces | Can be thicker to work with, may not penetrate as deeply as oil | Vertical surfaces, furniture with intricate details, blotch-prone woods |
Application Techniques
There are several ways to apply wood stain. The most common is using a brush or a cloth. For a natural look, a lint-free cloth is often preferred.
Pour a small amount of stain onto the cloth. Apply it to the wood in long, even strokes. Always work with the grain of the wood.
Don’t apply too much stain at once. It is easier to add more stain than to remove excess.
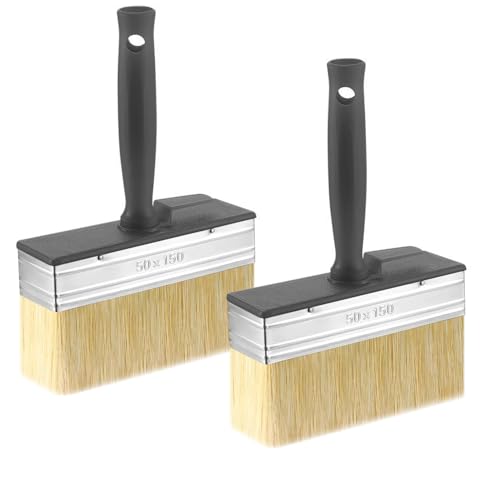
Using a foam brush or a good quality bristle brush is another option. This can give you more control, especially on larger surfaces. Apply the stain in thin, even coats.
Make sure to cover the entire surface. Work in manageable sections. This prevents the stain from drying before you can wipe it off.
For very fine detail work, a small artist’s brush might be useful. Whatever method you choose, consistency is key. Aim for even application across the entire piece.
Application Step-by-Step:
- Stir the Stain: Thoroughly stir the stain before and during use. Do not shake it, as this can create air bubbles.
- Apply Stain: Using a cloth or brush, apply the stain liberally to a small section of the wood. Work in the direction of the grain.
- Allow Penetration: Let the stain sit on the wood for the time recommended by the manufacturer. This is usually 5-15 minutes, depending on the desired color depth.
- Wipe Off Excess: Using a clean, lint-free cloth, wipe away the excess stain. Again, always wipe with the grain. This step determines the final color.
- Repeat if Necessary: For a darker color, you can apply a second coat after the first has dried.
Controlling Stain Color Depth
The amount of time you leave the stain on the wood before wiping off the excess directly impacts the final color. A shorter time results in a lighter shade. Leaving it on longer allows it to penetrate deeper and create a darker hue.
For example, if you want a light honey color on pine, you might only leave the stain on for 5 minutes. If you desire a deep walnut look, you might let it sit for 15-20 minutes.
Always test your stain on a scrap piece of wood first. This will help you determine the right amount of time for your desired color. You can also experiment with multiple thin coats.
Apply one coat, let it dry, and then apply another. This gives you more control than trying to get the perfect color in one go. Remember that each wood species absorbs stain differently.
What takes 10 minutes on pine might take 20 minutes on oak. Always refer to the stain manufacturer’s guidelines and do your tests.
Scenario: Achieving a Medium Oak Tone on Poplar
- Prepare the poplar wood by cleaning, sanding (120, 180, 220 grit), and applying a pre-stain conditioner.
- Stir the medium oak stain thoroughly.
- Apply the stain to a section of the wood using a lint-free cloth, working with the grain.
- Let the stain penetrate for approximately 10 minutes.
- Wipe off the excess stain with a clean cloth, following the wood grain.
- Observe the color. If it’s too light, wait for it to dry and apply a second coat, letting it penetrate for a shorter time (e.g., 5 minutes) before wiping.
Finishing and Protecting Stained Wood
Once you have achieved the desired color with your stain, the process isn’t quite finished. Protecting the stained wood is just as important as applying the stain itself. A good topcoat will not only shield your wood from damage but also enhance its appearance.
This section covers applying protective finishes like polyurethanes and varnishes, discussing different types, and offering tips for a flawless finish.
Types of Topcoats
There are several types of protective topcoats you can use. Polyurethane is a very popular choice. It offers excellent durability and protection against scratches, spills, and wear.
Polyurethane comes in water-based and oil-based formulas. Water-based polyurethanes dry clear and have low odor. They are great for lighter woods because they won’t yellow over time.
Oil-based polyurethanes offer a slightly warmer, amber tone. They are also very durable but can yellow over time, which might complement some stains.
Varnish is another option. It is also very durable and water-resistant. Like polyurethane, it comes in different formulations.
Lacquer is another finish that dries very quickly. It is often used by professionals. However, it can be more challenging for beginners to work with.
Shellac is a natural finish that dries very fast. It can be used as a sealer or a topcoat. It is also good for sealing knots in wood.
The best choice depends on your project and the level of protection needed.
Topcoat Properties:
- Durability: How well the finish resists scratches, dents, and wear. Polyurethane and varnish are generally very durable.
- Water Resistance: How well the finish protects against moisture and spills. Most topcoats offer good water resistance.
- UV Protection: Some finishes contain UV inhibitors to prevent fading from sunlight. This is important for items exposed to direct light.
- Appearance: Finishes can be clear, tinted, or have different sheens (matte, satin, gloss).
Applying the Topcoat
Applying the topcoat is similar to applying stain, but with a few key differences. First, ensure your stained wood is completely dry. This can take 24-48 hours, depending on the stain and humidity.
Always work in a well-ventilated area. Use a high-quality brush, foam applicator, or sprayer. For brushes, synthetic bristles are best for water-based finishes, while natural bristles are good for oil-based ones.
Apply thin, even coats of the topcoat. Avoid applying too much at once, as this can lead to drips and an uneven finish. Brush in the direction of the wood grain.
After applying a coat, let it dry completely according to the manufacturer’s instructions. Then, lightly sand the surface with very fine-grit sandpaper (220-320 grit). This is called scuff sanding.
It helps the next coat adhere better. Wipe away all dust with a tack cloth before applying the next coat.
Tips for Applying Topcoats:
- Work in Thin Coats: Multiple thin coats are better than one thick coat. This ensures even drying and a smoother finish.
- Scuff Sand Between Coats: Lightly sanding between coats creates a better bond for subsequent layers.
- Use a Tack Cloth: Always remove dust after sanding before applying the next coat.
- Avoid Over-Brushing: Try to apply the finish in smooth, consistent strokes to minimize brush marks.
Achieving a Professional Finish
A professional finish requires patience and attention to detail. The key is multiple thin coats of finish, with light sanding between each. Each coat adds a layer of protection and builds up a smooth surface.
For example, applying three coats of polyurethane is standard for many projects. Each coat should be allowed to dry fully. Then, scuff sanded and wiped clean before the next is applied.
The final coat should not be sanded unless you are aiming for a matte or satin look. If you want a high-gloss finish, the last coat should be applied carefully. Avoid disturbing it while it dries.
Proper drying conditions are important too. Avoid areas with high dust or humidity. A clean environment is crucial for a flawless outcome.
Remember that practice makes perfect. Each project will help you refine your technique.
Real-Life Example: Refinishing a Pine Tabletop
Sarah wanted to update her old pine dining table. The wood was light and had some scratches. She followed these steps: she cleaned the table, sanded it thoroughly with 120, 180, and 220-grit sandpaper, and applied a pre-stain wood conditioner.
Then, she stained it with a medium walnut gel stain. After letting it penetrate for 15 minutes, she wiped off the excess. For protection, she applied four thin coats of water-based polyurethane, scuff sanding and cleaning between each coat.
The result was a beautifully transformed table with a rich, even color and a durable finish.
Common Staining Mistakes and How to Fix Them
Even with the best intentions, mistakes can happen when staining wood. Fortunately, most common issues can be fixed or at least improved. This section will address common errors like blotching, streaking, and inconsistent color.
We will provide practical advice on how to correct them. Knowing how to troubleshoot will give you confidence. It ensures you can rescue your project if something goes wrong.
Fixing Blotchy Staining
Blotching is perhaps the most common problem when staining porous woods. It looks like dark, uneven patches. If you notice blotching after applying the stain, don’t panic.
The best fix is to lighten the affected areas. You can try using a wood bleach. This will lighten the wood itself.
After bleaching, you will need to re-stain. This time, consider using a pre-stain conditioner on those spots.
Another method is to use a glaze. A glaze is a tinted finish that sits on the surface. You can mix a glaze with a color close to your stain.
Apply it over the blotchy areas and wipe it back. This can help blend the dark spots. Sometimes, simply applying another coat of stain over the entire piece can help.
This can even out the color. But be careful not to make it too dark. Always test any fix on an inconspicuous area first.
Correcting Streaks and Uneven Color
Streaks and uneven color can occur if the stain wasn’t applied evenly or if the wood wasn’t prepared properly. If the streaks are light, you might be able to fix them by applying another thin coat of stain. Focus on the areas that are too light.
Feather it out into the surrounding areas.
For darker streaks or patches, you might need to remove some of the stain. A solvent such as mineral spirits (for oil-based stains) or denatured alcohol (for water-based stains) can help. Apply the solvent to a cloth and gently rub the affected area.
This can lift some of the stain. You may need to repeat this process. After fixing, you will likely need to reapply stain to blend the area.
This requires careful work. Patience is key to achieving a uniform color.
When to Start Over
Sometimes, a project might be too far gone to fix easily. If the stain is very dark and uneven, or if you’ve made several attempts to fix it without success, it might be time to consider starting over. The good news is that you can often remove old stain.
For oil-based stains, you can use a chemical stripper. For water-based stains, sanding is usually the best option.
Sanding off old stain can be labor-intensive. Start with a coarser grit sandpaper (e.g., 80-grit) to remove the bulk of the stain. Then, move to finer grits (120, 180, 220) to smooth the wood again.
Once you have removed all traces of the old stain and smoothed the surface, you can reapply the stain. This time, be extra careful with your preparation steps. A fresh start can lead to a much better outcome.

Frequently Asked Questions
Question: Can I stain over a previously stained lighter wood?
Answer: Yes, you can stain over previously stained wood, but proper preparation is key. You will likely need to sand off the old finish or use a chemical stripper to expose fresh wood before applying new stain. If the old stain is very light and you are applying a darker stain, a thorough sanding might be enough.
Question: Will stain look different on different types of light wood?
Answer: Absolutely. Even though the wood is light, species like pine, poplar, and birch have different grain patterns and densities. This means they will absorb and display stain colors slightly differently, resulting in unique looks for each wood type.
Question: How do I prevent dark spots when staining light wood?
Answer: The best way to prevent dark spots, or blotching, is to use a pre-stain wood conditioner. This product evens out the wood’s absorbency, allowing the stain to penetrate more uniformly across the surface.
Question: Can I use a wood dye instead of stain on light wood?
Answer: Yes, you can. Wood dyes penetrate the wood more deeply than stains and often provide more vibrant colors. They are also an excellent option for lighter woods.
Like stains, they often benefit from a pre-stain conditioner.
Question: How many coats of stain can I apply to lighter wood?
Answer: You can apply multiple coats of stain to achieve a darker color. Allow each coat to dry for at least 4-6 hours, or as recommended by the manufacturer, before applying the next. Wiping off excess stain after each application controls the depth.
Summary
Yes, you can stain over lighter wood, and it’s often an ideal scenario for beautiful results. Proper preparation, including cleaning and sanding, is crucial. Using a pre-stain conditioner helps prevent blotching, especially on softer woods.
Choosing the right stain type and color, applying it evenly, and controlling the depth by wiping off excess are key steps. Protecting your work with a quality topcoat ensures longevity. Don’t fear mistakes; most can be fixed.