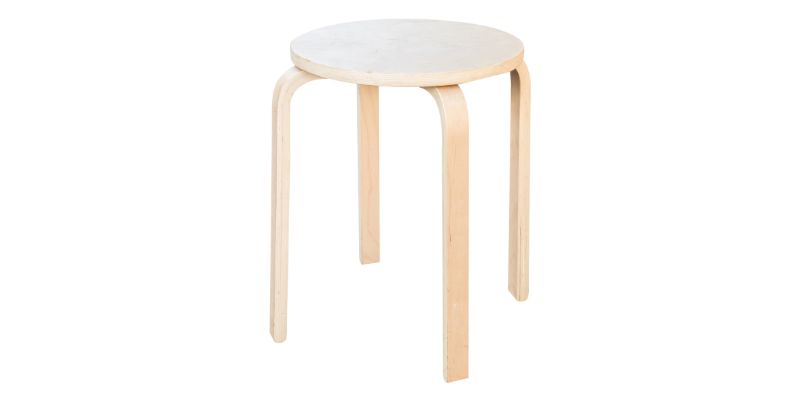
DIY Wooden Stool: 4 Steps to Build Your Own Today
A DIY wooden stool comes together in 4 steps: measure and cut the wood, assemble the legs and seat with glue and screws, then sand the surfaces smooth, choosing oak or maple over softwood for lasting durability. Skip clamping the glued joints and the stool wobbles under regular weight. This guide covers the full step-by-step build, wood selection tips, and the tools a first-time builder needs.
Creative Ideas For Your DIY Wooden Stool Project
Discover the charm and practicality of creating your own DIY wooden stool. This project not only enhances your woodworking skills but also adds a personalized touch to your home decor. By sourcing the right materials and following simple construction techniques, you can craft a sturdy and stylish stool that fits your space perfectly. From choosing the best wood to finishing touches, this guide provides everything needed to embark on your DIY wooden stool journey, ensuring a rewarding and enjoyable experience.
2. Types of Wooden Stools
Distinction between bar stools, kitchen stools, and decorative stools. Breakdown of design styles: modern, rustic, and traditional.
Wooden stools come in many styles, each with a unique purpose. Here are some common types:
- Bar stools: These are taller stools, perfect for high tables or bars. They often have a modern design.
- Kitchen stools: Shorter than bar stools, these fit nicely under kitchen counters. They can be rustic or traditional.
- Decorative stools: These mainly serve as accents in a room and can have various artistic designs.
Design styles play a huge role too:
- Modern: Features sleek lines and minimalist design.
- Rustic: Emphasizes natural wood and rugged charm.
- Traditional: Classic shapes with rich details and finishes.
Choosing the right stool adds character and function to any space.
Best DIY Wooden Stool Kit Pick
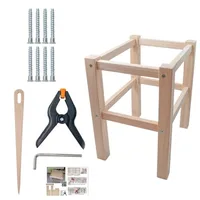
DIY Wood Stool Frame Kit – $60.07
A pre-cut, beginner-friendly frame that skips the measuring and cutting steps this guide walks through, so you can go straight to assembly with glue and screws.
- Best for: First-time builders who want to skip cutting
- Why we picked it: Pre-cut pieces match the 4-step build process in this guide
- Main drawback: Less customizable than cutting your own boards
Compare more stool-building essentials
 Option 1 Titebond III Wood Glue – $9.58
|
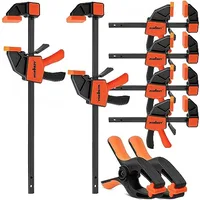 Option 2 HORUSDY Bar Clamps 8-Pack – $34.99
|
 Option 3 Sandpaper Assortment Pack – $14.99
|
As an Amazon Associate we earn from qualifying purchases.
3. Step-by-Step Guide to Building a Wooden Stool
Detailed list of required tools and materials. Step 1: Measuring and planning your design. Step 2: Cutting the wood accurately. Step 3: Assembling the stool structure. Step 4: Sanding and finishing touches.
Begin your project with the right tools and materials. You will need:
- Wood planks (for seat and legs)
- Saw (to cut the wood)
- Measuring tape and square
- Sandpaper (for smooth surfaces)
- Wood glue and screws (for assembly)
Start by measuring and planning your stool’s design. Next, cut the wood accurately, following your measurements.
After that, assemble the stool structure using wood glue and screws. Finally, sand the surfaces to remove rough edges and add finishing touches. Your DIY wooden stool will be ready to use!
4. Essential Tips for Choosing the Right Wood
Best types of wood for durability and aesthetic appeal. Factors to consider: weight capacity, weather resistance, and cost.
Choosing the right wood is crucial for a sturdy and appealing DIY stool. Here are four tips to guide you:
- Weight capacity: Ensure the wood can support the intended load.
- Weather resistance: For outdoor use, select woods like cedar or redwood that withstand moisture.
- Durability: Hardwoods like oak or maple last longer than softwoods.
- Cost: Balance quality and budget to find the best option for your project.
5. Safety Precautions While DIYing
Importance of protective gear. Guidelines for safe tool usage.
Staying safe while working on a DIY project is very important. Always wear protective gear like gloves and safety glasses. They help keep you safe from injuries. It’s also essential to use tools properly:
- Read instructions before using any tool.
- Keep your workspace clean to avoid accidents.
- Check tools regularly to make sure they work well.
- Use the right tool for the job to avoid mistakes.
- Ask for help if you are unsure about something.
By following these steps, you can enjoy your DIY wooden stool project safely.
6. Customization Ideas for Your Wooden Stool
Staining and painting techniques. Upholstery options for added comfort.
Transform your wooden stool with these exciting ideas.
- Staining adds depth and richness. Choose dark or light stains to match your room.
- Painting allows for creativity. Bright colors can make the stool a focal point.
- Upholstery can enhance comfort. Use soft fabric for a cozy feel.
- Consider patterns to add fun and style.
- Find durable materials for long-lasting use.
Personalizing your stool makes it unique and appealing!
7. Common Mistakes to Avoid
Frequently overlooked steps in the building process. Tips for troubleshooting and problemsolving.
Building a DIY wooden stool can be fun, but mistakes can turn it into a comedy show! First, don’t forget to measure twice before cutting. It’s like trying to fit a big slice of cake into a tiny plate.
Next, use the right type of wood glue; not all glues have superpowers. Check alignment often; a tilted stool might give you a wobbly seating experience, like a dance party gone wrong.
| Mistake | Tip |
|---|---|
| Skipping sandpaper | For a smooth finish, don’t skip this step! |
| Neglecting to pre-drill | Prevent wood from splitting like splitting a banana! |
| Ignoring weight limits | Remember, only a certain number of friends can sit on it! |
Lastly, don’t be afraid to ask for help. Even the best builders need a sidekick sometimes, just like Batman!
Happy building!
8. Where to Find Inspiration for Your DIY Project
Recommended websites, books, and social media platforms. How to gather ideas from your surroundings and nature.
Finding ideas for your DIY project can be fun and easy! Here are some great places to explore:
- Websites: Check out platforms like Pinterest and Etsy for creative designs.
- Books: Search your local library for DIY books full of exciting projects.
- Social Media: Follow DIY pages on Instagram or Facebook to see what others are making.
Don’t forget to look around your home and outside. Everyday items or nature can spark your creativity. A fallen branch or an old chair can inspire unique designs!
9. Final Thoughts: Embracing Your DIY Journey
Encouragement to share finished projects. Building a community around DIY woodworking.
Completing your DIY wooden stool is like earning your badge in woodworking! Share your masterpiece with friends and family. Trust me, their jealous comments will feel like warm hugs.
🌟 Building a community is crucial. Join online groups or local workshops. You’ll find support, tips, and plenty of funny stories! Remember, we’re all learning together and laughing along the way.
| Why Share? | Benefit |
|---|---|
| Feedback | Get tips to improve |
| Support | Find friends who share your passion |
Your journey doesn’t end here. Keep creating and laughing!
The more, the merrier—just like a party where everyone’s invited!
Conclusion
In conclusion, crafting your own DIY wooden stool not only enhances your woodworking skills but also allows you to create a unique piece that perfectly fits your space. With simple materials and a bit of creativity, you can enjoy the satisfaction of a personalized project while adding functionality and style to your home. Embrace the art of DIY and start building today!
FAQs
Sure! Here Are Five Related Questions On The Topic Of Diy Wooden Stools:
1. What materials do I need to build a DIY wooden stool? 2. How do I select the right type of wood for my project? 3. Can you provide simple step-by-step instructions for constructing a wooden stool? 4. What finishing techniques can I use to enhance the appearance of my stool? 5. Are there any safety tips I should consider while working on this DIY project?
Sure! Please provide the question you’d like me to answer.
What Materials Do I Need To Build A Basic Wooden Stool?
To build a basic wooden stool, you will need wood boards for the seat and legs, typically made from pine or plywood. You’ll also need wood screws or dowels for assembly, sandpaper for smoothing surfaces, and wood glue for added strength. Additionally, a wood finish or paint can be used for aesthetics and protection. Basic tools like a saw, drill, and measuring tape are essential for construction.
What Are The Essential Tools Required For Constructing A Diy Wooden Stool?
To construct a DIY wooden stool, you will need a few essential tools: a hand saw (or power saw) for cutting the wood, a drill for making holes and securing joints with screws, and a measuring tape for precise measurements. Additionally, sandpaper is important for smoothing the edges and surfaces of the wood. A square helps ensure that your angles are accurate, while a wood glue can provide extra stability. Lastly, clamps are useful for holding pieces together while the glue dries or while fastening them.
How Do I Choose The Right Type Of Wood For My Stool Project?
To choose the right type of wood for your stool project, consider the intended use and desired aesthetic. Hardwoods like oak or maple are durable and suitable for heavy use, while softer woods like pine are more affordable and easier to work with, but may not withstand as much wear. Additionally, factor in the wood’s grain pattern and color to match your design preferences. Lastly, ensure the wood is properly dried and treated to prevent warping or damage over time.
What Design Considerations Should I Keep In Mind For Stability And Comfort When Building A Wooden Stool?
When designing a wooden stool, prioritize a wide base to enhance stability and prevent tipping. Ensure the seat height is appropriate for the intended use, typically 16-18 inches for standard seating, and incorporate a contoured seat shape for added comfort. Select durable, high-quality wood and consider reinforcing joints with dowels or screws for longevity. Additionally, finish the wood with smooth edges to avoid splinters and enhance the overall comfort during use.
Are There Any Safety Tips I Should Follow While Working With Wood And Power Tools During The Diy Project?
Yes, there are several safety tips to follow when working with wood and power tools. Always wear personal protective equipment, such as safety glasses, gloves, and ear protection, to safeguard against injuries. Ensure that your work area is clean and well-lit, and keep cords and tools organized to prevent tripping hazards. Finally, familiarize yourself with the tools’ instructions and safety features, and never operate tools while distracted or fatigued.
Sponsored / affiliate links. As an Amazon Associate I earn from qualifying purchases. I may earn additional commission from eligible campaigns.