How Long to Wait Before Removing Painter’s Tape
When you finish painting a room, the next step is often pulling off that blue or green tape. But there’s a little trick to it. Knowing How Long to Wait Before Removing Painter’s Tape can make all the difference between crisp, clean lines and ripped paint.
Many beginners wonder if they should wait until the paint is totally dry or pull it off right away. It sounds simple, but getting it wrong can lead to frustrating touch-ups. Don’t worry, this guide will walk you through it step-by-step.
The Best Time to Remove Painter’s Tape
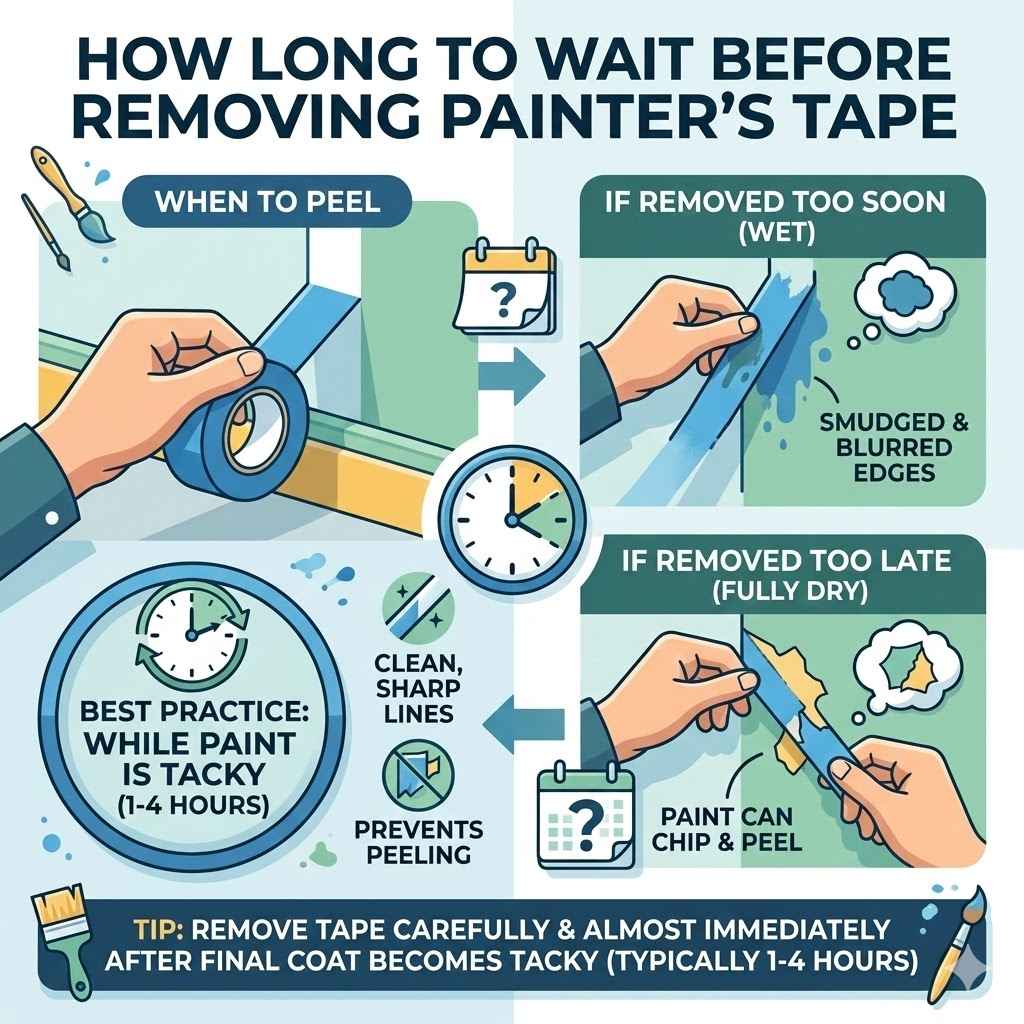
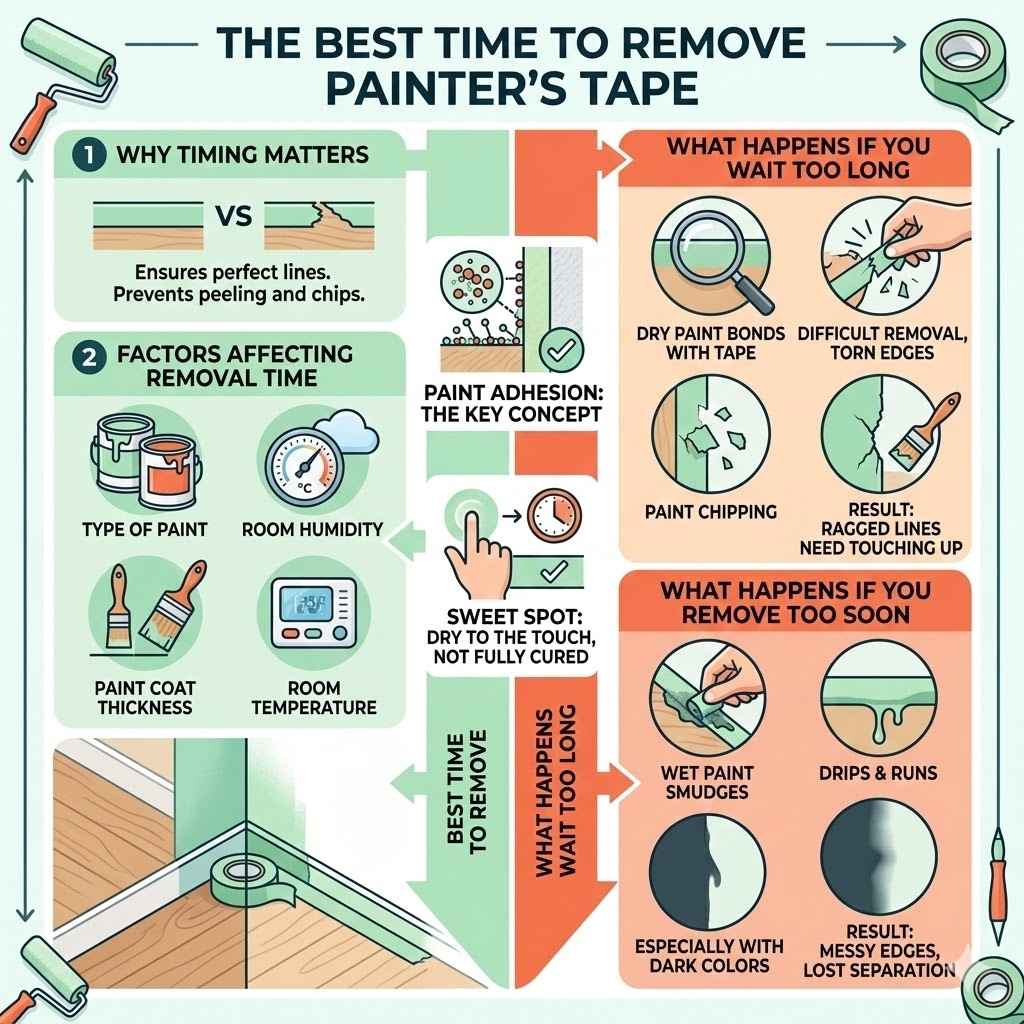
Understanding when to pull painter’s tape is a key part of getting a professional-looking paint job. If you wait too long, the paint can dry onto the tape, leading to it peeling away your new paint. If you pull it off too soon, the wet paint can smudge or run, creating messy edges. This is why timing is so important for those perfect lines.
Why Timing Matters for Tape Removal
The main reason timing is critical is paint adhesion. Painter’s tape is designed to stick to surfaces while you paint. However, it’s not meant to be a permanent part of your wall. Once the paint is applied, you create a new layer on top of your original surface. If this new paint layer is still wet when you remove the tape, it hasn’t set enough to resist being pulled away. This can cause the paint to lift from the wall or, worse, pull off chunks of the new paint with the tape. On the flip side, if the paint dries completely hard, it can bond with the adhesive of the tape. This makes removal very difficult and can result in torn edges or paint chipping. The sweet spot is when the paint is dry to the touch but not fully cured. This allows the paint to hold its shape without being so sticky that it adheres to the tape.
Factors Affecting Tape Removal Time
Several things can influence how long you should wait. The type of paint you use plays a big role. Latex-based paints, which are common for interior walls, usually dry to the touch faster than oil-based paints. The humidity in your room also makes a difference. In a humid environment, paint takes longer to dry.
Conversely, dry air helps paint cure more quickly. The thickness of the paint coat is another factor. A thin coat will dry much faster than a thick one. Even the temperature of the room can affect drying times. Warmer temperatures generally speed up drying. So, it’s not just about looking at the clock; it’s about observing the paint.
What Happens If You Wait Too Long
Waiting too long to remove painter’s tape is a common mistake. When paint dries completely, it can become like a second skin on your wall. The adhesive on the tape can actually bond with this dry paint. Trying to peel off the tape then becomes a battle. You might find the tape is very stiff and hard to get a clean edge with.
Often, it will start to rip, leaving small pieces stuck to the wall. Even if you manage to peel it off in one piece, the dry paint along the edge of the tape might crack or chip. This happens because the tape’s adhesive is stronger than the bond of the dried paint to the wall. This leaves you with ragged lines that need touching up. You’ll likely have to use a small brush to carefully re-paint along the edge, which is time-consuming and can sometimes still look imperfect.
What Happens If You Remove Tape Too Soon
Removing painter’s tape when the paint is still very wet is another common pitfall. If the paint is still liquid, it has no structure. As you pull the tape, the wet paint can smear or smudge along the edge. It can also create a sort of bead or drip of paint that sits on top of the tape line, looking messy. In some cases, the weight of the wet paint can actually cause it to run down the wall, creating drips below your taped line.
This is especially problematic if you are painting a darker color over a lighter one, as the wet paint can easily blend and ruin the clean separation you were aiming for. The goal is for the paint to be dry enough to hold its shape, not so wet that it flows.
Signs Your Paint Is Ready for Tape Removal
Knowing the signs that indicate the perfect time to remove your painter’s tape is a skill that comes with practice. You don’t need special tools; just your eyes and a gentle touch are enough. Look for changes in the paint’s surface and texture. A simple touch test is often the most effective method.
The Touch Test Explained
The touch test is the most reliable way to know if your paint is ready. Gently touch a small, inconspicuous area of the painted surface near the edge of the tape. Use the side of your finger rather than the tip. If the paint comes off on your finger or feels sticky, it’s too wet. You need to wait longer.
If the paint feels firm and doesn’t transfer to your finger, it’s likely in the right stage. It should feel dry to the touch, almost like a hard shell has formed. This means the surface has dried sufficiently to prevent smudging or running when the tape is pulled. However, it’s not so fully cured that it will bond with the tape’s adhesive.
Visual Cues to Look For
Besides the touch test, there are visual cues you can observe. When paint is drying, its sheen often changes. A wet paint finish might look glossy or wet. As it dries, it will start to look more matte or dull, depending on the paint’s finish (e.g., eggshell, satin, semi-gloss). If you notice that the paint looks uniformly dry across the surface and has lost its wet appearance, it’s a good sign. Also, check the edges where the paint meets the tape. If the paint looks settled and not pooled or drippy, it’s a positive indicator. If you see any areas that still look wet or shiny, wait a bit longer in those spots.
Understanding Paint Drying Stages
Paint has different stages of drying. The first stage is “dry to the touch.” This is usually achieved within an hour or two for latex paints. At this stage, the surface feels dry, but the paint underneath is still soft. This is the ideal time for tape removal. The next stage is “hard dry.” This can take several hours. The paint is firm to the touch, and most of the solvents have evaporated. The final stage is “fully cured.” This can take days or even weeks.
At this point, the paint has reached its maximum hardness and durability. For painter’s tape, you want to catch it between “dry to the touch” and “hard dry.” This is why waiting too long can be problematic, as you might enter the “hard dry” or even “fully cured” stages where adhesion to tape becomes an issue.
The Ideal Window for Tape Removal
There’s a sweet spot for pulling off painter’s tape that ensures clean lines. This window isn’t a fixed time but rather depends on several conditions. Knowing what to look for helps you master this technique.
The 24-Hour Rule Is Not Always Best
Many people think waiting 24 hours is a safe bet for removing painter’s tape. However, this is often too long. If you wait a full day, especially with latex paints, the paint will have likely hardened significantly. As discussed, this can lead to paint lifting or tearing when you remove the tape. While it might be acceptable for some very specific situations or certain paint types, the 24-hour rule is generally not the optimal approach for achieving crisp, clean paint lines.
For most common interior latex paints, this wait time allows for too much bonding between the paint and the tape’s adhesive. It’s better to check the paint’s readiness through touch tests.
When to Pull the Tape After Painting
The most common advice is to remove the painter’s tape while the paint is still slightly wet. This typically means within an hour or two after you finish painting the final coat. For latex or acrylic paints, which are most common for walls, this often means removing the tape while the paint is dry to the touch but not fully hardened. This is the golden window. You want the paint to have set enough that it won’t run or smudge when pulled.
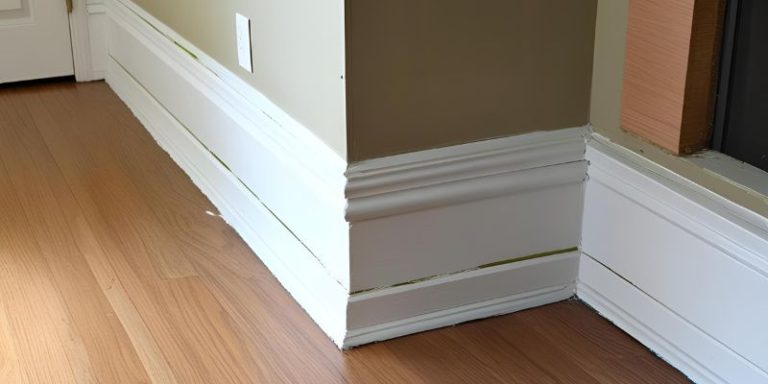
If you’re painting trim and walls, you might paint the trim first, let it dry, then mask it off. For wall edges, when painting the main wall color, you’ll remove the tape soon after finishing that wall section.
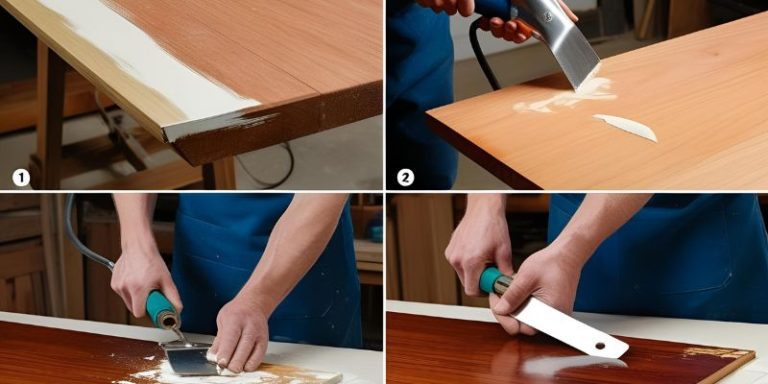
The Technique for Clean Tape Removal
Removing the tape properly is as important as the timing. Start by finding an loose edge on the tape. If you can’t find one easily, use a utility knife to gently score the very edge of the paint line where the tape meets the wall. Be careful not to cut too deep into the wall itself. Once you have a starting point, pull the tape slowly and at a 45-degree angle away from the painted surface. Keep the tape taut as you pull.
This gradual, angled pull helps prevent the tape from snagging on the drying paint and creates a cleaner break. If you see any paint starting to lift or tear, stop pulling and adjust your angle or speed. Sometimes, a second person can help by holding a steady tension on the tape as you pull.
Dealing with Potential Paint Bleed
Even when you get the timing and technique right, sometimes a little paint bleed can happen. This is when paint seeps under the tape. It often occurs if the tape wasn’t pressed down firmly enough, or if there’s a gap in the paint surface the tape is adhering to. If you notice small bleeds after removing the tape, don’t panic. A small artist’s brush or a fine-tipped detail brush can be used to carefully touch up these areas.
Use the original wall color to paint over the bleed spot. For the line between two different paint colors, you might need to use a very fine brush to carefully paint the correct color into the bleed spot to create a sharp edge. This touch-up work is much easier than dealing with large smudges or ripped paint.
How Long to Wait with Different Paint Types
The type of paint you use significantly impacts drying times. Understanding these differences helps you time your tape removal perfectly.
Latex and Acrylic Paints
Latex and acrylic paints are water-based and generally dry quite fast. This makes them popular for DIY projects. For these paints, the ideal time to remove painter’s tape is usually within 1 to 2 hours after the last coat is applied. The paint should be dry to the touch. This means it won’t transfer to your finger, but it might still feel slightly soft underneath. This is the sweet spot. The paint has enough integrity to hold its line, but it’s not so hard that it will bond strongly with the tape’s adhesive.
Waiting too long, say 12-24 hours, can lead to issues where the paint pulls away with the tape. Some manufacturers might suggest slightly different times, so always check the paint can for specific recommendations if available.
Oil-Based Paints
Oil-based paints, also known as alkyd paints, dry much slower than latex or acrylic paints. They require mineral spirits or paint thinner for cleanup. Because they dry more slowly, the window for removing painter’s tape is also longer. You might need to wait several hours, potentially 8 to 12 hours, before removing the tape. For oil-based paints, it’s often best to wait until the paint is firm to the touch and has lost its wet sheen.
It should feel hardened, but before it becomes extremely brittle or fully cured. Even then, be sure to use the slow, angled removal technique. The slower drying nature means there’s a greater risk of smudging if removed too soon, but also a risk of the paint bonding to the tape if left for days.
Specialty Paints and Finishes
Some specialty paints or finishes have unique drying properties. For example, chalk paint might have a different texture and drying requirement. Metallic paints or those with fine glitters might need careful handling. If you are using a paint with a distinct texture, like a textured finish or a high-gloss lacquer, it’s crucial to consult the manufacturer’s instructions. These paints can have specific recommendations for when to apply or remove masking materials. For most specialty paints, it’s wise to perform a small test in an inconspicuous area to gauge drying times and tape adhesion before committing to a large area. The general rule of thumb for specialty paints is to always follow the product guidelines.
Primer and Sealant Application
If you are painting over a primer or a sealant, the same principles apply. Primers are designed to create a good surface for paint, and they also need time to dry. Most latex-based primers will be dry to the touch within an hour or two. You can usually remove painter’s tape soon after the primer is dry to the touch, following the same methods.
Sealants, especially clear ones, can vary widely. Some sealants dry very quickly, while others might need a longer curing period. Again, check the product label for specific drying times. If a sealant is still tacky or soft, removing tape could lift the sealant or leave a sticky residue.
Tips for Flawless Tape Removal
Getting perfect paint lines isn’t just about how long you wait; it’s also about the little tricks that make the process easier and more effective. These tips can help you avoid common frustrations.
Prepare the Tape Properly
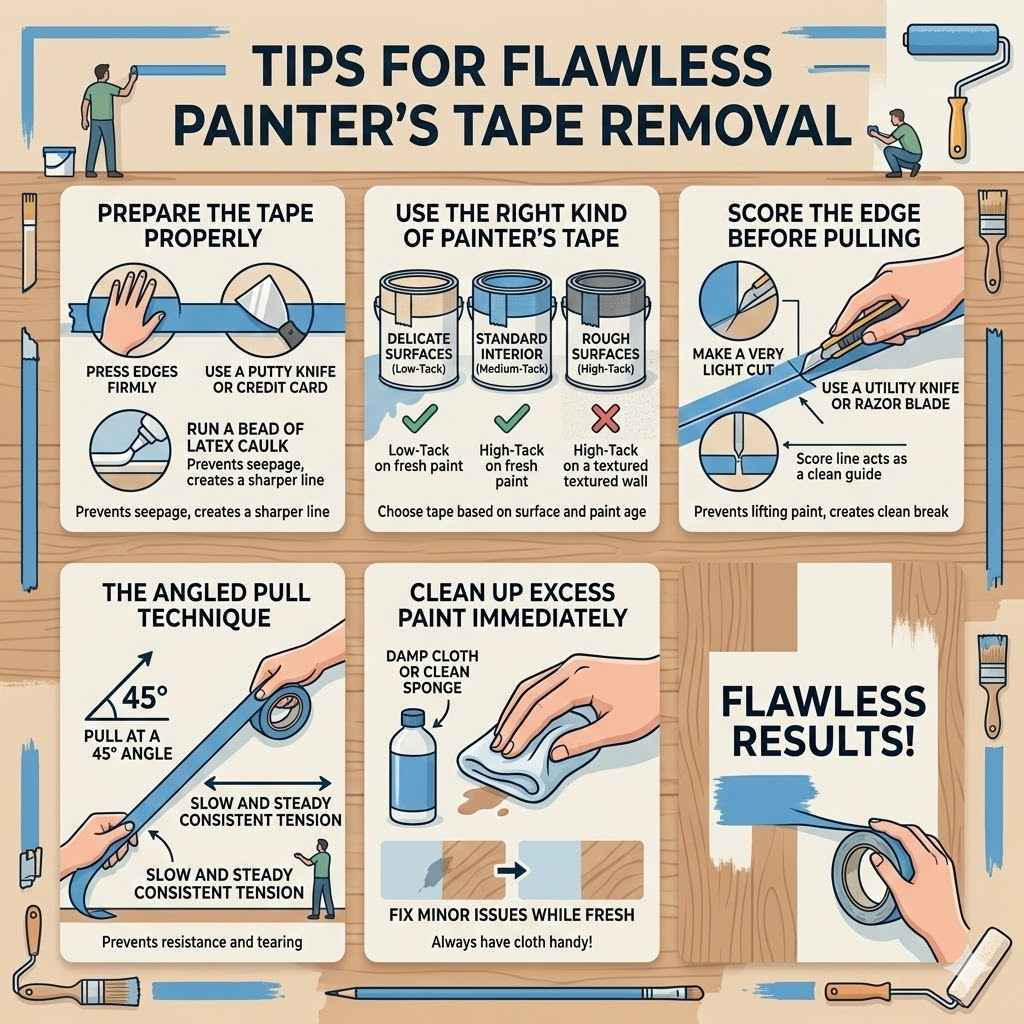
Before you even start painting, make sure your painter’s tape is applied correctly. Press down the edges firmly with a putty knife or a credit card. This creates a seal that prevents paint from seeping underneath. Some painters recommend running a bead of latex caulk along the edge of the tape before painting, especially when painting a darker color next to a lighter one, or where you want an extremely sharp line. Once the caulk is dry, you can paint over it and the tape. When it’s time to remove the tape, the caulk line acts as a barrier. This technique is especially useful for demanding projects.
Use the Right Kind of Painter’s Tape
There are different types of painter’s tape. For delicate surfaces or freshly painted walls, use a low-tack tape. For standard interior painting, a medium-tack tape is usually sufficient. High-tack tape is designed for rough surfaces or long-term masking. Using the wrong type of tape can lead to problems. Low-tack tape might not seal well enough on textured walls. High-tack tape can be too aggressive and pull off paint, even if it’s dry. Always choose painter’s tape based on the surface you are painting and the age of the existing paint. Most brands offer specific tapes for different applications.
Score the Edge Before Pulling
As mentioned before, scoring the edge of the paint line can be a lifesaver. Use a sharp utility knife or a razor blade. Make a very light cut along the line where the tape meets the paint. You’re not trying to cut into the wall, just to create a clean break in the paint film. This score line acts as a guide for the tape to peel away from cleanly, preventing the paint from lifting with the tape. Be careful and steady when scoring. A slight angle with the blade can help achieve a smoother cut. This step is particularly useful if you suspect the paint might be sticking to the tape more than usual.
The Angled Pull Technique
Always pull the tape at an angle. A 45-degree angle is generally recommended. This helps the tape peel away smoothly, rather than pulling straight off the wall, which can create more resistance and risk tearing. Keep the tension on the tape consistent. If you’re working on a long section, it can be helpful to have someone else assist by pulling the tape steadily from the other end. This way, you control the peeling angle and speed without the tape getting snagged or pulled unevenly. Slow and steady wins the race here for achieving the best results.
Clean Up Excess Paint Immediately
If you notice any small mistakes, like a tiny bit of paint bleed, address them right away. It’s much easier to fix minor issues when the paint is still fresh or slightly wet. A damp cloth or a clean sponge can often wipe away small smudges before they dry. For slightly dried paint, a damp cloth might still work, but you risk smearing. Always have a clean, damp cloth or paper towel handy when you’re removing painter’s tape. This allows for immediate correction of small imperfections, saving you from having to do more extensive touch-up work later.
Frequently Asked Questions
Question: Can I leave painter’s tape on for more than 24 hours
Answer: Generally, it is not recommended to leave painter’s tape on for more than 24 hours, especially with latex paints, as the paint can fully dry and bond to the tape, causing it to peel away your new paint when removed.
Question: What is the best way to remove painter’s tape from delicate surfaces
Answer: For delicate surfaces, use a low-tack painter’s tape and try to remove it while the paint is still slightly wet. Pull it slowly at a 45-degree angle to minimize the risk of damage.
Question: Will humidity affect when I can remove painter’s tape
Answer: Yes, high humidity will slow down the drying process, meaning you’ll need to wait longer before removing the tape. Conversely, dry air speeds up drying.
Question: How do I fix paint that bled under the tape
Answer: If paint bled under the tape, wait for the paint to dry, then use a small artist’s brush to carefully paint over the bleed spot with the correct color to create a clean line.
Question: Is it okay to use masking tape instead of painter’s tape
Answer: It’s best to use painter’s tape. Standard masking tape has a stronger adhesive and can often pull off paint, especially when it’s not fully cured.
Summary
Knowing How Long to Wait Before Removing Painter’s Tape is key for crisp paint lines. Aim for when paint is dry to the touch but not fully hard. This is typically within one to two hours for latex paints.
Slow, angled removal and proper tape preparation prevent paint lifting and smudging. Address small mistakes immediately for best results.