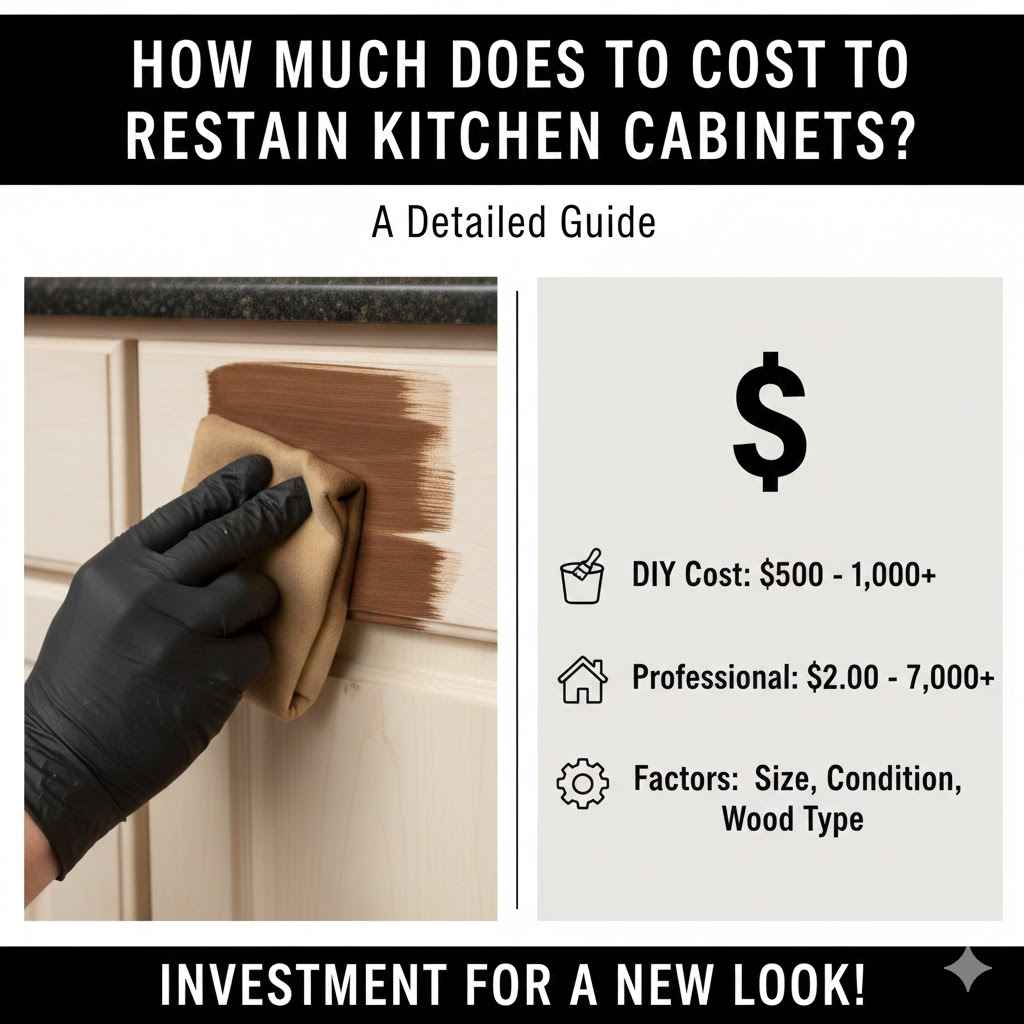
How Much Does It Cost to Restain Kitchen Cabinets? A Detailed Guide
Figuring out How Much Does It Cost to Restain Kitchen Cabinets? can feel tricky, especially if you’re new to home improvement projects. You’ll find lots of different numbers online, making it hard to know where to start. Don’t worry, this guide will help. We’ll break down everything you need to know in a clear, easy-to-follow way. Get ready to explore the factors that impact your costs and the steps involved.
The Essentials of Restaining Kitchen Cabinets
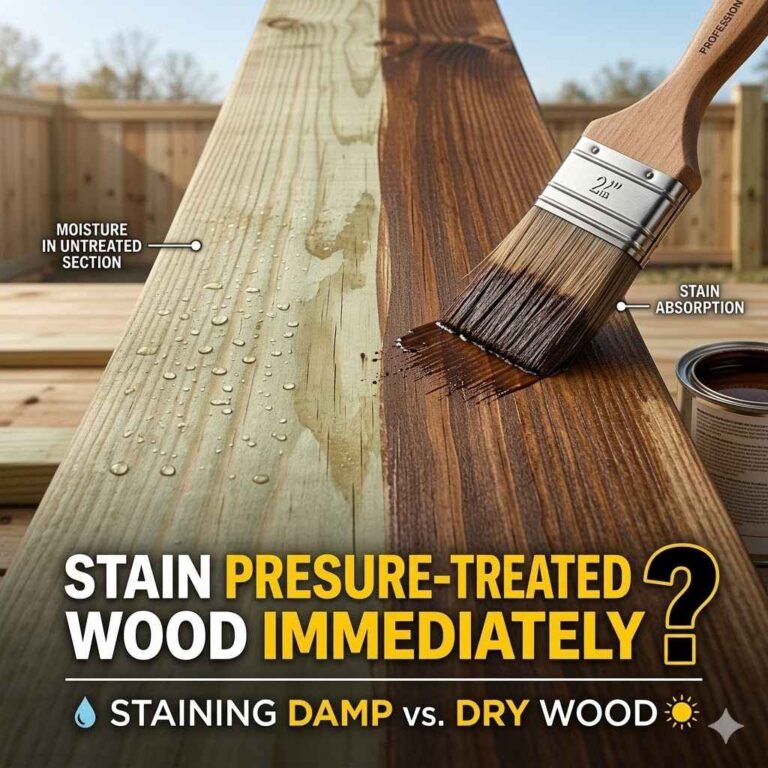
Restaining kitchen cabinets is a popular way to refresh a kitchen’s look without a complete remodel. The process involves sanding down the existing finish, applying a new stain, and sealing the wood. This can dramatically change the space, making it look modern or cozy, depending on your stain choice. But before beginning, it is important to first consider the current status of your cabinets. This includes checking for any existing damage such as water stains, peeling paint, or warping which may require repair or replacement.
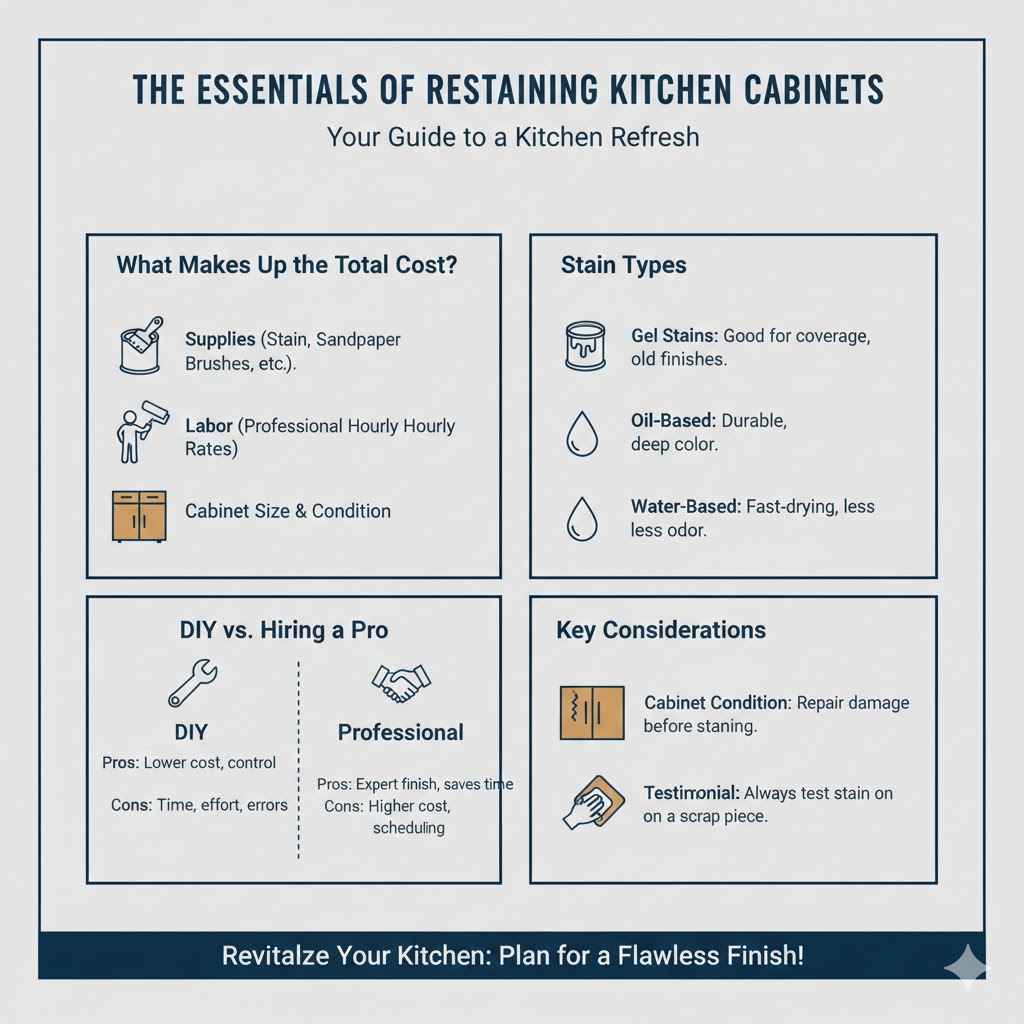
What Makes Up the Total Cost?
The total cost to restain your cabinets has several key parts. First, there’s the cost of supplies: stain, primer, sandpaper, brushes, rollers, and protective gear. Then, there’s the labor cost, if you hire someone. Labor costs vary based on experience, location, and the project’s difficulty. Cabinet size and the current condition also play a role. Larger kitchens with more cabinets will obviously require more materials and time, increasing the overall cost. Finally, the type of stain you select affects the budget. Different stain types, like gel, oil-based, or water-based, vary in price. It is important to compare costs early on to estimate your financial commitment.
- Stain Type: Gel stains are great for covering older finishes, while oil-based stains offer durability. Water-based stains dry quickly, but may require more coats.
- Cabinet Size: More cabinets mean more surface area to work on. Small kitchens might be easier and cheaper to restain than large ones.
- Labor Costs: Professionals charge hourly or by the project. Prices differ based on location and the painter’s skill.
DIY Versus Hiring a Pro
Deciding if you’ll do it yourself or hire a pro directly affects your budget. DIY saves money on labor, but it needs time, effort, and possibly more supplies if you make mistakes. Professional painters bring expertise, and efficiency, and have experience. They can also ensure a high-quality finish and are especially helpful if your cabinets are in bad condition. Consider your skill level, the project’s timeline, and how comfortable you are with the process. If you decide to DIY, researching the best products and following instructions closely is essential. A misstep might cost you in the end, as well as the initial expenditure.
- DIY Pros: Lower upfront costs, you control the pace of the project.
- DIY Cons: Requires time, skill, and potential for errors.
- Professional Pros: Expert finish, saves time, and may come with guarantees.
- Professional Cons: Higher upfront costs, less control over scheduling.
Breaking Down the Costs of Restaining
Knowing the specific costs can help you plan your budget. This breakdown provides estimates for materials, labor, and potential add-ons. The cost depends on several factors, including the size and construction of your cabinets. Preparing a detailed budget before beginning is essential for managing your finances throughout the project. When considering materials, always check for special deals at your local hardware store. When considering labor, ensure that you compare quotes from several different contractors before making your final decision.
Material Costs Explained
Materials make up a significant part of the total cost. The most expensive materials are usually the stain and sealant, and the amount needed depends on the number and size of your cabinets. Sandpaper, brushes, rollers, and other tools add to the budget. Don’t forget protective gear like gloves, masks, and safety glasses. Also, consider the cost of fillers if you need to repair any cabinet imperfections. The total spent on materials can vary depending on brand choices and the amount of work required.
- Stain: This can range from $20 to $70 per quart, depending on the brand and type.
- Sandpaper: Costs are minimal.
- Brushes and Rollers: These typically cost between $10 and $30.
- Primer: Costs between $20 and $40 per gallon.
Labor Cost Estimations
If you’re hiring professionals, labor costs are a crucial part of the total. Labor costs differ greatly based on where you live, the experience of the painter, and the complexity of the job. Generally, expect to pay an hourly rate or a flat fee for the whole project. Labor costs can make up a large portion of the budget, so it is important to get quotes from several contractors. Be certain that you’re clear on all fees before you give someone the go-ahead. If the project is complex, or if your cabinets need significant repairs, the labor costs will increase.
- Hourly Rate: Most painters charge between $25 and $80 per hour.
- Flat Fee: Some may offer a fixed price for the entire project.
- Regional Variations: Costs are higher in big cities and areas with a high cost of living.
Potential Extra Expenses
Unexpected expenses can pop up during any home improvement project. Additional costs might include the need for more supplies than first estimated. Cabinet repairs, such as replacing damaged parts, can add to the bill. If your cabinets have intricate designs, they require more time and work. These extra costs can quickly add up, so it is important to include a contingency fund in your budget. By planning ahead and expecting the unexpected, you’ll be ready for any additional spending.
- Cabinet Repairs: Fixing damaged areas might cost extra.
- Specialty Finishes: Custom finishes could mean extra costs.
- Unexpected Issues: Plan for any hidden problems you might find.
Step-by-Step: Restaining Process
The restaining process includes a few key steps. These steps need to be done carefully to get a great result. The process involves some prep work, such as cleaning and sanding the cabinets. Next comes the staining and sealing. Knowing each step will help you to decide if you will do it yourself or hire a professional. This will also give you an idea of what each part of the project includes.
Prepping the Cabinets
Proper preparation is key to a successful restaining project. Begin by removing all the cabinet doors, drawers, and hardware. Clean the cabinets with a degreasing cleaner to eliminate any dirt or grease. Next, sand the surfaces using different grit sandpapers to get rid of the old finish and create a smooth surface. Any imperfections, such as scratches or dents, should be filled with wood filler and then sanded smooth. This preparatory work can affect the quality of the finished look. Take your time with these steps to get the best result.
- Remove Doors and Hardware: This makes the sanding and staining easier.
- Clean Surfaces: Removes dirt, grease, and other contaminants.
- Sand: Smooths the surface and makes it easier for the stain to stick.
- Fill Imperfections: Repairing dents and scratches ensures a flawless finish.
Staining and Finishing
Once the cabinets are prepared, it is time to stain them. Choose the stain color you like and follow the manufacturer’s instructions. Apply the stain evenly, allowing each coat to dry fully. After the stain is dry, apply a sealant or topcoat to protect the finish and add durability. This topcoat protects your cabinets from water and wear. The sealant will also define the color and shine of the cabinets. Properly sealing the cabinets is essential for long-lasting results. Ensure to wait the correct amount of time between coats.
- Apply Stain: Use the recommended tools to ensure even coverage.
- Allow Drying: Give each coat enough time to dry, as stated on the product’s label.
- Apply Sealant: Protect the stain from damage.
- Reassemble: Reattach the doors, drawers, and hardware after everything is dry.
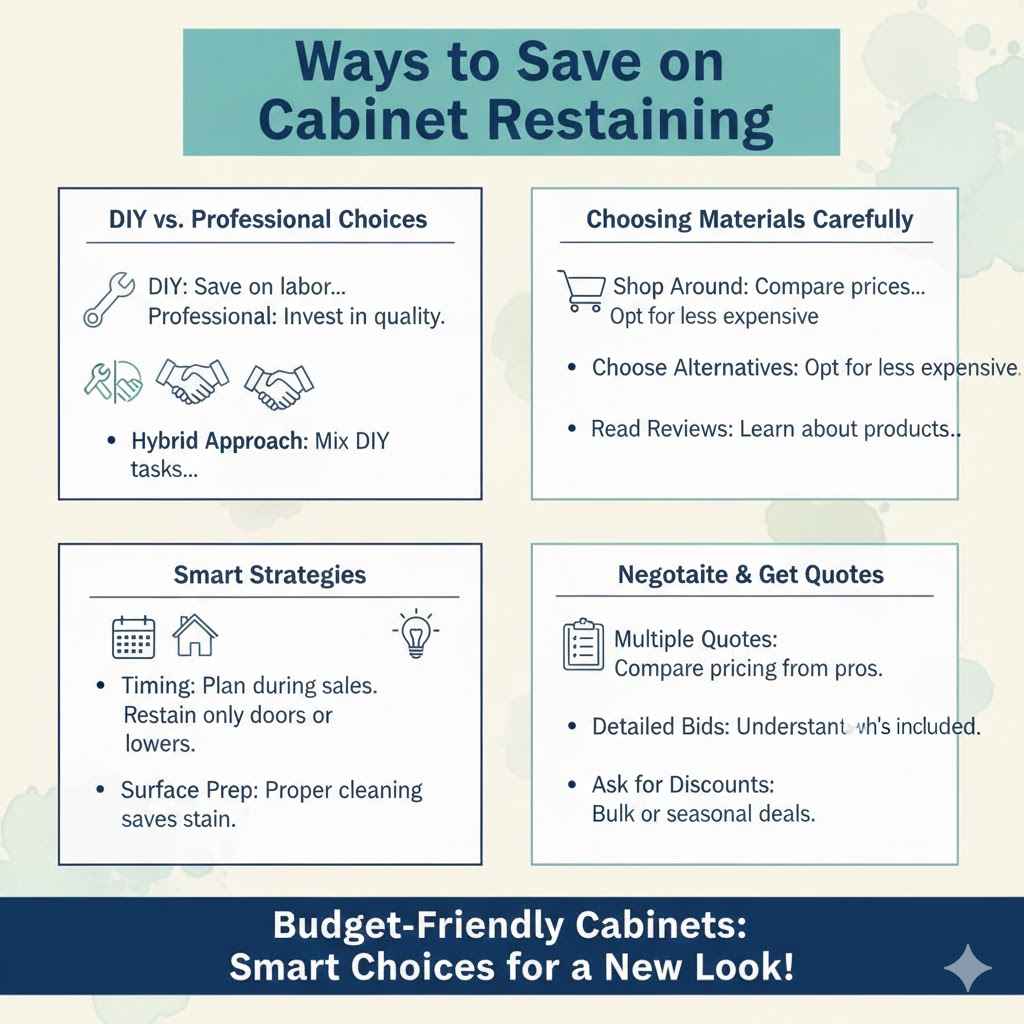
Ways to Save on Cabinet Restaining
You can use different strategies to control your costs. Doing some parts of the project yourself can save money. Choosing less expensive materials or researching the best deals can help. Knowing these methods can help you to stay on budget and still get the look you want. By being wise with your money and knowing your options, you can make your kitchen look fresh without overspending.
DIY vs. Professional Choices
Decide whether you will do the project yourself or hire a professional to reduce your costs. DIY can save money on labor, but it needs time and possibly more material costs. Doing some parts yourself and hiring a pro for other parts can be a good middle ground. Think about your abilities and how much time you have. Hiring a professional will cost more, but it guarantees quality and efficiency. When planning your budget, compare costs, and see what works best for you and your budget.
- DIY: Save on labor by completing parts of the project yourself.
- Professional: Invest in the quality and speed of an experienced team.
- Hybrid Approach: Mix DIY tasks with some professional services.
Choosing Materials Carefully
Selecting materials plays a significant role in your budget. Prices differ among stain brands and types. Before purchasing materials, research and compare the costs of different stain brands and kinds. Look for sales at your local hardware stores and online shops. Consider using less costly but still high-quality alternatives for some materials. Be prepared to compare the quality and pricing to help you get the best value. Small changes in your material choices can lead to big savings.
- Shop Around: Compare prices at multiple stores to find the best deals.
- Choose Alternatives: Opt for less expensive, but quality, materials.
- Read Reviews: Learn about products before you commit.
Frequently Asked Questions
Question: How long does it take to restain kitchen cabinets?
Answer: The time it takes varies, but it usually takes around 3-7 days, depending on the size of the kitchen and the complexity of the project.
Question: Do I need to remove my cabinet doors to restain them?
Answer: Yes, removing the doors and drawers makes the sanding and staining process much easier and ensures a more uniform finish.
Question: Can I restain my cabinets without sanding?
Answer: While some products claim you can skip sanding, it is best to sand the cabinets to create a good surface for the stain to stick to.
Question: What’s the best type of stain for kitchen cabinets?
Answer: Oil-based stains offer durability, while water-based stains dry quickly and are easier to clean. Your choice depends on your specific needs and preferences.
Question: How often should I restain my kitchen cabinets?
Answer: With proper care, restained cabinets can last for 5-10 years or longer, but the longevity varies depending on use and maintenance.
Final Thoughts
Understanding How Much Does It Cost to Restain Kitchen Cabinets? involves knowing the parts of the cost, choosing between DIY and professional help, and making smart material choices. Factors such as the stain type, your kitchen’s size, and the state of the cabinets influence the final costs. Preparing the cabinets well and following the steps of the process will help to achieve a great finish.
You also have ways to save money, like selecting budget-friendly materials. Now that you have this information, you can get started on restaining your kitchen cabinets with confidence. Begin by figuring out your budget and planning your project step by step. Have fun and enjoy the new look!