How Much Thinner to Mix Paint Spray Gun
Figuring out how much thinner to mix with paint for a spray gun can seem tricky at first, especially if you’re new to painting. You want that perfect smooth finish, but too much or too little thinner can cause problems. Don’t worry, it’s simpler than you think!
This guide will break it all down step by step. We’ll cover why thinning is important and exactly how to get it right every time, so your projects look amazing.
Understanding Paint Thinning for Spray Guns
When you spray paint, getting the right consistency is key for a smooth, even coat. Too thick, and the paint might sputter, clog your gun, or leave a rough texture. Too thin, and it can run down the surface, creating drips and uneven coverage.
Knowing how much thinner to add helps your paint flow properly through the spray gun and onto your project without issues. This process ensures a professional-looking finish and makes your painting job much easier.
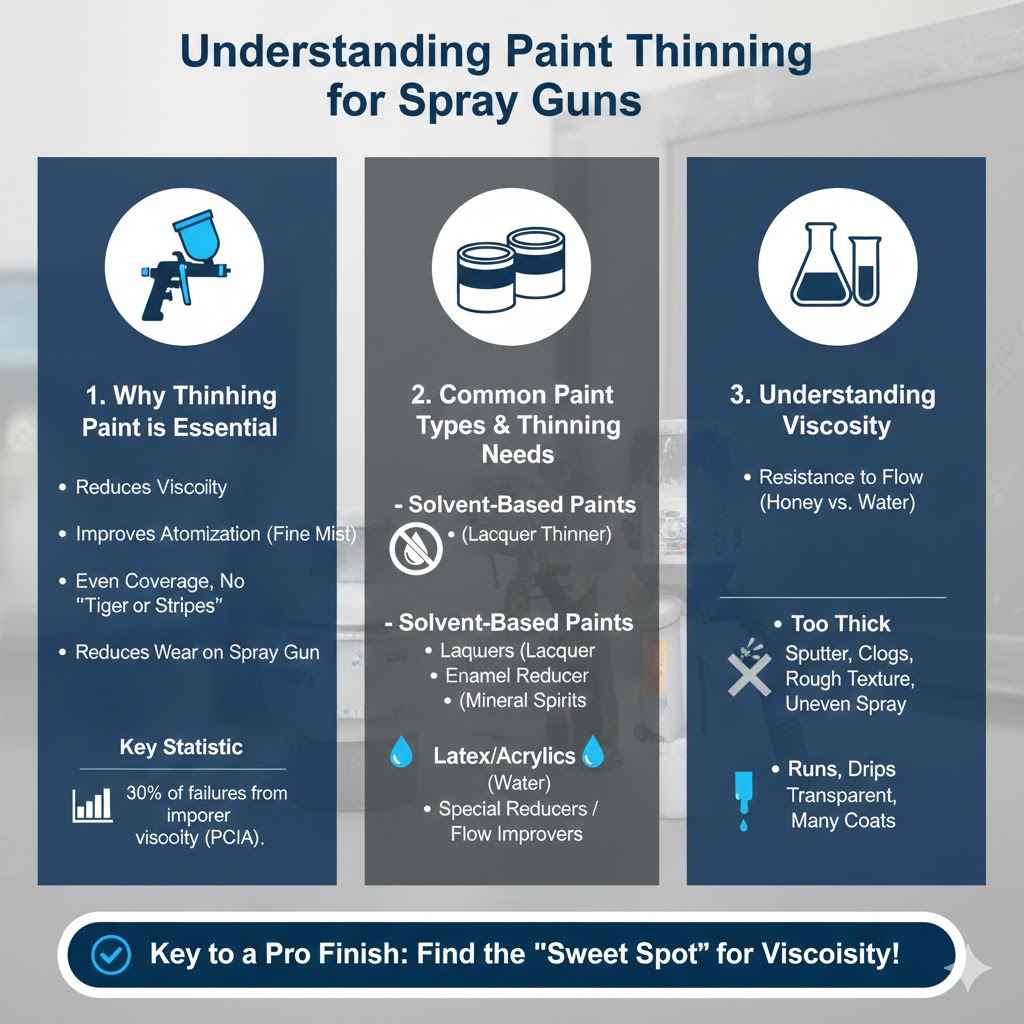
Why Thinning Paint is Essential
Thinning paint is crucial for several reasons when using a spray gun. The primary goal is to reduce the paint’s viscosity, which is its resistance to flow. Paint straight from the can is often too thick for a spray gun nozzle.
Thinning it makes the paint atomize better. Atomization is the process where the spray gun breaks the paint into tiny droplets that form a fine mist.
Proper thinning also helps the paint spread evenly on the surface. Without the right consistency, you might get “tiger stripes” or an uneven spray pattern. It also reduces wear on your spray gun components.
A properly thinned paint flows smoothly, preventing excessive strain on the gun’s motor and internal parts.
Consider this: a study by the Paint and Coatings Industry Association found that improper viscosity is a leading cause of spray finishing failures, affecting over 30% of application issues. This highlights the importance of getting the thinning ratio right.
Common Paint Types and Thinning Needs
Different types of paint have different base compositions and require varying thinning approaches. Understanding these differences helps you choose the correct thinner and the right amount to use. For example, solvent-based paints like lacquers and enamels typically need a specific solvent thinner.
Water-based paints, also known as latex or acrylics, use water as their primary thinner. However, some water-based paints might also benefit from a special water-based reducer or flow improver for better spraying characteristics. Oil-based paints, on the other hand, require mineral spirits or turpentine as thinners.
The type of finish you want also plays a role. A high-gloss finish might require a thinner that promotes leveling, while a matte finish might be more forgiving. Always check the paint manufacturer’s recommendations, as they often provide specific thinning ratios for different application methods, including spray guns.
Understanding Viscosity
Viscosity is a measure of a fluid’s resistance to flow. Think of honey versus water. Honey is highly viscous, meaning it’s thick and flows slowly.
Water is low viscosity; it’s thin and flows easily. For spray painting, you need the paint to be somewhere in the middle – thin enough to pass through the spray gun and atomize, but not so thin that it runs or loses its opacity.
When paint is too viscous, it won’t spray properly. The spray gun might struggle to pull the paint, or the droplets might be too large and uneven. This can lead to a poor finish, with drips, runs, and an inconsistent texture.
The spray pattern might be broken or uneven, making the job look unprofessional.
Conversely, if paint is not viscous enough, meaning it’s too thin, it can lead to other problems. The paint might be too transparent, requiring many coats to achieve the desired color. It can also easily run down vertical surfaces, creating unsightly drips.
This is why finding the “sweet spot” for viscosity is so important for a good spray paint job.
The Role of Thinners
Thinners are liquids added to paint to adjust its viscosity. They evaporate as the paint dries, leaving the binder and pigment behind to form the coating. The type of thinner must be compatible with the paint’s base.
Using the wrong thinner can cause the paint to curdle, separate, or fail to adhere properly.
For solvent-based paints, common thinners include lacquer thinner, enamel reducer, and mineral spirits. Lacquer thinner evaporates quickly and is used for lacquers. Enamel reducers are slower evaporating and suitable for enamels.
Mineral spirits are good for oil-based paints.
For water-based paints, the primary thinner is water. However, specialized additives like flow improvers or retarders can also be used. Flow improvers help the paint spread smoothly, while retarders slow down the drying time, which is useful in hot or dry conditions to prevent premature drying on the spray gun or surface.
How Much Thinner to Mix with Paint for a Spray Gun
The question of how much thinner to mix with paint for a spray gun is central to achieving a flawless finish. There isn’t a single, universal answer because it depends on several factors, including the type of paint, the specific brand, the temperature, and even the type of spray gun you are using. However, manufacturers usually provide a recommended range.
The most reliable way to determine the correct amount is to start by reading the paint can or manufacturer’s technical data sheet. These documents often give a percentage range, like “add 5-10% thinner.” You then measure the paint and add the thinner accordingly. It’s always better to start with less thinner and add more as needed.
You can always add more, but you can’t easily take it out.
A common mistake beginners make is adding too much thinner, thinking it will make spraying easier. This can lead to a weak film, poor adhesion, and runs. Conversely, not adding enough thinner will result in a thick, difficult-to-spray coating that can clog the gun and create an uneven surface.
The goal is a consistency that flows smoothly from the gun and atomizes into a fine mist.
General Guidelines and Ratios
As a starting point, most conventional paints require about 10-20% thinner by volume. This means if you have 100 ounces of paint, you might add 10 to 20 ounces of thinner. However, this is a very broad guideline, and you should always verify with the paint manufacturer’s specifications.
Some specialized paints, like certain automotive urethanes, might require very precise ratios, sometimes as low as 1:1:1 (paint:reducer:hardener) or specific thinning percentages like 25-30%. High-solids paints, which contain more pigment and binder and less solvent, often require more thinner to achieve a sprayable consistency compared to standard paints.
It’s also important to consider the “reducer” versus “thinner” terminology. Reducers are typically designed to work with specific paint systems (like enamels or urethanes) and often contain slow-evaporating solvents to help with flow and leveling. Thinners can be more general-purpose solvents.
Always use the product recommended by the paint manufacturer for their specific paint line.
The Importance of Testing
Before you commit to spraying your entire project, always perform a test spray on a scrap piece of material or cardboard. This allows you to see how the thinned paint sprays and if the viscosity is correct. You can adjust the thinner amount based on your test results.
During the test spray, observe the spray pattern. Is it a smooth, even fan shape? Or is it broken, sputtering, or uneven?
If it’s broken or sputtering, the paint is likely too thick, and you need to add a little more thinner. If the paint is running or dripping off the test surface, it might be too thin, or your spray gun settings might be incorrect.
This testing phase is critical. It’s where you fine-tune the mixture to match your specific spray gun and conditions. A few minutes of testing can save you hours of fixing mistakes on your actual project.
It’s a small step that makes a huge difference in the final outcome.
Factors Affecting Thinning Needs
Several factors influence how much thinner you’ll need. Temperature is a big one. In hot weather, paint dries faster, and you might need a slower-evaporating thinner or slightly more thinner to compensate.
In cold weather, paint dries more slowly, and you might need a faster-evaporating thinner or less thinner.
Humidity also plays a role. High humidity can slow down drying, similar to cold temperatures. The type of spray gun tip you are using can also affect how much thinner is needed.
A larger tip might allow for thicker paint, while a smaller tip will require thinner paint.
The condition of the paint itself matters. If the paint has been sitting for a long time and is starting to thicken or skin over, it will require more thinner than fresh paint. Always stir paint thoroughly before thinning, as this can help reincorporate settled components and improve consistency.
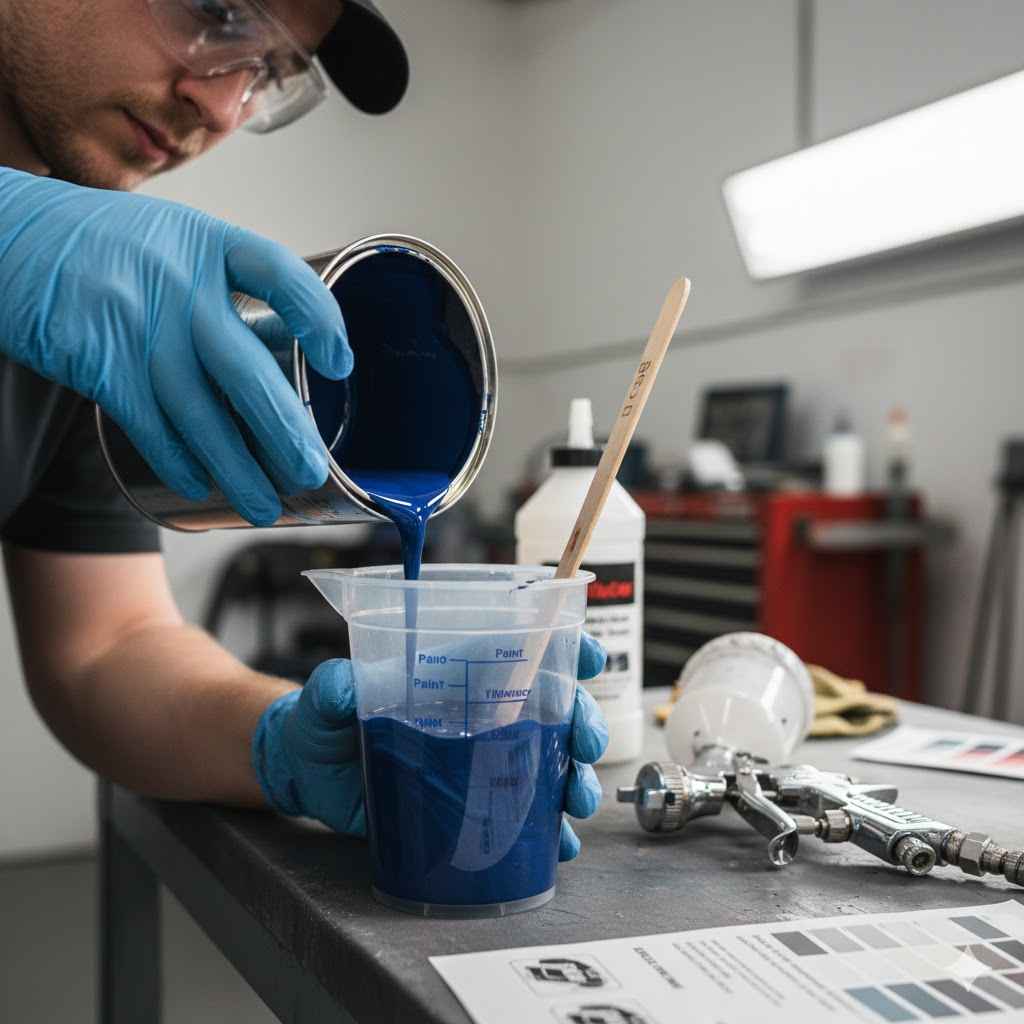
Tools for Measuring and Mixing
Accurate measurement is essential for consistent results. You’ll need tools to measure both paint and thinner. Common tools include:
- Measuring Cups: Graduated plastic or metal cups with clear markings for ounces or milliliters are perfect for this. They allow for precise volume measurements. Always use cups dedicated for paint or cleaning them thoroughly if reusing.
- Syringes: For very small batches or when precision is paramount, large syringes can be useful for measuring smaller quantities of thinner.
- Paint Strainers: While not for measuring, these cone-shaped filters are placed over the paint cup to catch any dried paint chips or debris before it enters the spray gun. This is crucial for preventing clogs.
- Stir Sticks: Used to thoroughly mix the paint and thinner together. Ensure you stir enough to fully incorporate the thinner into the paint, not just on the surface.
When mixing, it’s a good practice to pour the measured amount of paint into a clean mixing container first. Then, add the measured thinner. Stir gently but thoroughly until the mixture is uniform.
Avoid vigorous shaking, which can introduce air bubbles.
How to Achieve the Right Paint Consistency for Spraying
Getting the paint consistency just right is the goal. This is where you translate the general guidelines and your understanding of thinning into practical application. It’s about achieving a balance that allows the paint to flow through your spray gun, atomize effectively, and lay down smoothly on your surface.
This section will guide you through the process of checking and adjusting your paint’s thickness.
The most common method for checking paint consistency without specialized equipment is the “feel” test and the “drip” test. While a viscosity cup is the most accurate tool, these simpler methods can provide good enough results for many DIY projects. Understanding these techniques will help you feel more confident when preparing your paint.
Using a Viscosity Cup
A viscosity cup is a specialized tool used to measure the thickness of liquids. It’s a small container with a precisely sized hole at the bottom. You fill the cup with the thinned paint, then time how long it takes for the paint to completely drain out through the hole.
Different types of viscosity cups are available, such as Ford, Zahn, and ISO cups, each with different hole sizes. The manufacturer of your paint will often specify a target viscosity range in seconds for a particular type of cup. For example, they might say, “Aim for 15-20 seconds with a #4 Ford cup.”
To use it, submerge the cup in the thinned paint to fill it completely, then lift it out. Start your stopwatch the moment the bottom of the paint stream leaves the cup’s orifice. Stop the watch when the stream breaks.
If the time is too long, add a bit more thinner. If it’s too short, the paint is too thin.
The Drip Test
A simpler, though less precise, method is the drip test. It involves dipping a stir stick or a similar object into the thinned paint and observing how it drips off.
For this test, stir the paint thoroughly. Then, dip a clean stir stick straight down into the paint and pull it straight out. Watch how the paint flows off the stick.
If it drips off in thick, heavy streams that quickly form a continuous stream, it’s likely too thick. If it runs off in a very thin, watery stream with little body, it’s likely too thin.
The ideal consistency will drip off the stick in a steady, continuous stream that gradually gets thinner. It should coat the stick evenly for a period before breaking into drips. This test gives you a good tactile and visual sense of the paint’s flow properties.
Spraying Techniques for Consistency Check
The best test for paint consistency is, of course, spraying it. Even if you use a viscosity cup or perform a drip test, the actual spray performance is the ultimate indicator. This is why performing test sprays is so important before you start your main project.
During a test spray on a piece of cardboard or scrap wood, look closely at the spray pattern. A correct consistency will produce a well-defined, even, fan-shaped pattern. The paint should lay down smoothly without excessive overspray or the appearance of “dusting” (a dry, grainy texture).
If the spray pattern is uneven, has broken edges, or looks “bumpy,” the paint is likely too thick. If the paint appears very transparent, runs easily, or seems to “pool” on the surface, it might be too thin, or your spray gun pressure is too low. Adjust your thinning ratio and test again.
Troubleshooting Common Spraying Issues
Experiencing problems like spitting, clogging, or poor atomization? These are often signs that your paint consistency is off. Spitting usually means the paint is too thick or there’s dried paint in the gun.
Clogging indicates the paint is too thick for the nozzle, or debris is present.
Poor atomization, where the paint comes out in large, uneven droplets instead of a fine mist, is also a common symptom of overly thick paint. This results in a rough, textured finish. On the flip side, if the paint runs or drips excessively, it’s too thin or applied too heavily.
Remember to also check your spray gun’s air pressure. Too low pressure can cause poor atomization, even with perfectly thinned paint. Too high pressure can lead to overspray.
Ensure your gun is clean and all parts are functioning correctly.
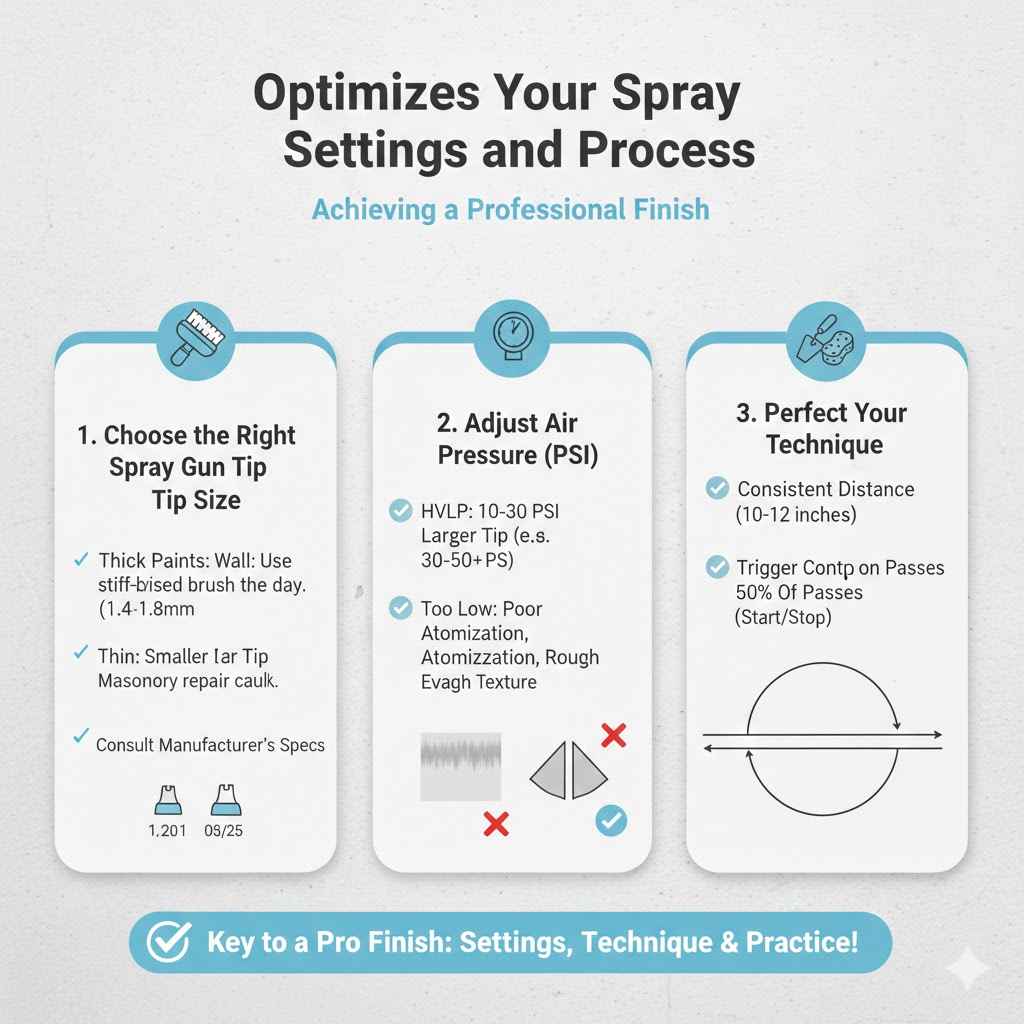
Optimizing Your Spray Gun Settings and Process
Even with perfectly thinned paint, your spray gun settings and technique are critical for a professional result. This section covers how to dial in your spray gun to work harmoniously with your prepared paint. Getting these adjustments right ensures that your efforts in thinning the paint pay off with a smooth, even finish.
Think of your spray gun as a tool that needs to be set up correctly for the job. The air cap, fluid tip, and needle work together to control the spray pattern and the amount of paint delivered. Adjusting these, along with your spraying motion, ensures the thinned paint is applied optimally.
Choosing the Right Spray Gun Tip Size
The size of the fluid tip on your spray gun is arguably the most important factor in determining how thick the paint can be and still spray effectively. Different paint types and viscosities are designed to work with specific tip sizes. A general rule of thumb is that thicker paints require larger tip sizes, and thinner paints work better with smaller tips.
For example, very thin paints like lacquers or stains might spray well through a 0.8mm to 1.2mm tip. Standard latex paints often need a 1.4mm to 1.8mm tip. For thicker coatings like high-build primers or certain automotive finishes, you might need a 2.0mm tip or even larger.
Always consult the paint manufacturer’s recommendations for compatible tip sizes.
Using a tip that is too small for your paint will require excessive thinning, potentially compromising the paint’s integrity. Conversely, using a tip that is too large with thin paint can lead to overspray and difficulty controlling the application. Matching the tip size to the paint viscosity is crucial for efficiency and finish quality.
Adjusting Air Pressure
Air pressure is another vital setting on your spray gun. It controls how the paint is atomized and the shape of the spray pattern. Most spray guns operate within a range of 20-50 PSI (pounds per square inch).
The exact pressure needed depends on the type of spray gun (HVLP, conventional, LVLP), the paint being sprayed, and the tip size.
HVLP (High Volume Low Pressure) guns use more air volume at a lower pressure (typically 10-30 PSI at the gun) to atomize paint effectively. Conventional guns use higher pressures (30-50 PSI or more). Lowering the air pressure too much can lead to poor atomization, causing the paint to come out in large droplets and creating a rough texture.
Increasing it too much can cause overspray and material waste.
A good starting point for many spray guns is around 30 PSI. You can then adjust this based on the spray pattern. If the edges of the fan are fuzzy and broken, you might need more air.
If you see excessive overspray or “tailing” (where the spray is thicker at the front than the back), you might have too much air pressure.
Spray Gun Technique
Your spraying technique significantly impacts the final finish. The goal is to maintain a consistent distance from the surface and move the gun at a steady speed. Hold the spray gun perpendicular to the surface you are painting.
Keep your wrist straight and move your entire arm.
Start moving the gun before you pull the trigger, and release the trigger after you stop moving the gun. This “trigger control” technique prevents puddles at the beginning and end of each pass, reducing the risk of drips and runs. Overlap each pass by about 50% to ensure uniform coverage.
Maintain a consistent distance from the surface, usually 8-12 inches, depending on the spray gun and paint. If you are too close, you can apply the paint too thickly, causing runs. If you are too far, you risk poor atomization and overspray, leading to a dry, uneven finish.
Practice this technique on scrap material to develop a smooth, consistent motion.
Sample Spraying Scenario
Let’s say you are painting a wooden cabinet door with an oil-based enamel using a siphon feed spray gun. The paint can recommends adding 15-20% thinner. You mix 10 ounces of paint with 1.5 ounces of mineral spirits (about 15%).
You stir well and test with a viscosity cup, finding it takes 25 seconds to drain through a #4 Ford cup. The manufacturer recommends 18-22 seconds.
This means your paint is slightly too thick. You add another half ounce of mineral spirits (making it 10 oz paint to 2 oz thinner, or 20%) and re-test. It now drains in 20 seconds, which is within the recommended range.
You then test spray on a piece of cardboard.
The spray pattern looks good, a nice, even fan. You set your spray gun air pressure to 35 PSI. You begin spraying the cabinet door, holding the gun about 10 inches away, moving your arm steadily across the door, and overlapping each pass by 50%.
You ensure you are triggering and releasing the spray consistently.
Frequently Asked Questions
Question: What is the most common mistake beginners make when thinning paint for a spray gun
Answer: Beginners often add too much thinner, thinking it will make spraying easier. This can weaken the paint film, reduce adhesion, and cause runs and drips, leading to a poor finish.
Question: Can I use any type of thinner for my paint
Answer: No, it’s crucial to use a thinner that is compatible with your specific type of paint. Using the wrong thinner can cause the paint to curdle, separate, or fail to adhere correctly.
Question: How do I know if my paint is too thick or too thin
Answer: If the paint splatters, clogs the gun, or produces a broken spray pattern, it’s likely too thick. If it runs easily, drips, or looks very transparent, it’s likely too thin.
Question: Do I need a special spray gun for different types of paint
Answer: While some spray guns are better suited for certain tasks, many can handle a range of paints with the correct tip size and pressure adjustments. Always check your spray gun’s manual and the paint manufacturer’s recommendations.
Question: How long does paint mixed with thinner last
Answer: Paint mixed with thinner should ideally be used soon after mixing. Leaving thinned paint to sit for extended periods can cause separation or evaporation of solvents, altering its consistency and performance.
Wrap Up
Getting how much thinner to mix with paint for a spray gun right ensures a smooth, professional finish. Always check the paint can for the recommended ratio, use compatible thinners, and test your mixture before spraying your project. Adjusting your spray gun settings and technique also plays a big part.