How to Align Door Hinges for a Perfect Fit
Sometimes getting a door to hang just right can feel tricky, especially if you’re new to home repairs. You might find that doors stick, rub against the frame, or don’t close smoothly. This often comes down to the door hinges not being perfectly aligned. It can seem like a puzzle at first, but with a few simple steps, you can fix it. This guide will walk you through exactly how to get your doors fitting and working like new.
Understanding Door Hinge Alignment Basics
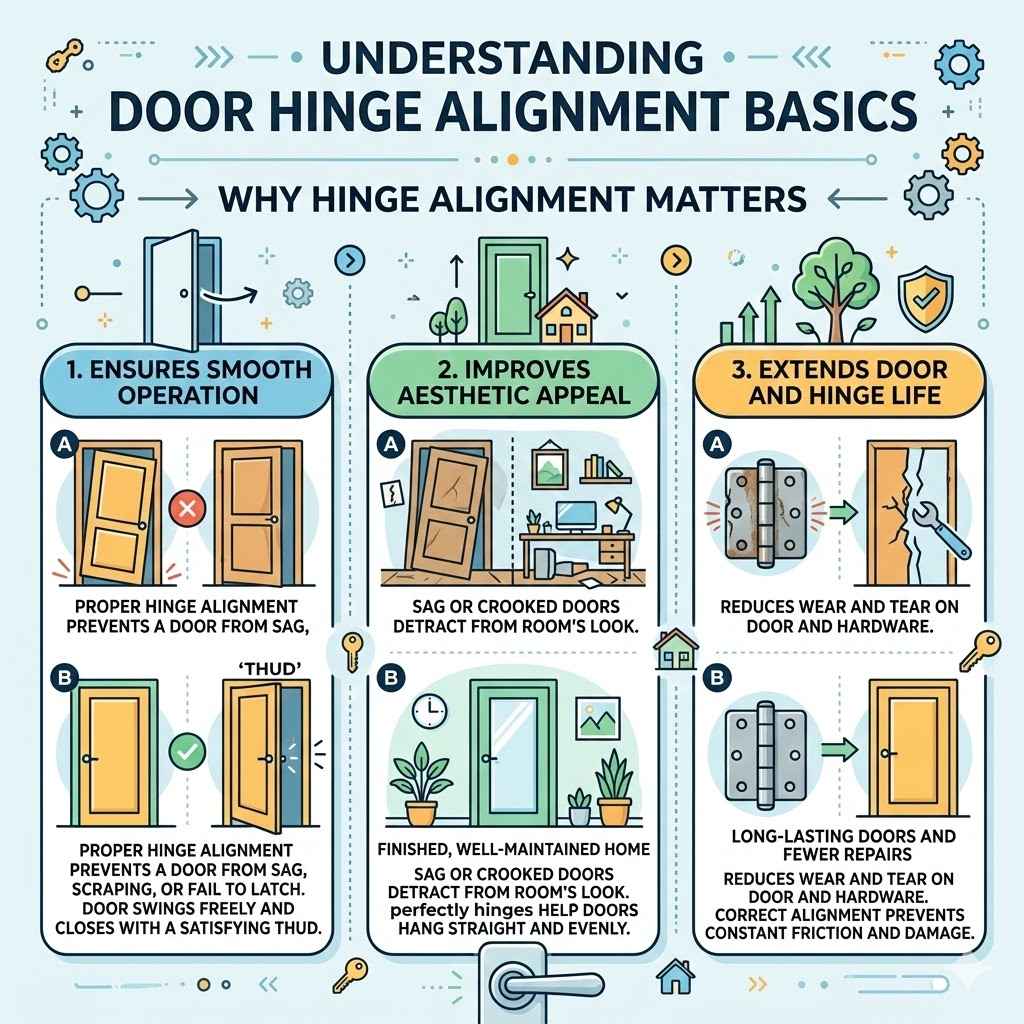
Properly aligned door hinges are essential for a door to function smoothly and look its best. When hinges are out of alignment, it can cause a variety of problems. The door might sag, scrape against the floor or the door frame, or not latch properly. This issue is a common challenge for beginners because hinges are small but play a big role in a door’s operation. Getting them right means the door swings freely and closes with a satisfying thud.
Why Hinge Alignment Matters
The main job of a door hinge is to connect the door to its frame and allow it to pivot open and closed. They bear the weight of the door and endure constant movement. When these hinges are not aligned correctly, the stress on them can increase, leading to premature wear and tear. A door that is consistently difficult to open or close due to misalignment can be frustrating. It also impacts the overall appearance of your entryway or room.
- Proper hinge alignment ensures a door operates without sticking or rubbing. This saves you from the daily annoyance of a difficult door. It also prevents damage to the door and the frame from constant friction.
- A well-aligned door contributes to a home’s aesthetic appeal. A sagging or crooked door can make a room look unfinished or poorly maintained. Perfectly aligned hinges help doors hang straight and evenly.
- Correctly aligned hinges reduce wear and tear on the door and its hardware. This means your doors will last longer and require fewer repairs over time. It’s a simple fix that has lasting benefits.
Common Door Hinge Problems and Solutions
Many issues you encounter with doors are directly related to hinge problems. Recognizing these issues is the first step to fixing them. Doors that squeak, sag, or don’t close properly are often telling you something about their hinges.
Diagnosing Door Hinge Issues
Before you can fix hinges, you need to know what’s wrong. A common sign is a door that scrapes the floor or the frame on one side. You might also notice a gap between the door and the frame that is wider at the top than the bottom, or vice-versa. Another indicator is a door that feels loose or wobbly when you try to open or close it. Sometimes, the latch doesn’t line up with the strike plate, making it hard to lock.
- A door that scrapes the floor usually means the hinges are loose or the door has sagged. This is often seen on older doors or those that get a lot of use. The hinge pins might be worn, or the screws holding the hinges to the door or frame have loosened.
- If a door binds at the top or side of the frame, it might be that the hinges are not set deep enough into the jamb or door. Alternatively, the door itself might have warped slightly. This causes friction points that prevent smooth operation.
- A door that won’t stay open or shut firmly could have hinges that are bent or damaged. This is less common but can happen if the door has been forced or impacted. Replacing bent hinges is usually the best solution here.
Tools and Materials Needed
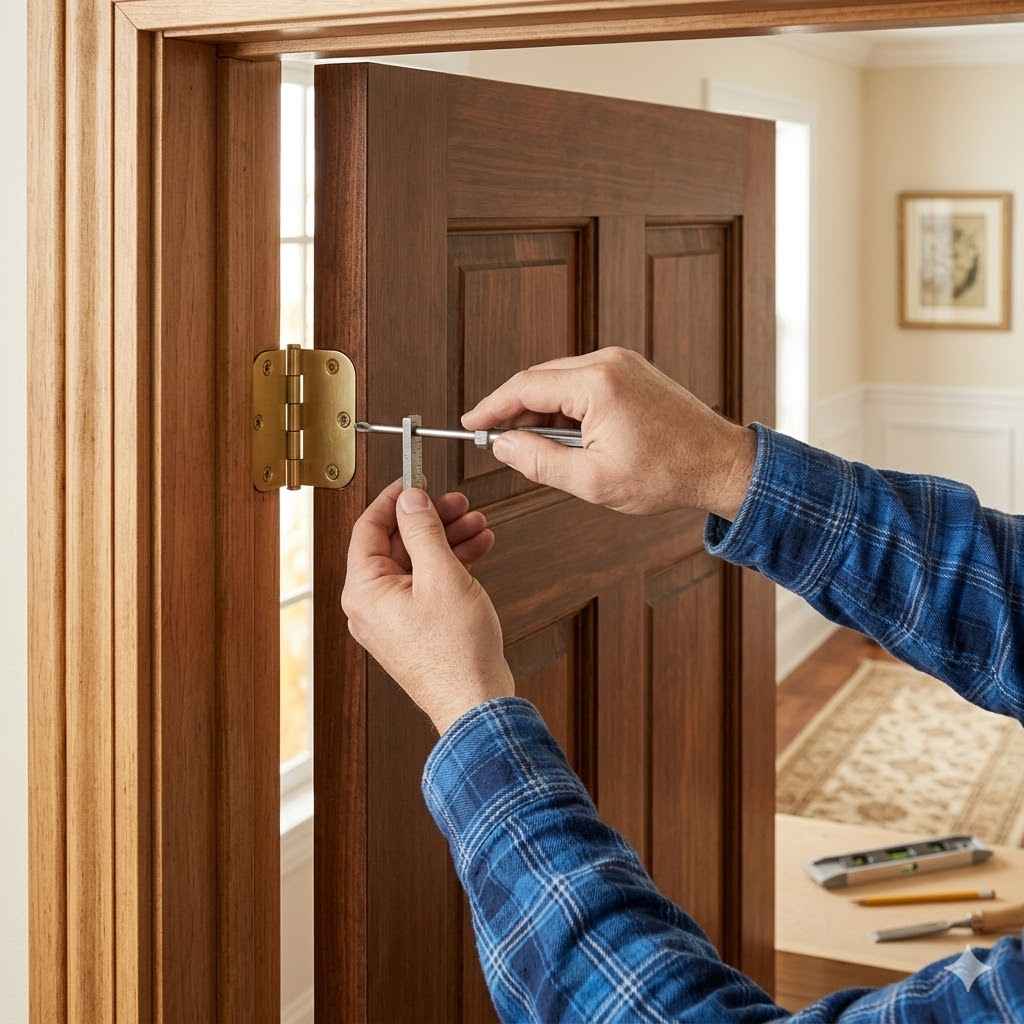
To tackle hinge alignment, you’ll want a few basic tools. A Phillips head screwdriver is essential for tightening screws. You might also need a flathead screwdriver, a hammer, and some wood shims. For more serious adjustments, a putty knife and wood filler can be helpful. If you need to remove hinge pins, a nail and hammer can be used to tap them out from below. Having these items ready makes the job much easier.
- Screwdrivers Phillips and flathead are your primary tools for adjusting hinge screws. Make sure they fit the screw heads snugly to avoid stripping them.
- A hammer and a nail are useful for gently tapping out hinge pins if you need to remove them for cleaning or replacement.
- Wood shims are incredibly useful for making small adjustments to the door’s position within the frame. They can lift or support the door slightly.
- Wood filler and a putty knife can repair gouges or stripped screw holes in the wood, providing a solid base for re-securing hinges.
Step-by-Step Guide How to Align Door Hinges for a Perfect Fit
Achieving a perfect door fit involves understanding the mechanics of your hinges and making precise adjustments. This guide breaks down the process into manageable steps. We will cover everything from tightening loose hinges to shimming for better alignment.
Adjusting Loose Hinges
The most common reason for a door to sag or rub is loose hinge screws. This is also the easiest fix.
- Inspect each hinge. Look for screws that are sticking out or seem loose.
- Gently try to tighten all the screws on all the hinges. Use a screwdriver that fits the screw head well. Do not overtighten, as this can strip the wood.
- Test the door. If it now closes and opens smoothly, you’re done. If not, proceed to the next steps.
If the screws won’t tighten because the wood is stripped, you’ll need to repair the screw holes.
- For stripped screw holes, you can try inserting a wooden toothpick or a golf tee into the hole along with the screw. The wood fills the gap, giving the screw something to grip.
- Another method is to use wood filler. Apply it into the hole, let it dry completely, and then re-drill a pilot hole before inserting the screw.
- For more severe damage, you may need to use longer screws that reach deeper into the wall stud behind the door frame. This provides a much stronger anchor.
Shimming Hinges for Alignment
When tightening screws doesn’t solve the problem, you may need to use shims. Shims are thin pieces of wood that can slightly alter the position of the hinge.
- Identify where the door is binding or not closing properly. For instance, if the top of the door scrapes the frame, you might need to adjust the top hinge.
- If the door is too close to the strike side of the frame, you might need to shim the hinges on the jamb side. This pushes the door away from the strike.
- To shim, you’ll need to loosen the screws on the hinge you want to adjust. Then, carefully insert a thin piece of cardboard or a thin wood shim between the hinge leaf and the door jamb.
- Re-tighten the screws. Start by tightening the top screw to hold the shim in place, then the bottom.
- Test the door’s movement. You may need to add or remove shims, or try different positions, to get the perfect alignment.
This process is about making tiny adjustments. Even a small shim can make a noticeable difference in how the door operates. It takes patience, but the results are worth it.
Dealing with Sagging Doors
A sagging door often looks like it’s drooping on the handle side. This is usually caused by the weight of the door putting too much stress on the hinges, particularly the top one.
- First, try tightening all hinge screws as described earlier. This is the quickest fix if the sag is due to loose screws.
- If tightening doesn’t work, you might need to shim the hinges to compensate for the sag. For a sagging door, you typically need to shim the bottom hinge on the jamb side to lift the door, or shim the top hinge on the door side to bring it down.
- Consider reinforcing the hinge mortises. If the wood is soft or damaged, the hinge might be sinking into it. Wood filler or even a piece of veneer can strengthen these areas.
- For very heavy doors or significant sag, you might need to consider reinforcing the door frame itself. Adding a metal brace or reinforcing the wall studs behind the jamb can provide extra support.
Here’s a sample scenario for adjusting hinge placement:
Scenario 1: The door rubs on the top of the strike side of the frame.
This indicates the door is too high on the strike side.
To fix this, you need to slightly lower the strike side of the door.
You can do this by shiming the hinges on the jamb side.
Start with the top hinge on the jamb. Loosen the screws, insert a thin shim behind the hinge leaf, and retighten.
Then, try the door. You may need to adjust the bottom hinge on the jamb side as well.
Removing and Reinstalling Hinges
Sometimes, the best way to realign hinges is to take them off and put them back on. This allows you to reset their position or ensure they are seated properly.
- Support the door. It’s best to have someone help you, or prop the door up with wedges from underneath.
- Remove the hinge pins. You can usually do this by tapping upwards on the bottom of the pin with a nail and hammer.
- Once the pins are out, you can detach the hinge leaves from the door and the frame.
- Check the hinge mortises (the cutouts where the hinges sit). Make sure they are clean and free of debris. If the wood is damaged, repair it with wood filler.
- Reattach the hinge leaves. Ensure they are flush with the surface and aligned correctly.
- Reinsert the hinge pins. Tap them gently into place.
- Test the door. Make any minor adjustments needed by shimming.
This method is more involved but offers a chance to start fresh with your hinge placement. It’s especially useful if hinges have been incorrectly installed or the wood is damaged.
Advanced Hinge Adjustment Techniques
For doors with persistent alignment issues, or when you want a truly perfect fit, advanced techniques can be employed. These methods address underlying structural problems or fine-tune the hinge placement.
Planing the Door Edge
If the door is rubbing against the frame and shimming isn’t enough, the door itself might be slightly too wide or warped. In such cases, carefully planing the edge of the door can solve the problem.
Planing involves using a hand plane or an electric planer to shave off a small amount of wood from the edge of the door where it is binding. It’s crucial to remove wood slowly and evenly, checking the fit frequently. This technique requires a steady hand and an understanding of how much wood to remove.
Taking too much off can create a new problem, making the door too loose or creating a gap.
For example, if a door is sticking on the top corner of the frame, you would gently plane that specific corner. The goal is to create just enough clearance for the door to swing freely without leaving a noticeable gap. Always plane with the grain of the wood to avoid tearing.
After planing, you may need to re-sand and repaint or refinish the edge of the door.
Replacing Worn or Damaged Hinges
Sometimes, the hinges themselves are the problem. Worn-out hinges can become loose, bent, or corroded, leading to alignment issues that can’t be fixed by adjustments alone.
- Inspect hinges for signs of wear, such as a loose pin that easily falls out, or visible bending or warping of the hinge leaves. Rust can also weaken hinges and make them bind.
- When replacing hinges, always use new hinges that are the same size and type as the old ones. This ensures a proper fit and consistent alignment. Measure the existing hinges carefully.
- If the mortises for the hinges are damaged or too deep, you might need to fill them with wood filler or a shim before installing the new hinges. This provides a solid base for the screws.
- Ensure the new hinges are installed flush with the door and frame. This is critical for proper alignment and smooth operation.
Statistics show that replacing old, worn hinges can solve over 30% of common door sticking and sagging issues, leading to improved functionality and aesthetics.
Using Squareness Gauges and Levels
To ensure a perfect fit, using tools like a level and a square can be incredibly helpful. These tools help you verify that the door is hanging plumb and square within the frame.
A spirit level can confirm if the door is hanging straight up and down. Place it on the top edge of the door. If the bubble is off-center, the door is not plumb and likely needs hinge adjustment.
A carpenter’s square can be used to check if the door is square to the frame. Checking the diagonals of the door opening or the door itself can reveal if it’s been warped.
When you are adjusting hinges, these tools become your best friends. They provide objective measurements, ensuring that your adjustments are making the door correctly aligned rather than just guessing. For instance, if your level shows the door is leaning, you know which hinge needs attention to correct this.
This precision ensures a professional-quality finish.
Maintaining Door Hinge Health
Once you have your door hinges perfectly aligned, a little ongoing maintenance can keep them that way. Simple steps can prevent future problems and ensure your doors continue to operate smoothly for years to come.
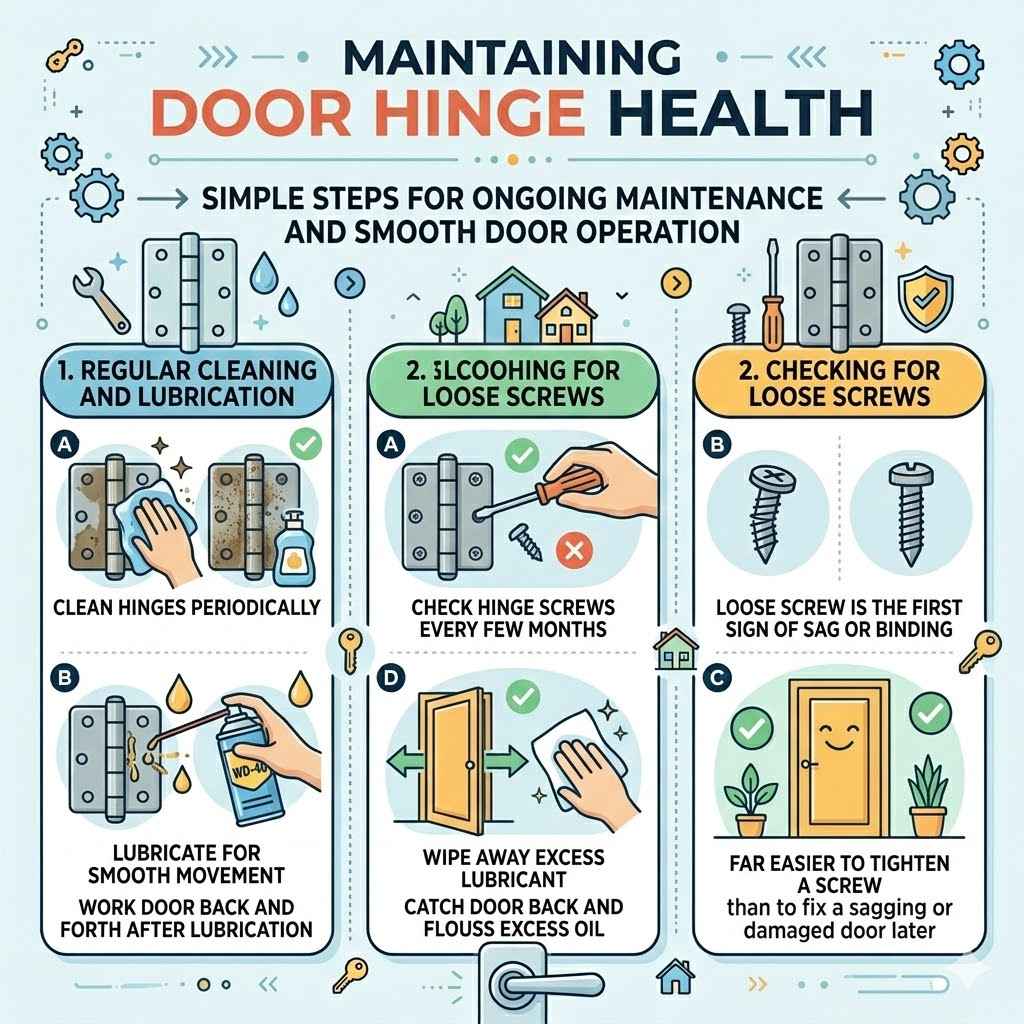
Regular Cleaning and Lubrication
Dirt and grime can build up in the hinge joints, causing them to bind and squeak. Regular cleaning and lubrication are key to preventing this.
- Clean hinges periodically by wiping them down with a damp cloth. If there’s stubborn dirt, a mild detergent can be used.
- Lubricate the hinges to ensure smooth movement. A few drops of machine oil or a spray lubricant like WD-40 can work wonders. Apply it to the hinge pin and the joints.
- Work the door back and forth a few times after lubricating to help the oil spread evenly throughout the hinge mechanism.
- Wipe away any excess lubricant to prevent it from attracting dust or dripping onto the floor.
Checking for Loose Screws
Even with perfect initial alignment, screws can loosen over time due to the door’s movement and vibration. A quick check can save a lot of trouble.
Make it a habit to check hinge screws every few months. A loose screw is often the first sign that a door might start to sag or bind. It’s far easier to tighten a screw than to fix a door that has started to warp or damage its frame due to misalignment.
This simple preventative measure takes only a minute or two.
Frequently Asked Questions
Question: How often should I lubricate my door hinges
Answer: It’s generally a good idea to lubricate your door hinges every 6 to 12 months, or whenever you notice them starting to squeak or feel stiff. Regular lubrication helps prevent wear and tear.
Question: What should I do if my door still rubs after adjusting the hinges
Answer: If rubbing persists, the door itself might be warped or slightly too large for the frame. You may need to gently plane the edge of the door where it’s rubbing. Ensure you remove only a small amount of wood at a time.
Question: Can I use thicker screws to fix stripped hinge holes
Answer: Yes, using slightly thicker or longer screws can often help grip stripped wood holes. You can also use wood filler or toothpicks to reinforce the hole before screwing.
Question: Do all doors have the same type of hinges
Answer: Most interior doors use standard butt hinges, but there are variations. Exterior doors, security doors, and specialty doors might use different types of hinges. Always match replacement hinges to the original type.
Question: How can I tell if my hinge pins are bent
Answer: You can often tell if a hinge pin is bent by trying to remove it. If it’s difficult to tap out or comes out unevenly, it’s likely bent. Bent pins can cause the hinge to bind and affect door alignment.
Conclusion
Fixing misaligned door hinges is an achievable DIY task. By understanding common issues and following simple steps, you can achieve a perfectly fitting door. Tightening screws, using shims, or even planing an edge can make a big difference. Regular checks and lubrication will keep your doors working smoothly. With a little effort, you’ll enjoy doors that open and close with ease, looking great and functioning perfectly.