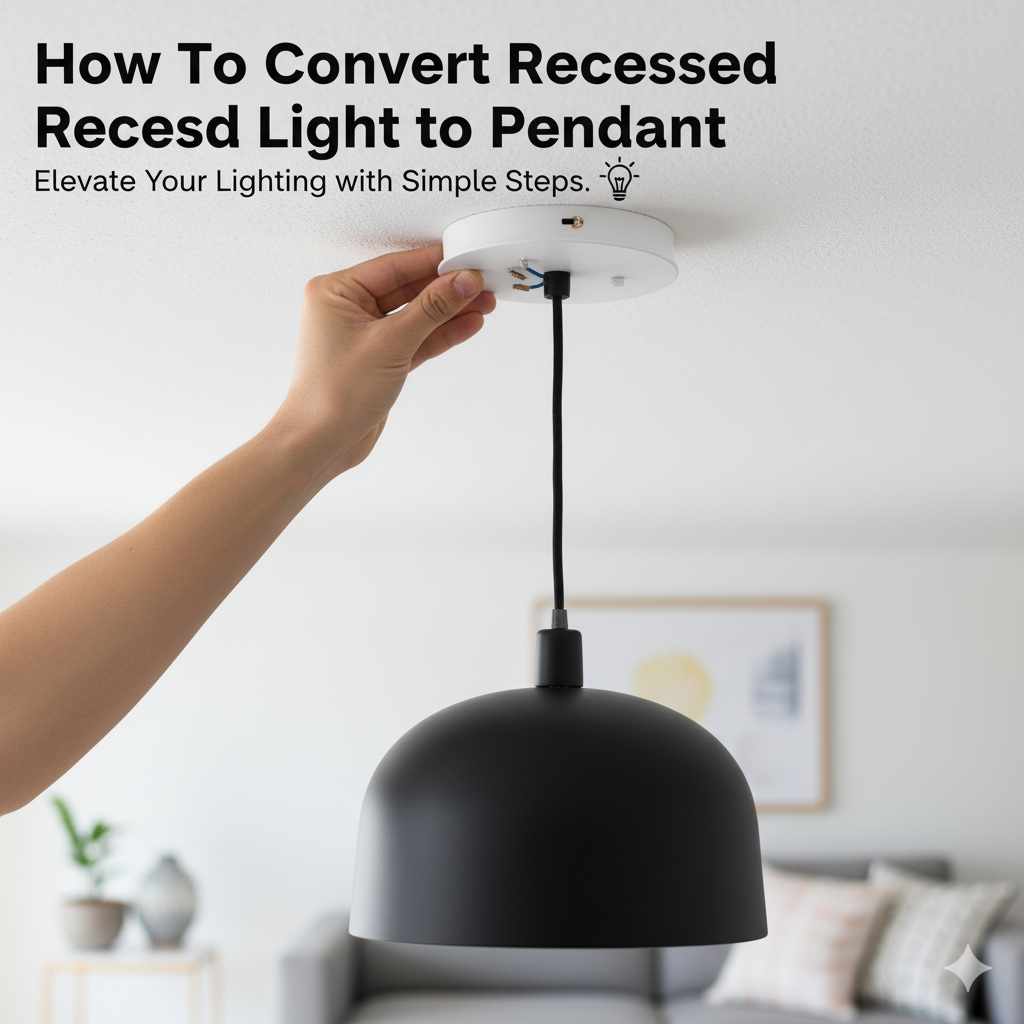
How To Convert Recessed Light to Pendant: Genius Guide
To convert recessed lighting to a pendant light, you’ll need to remove the existing can light, adapt the ceiling box for pendant installation, and then safely wire and hang your new fixture. This guide breaks down the process into simple, manageable steps for any DIYer.
Tired of those flat, uninspiring recessed lights? You’re not alone! Many homeowners dream of adding a touch of style and personality with beautiful pendant lights, but the thought of rewiring can feel daunting. Don’t worry, transforming your space from drab to dazzling is totally achievable, even if you’re new to home improvement. This guide will walk you through each step, making the process clear, safe, and surprisingly straightforward. We’ll cover everything from gathering your tools to that final, satisfying moment when your new pendant light shines. Get ready to elevate your home décor!
Why Convert Recessed Lights to Pendants?
Recessed lights, also known as can lights, are functional and blend into the ceiling, offering a clean look. However, they often lack the decorative flair that pendant lights provide. Pendant lights, on the other hand, hang down, making them a focal point that can:
Add Style and Personality: Pendants come in endless designs, from modern minimalist to rustic farmhouse, allowing you to express your personal taste and complement your room’s décor.
Create Ambiance: The diffused light from a pendant can create a warmer, more inviting atmosphere than the often starker light from recessed fixtures.
Define Spaces: In open-plan areas, pendant lights can visually separate different zones, like a kitchen island from a dining area.
Provide Task Lighting: Strategically placed pendants can offer focused light for activities like cooking or reading.
Increase Home Value: Updated lighting fixtures are a simple yet effective way to boost your home’s appeal.

Is This a DIY Project for You?
Converting recessed lights to pendants is a rewarding DIY project that can save you money compared to hiring an electrician. It involves working with electricity, so safety is paramount. If you’re comfortable with basic tools and can follow instructions carefully, this project is well within your reach.
Here’s what makes this project suitable for DIYers:
Clear Steps: We’ll break down each stage into easy-to-follow instructions.
Safety First: We’ll highlight crucial safety precautions.
Cost-Effective: Doing it yourself significantly reduces labor costs.
Rewarding Outcome: You’ll gain the satisfaction of upgrading your home with your own hands.
If you’re unsure about any electrical work, it’s always best to consult or hire a qualified electrician. Safety should always be your top priority.
Tools and Materials You’ll Need
Gathering the right tools and materials before you start will make the process much smoother. Here’s a comprehensive list:
Essential Tools:
Screwdrivers: Both Phillips head and flathead, in various sizes.
Wire Strippers/Cutters: For safely preparing electrical wires.
Voltage Tester (Non-Contact): Crucial for confirming power is off.
Pliers: Needle-nose and standard pliers can be very handy.
Adjustable Wrench: For tightening or loosening nuts and bolts.
Ladder: A sturdy ladder to safely reach your ceiling.
Safety Glasses: To protect your eyes from dust and debris.
Work Gloves: To protect your hands.
Utility Knife: For cutting materials if needed.
Drill and Drill Bits: May be needed for mounting or making adjustments.
Stud Finder: To locate ceiling joists for secure mounting.
Wire Nuts: To connect electrical wires securely.
Materials:
Pendant Light Fixture: Choose one that suits your style and room. Ensure it’s rated for the intended location (e.g., damp-rated for bathrooms).
Ceiling Box Adapter Kit (if needed): Many pendant kits come with these, or you might need a specific one to adapt a recessed can opening for a pendant’s weight and mounting. Look for kits designed to fit standard recessed can openings.
Adjustable Height Cable/Chain: If your pendant doesn’t have sufficient adjustment.
Mounting Hardware: Screws, anchors, etc., that come with your pendant or adapter kit.
Electrical Tape: For extra insulation on wire connections.
Light Bulb: The correct type and wattage for your new fixture.
Step-by-Step Guide: Converting Recessed Light to Pendant
Let’s get started! Follow these steps carefully for a successful conversion.
Step 1: Safety First – Turn Off the Power!
This is the most critical step.
1. Locate Your Circuit Breaker Panel: This is usually in a basement, garage, or utility closet.
2. Identify the Correct Circuit: Find the breaker that controls the recessed light you’ll be working on. If unsure, you might need to test by turning off breakers one by one until the light goes out.
3. Flip the Breaker to the “OFF” Position: Ensure it’s completely off.
4. Verify Power is Off: Go back to the light fixture. Try flipping the light switch for that fixture. It should not turn on. For extra safety, use your non-contact voltage tester on the wires inside the ceiling box (once you open it).
For more detailed information on electrical safety, the U.S. Consumer Product Safety Commission (CPSC) offers excellent resources.
Step 2: Remove the Existing Recessed Light Fixture
Now that the power is safely off, you can remove the old fixture.
1. Remove the Trim and Bulb: Gently pull down the trim ring of the recessed light. Some trims twist and lock, while others might have springs holding them in place. Carefully detach the trim. Remove the light bulb.
2. Access the Can: You might need to gently pry the trim down to get a better look at how the can is secured. Some cans are held by spring clips that you’ll need to push up or out.
3. Disconnect Wiring: Once the can is accessible, you’ll see the electrical connection. Carefully twist off the wire nuts connecting the fixture’s wires to the house wiring.
4. Remove the Fixture: Gently pull the can fixture down and out of the ceiling. You may need to push any remaining spring clips up into the ceiling opening to free it.
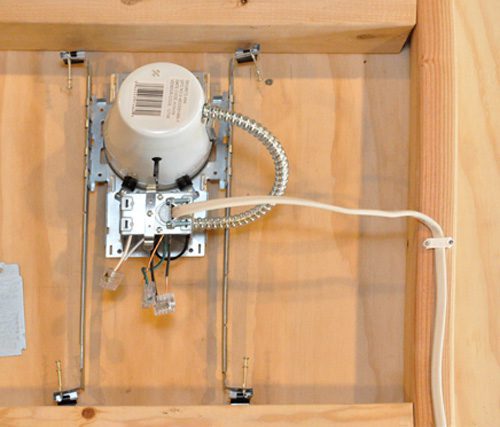
5. Inspect the Ceiling Box: Note the existing electrical box in the ceiling. This is where your new pendant will connect.
Step 3: Prepare the Ceiling Box for the Pendant
Most recessed lights are installed in a “recessed can” housing, which is often too large or not designed for the weight and mounting of a pendant. You’ll likely need to adapt this.
1. Assess Your Ceiling Box:
If you have a standard junction box: Great! You might only need a pendant adapter plate or a decorative canopy to cover the existing box and provide a mounting point.
If you have a recessed can housing: You’ll need to remove the can itself and install a new, suitable electrical box or use a special adapter designed to mount to the joists or the existing hole. Many recessed light housings are not designed to support the weight of a pendant, so this step is crucial.
2. Install a New Electrical Box (if necessary):
Check for Joists: Use your stud finder to locate ceiling joists near the existing hole.
Choose the Right Box: Select an electrical box rated for ceiling fan/pendant support if your pendant is heavy. These boxes are designed to be securely mounted to joists. Standard “old work” boxes (which clamp to drywall) are generally not sufficient for heavier pendants.
Mount the Box: Follow the manufacturer’s instructions for your chosen box. This might involve screwing directly into joists or using a brace that spans between joists. Ensure it’s firmly secured, as it will bear the weight of your pendant.
3. Use a Recessed Light Conversion Kit: Many kits are available that allow you to mount a new electrical box or a specialized bracket directly to the existing recessed light opening, often utilizing the joists for support. These kits are designed to simplify the transition. One common method is to install a bar hanger that spans the opening and supports a new junction box.
For guidance on electrical boxes and their ratings, the Underwriters Laboratories (UL) website provides information on safety standards for electrical components.
Step 4: Install the Pendant Mounting Hardware
Your pendant light will come with a canopy (the decorative cover that sits against the ceiling) and a mounting bracket.
1. Attach the Mounting Bracket: Secure the bracket that came with your pendant light to the newly installed or adapted electrical box using the provided screws. Ensure it’s level and firmly attached.
2. Prepare the Pendant: Follow the manufacturer’s instructions to assemble the pendant’s stem, chain, or cord. This often involves feeding the wires through the downrod or cable.
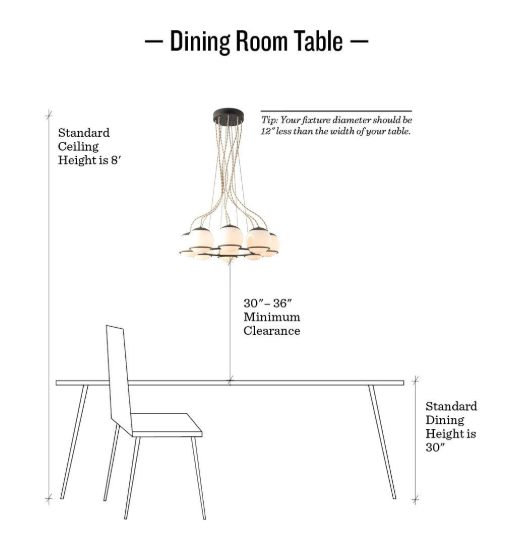
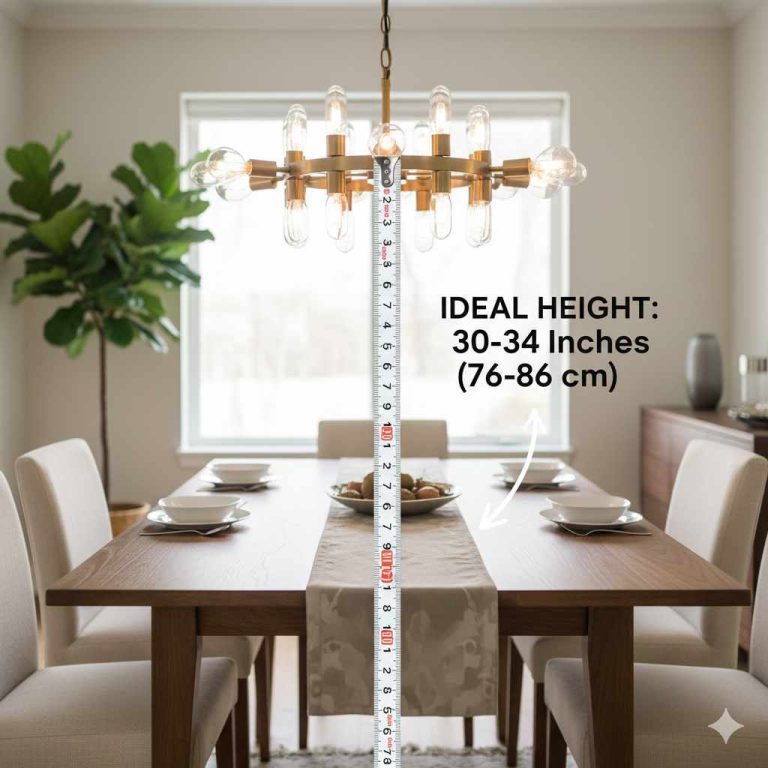
3. Adjust the Height: Determine the desired hanging height for your pendant. Measure and cut the cord or chain to length, ensuring you leave enough wire for connections.
Step 5: Wire the Pendant Light
This is where you’ll connect the new fixture to your home’s electrical supply. Double-check that the power is still OFF at the breaker!
1. Identify the Wires: Your pendant light will have three wires:
Black (Hot): Usually connects to the black wire from the ceiling.
White (Neutral): Usually connects to the white wire from the ceiling.
Green or Bare Copper (Ground): Connects to the ground wire from the ceiling and the grounding screw on the mounting bracket.
The ceiling wires will typically be black, white, and bare copper/green.
2. Connect the Wires:
Ground First: Connect the ground wire from the pendant to the ground wire from the ceiling using a wire nut. If your mounting bracket has a green grounding screw, connect the ground wire to that as well.
Neutral: Connect the white wire from the pendant to the white wire from the ceiling using a wire nut.
Hot: Connect the black wire from the pendant to the black wire from the ceiling using a wire nut.
Secure Connections: Ensure all wire nuts are twisted on tightly. Give each wire a gentle tug to confirm it’s secure. You can wrap electrical tape around the wire nuts and wires for extra security.
3. Tuck Wires: Carefully tuck all the connected wires and wire nuts up into the electrical box.
For a refresher on basic wiring principles, resources like the Electrical Safety Foundation International (ESFI) provide valuable insights.
Step 6: Mount the Pendant Fixture and Canopy
Now it’s time to attach the decorative part of your pendant.
1. Attach the Canopy: Carefully lift the pendant fixture up to the ceiling. Slide the canopy over the mounting bracket and wires.
2. Secure the Canopy: Most canopies attach to the mounting bracket with screws. Align the canopy and secure it firmly. Make sure it sits flush against the ceiling, hiding the electrical box and wiring.
3. Install the Light Bulb: Screw in the appropriate light bulb for your fixture.
Step 7: Restore Power and Test
You’re almost there!
1. Turn the Breaker Back On: Go back to your circuit breaker panel and flip the breaker for that light back to the “ON” position.
2. Test the Light: Go to the light switch and turn it on. Your new pendant light should illuminate!
3. Check for Stability: Gently check if the pendant is securely hanging and doesn’t wobble excessively.
Congratulations! You’ve successfully converted your recessed light to a stylish pendant.
Table: Pendant Light Styles and Their Common Uses
Choosing the right pendant style can dramatically impact your room’s atmosphere. Here’s a quick guide:
| Pendant Style | Description | Best For | Example Use Cases |
|---|---|---|---|
| Globe/Sphere | Smooth, round shades that provide diffused, even light. | General ambient lighting, creating a soft glow. | Living rooms, bedrooms, hallways, dining areas. |
| Drum | Cylindrical shades, often fabric or metal, that direct light up and down. | Task lighting and ambient lighting, adding warmth. | Kitchen islands, dining tables, bedrooms. |
| Linear/Chandelier | Long, rectangular fixtures with multiple lights, often over tables or islands. | Defining spaces and providing ample light over specific areas. | Kitchen islands, dining tables, long countertops. |
| Barn/Industrial | Often metal, with a rustic or utilitarian look, mimicking old factory or barn lighting. | Adding character and focused light. | Kitchens, entryways, man caves, workshops. |
| Lantern | Decorative frames enclosing bulbs, often with glass panels, resembling traditional lanterns. | Adding decorative charm and ambient light. | Entryways, dining rooms, living rooms, porches (if rated for outdoor use). |
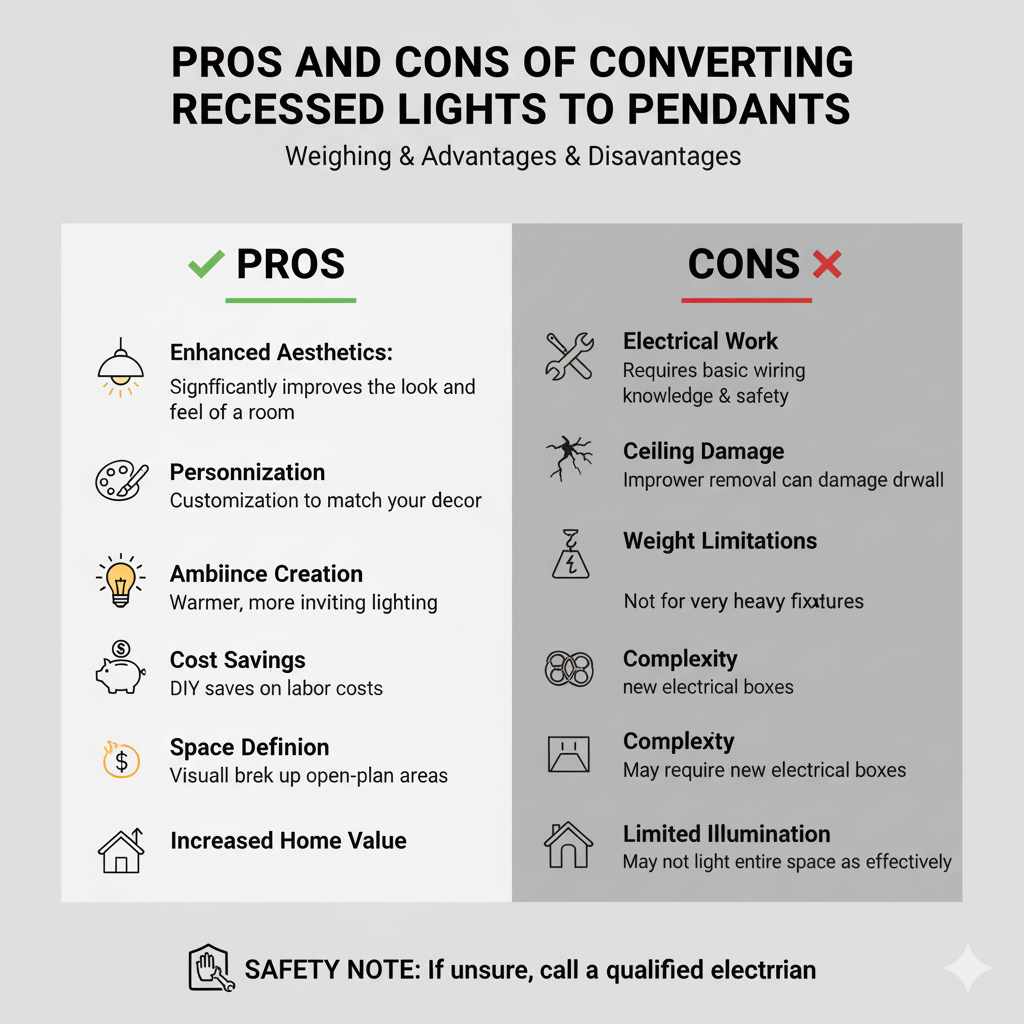
Pros and Cons of Converting Recessed Lights to Pendants
Like any home improvement project, this conversion has its advantages and disadvantages.
Pros:
Enhanced Aesthetics: Significantly improves the look and feel of a room.
Personalization: Allows for customization to match your décor.
Ambiance Creation: Offers warmer, more inviting lighting.
Cost Savings: DIY saves on professional labor costs.
Space Definition: Helps visually break up open-plan areas.
Increased Home Value: Modern, stylish lighting is a desirable feature.
Cons:
Electrical Work Involved: Requires careful attention to safety and basic wiring knowledge.
Potential for Ceiling Damage: Improper removal or installation can damage drywall or ceiling structure.
Weight Limitations: Some ceiling boxes or adapters may not support very heavy fixtures.
Complexity: May require installing new electrical boxes or support structures, adding time and effort.
* Limited Adjustment: If converting multiple recessed lights in a grid, a pendant might not fill the entire space as effectively as the original recessed lights did for overall illumination.
Frequently Asked Questions (FAQ)
Here are some common questions beginners have about this project.
Q1: How do I know if my ceiling can support a pendant light?
Most standard recessed light housings are not designed to support the weight of a pendant. You’ll likely need to install a new electrical box that is securely mounted to ceiling joists or use a specialized heavy-duty ceiling fan brace. Always check the weight rating of your chosen pendant and ensure your mounting solution can handle it.
Q2: Can I use the existing wiring for my pendant light?
Yes, if the existing wiring is in good condition and properly installed, you can use it. The key is to ensure the circuit can handle the wattage of your new pendant and that the connections are made safely. Always confirm the power is off before touching any wires.
Q3: What if my pendant light is too heavy for a standard “old work” electrical box?
If your pendant is heavy, you must use an electrical box specifically rated for supporting fixtures or ceiling fans, which are typically designed to be attached directly to ceiling joists or use a brace system. A standard “old work” box that clamps to drywall is not sufficient for significant weight.
Q4: How do I adjust the hanging height of my pendant light?
Most pendant lights come with adjustable cords, chains, or rods. You can shorten these by cutting the cord, re-threading it through the canopy, or by using specialized connectors for chains. Always follow the manufacturer’s instructions for your specific fixture.
Q5: Do I need a dimmer switch for my pendant light?
A dimmer switch is optional but recommended if you want to control the ambiance of the room. Ensure that both your pendant light fixture and the light bulb you use are “dimmable.”
Q6: What is a recessed light converter kit?
A converter kit is a product designed to make the transition from a recessed light to a pendant easier. These kits often include a mounting bracket that attaches to the existing recessed can opening or ceiling joists, and a new electrical box to hang your pendant from. They simplify the process of adapting the ceiling structure.
Conclusion
Transforming your recessed lighting into beautiful pendant fixtures is a fantastic way to inject style and personality into your home. While it involves working with electricity, by following these clear, step-by-step instructions, prioritizing safety, and using the right tools, you can confidently tackle this project. You’ll not only create a more inviting and aesthetically pleasing space but also gain the immense satisfaction of a job well done. Remember, if at any point you feel unsure, don’t hesitate to call in a professional. Happy decorating!