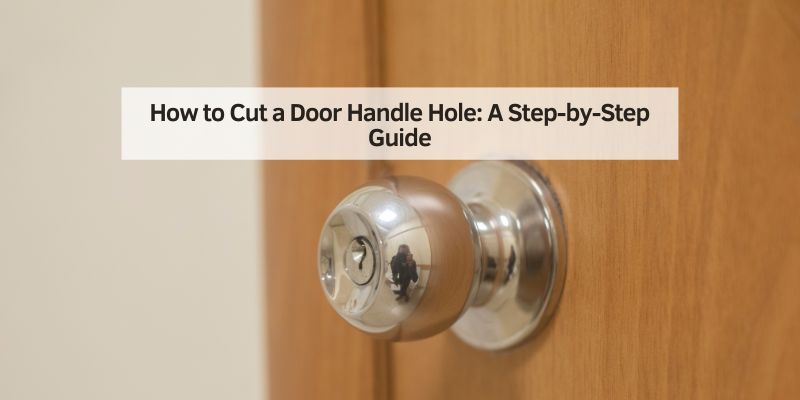
How to Cut a Door Handle Hole: A Step-by-Step Guide
Hey there! So, you’re looking to cut a door handle hole, huh? I’ve been there, staring at a blank door, wondering how to get that perfect hole for a new handle. It might seem daunting, but trust me, it’s doable with the right tools and a bit of patience. I’ve tackled this project a few times myself, and each time, I’ve learned something new. Whether you’re installing a new door, replacing an old handle, or just upgrading your setup, I’m excited to share my experience with you. This guide is packed with practical tips, clear steps, and a few tricks I’ve picked up along the way to make your project smooth and successful. Let’s dive into how to cut a door handle hole like a pro!
Why Cutting a Door Handle Hole Matters
Cutting a door handle hole isn’t just about making a door functional—it’s about precision and getting it right. A well-cut hole ensures your door handle fits perfectly, operates smoothly, and looks professional. I remember my first attempt; I was nervous about ruining a brand-new door, but getting it right gave me such a sense of accomplishment. A poorly cut hole can lead to a wobbly handle, a misaligned latch, or even a damaged door. Doing it correctly saves you time, money, and frustration. Plus, it’s a skill you can brag about at your next DIY gathering!
Tools and Materials You’ll Need
Before we start, let’s gather everything you need. Having the right tools makes this job so much easier. Here’s what I always have on hand when cutting a door handle hole:
| Item | Purpose |
|---|---|
| Door handle kit | Includes the handle, latch, and template for cutting the hole. |
| Hole saw (2-1/8 inch) | For cutting the main hole for the handle. |
| Spade bit (1 inch) | For drilling the latch hole in the door’s edge. |
| Drill | To power the hole saw and spade bit. |
| Measuring tape | To mark the exact spot for the hole. |
| Pencil | For marking measurements on the door. |
| Level | To ensure your marks are straight and aligned. |
| Chisel | For carving out the latch plate recess. |
| Screwdriver | For securing the handle and latch after cutting. |
| Safety glasses | To protect your eyes from sawdust or debris. |
| Sandpaper | To smooth rough edges after cutting. |
| Clamps (optional) | To hold the door steady if working on a sawhorse. |
Pro tip: Check your door handle kit for a paper template. Most kits include one, and it makes marking the hole placement a breeze. If your kit doesn’t have one, don’t worry—I’ll explain how to measure manually.
Choosing the Right Door Handle
Picking the right door handle is key to a successful project. I’ve spent way too much time in hardware stores debating between styles, so let me save you some hassle. Door handles come in different types—knob, lever, or even smart locks—and each requires a standard 2-1/8 inch hole for the handle and a 1-inch hole for the latch. Make sure the handle matches your door’s thickness, usually 1-3/8 to 1-3/4 inches for interior doors and slightly thicker for exterior ones.
Consider the finish, too. I went with a brushed nickel lever for my living room door because it matched the modern vibe of my home. If you’re installing an exterior door handle, look for weather-resistant options like stainless steel or brass. Also, check if your handle requires a specific backset (the distance from the door’s edge to the center of the hole). Standard backsets are 2-3/8 or 2-3/4 inches, and most kits are adjustable, but double-check to avoid issues.
Preparing Your Workspace
Setting up a clean, stable workspace is a game-changer. I learned this the hard way when I tried cutting a hole with my door still hung—sawdust everywhere and a wobbly setup. If possible, remove the door from its hinges and place it on a flat surface like sawhorses. Use clamps to keep it steady. If you can’t remove the door, prop it open securely and cover the floor with a drop cloth to catch debris.
Clean the door with a damp cloth to remove dust or grease. This helps your pencil marks show up clearly. Make sure you have good lighting too—I’ve squinted in dim light before, and it led to crooked marks. A well-lit, stable setup sets you up for success.
Measuring and Marking the Hole
Accuracy is everything when cutting a door handle hole. Most door handle kits come with a template, which is a lifesaver. If yours has one, tape it to the door at the desired height—typically 36 inches from the bottom for standard handles. I adjusted mine to 38 inches because it felt more comfortable for my family. Use a level to ensure the template is straight, then mark the center of the handle hole and the latch hole with a pencil.
If you don’t have a template, measure manually. Measure 36 inches (or your preferred height) from the bottom of the door and mark it. Then, measure the backset (2-3/8 or 2-3/4 inches) from the door’s edge to find the center of the handle hole. Mark this spot. For the latch hole, mark the center of the door’s edge at the same height. Double-check your measurements with a tape measure and level. I’ve rushed this step before, and let me tell you, a misaligned hole is a headache to fix.
Cutting the Handle Hole
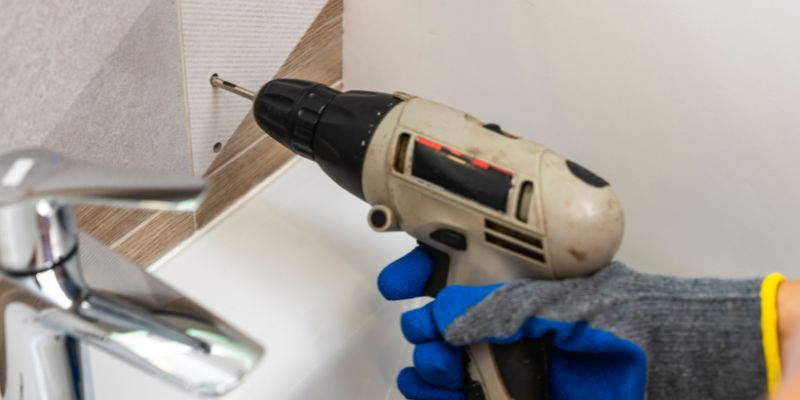
Now it’s time to cut the main hole for the handle. This is where the hole saw comes in. Attach a 2-1/8 inch hole saw to your drill. If you’re new to using a hole saw, practice on a scrap piece of wood first—it takes some getting used to. Wear safety glasses, as sawdust can fly everywhere.
Start on one side of the door. Align the hole saw’s pilot bit with your marked center point. Drill slowly and steadily, applying even pressure. Don’t force it; let the saw do the work. I made the mistake of pushing too hard once, and it jammed the saw, which was a pain to free. Drill about halfway through the door, then stop.
Flip the door over and finish the cut from the other side, using the pilot hole as your guide. This prevents splintering and gives you a cleaner cut. Once the hole is complete, use sandpaper to smooth any rough edges. I like to run my finger around the hole to check for splinters—it should feel smooth and even.
Cutting the Latch Hole
Next, you’ll cut the hole for the latch on the door’s edge. Grab your 1-inch spade bit and attach it to your drill. Align the bit with the mark you made on the door’s edge. Drill straight into the edge, keeping the bit level. Go slowly to avoid wandering off-center. I’ve found that marking the bit with tape at about 2 inches deep helps ensure you don’t drill too far.
Once the hole is drilled, test-fit the latch to make sure it slides in smoothly. If it’s tight, you may need to widen the hole slightly with the spade bit or sandpaper. The latch should sit flush with the door’s edge.
Carving the Latch Plate Recess
The latch plate (the flat metal piece that sits on the door’s edge) needs a shallow recess to sit flush with the door. This step makes the door look polished and ensures the latch works properly. Place the latch plate over the latch hole and trace its outline with a pencil. Use a chisel to carefully carve out the recess, removing small amounts of wood at a time. Aim for a depth of about 1/8 inch, or whatever matches the thickness of the latch plate.
I struggled with this step the first time because I tried to rush it. Take your time and tap the chisel gently with a hammer. Test-fit the latch plate frequently to avoid carving too deeply. Once it sits flush, screw the latch plate into place using the provided screws. Use a screwdriver, not a drill, to avoid overtightening.
Installing the Door Handle
With the holes cut, it’s time to install the handle. Follow the instructions in your door handle kit, as designs vary slightly. Generally, you’ll insert the latch into the edge hole first, securing it with screws. Then, slide the handle components through the main hole, aligning them with the latch mechanism. Most handles have two halves that connect through the hole, secured with screws or a mounting plate.
Tighten the screws carefully, checking that the handle moves smoothly. I’ve had handles feel stiff because I overtightened, so loosen them slightly if needed. Once everything is secure, test the handle by turning it to ensure the latch extends and retracts properly.
Installing the Strike Plate
The strike plate goes on the door frame, where the latch catches when the door closes. Close the door and mark where the latch hits the frame. Hold the strike plate over this spot and trace its outline. Use your chisel to carve a shallow recess, just like you did for the latch plate. Drill a pilot hole for the latch bolt (usually 1 inch deep) in the center of the strike plate area.
Screw the strike plate into place, ensuring it’s flush with the frame. Test the door by closing it to confirm the latch catches securely. If it doesn’t, adjust the strike plate’s position slightly or deepen the latch hole in the frame.
Troubleshooting Common Issues
Even with careful work, you might hit a snag. Here are some issues I’ve run into and how to fix them:
- Hole Is Off-Center: If your handle hole is slightly misaligned, you can sometimes use a larger backplate to cover it. For bigger mistakes, you may need to fill the hole with wood filler, sand it smooth, and try again.
- Splintered Edges: If the hole saw splinters the door, sand the edges thoroughly. For bad damage, consider a decorative backplate to hide imperfections.
- Latch Doesn’t Catch: If the latch doesn’t engage with the strike plate, check the alignment. Adjust the strike plate or deepen the latch hole in the frame.
- Handle Feels Loose: Tighten all screws, but don’t overtighten. If the handle still wobbles, check if the door’s thickness matches the handle’s specifications.
Maintaining Your Door Handle
Once your handle is installed, a little upkeep keeps it working smoothly. I check mine every few months to tighten screws, as they can loosen with use. Lubricate the latch mechanism with a silicone-based spray to keep it moving freely. Avoid oil-based lubricants, as they attract dust. For exterior doors, clean the handle regularly to prevent rust, especially in humid or coastal areas. A quick wipe with a damp cloth does wonders.
Why This Project Is Worth It
Cutting a door handle hole might sound intimidating, but it’s one of those DIY projects that feels incredibly rewarding. I still smile when I walk through my front door and feel the handle click perfectly into place. It’s a practical skill that saves you money and adds a personal touch to your home. Plus, it’s a great way to impress your friends or family with your handiness!
Conclusion
And there you go—a complete guide to cutting a door handle hole! From picking the right tools to chiseling a perfect latch recess, I’ve shared every step and lesson I’ve learned from doing this myself. This project is all about precision and patience, but the payoff is a door that looks great and works flawlessly. Whether you’re upgrading your home or fixing a door that’s seen better days, you now have the know-how to tackle it with confidence. So grab your drill, measure twice, and enjoy the satisfaction of a job well done. Your new door handle will be a small but mighty improvement to your space. Happy DIYing!
FAQs
What size hole do I need for a door handle?
Most door handles require a 2-1/8 inch hole for the handle and a 1-inch hole for the latch. Check your handle kit’s instructions to confirm.
Can I cut a door handle hole without a hole saw?
It’s tough without a hole saw, as it ensures a clean, round hole. You could use a jigsaw, but it’s harder to get precise results. A hole saw is worth the investment.
How long does it take to cut a door handle hole?
It usually takes 1 to 2 hours, depending on your experience and tools. Measuring and cutting carefully takes time, but prevents mistakes.
What if I cut the hole in the wrong spot?
If it’s a small error, a larger backplate might cover it. For bigger mistakes, fill the hole with wood filler, sand it smooth, and start over.
Do I need to remove the door to cut the hole?
It’s easier to remove the door and work on a flat surface, but you can cut the hole with the door hung if you secure it and protect the area.
How do I keep my door handle from rusting?
For exterior doors, choose a rust-resistant finish like stainless steel. Clean the handle regularly and lubricate the latch with silicone spray to prevent corrosion.