How To Disinfect Hardwood Floors Without Damaging Them: Essential Guide
To safely disinfect hardwood floors without damage, use mild soap or vinegar diluted heavily in water, or EPA-approved wood floor disinfectants. Avoid soaking the floor, use a damp (not wet) mop, and always test your cleaner in an inconspicuous spot first to protect that beautiful finish.
Hardwood floors bring so much warmth and beauty to a home. But when life happens—maybe the kids were sick, or you had pets track in something messy—you need to clean them well. It’s easy to worry! You might think deep cleaning requires harsh chemicals that could dull the shine or warp the wood. Don’t fret! Keeping your floors sanitary doesn’t mean sacrificing their lifespan or beauty. With the right approach, you can disinfect effectively and safely. We will walk through simple, proven methods that work wonders on wood. Let’s get your floors sparkling clean and germ-free, the safe way!
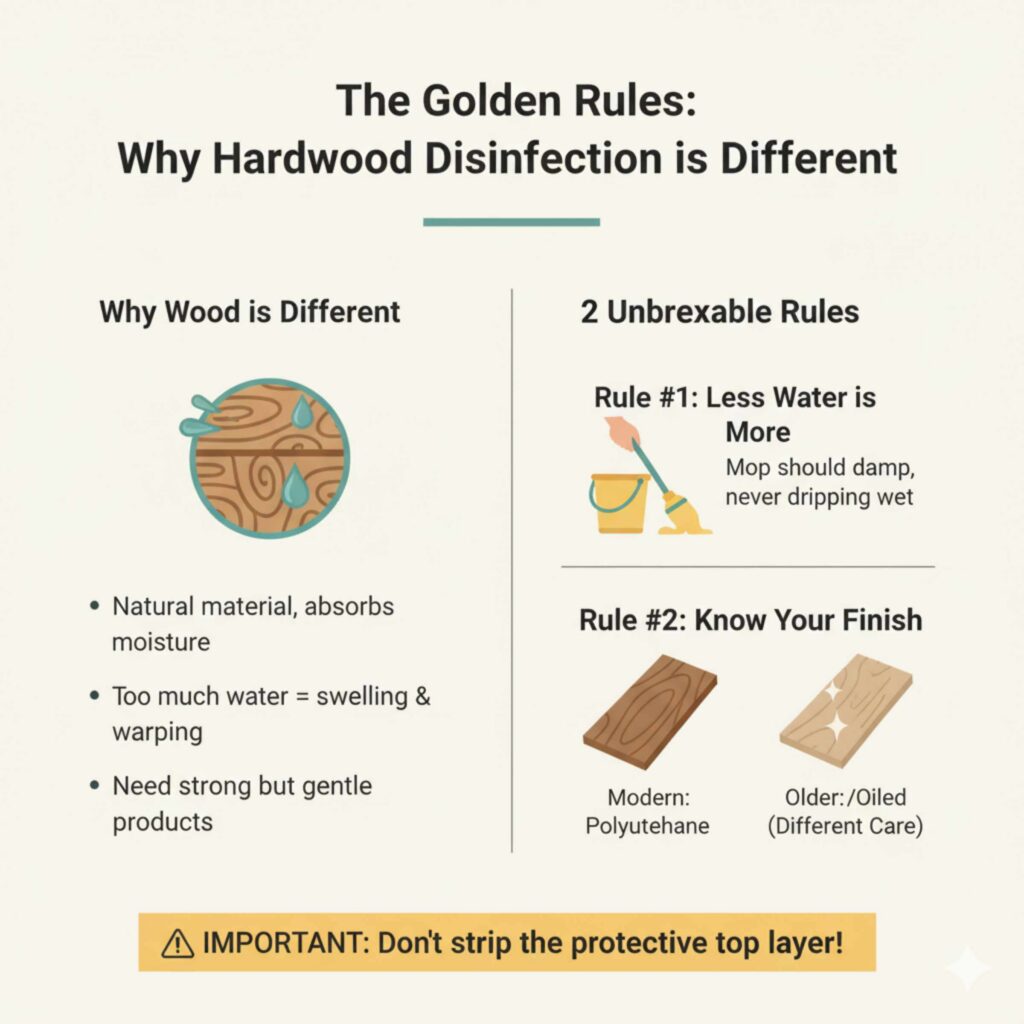
The Golden Rules: Why Hardwood Disinfection is Different
Wood is a natural material. Unlike tile or vinyl, it absorbs moisture. This is the key difference when cleaning wood floors. Too much water is the biggest enemy of hardwood, leading to swelling, cupping, and warping. When we talk about disinfection, we aren’t just wiping up dust; we are killing germs. We need a product strong enough to handle bacteria and viruses but gentle enough not to strip the finish (the protective top layer).
Before diving into the recipes, remember these two unbreakable rules:
- Rule #1: Less Water is More. Your mop should always be damp, never dripping wet.
- Rule #2: Know Your Finish. Modern floors usually have a durable surface finish (like polyurethane). Older floors might be waxed or oiled, which need very different care.
Step 1: Prep Your Floors – The Essential First Pass
You cannot effectively disinfect a dirty floor. Disinfectants work best when they don’t have to fight through layers of dust, pet hair, and grit first. Think of it like washing your hands—you scrub off the dirt before you use sanitizer.
Tools Needed for Prep
- Soft-bristle broom or a vacuum cleaner with a hardwood floor setting (make sure the beater bar is off).
- Microfiber dust mop.
The Cleaning Process
- Vacuum Thoroughly: Use the soft brush attachment or a vacuum designed specifically for hard floors. Pay close attention to the edges and corners where dirt likes to hide. Avoid using vacuums with rotating brush bars (beater bars) unless they can be completely turned off, as these can scratch the finish over time.
- Dry Mop: Follow up with a clean, dry microfiber mop. Microfiber is excellent because it grabs fine dust particles that vacuuming might miss. This dry step removes abrasive particles that could scratch your floor when you apply liquid later.
Step 2: Choosing Your Safe Disinfectant Solution
This is where many homeowners get nervous. What can kill germs without wrecking the wood? You have three main safe routes: the mild soap route, the natural vinegar route, or using a specifically formulated product. Always ensure your chosen product is safe for wood floors, especially those with a polyurethane finish. You can often find guidelines from the National Fire Protection Association regarding general cleaning safety, though specific wood care should come from your flooring manufacturer.
Option A: Mild pH-Neutral Soap Solution (Best for General Use)
If you just need to clean and sanitize lightly without heavy chemical exposure, a tiny bit of pH-neutral dish soap works wonders.
- What you need: A gallon bucket, clean water, and a few drops of mild, dye-free dish soap (like Dawn).
- The Recipe: Fill your bucket with one gallon of warm water. Add only 1 or 2 teaspoons of dish soap. Too much soap will leave a sticky residue that attracts dirt later!
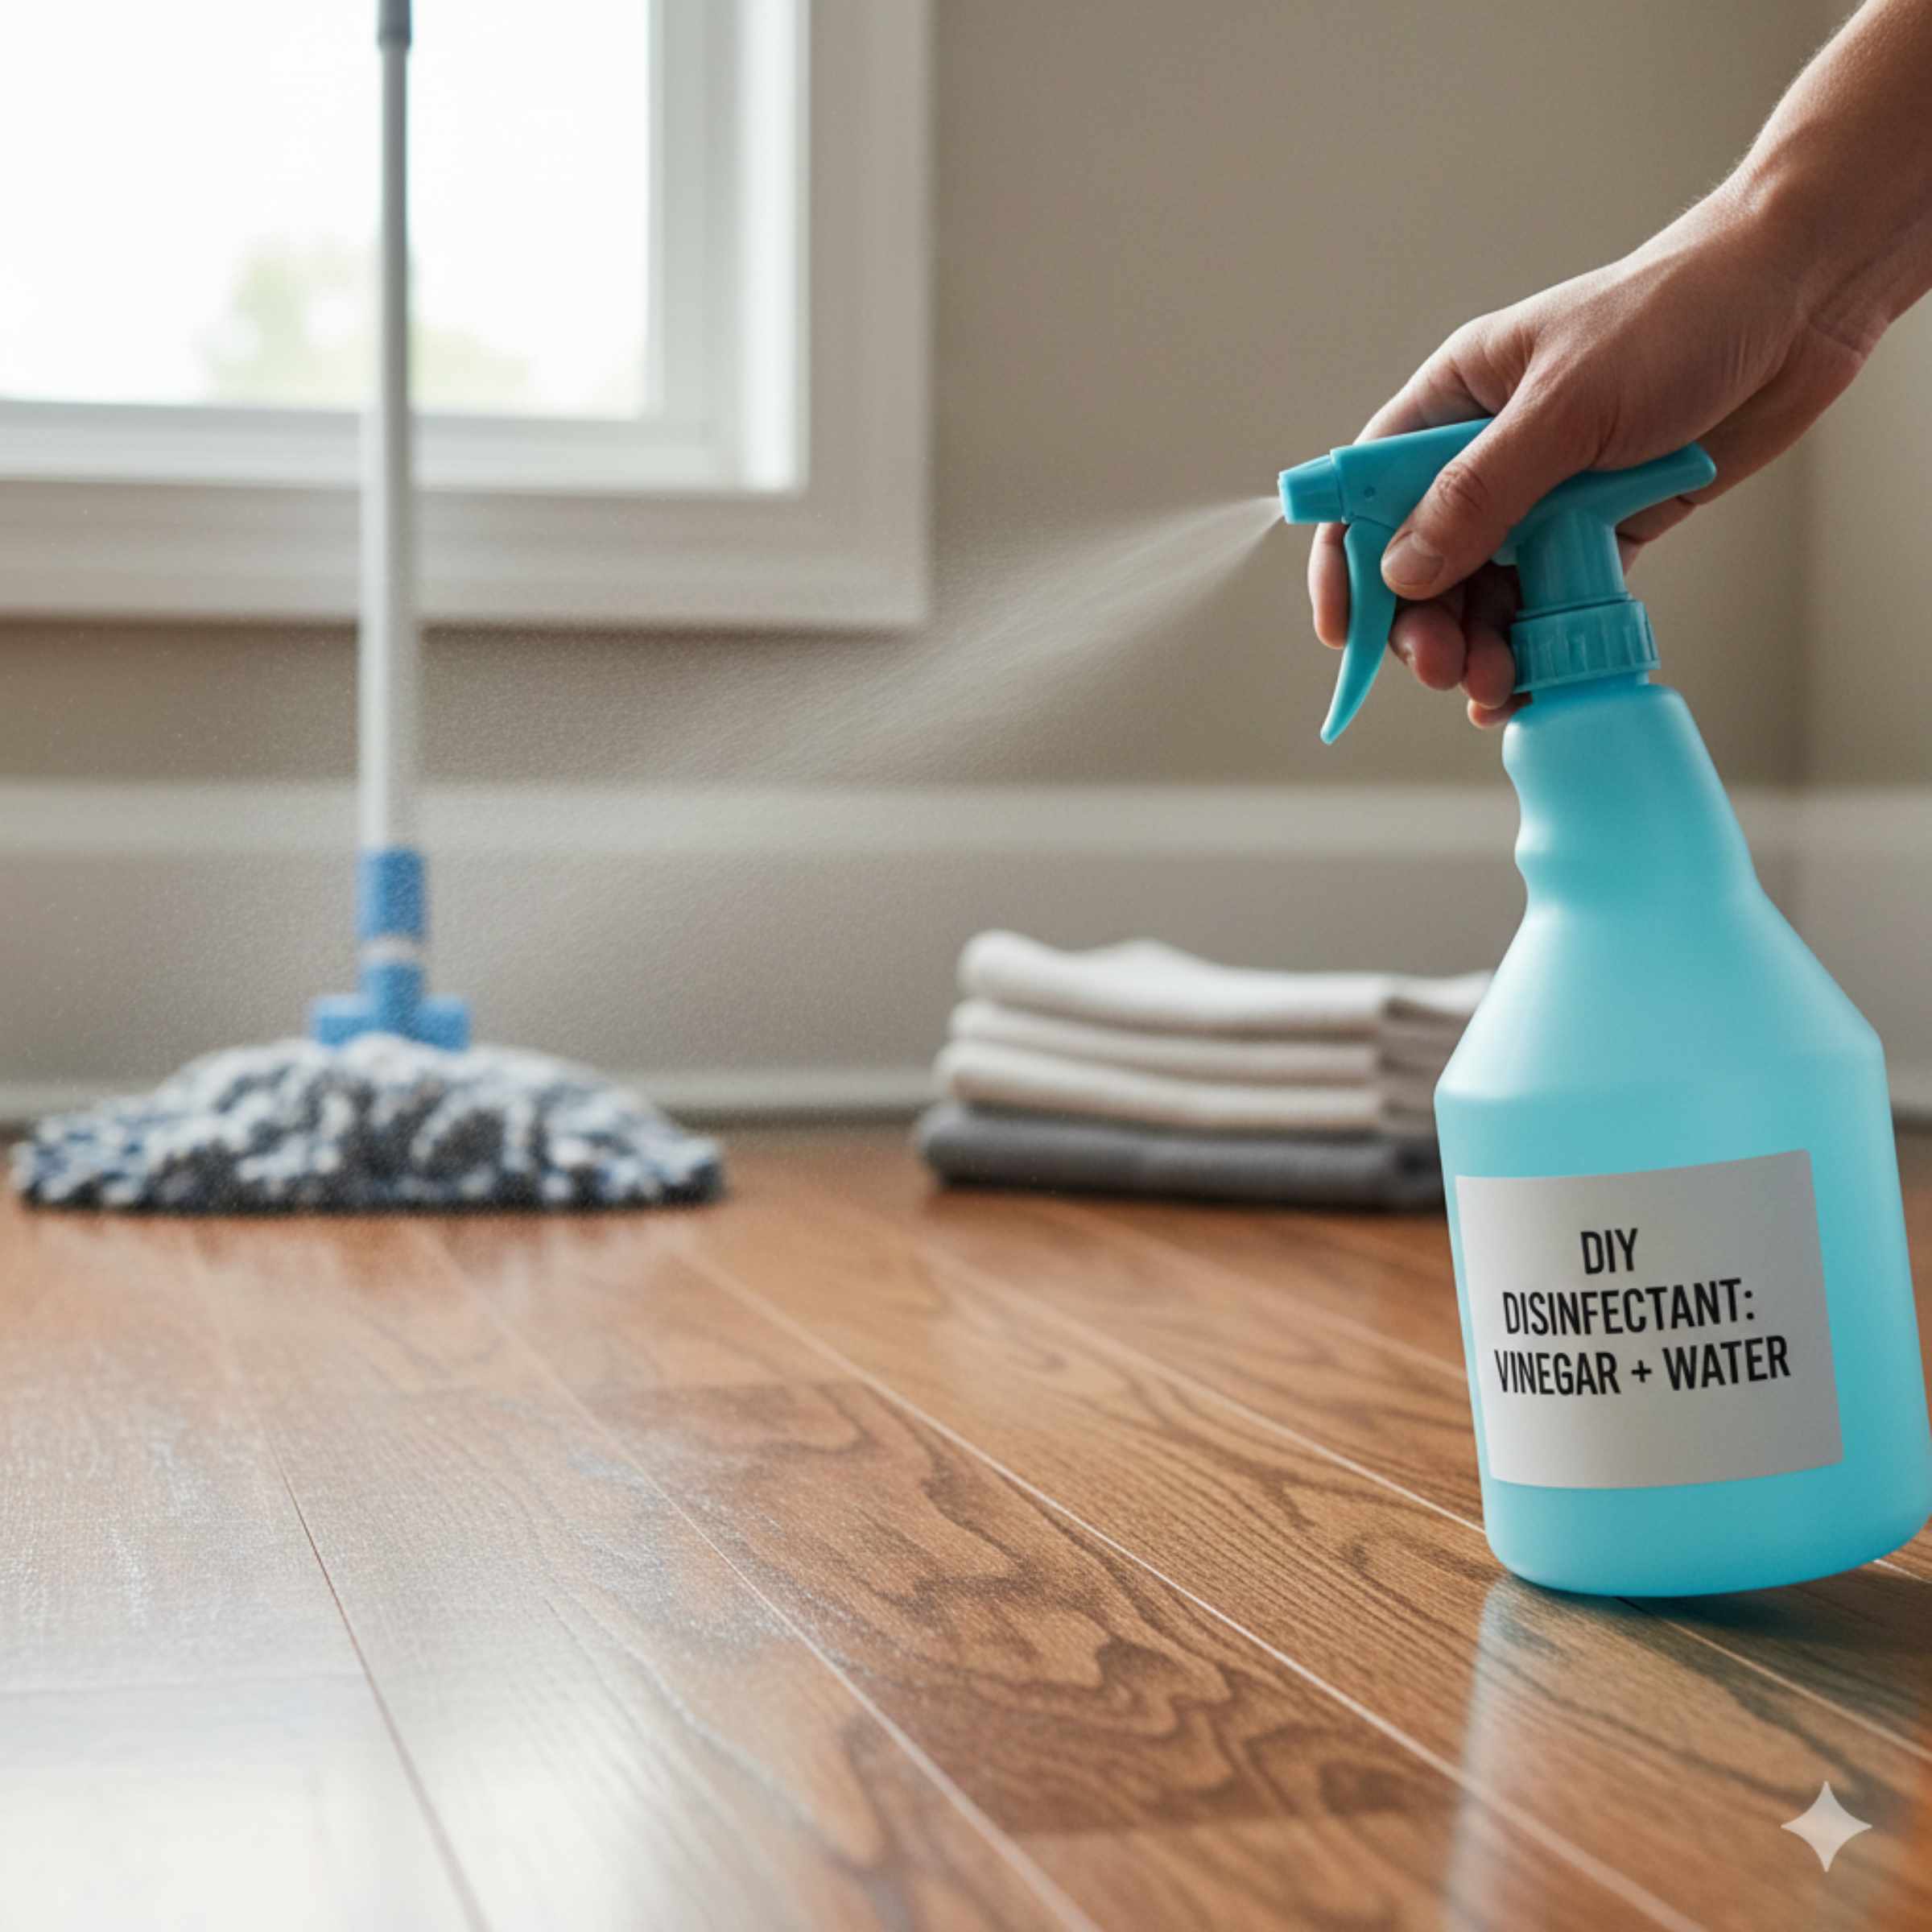
Option B: Diluted White Vinegar Solution (Natural Disinfecting Boost)
Vinegar is acidic, which helps break down grime and has mild disinfectant properties. However, because it is acidic, we must dilute it heavily. Do not use vinegar on unsealed, oiled, or waxed floors.
- What you need: A gallon bucket, clean water, and distilled white vinegar.
- The Recipe: Mix 1/2 cup of white vinegar into one gallon of warm water. This dilution is key to preventing dulling over time.
Option C: EPA-Approved Wood Floor Disinfectants
For times when you need medical-grade disinfection (like after someone has been sick), look for products specifically labeled as safe for finished hardwood floors and registered with the EPA. These products are balanced to clean wood while killing germs. Always follow the dilution instructions on the bottle exactly.
Here is a quick comparison of the cleaning agents:
| Cleaning Agent | Disinfecting Power | Risk to Finish (When Diluted) | Residue Concern |
|---|---|---|---|
| Mild Soap | Good for light sanitation | Low | Medium (if too much is used) |
| Diluted Vinegar | Moderate (acidic action) | Low to Moderate (use sparingly) | Low |
| EPA Wood Cleaner | High (kills specific pathogens) | Low (if approved for wood) | Very Low |
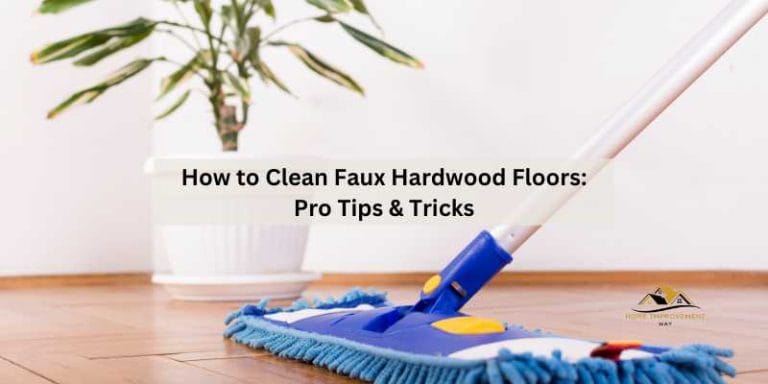
Step 3: The Right Way to Mop Your Hardwood Floors
This is the most crucial step for avoiding damage. We must use the right tools and the right amount of moisture.
Essential Mop Checklist
- Mop Type: Use a flat-head microfiber mop. These mops hold liquid efficiently but release it slowly, keeping the floor damp, not soaked.
- Avoid: String mops or steam mops. String mops hold too much water and can drip, and steam mops can introduce excessive heat and moisture directly into the wood seams.
The Damp Mopping Technique (The “Wring It Out Twice” Method)
- Dip and Wring Aggressively: Dip your microfiber pad or mop head into your chosen solution (Soap, Vinegar, or Commercial Cleaner).
- Wring Until It Feels Almost Dry: Wring the mop head out thoroughly over the bucket. Then, wring it out again over a sink or drain. You should be able to run your hand over the mop head and feel only slight coolness, not actual wetness. It should be just barely damp to the touch.
- Mop in Sections: Work in small, manageable sections, perhaps 4×4 feet at a time. This prevents the solution from sitting too long on the wood before you can dry it.
- Wipe and Go: Wipe the section firmly. If you notice any standing water or puddles forming, stop immediately and go over that area with a clean, dry section of your mop pad.
- The Final Polish: If the floor still feels damp after mopping a section, take a completely dry, clean microfiber cloth or mop pad and go over that area immediately to absorb any excess moisture. This step guarantees no standing water remains.
Step 4: Natural Spot Disinfection (For High-Traffic or Problem Areas)
Sometimes a whole-floor mop isn’t necessary; you just need to tackle a specific spill or area where germs might be concentrated (like near the trash can or pet food station). For these spots, you can use a slightly stronger, targeted application, still being very careful with moisture.
Using Rubbing Alcohol (Isopropyl Alcohol)
Rubbing alcohol (70% concentration) is a fantastic disinfectant that evaporates very quickly, minimizing the risk of water damage. It is safe for most modern polyurethane finishes, but always test first.
- Test Spot: Apply a tiny drop to an unseen area (like under a rug corner) and wait 5 minutes. If the finish looks dull or cloudy, do not proceed.
- Apply to Cloth: Lightly dampen a clean microfiber cloth with the rubbing alcohol. Do not pour it directly onto the floor.
- Wipe the Area: Wipe down the soiled or germy area. The alcohol will evaporate rapidly, leaving no moisture behind.
- Air Dry: Allow a few minutes for complete evaporation before walking on the area.
The Power of Hydrogen Peroxide (For Tough Stains/Germs)
Hydrogen peroxide (3% solution, the kind found in drugstores) is an excellent, non-chlorine bleach alternative that disinfects well and breaks down into water and oxygen. It can sometimes lift light stains, but use it sparingly on dark woods, as it can cause lightening over time.
- Dilute Slightly: For general disinfection, you can use the 3% solution straight, but for added safety on the finish, some experts suggest mixing 1 part peroxide with 3 parts water.
- Apply Locally: Spray lightly onto a cloth and blot the area needing disinfection.
- Do Not Rinse: Since it breaks down into harmless components, rinsing is usually not required unless you see sudsing residue.
Understanding Your Floor’s Finish: The Protection Layer
The secret to safely disinfecting hardwood floors lies almost entirely in understanding what is protecting the wood underneath. Most floors installed in the last 25 years have a Surface Finish (usually polyurethane, urethane, or acrylic). These finishes form a hard, plastic-like layer on top of the wood, making them highly resistant to water penetration and gentle cleaners.
Finish Types and Disinfecting Safety
| Finish Type | Description | Disinfecting Approach |
|---|---|---|
| Polyurethane/Urethane (Most Common) | Durable, sits on top of the wood. Looks slightly glossy or semi-gloss. | Tolerates mild soap, vinegar (diluted), or approved wood disinfectants well. Avoid anything overly abrasive. |
| Waxed/Oiled (Less Common/Antique) | Soaks into the wood grain, requires periodic re-waxing. Looks very natural and matte. | Extremely sensitive. Never use vinegar or harsh soaps.** Use only specialty wood oil cleaners or mineral spirits sparingly. Water is the enemy. |
If you are unsure about your finish, try the “Water Test.” Place a single drop of water in an inconspicuous spot. If it beads up and stays on the surface after 10 minutes, you likely have a good surface finish. If it soaks in and darkens the wood, you have an oiled or penetrating finish and must use extreme caution.
Avoiding Common Hardwood Floor Mistakes That Lead to Damage
As your friendly guide, I want to save you the heartache of costly repairs. Damage usually happens when we try to clean too quickly or use the wrong product. Here are the top three mistakes to sidestep when disinfecting:
- Using Too Much Water: This is number one. Water seeps into the gaps between boards, causing them to swell and buckle (cupping). Always use a damp mop, never a wet one.
- Using Ammonia or Chlorine Bleach: These chemicals are too harsh for the protective sealants on your wood floors. They can strip the finish, leading to a dull, hazy appearance that is hard to restore.
- Using Undiluted Vinegar or Steam: While vinegar is great when heavily diluted, using it straight can etch the finish. Steam mops introduce heat and moisture deep into the wood fibers, leading to warping over time. For disinfection, stick to the damp mop method.
Maintenance Cleaning vs Deep Disinfection Schedules
You don’t need to deep-disinfect your floors daily. Over-cleaning, even with safe products, can wear down the finish faster than regular dirt. It’s helpful to establish two different cleaning routines.
Routine Cleaning Schedule (Weekly)
This routine focuses on removing dust, dirt, and debris that could scratch the floor.
- Dry mop or vacuum.
- Use a very lightly dampened microfiber mop with just water or a tiny bit of pH-neutral wood cleaner.
Deep Disinfection Schedule (Monthly or As Needed)
This routine is for when you need to actively kill germs (e.g., after a cold, having pets in from the rain, or during flu season).
- Perform the thorough prep (Step 1).
- Use one of the safe, diluted solutions from Step 2 (Soap, Vinegar, or EPA-approved cleaner).
- Mop using the strict damp-mopping technique.
- Ensure the floor dries quickly and completely.
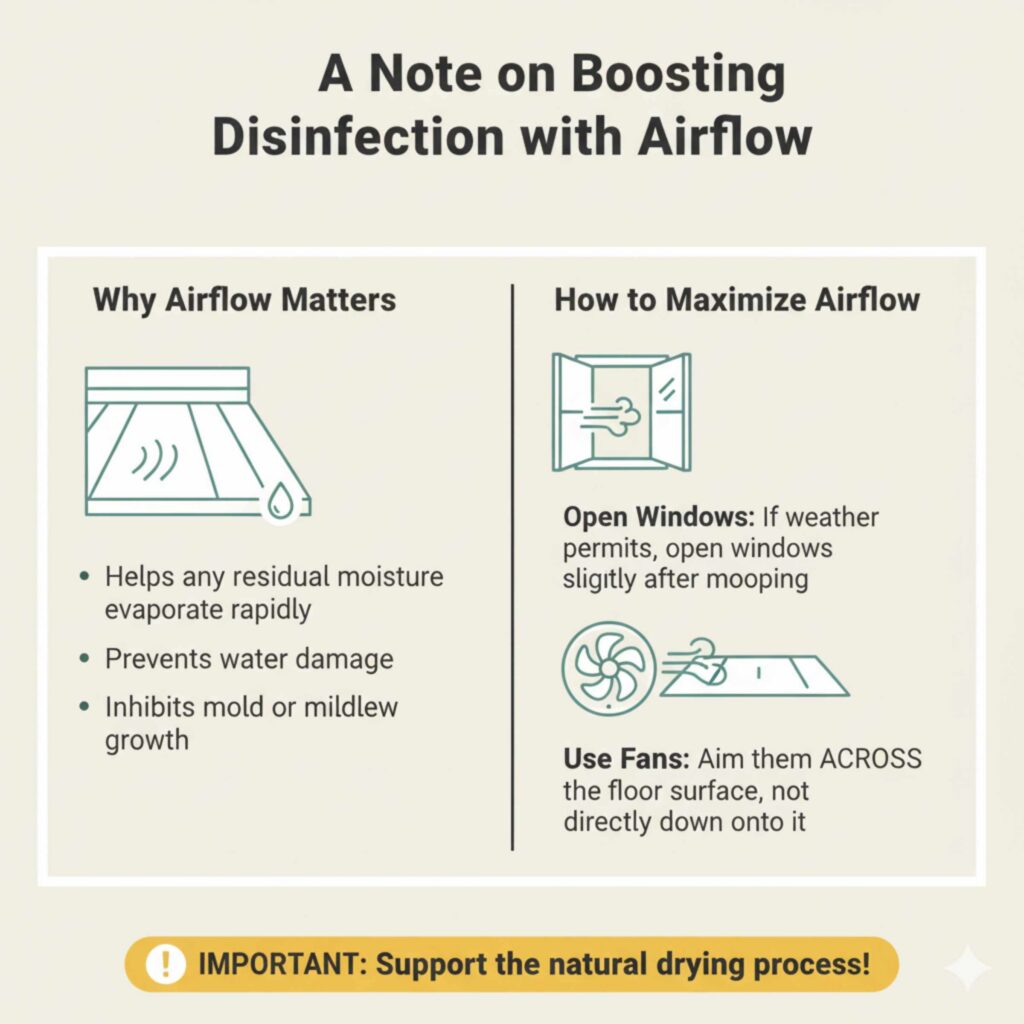
A Note on Boosting Disinfection with Airflow
One final, easy tip for ensuring a safe, sanitized environment without adding more liquid to your wood is maximizing airflow after cleaning. Airflow helps any residual moisture evaporate rapidly, preventing water damage and inhibiting mold or mildew growth.
After you finish mopping, if the weather permits, open windows slightly. If you must use fans, aim them across the floor surface rather than directly down onto it. This natural drying process supports the disinfection work you’ve already done.
Frequently Asked Questions (FAQ) for Hardwood Floor Disinfection
Q1: Can I use Lysol wipes or Clorox wipes on my finished hardwood floors?
A: Generally, no, you should avoid standard disinfecting wipes. They contain chemicals and moisture levels that are too high for safe, regular use on wood finishes. If you must use a wipe for spot cleaning, look specifically for wipes labeled as “Safe for Sealed Hardwood Floors.”
Q2: How often should I actually disinfect my hardwood floors?
A: Routine cleaning should happen weekly. Deep disinfection is only necessary when someone in the house has been sick or if there’s been a significant spill or contamination. For general home health, monthly disinfection is plenty, provided you keep up with dry dusting.
Q3: Will white vinegar ruin the shine on my wood floors?
A: Vinegar is acidic, which can dull the protective polyurethane finish over many years if used frequently or undiluted. If you dilute it heavily (1/2 cup per gallon), it is usually safe for monthly disinfection. Always test it first!
Q4: What is the absolute safest cleaner to use on brand new hardwood floors?
A: For brand new floors still under warranty, stick strictly to the cleaner recommended by the flooring manufacturer. If you don’t have that, the safest choice is distilled water with one or two drops of pH-neutral soap, wrung out nearly dry.
Q5: My floors look hazy after I used a disinfectant. What happened?
A: A haze usually means you left a residue behind. This happens from using too much soap or using a cleaner that isn’t fully rinsing away. Try mopping that area again immediately with a cloth dampened only with clean, distilled water, making sure to wring the cloth out until it’s barely damp. This “rinse mop” should remove the film.
Q6: Can I use essential oils like tea tree oil for disinfection?
A: Tea tree oil has natural antimicrobial properties. You can add a few drops to your diluted vinegar solution (Option B) for a natural scent and extra germ-fighting power. However, use very sparingly, as any oil residue left on the floor can become slippery or attract dirt.
Conclusion: Confidence in Your Clean Floors
Cleaning and disinfecting your beautiful hardwood floors doesn’t have to be a stressful guessing game. By respecting the natural characteristics of wood and following a few proven principles—minimal moisture, gentle cleaners, and the right tools—you can keep your floors both hygienic and stunning for years to come.
The biggest takeaway is simple: effective disinfection does not require harsh chemicals or soaking the floor. Whether you choose a lightly diluted soap solution, heavily diluted vinegar, rubbing alcohol for spot treatment, or an EPA-approved wood-safe disinfectant, success comes from controlled application and quick drying. Pair that with proper prep work and a damp (never wet) microfiber mop, and you eliminate germs without compromising the finish.
When you clean with intention instead of force, you protect the protective layer that keeps hardwood floors resilient and beautiful. Test first, clean gently, and disinfect only when truly needed. With this approach, you’ll enjoy peace of mind knowing your floors are not just clean—but safely cared for!