How to Find Bad Bulb: Essential LED Christmas Light Fix
Quick Summary:
Finding a bad bulb in LED Christmas lights is simple! Usually, one faulty bulb or a loose connection causes a whole string to go dark. This guide will show you easy, step-by-step methods to pinpoint that one bad bulb, getting your festive lights shining again quickly and safely.
Hello there! It’s Md Meraj, your go-to guide for making home projects feel less daunting and more like fun challenges. You know that moment when you excitedly string up your Christmas lights, only to find a section stubbornly dark? It’s a common holiday headache, especially with modern LED lights. But don’t worry, that frustrating dark patch doesn’t mean the whole string is ruined. In fact, it’s usually just one tiny culprit – a single bad bulb or a loose connection. This guide is designed to help you find that sneaky, bad bulb with simple, clear steps. We’ll walk through how to diagnose the problem and get your beautiful lights twinkling again in no time. Let’s get started!
Why Do LED Christmas Lights Go Bad?
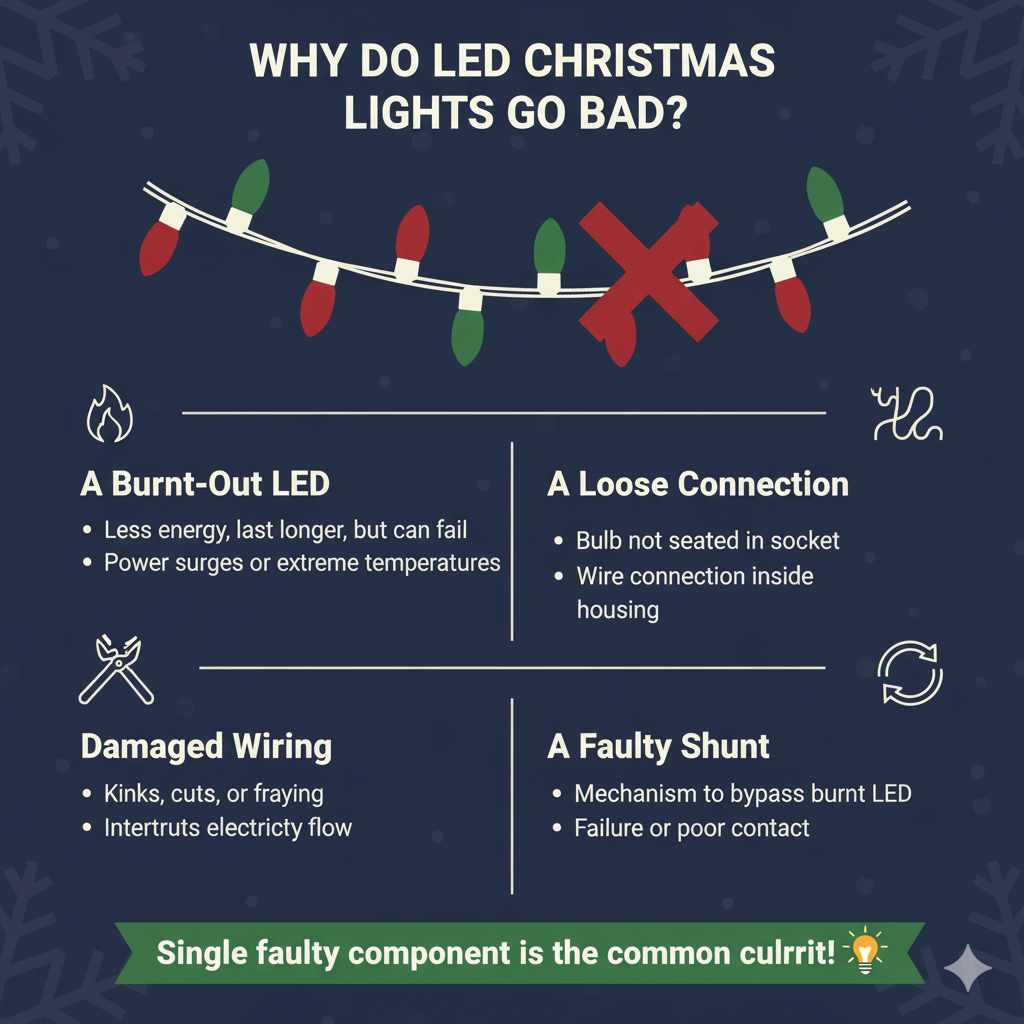
LED Christmas lights are fantastic because they use less energy and last much longer than traditional incandescent bulbs. However, like any electronic device, they can still develop issues. The most common reason a section or an entire string of LED lights goes dark is a single faulty component. This could be:
- A Burnt-Out LED: While LEDs are durable, they can eventually burn out, especially if they’ve been exposed to power surges or extreme temperatures.
- A Loose Connection: Sometimes, an LED bulb might not be seated properly in its socket, or a wire connection inside the bulb housing could become loose.
- Damaged Wiring: Kinks, cuts, or fraying in the wires can interrupt the flow of electricity to the rest of the string.
- A Faulty Shunt: Many LED Christmas light strings have a built-in “shunt” mechanism. If an LED burns out, the shunt is supposed to activate and bypass it, allowing the rest of the string to stay lit. If the shunt fails, or if the LED isn’t truly “burnt out” but just making poor contact, the entire section can go dark.
Understanding these common culprits helps us approach the fix with a clear strategy. The good news is that identifying and replacing a single bad LED bulb is usually a straightforward process.
Essential Tools You’ll Need
Before we dive into finding that bad bulb, let’s gather a few simple tools. You probably have most of these around the house, making this a truly DIY-friendly fix!
- Safety Glasses: Always protect your eyes, especially when dealing with electrical components.
- Gloves: These can help with grip and protect your hands from any sharp edges or minor electrical static.
- A Non-Contact Voltage Tester (Optional but Recommended): This handy tool can detect if electricity is flowing through a wire without you needing to touch anything directly. It’s a great safety feature. You can find reliable ones at most hardware stores.
- A Small Flathead Screwdriver or a Pliers with a Fine Tip: This will be used to gently pry out the old bulb.
- Replacement LED Bulbs: Make sure they are the correct type and color for your light string. Often, you can find replacement bulbs sold in packs specifically for LED Christmas lights.
- A Multimeter (Optional): For more advanced troubleshooting, a multimeter can test continuity and voltage, but it’s usually not necessary for finding a single bad bulb in a string.
- A Ladder or Step Stool: If your lights are hung high, ensure you have a stable way to reach them safely.
Having these tools ready will make the process much smoother and safer. Remember, safety first when working with any electrical items!
Step-by-Step Guide: How to Find the Bad Bulb
Now, let’s get down to business. We’ll go through a few methods, starting with the simplest. Don’t feel overwhelmed; we’ll take it one step at a time.
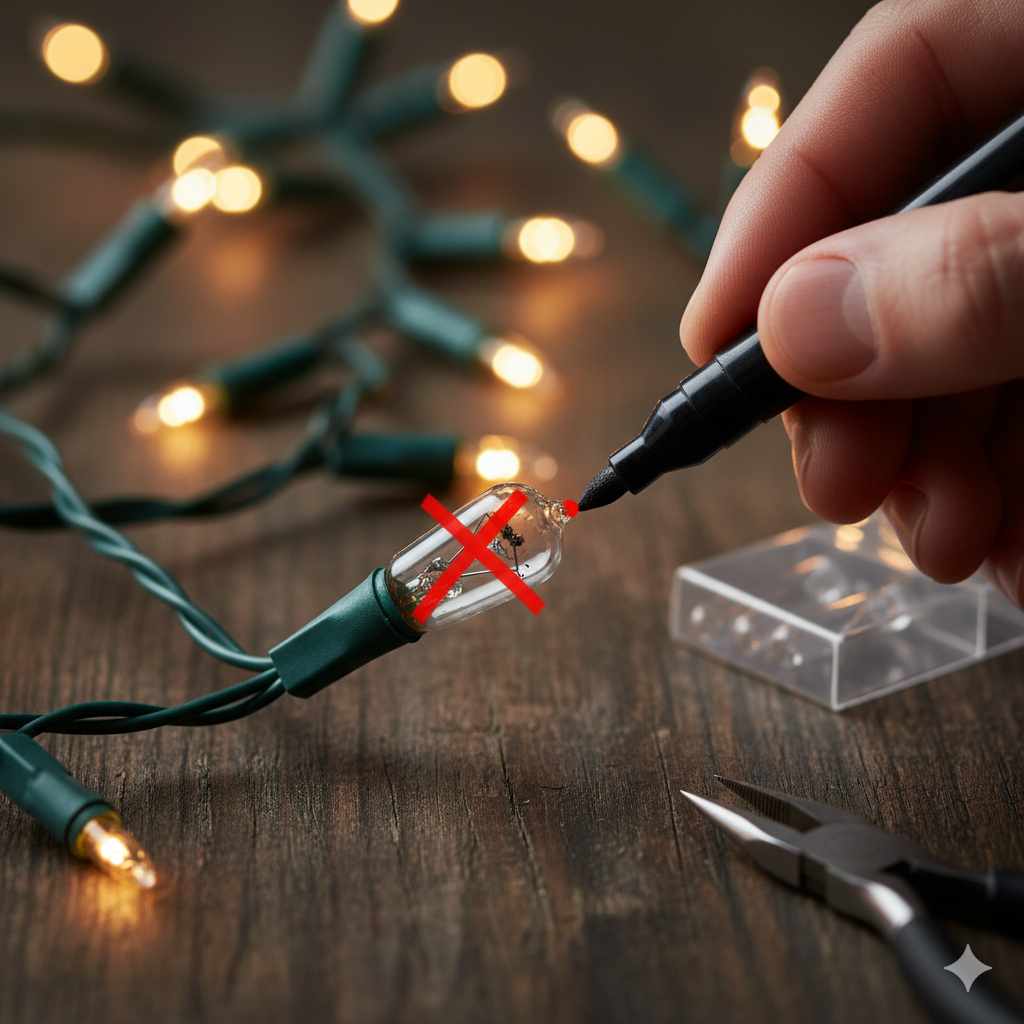
Method 1: The Visual Inspection
This is the easiest starting point and often solves the mystery.
- Unplug the Lights: This is the absolute first and most crucial step. Never attempt to work on Christmas lights while they are plugged in. Ensure the plug is completely out of the socket.
- Examine the Entire String: Carefully look at every single bulb on the dark section of your light string.
-
Look for Obvious Damage:
- Are any bulbs cracked or broken?
- Do any bulbs look discolored or burnt?
- Are any wires visibly frayed, cut, or kinked severely?
- Check Bulb Seating: Ensure each bulb is firmly seated in its socket. Sometimes, a bulb can simply come loose during storage or hanging. Gently push each bulb further into its socket.
If you spot an obviously damaged bulb or a loose connection, that’s likely your culprit! If you find one, proceed to Method 3 to replace it.
Method 2: The “One-by-One” Bulb Swap (If Visual Inspection Fails)
If the visual inspection doesn’t reveal an obvious problem, the next step is to systematically check each bulb. This method works best for LED strings where a single bad bulb can take out a whole series.
- Safety First: Ensure the Lights are Unplugged! I can’t stress this enough.
- Identify the Dark Section: Note exactly where the lights go out. This helps narrow down your search.
- Get Your Replacement Bulbs Ready: Have a known working replacement bulb of the correct type handy.
- Start at the Beginning of the Dark Section: Take the first bulb in the dark segment.
- Carefully Remove the Bulb: Gently twist or pull the bulb straight out of its socket. Some LED bulbs have a small plastic cap you might need to pry off first.
- Insert a Known Good Bulb: Place your working replacement bulb into the empty socket.
- Test the String (Briefly!): Plug the light string in for just a few seconds to see if the dark section now lights up. If it does, you’ve found your bad bulb! Unplug the lights immediately after testing.
- If it Doesn’t Light Up: Unplug the lights again. Remove the good bulb you just inserted, and put the original bulb back into its socket.
- Move to the Next Bulb: Repeat steps 5 through 8 for the next bulb in the dark section.
- Continue Systematically: Keep moving through each bulb in the dark segment, replacing it with your known good bulb one at a time and testing briefly.
This method can be a bit tedious, but it’s very effective for pinpointing the exact faulty bulb. Patience is key here!
Method 3: Replacing the Faulty Bulb
Once you’ve identified the bad bulb using Method 1 or 2, replacing it is usually straightforward.
- Unplug the Lights: Always ensure they are unplugged.
- Remove the Bad Bulb: Gently twist or pull the faulty bulb straight out of its socket. You might need your small flathead screwdriver or needle-nose pliers to gently leverage it out if it’s stuck. Be careful not to damage the socket.
- Prepare the Replacement: If your replacement LED bulbs come with small wire clips or connectors, ensure they are ready to be attached.
-
Install the New Bulb:
- For Bulbs with Integrated Connectors: Simply push the new bulb firmly into the socket. Ensure it’s seated correctly.
- For Bulbs Requiring Wire Connections: This is less common with modern LED Christmas lights but can happen. If your replacement bulb has wires, you’ll need to carefully insert them into the corresponding contacts within the socket. Refer to any instructions that came with your replacement bulbs.
- Secure the Bulb: Make sure the new bulb is snug and doesn’t wiggle excessively.
- Test Again: Plug in the light string to confirm that the entire section is now lit.
- If It Still Doesn’t Work: If replacing a bulb doesn’t fix the problem, the issue might be a faulty wire connection within the socket itself, or a problem further up or down the string. You might need to try replacing the next bulb in the sequence or inspect the wiring more closely.
Troubleshooting Loose Connections
Sometimes, the problem isn’t a burnt-out bulb but a loose connection within the socket or where the wires enter the bulb.
- Unplug the Lights!
- Inspect the Socket: Look inside the socket where the bulb was. Are the metal contacts bent or corroded? You can try gently bending them back into place with a small screwdriver, but be very careful not to break them.
- Check Wire Entry Points: Examine where the wires enter the bulb housing and the socket. If a wire looks loose or is starting to pull away, this could be the issue. Sometimes, a tiny amount of electrical tape can secure a slightly loose wire, but if it’s significantly damaged, the string might be beyond simple repair.
When to Consider Replacing the Entire String
While finding and replacing a single bad bulb is usually the goal, there are times when it’s more practical or safer to retire the entire string.
- Extensive Damage: If you find multiple broken bulbs, significant fraying or cuts in the wiring, or damage to the plug or controller, it’s often best to replace the whole string. The risk of electrical shorts or fire hazards increases with widespread damage.
- Repeated Failures: If you find yourself constantly replacing bulbs on the same string year after year, the string itself might be nearing the end of its lifespan, or there could be an underlying issue that’s difficult to fix.
- No Replacement Bulbs Available: If you can’t find compatible replacement bulbs for your specific type of LED lights, you might have no choice but to replace the string.
- Safety Concerns: If at any point you feel unsure or unsafe working with the lights, it’s always better to err on the side of caution and buy a new set.
According to the U.S. Consumer Product Safety Commission (CPSC), electrical malfunctions are a leading cause of holiday fires. Prioritizing safety means knowing when a repair is worthwhile and when it’s time for a new set of lights.
Understanding LED Light String Configurations
LED Christmas lights are often wired in series, which means the electricity flows through each bulb one after another. This is why one bad bulb can cause a whole section to go dark. However, some strings are wired in parallel, or have multiple parallel circuits within a single string, which can make them more resilient. Knowing how your lights are configured can help you troubleshoot.
Many modern LED strings have a “shunt” inside each bulb. When an LED burns out, the shunt is supposed to activate and complete the circuit, allowing the rest of the bulbs to stay lit. If the shunt fails, or if the bulb isn’t truly “burnt out” but just not making good contact, the circuit breaks.
To help illustrate, here’s a simplified look at how series wiring can cause a chain reaction:
| Configuration | How a Bad Bulb Affects the String | Common Fix |
|---|---|---|
| Simple Series | One bad bulb or loose connection breaks the entire circuit for that section. | Finding and replacing the single bad bulb. |
| Series with Shunts | A burnt-out bulb should be bypassed by its shunt. If the shunt fails, or the bulb isn’t fully burnt out, the section goes dark. | Finding and replacing the bulb, even if it looks okay, as its shunt may have failed. |
| Parallel or Combination | Usually more resilient; a single bad bulb might only affect itself or a small group of bulbs. | Often requires identifying and replacing individual faulty bulbs or a small segment. |
Most common mini-style LED Christmas lights operate on a series-with-shunts principle, making the “one bad bulb” scenario very frequent.
Tips for LED Christmas Light Maintenance
A little bit of care can go a long way in extending the life of your LED Christmas lights and preventing future headaches.
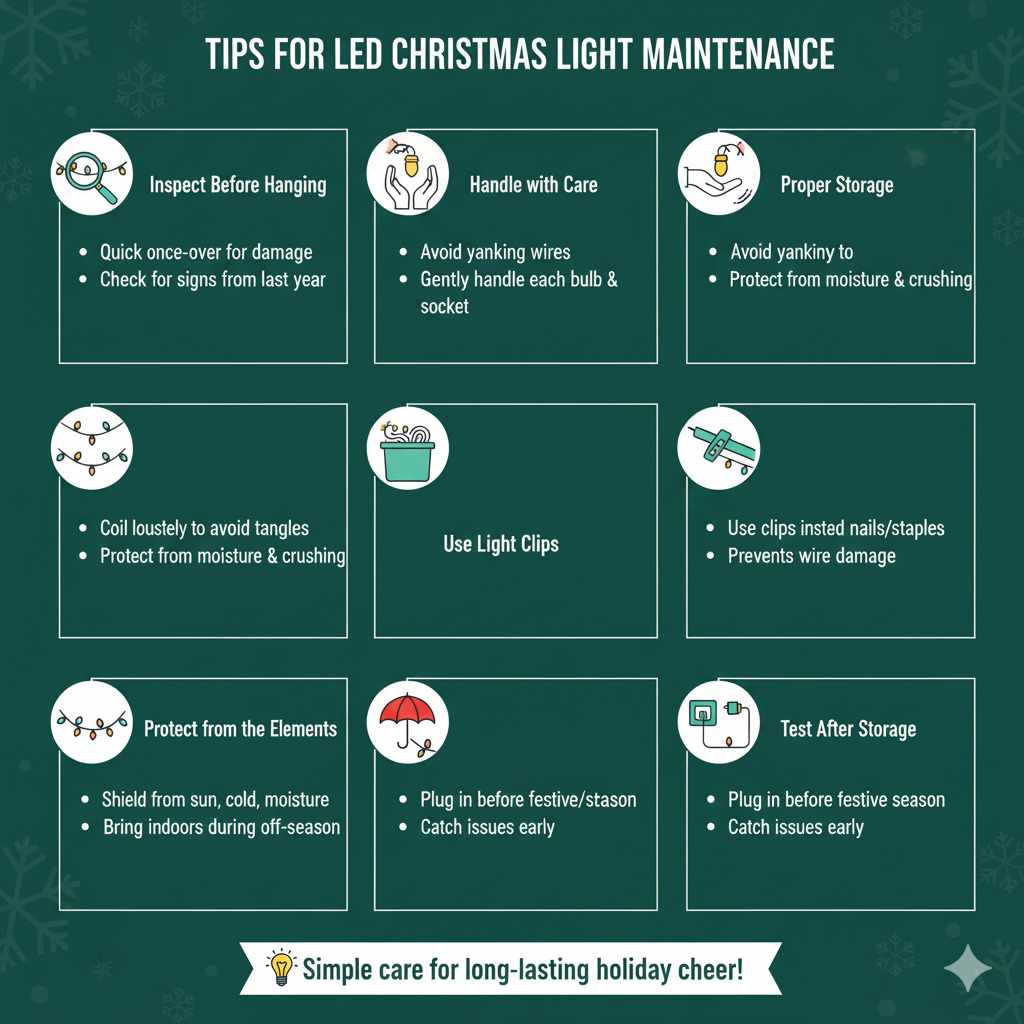
- Inspect Before Hanging: Always give your light strings a quick once-over before you put them up. Look for any signs of damage from the previous year or from storage.
- Handle with Care: Avoid yanking on the wires when hanging or taking down lights. Gently handle each bulb and socket.
- Proper Storage: Coil your lights loosely to avoid kinks and tangles. Store them in a container that protects them from moisture and crushing. Some people like to wrap them around a piece of cardboard or use specialized light storage reels.
- Use Light Clips: When hanging, use appropriate light clips instead of staples or nails that can damage the wires.
- Protect from the Elements: While LED lights are designed for outdoor use, prolonged exposure to harsh sun, extreme cold, and moisture can still degrade them over time. Consider bringing them indoors during the off-season if possible.
- Test After Storage: Before the festive season officially begins, plug in your lights to test them. This allows you to catch any issues while you still have time to fix them or replace the strings.
Following these simple maintenance tips can save you time, money, and frustration when the holiday season rolls around.
Frequently Asked Questions (FAQ)
Q1: How do I know if it’s an LED or incandescent light string?
A: LED bulbs are typically smaller, often have a frosted or solid plastic appearance rather than glass, and they don’t get hot to the touch. Incandescent bulbs are usually made of glass and produce heat. Also, LED strings are much more energy-efficient.
Q2: Can I replace an LED bulb with a different type of bulb?
A: No, it’s crucial to use only replacement LED bulbs that are specifically designed for your type of LED Christmas light string. Using the wrong type can damage the string, cause a fire hazard, or simply not work.
Q3: My entire string of LED lights is out. Is it still just one bad bulb?
A: It’s possible, especially if the string is wired in series. However, if the entire string is out, also check the plug, the fuse (if your string has one), and the connection to the power source. Sometimes, a loose wire at the plug or a blown fuse can take out the whole string.
Q4: How can I test my Christmas lights safely?
A: Always unplug the lights before making any physical contact or attempting repairs. When testing after a repair, plug them in briefly to see if they work, then unplug them immediately afterward. For more advanced checks, a non-contact voltage tester can confirm if power is reaching a certain point in the string while it’s plugged in, but use with extreme caution and only if you are comfortable.
Q5: What is a “shunt” in an LED Christmas light bulb?
A: A shunt is a small component inside an LED bulb that acts as a backup conductor. If the LED itself burns out, the shunt is designed to activate and bypass the burnt-out LED, completing the electrical circuit so the rest of the bulbs in the series can stay lit. If the shunt fails, the whole section goes dark.
Q6: Can I fix a broken wire on my LED Christmas lights?
A: Minor kinks or very small nicks in the wire insulation might be temporarily fixed with electrical tape, but any significant cuts, fraying, or breaks in the wire itself can be a serious safety hazard. It’s generally recommended to replace the entire string if the wiring is substantially damaged.
Q7: My LED lights flicker. What could be the cause?
A: Flickering can indicate a loose connection, a partially burnt-out bulb, or a failing shunt. Work through the steps to find and replace any suspect bulbs. If the flickering persists after checking all bulbs, it might be an issue with the controller box (if your lights have one) or a more complex wiring problem, and it might be time for new lights.
Conclusion
Dealing with a dark section on your festive LED Christmas lights can feel disheartening, but as we’ve seen, finding that single bad bulb is usually a manageable DIY task. By following these straightforward steps – from a careful visual inspection to systematically swapping bulbs – you can confidently diagnose and fix the problem. Remember to always prioritize safety by unplugging the lights before you begin any work, and don’t hesitate to use the right tools to make the job easier and safer. With a little patience and these clear instructions, you’ll have your lights shining brightly again, adding that magical sparkle to your home. Happy decorating, and may your holidays be merry and bright!