How to Wire LED Bulbs Without a Ballast (Type B Steps)
Type B LED tubes wire directly to line voltage once the fluorescent ballast is removed — but only into non-shunted sockets, or the tube can short or fail to light. Wiring it wrong risks a blown driver or a tripped breaker. This guide covers removing the ballast safely, the correct hot/neutral wiring diagram, and how to tell if your tombstones are shunted before you start.
Why You Might Want to Wire LED Bulbs Without a Ballast
So, why go through the trouble of bypassing a ballast? It all comes down to efficiency, cost, and simplicity. Think of the ballast as an old-fashioned gatekeeper for your fluorescent lights. It controls the power, but it’s not very energy-smart and can be a source of problems.
The Benefits of Going Ballast-Free with LEDs
- Energy Savings: Ballasts themselves consume power, even when the light is off. Removing them means you eliminate that wasted energy, making your new LED setup even more efficient.
- Cost-Effectiveness: While LED bulbs have a higher upfront cost, their longer lifespan and lower energy consumption mean you save money over time. Plus, you avoid the cost of replacing a failing ballast.
- Longer Lifespan: LED bulbs are built to last much longer than traditional fluorescent tubes. By removing the ballast, you’re ensuring your new LED system can reach its full potential lifespan without a potentially failing component.
- Reduced Heat: Ballasts can generate heat, which can contribute to overall room temperature and potentially shorten the lifespan of other components. LEDs run cooler, which is a nice bonus.
- Environmental Friendliness: Lower energy use means a smaller carbon footprint. Many older ballasts also contain hazardous small capacitors, so removing them is a step toward safer disposal. See the EPA’s guidance on hazardous waste below.
- Simpler Installation: Once you understand the wiring, removing the ballast often simplifies the overall electrical setup — one less failure point to troubleshoot later.
📊 Fluorescent ballasts manufactured before 1979 may contain PCBs (polychlorinated biphenyls) — Congress banned PCB manufacturing in 1976 and the EPA phased out their use in 1979. — Source: U.S. EPA, Proper Maintenance, Removal and Disposal of PCB-Containing Fluorescent Light Ballasts
Understanding Your Lighting System: Ballast vs. Direct Wire LEDs
Before we dive into the wiring, let’s get a clear picture of what we’re dealing with. Traditional fluorescent lights need a ballast to work. LED technology, however, is different. It operates on low-voltage DC power, and many LED bulbs designed for fluorescent fixtures have built-in drivers (which are like a mini-ballast for LEDs) that handle this conversion. This means they can often be wired directly to your home’s AC power, bypassing the old ballast entirely.
Fluorescent Lights with Ballasts
Fluorescent tubes require a ballast for a couple of key reasons:
- Starting the Arc: They provide a high-voltage surge to start the electrical arc through the gas inside the tube.
- Regulating Current: Once the arc is going, the ballast limits the current to prevent the tube from burning out too quickly.
These ballasts can be either magnetic (older, heavier, less efficient) or electronic (newer, lighter, more efficient). Regardless of type, they are an extra component that LEDs often don’t need.
LED Tube Lights: The Main Types (A, B, C, and Hybrid)
When you’re looking to upgrade to LED tubes, you’ll typically find four labeled types that affect how you wire them:
- Type A (Ballast Compatible / Plug-and-Play): These LED tubes are designed to work with your existing ballast. You simply swap out the fluorescent tube for the LED tube. This is the easiest option but doesn’t eliminate the ballast or its energy draw.
- Type B (Ballast Bypass / Direct Wire): These are the ones we’re interested in! Type B LED tubes are designed to be wired directly into the power source, completely bypassing and removing the old ballast. They have their own internal drivers to manage the power.
For this guide, we’re focusing on Type B LED tubes because they offer the most benefits in terms of efficiency and simplicity once installed. Two other labels show up on packaging and are worth knowing about even though this guide doesn’t wire them:
- Type C (External Driver): The fluorescent ballast is removed entirely and replaced with a separate low-voltage LED driver mounted in or near the fixture, which then powers the tube. Type C tubes typically offer the longest lifespan and best dimming performance of the three, but the swap is more involved than a Type B bypass since you’re installing a new driver, not just re-routing wires.
- Type A+B (Hybrid/Dual-Mode): These tubes work either with the existing ballast left in place (Type A mode) or after the ballast is removed and wired direct (Type B mode) — useful if you want to upgrade tubes now and remove the ballast later without buying new tubes twice.
Shunted vs. Non-Shunted Tombstones: Which Do You Have?
A tombstone is the socket the tube’s pins plug into, and it’s the single most common point of failure in a Type B conversion. Shunted tombstones connect both pins internally to a single circuit — that’s what a fluorescent ballast expects, so it can send the starting surge through one path. Non-shunted tombstones keep each pin on its own isolated circuit, which is what most double-ended Type B LED tubes require once the ballast is gone. Wiring a double-ended Type B tube into shunted sockets can cause it to fail to light, flicker, or short internally. Check your LED tube’s packaging: it will specify shunted or non-shunted compatibility, and single-ended Type B tubes are usually built to work with either.
Safety First! Essential Precautions
Working with electricity can be dangerous if not done carefully. Your safety is the top priority here. Before you even think about touching any wires, please read and understand these crucial safety steps. If you ever feel unsure or uncomfortable, it’s always best to call a qualified electrician.
Your Safety Checklist
- Turn Off the Power: This is non-negotiable. Locate the circuit breaker that controls the light fixture you’ll be working on and flip it to the “OFF” position.
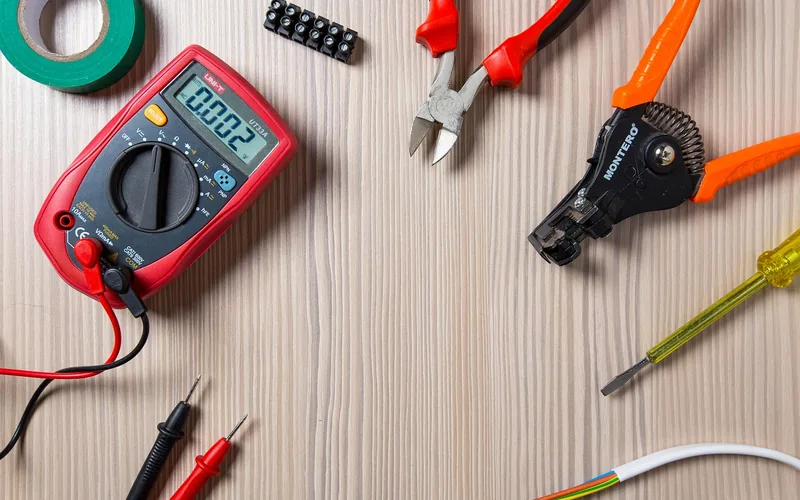
- Test for Power: Use a non-contact voltage tester to confirm there is no power running to the fixture wires, then confirm again with a multimeter — a magnetic ballast’s capacitor can hold a charge for several seconds after power is cut. If either tool lights up or beeps, the power is still on — go back to the breaker box!
- Wear Safety Gear: Always wear safety glasses to protect your eyes from falling debris or stray wire fragments. Insulated gloves can also provide an extra layer of protection.
- Use Insulated Tools: Ensure your screwdrivers, wire strippers, and pliers have insulated handles.
-
Understand Your Wiring: Familiarize yourself with basic electrical wiring colors (though these can vary). In the US, typically:
- Black: Hot/Live wire
- White: Neutral wire
- Green or Bare Copper: Ground wire
- Never Work in Damp Conditions: Ensure the area is dry. Water and electricity are a dangerous combination.
- Follow Local Codes: Electrical work should comply with local building codes. If unsure, consult a professional.
“Turn off the power at the breaker and remove the fluorescent tubes. Use a multimeter to confirm there is no electrical current.”
Tools and Materials You’ll Need
Gathering the right tools and materials beforehand makes the job much smoother. Here’s a list of what you’ll likely need:
Essential Tools
- Safety Glasses: To protect your eyes.
- Insulated Gloves: For added electrical protection.
- Non-Contact Voltage Tester: Crucial for confirming power is off.
- Screwdriver Set: With insulated handles, likely including Phillips head and flathead.
- Wire Strippers: To remove insulation from wires.
- Wire Cutters: For cleanly cutting wires if needed.
- Wire Nuts: To securely connect wires. Make sure they are the appropriate size for the wires you are connecting.
- Pliers: With insulated handles.
- Ladder or Step Stool: To safely reach the fixture.
Materials
- Type B (Ballast Bypass) LED Tubes: Ensure they are compatible with your fixture size (e.g., T8, T12) and voltage, and check whether they need shunted or non-shunted tombstones. Check the packaging for specific wiring instructions.
- Replacement Wire Nuts (Optional): If the existing ones are old or damaged.
- Electrical Tape (Optional): For extra insulation if needed, though proper wire nut connections are usually sufficient.
Best Type B LED Tube Pick
Sunco 10-Pack 4FT T8 LED Ballast Bypass Tubes – $61.98
A direct-wire Type B tube sized for the standard 4-foot fixtures this guide covers — check the packaging for shunted vs. non-shunted tombstone compatibility before you buy, exactly as covered above.
- Best for: Replacing multiple fluorescent tubes in one fixture at once
- Why we picked it: Type B direct-wire design matches the wiring steps in this guide, no ballast needed
- Main drawback: Requires the ballast to already be removed — won’t light up on an intact fluorescent circuit
Compare more ballast-bypass tools
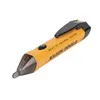 Option 1 Klein Tools Non-Contact Voltage Tester – $16.94
|
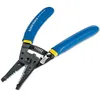 Option 2 Klein Tools Wire Cutter/Stripper – $17.64
|
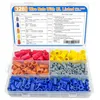 Option 3 MATWEI Wire Nuts Assortment Kit – $8.49
|
As an Amazon Associate we earn from qualifying purchases.
Step-by-Step Guide: How to Wire LED Bulbs Without Ballast
Alright, let’s get to it! This guide is for a typical fluorescent fixture. Remember, always refer to the specific instructions that come with your Type B LED tubes, as wiring can vary slightly between manufacturers.
Step 1: Turn Off the Power! (Seriously, Double-Check!)
Go to your electrical panel and find the breaker for the light fixture. Flip it OFF. Then, go to the light fixture and try the light switch. If the light doesn’t turn on, the power is off. Now, use your non-contact voltage tester on the wires inside the fixture, then confirm with a multimeter to be absolutely sure.
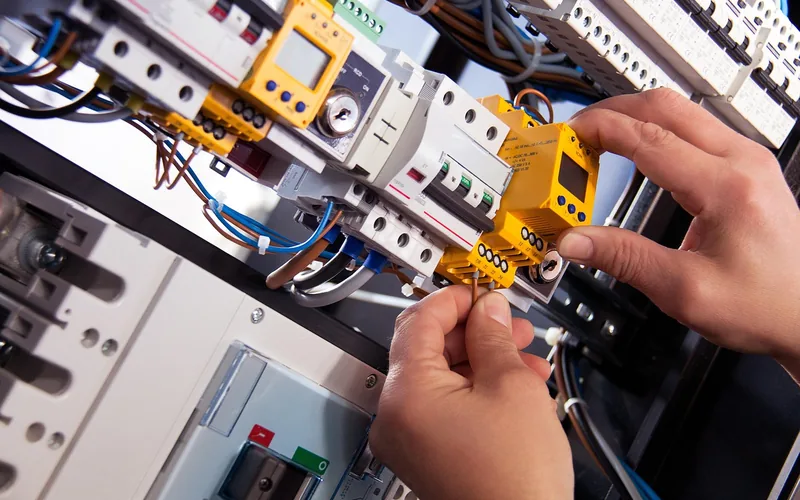
Step 2: Access the Fixture and Ballast
Remove the cover or lens of the light fixture. This usually involves sliding it off or unscrewing some clips. Next, you’ll need to remove the old fluorescent tubes. They typically twist and pull out. Once the tubes are out, you can usually access the ballast by removing a cover plate on the fixture itself, or sometimes the ballast is just exposed once the tubes are out.
Step 3: Identify and Remove the Ballast
The ballast is usually a rectangular metal box, often with wires coming out of it. You’ll need to disconnect it from the power source. Look for where the main power wires (from the ceiling/wall) connect to the ballast, and where the ballast wires connect to the lamp holders (sockets). Cut the wires leading to and from the ballast, leaving enough length on the wires coming from the ceiling/wall and going to the lamp holders. Use wire strippers to expose about half an inch of the wire ends. You may need to unscrew the ballast from its mounting bracket to remove it entirely.
Step 4: Understand the New Wiring Diagram
This is the most critical part. Your new Type B LED tubes will come with a wiring diagram. These diagrams are designed to be simple. Usually, you’ll be connecting the incoming power wires (hot and neutral) directly to the lamp holders, bypassing the ballast’s connection points entirely. The ground wire typically connects to the fixture’s metal chassis or a designated ground screw.
Common Wiring Scenario:
In many cases, you’ll connect the incoming hot wire (usually black) to one end of the fixture’s internal wiring that goes to one of the lamp holders. You’ll connect the incoming neutral wire (usually white) to the other end of the fixture’s internal wiring that goes to the other lamp holder. The ground wire (green or bare copper) should be connected to the fixture’s ground point.
Example Wiring Diagram (Conceptual):
| Incoming Power | Connection Point | Purpose |
|---|---|---|
| Hot (Black) | One side of the fixture’s internal wiring (leading to one lamp holder) | Supplies power to the LED tube |
| Neutral (White) | The other side of the fixture’s internal wiring (leading to the other lamp holder) | Completes the circuit for the LED tube |
| Ground (Green/Bare) | Fixture’s metal chassis or ground screw | Safety connection |
Important Note: Some LED tubes are “shunted,” meaning both pins on one end of the tube are connected internally — see the Shunted vs. Non-Shunted section above before you buy tubes or wire the sockets. Always check your specific tube’s documentation. Also note that field-modifying a fixture this way removes it from its original UL listing unless you use a UL-listed retrofit kit — National Electrical Code Section 410.6 requires retrofit kits to be Listed.
Step 5: Make the Electrical Connections
Using wire nuts, connect the wires according to the diagram provided with your LED tubes. For example:
- Connect the incoming hot wire to the appropriate wire leading to the lamp holder.
- Connect the incoming neutral wire to the appropriate wire leading to the other lamp holder.
- Ensure the ground wire is securely connected.
Give each connection a gentle tug to ensure it’s secure. If you need to strip more insulation, do so carefully. Make sure no bare wire is exposed outside of the wire nut.
Step 6: Secure and Insulate
Tuck all the wires neatly back into the fixture’s wiring compartment. Ensure no wires are pinched or strained. If you feel any connections are not as secure as they should be, you can wrap them with electrical tape, but a properly applied wire nut is usually sufficient.
Step 7: Install the LED Tubes
Carefully insert the new Type B LED tubes into the lamp holders. They should twist and lock into place just like the old fluorescent tubes. Ensure they are seated correctly.
Step 8: Reassemble the Fixture
Replace the fixture cover or lens that you removed in Step 2.
Step 9: Restore Power and Test
Go back to your breaker box and flip the circuit breaker back ON. Go to the light switch and turn it on. Your new LED light should illuminate!
Troubleshooting Common Issues
Even with the best preparation, sometimes things don’t work perfectly the first time. Here are a few common issues and how to fix them:
Light Doesn’t Turn On
- Check Power: Did you turn the breaker back on?
- Check Switch: Is the light switch in the “ON” position?
- Check Bulb Seating: Are the LED tubes fully and correctly seated in the lamp holders? Try removing and reinserting them.
- Check Wiring Connections: Turn the power OFF again at the breaker. Open the fixture and double-check all your wire nut connections. Ensure wires are stripped to the correct length and the nuts are tight.
- Check Tombstone Type: If the tube is a double-ended Type B and the fixture still has shunted sockets, the tube may not power on at all — see the Shunted vs. Non-Shunted section above.
- Check LED Tube: Could the LED tube itself be faulty? If you have another compatible tube, try swapping it in.
Light Flickers
- Loose Connections: This is the most common cause. Power OFF and re-check all wire nut connections.
- Faulty LED Tube: The internal driver of the LED tube might be failing. Try a different tube.
- Fixture Wiring Issue: Less common, but there could be an issue with the fixture’s internal wiring or lamp holders.
Only One Tube Works (in a Multi-Tube Fixture)
- Wiring Error: Double-check your wiring diagram. You might have missed a connection or connected a wire to the wrong terminal.
- Faulty Tube: The non-working tube might be defective. Test it in another socket or replace it.
When to Call a Professional Electrician
While this guide aims to make the process accessible, there are times when calling a professional is the wisest choice:
- If you are uncomfortable with any step of the process.
- If you encounter wiring colors that are not standard or confusing.
- If your fixture appears damaged or outdated in a way that makes it unsafe to work with.
- If you’ve followed all the steps and the light still doesn’t work.
- If your local electrical codes require a licensed electrician for such modifications.
A qualified electrician can ensure the job is done safely and correctly, giving you peace of mind. You can find guidance on hiring a licensed electrician and general electrical safety through the Electrical Safety Foundation International (ESFI).
Frequently Asked Questions (FAQ)
Here are some common questions beginners have about wiring LED bulbs without a ballast:
Can I use a regular LED bulb in a fluorescent fixture?
No, you generally cannot use a standard household LED bulb (like an E26 base) in a fluorescent fixture (like a T8 or T12 socket). You need specific LED tubes designed to replace fluorescent tubes. For ballast bypass, you need Type B LED tubes.
What’s the difference between Type A and Type B LED tubes?
Type A LED tubes are “plug-and-play” and work with your existing ballast. Type B LED tubes are “ballast bypass” and require you to remove the ballast and wire the fixture directly to the power source. See our Type A vs. Type B compatibility guide for how to tell which one your fixture needs.
Do I need to replace the entire light fixture?
Not necessarily. If your fixture is in good condition, you can often convert it by removing the ballast and installing Type B LED tubes. If the fixture is old, damaged, or you prefer a new look, replacing the entire fixture with an LED-ready fixture is also an option.
How do I know if my LED tubes are Type B?
The packaging and product description will clearly state if they are “Ballast Bypass,” “Direct Wire,” or “Type B.” It should also state whether the tube needs shunted or non-shunted tombstones. Always check this before purchasing.
Can I just leave the old ballast in place but not connect the new LED tubes to it?
No, this is not recommended. Even if not actively powering a tube, the ballast is still wired into the circuit and consumes power. For maximum efficiency and safety, the ballast must be physically removed and the wiring bypassed.
What if my fixture has multiple ballasts?
If your fixture has multiple fluorescent tubes, it might have one ballast per tube, or one ballast powering multiple tubes. In either case, you will need to identify and remove all ballasts and re-wire the fixture according to the Type B LED tube instructions, ensuring power reaches all necessary lamp holders.
Are there any risks associated with removing the ballast?
The primary risk is electrical shock if the power is not turned off and verified correctly. Field-modifying the fixture without a UL-listed retrofit kit also removes it from its original UL 1598 listing. Additionally, ballasts made before 1979 may contain PCBs — handle and dispose of them according to local hazardous-waste regulations.
Conclusion
Upgrading your lighting to energy-efficient LEDs by bypassing the old ballast is a rewarding DIY project once you know your tombstone type and wiring diagram. By following these steps, you can enjoy brighter, more efficient lighting while saving money on your energy bills. Remember, safety is paramount — always turn off the power and verify with both a voltage tester and a multimeter. If you ever feel unsure, don’t hesitate to consult a professional electrician. For more lighting projects, browse our Lighting & Ceiling Fan guides.
Sponsored / affiliate links. As an Amazon Associate I earn from qualifying purchases. I may earn additional commission from eligible campaigns.