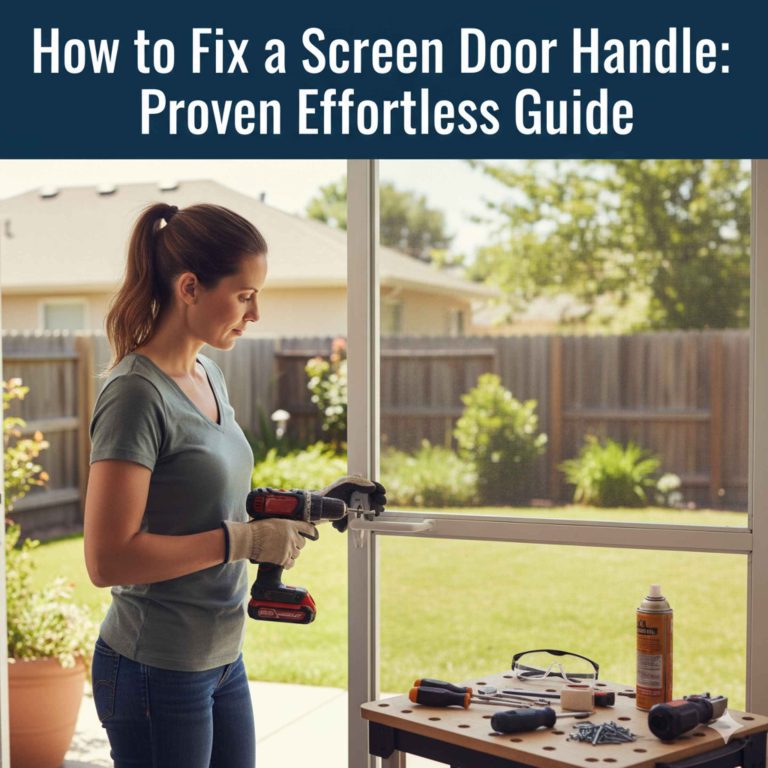
How to Fix a Refrigerator Door Handle: A DIY Guide for Car Enthusiasts
Hey there! As a car enthusiast who loves spending weekends tinkering with my vintage Ford Mustang or cruising to car shows, I’m all about fixing things with my own hands. But sometimes, the challenges aren’t under the hood—they’re right in my kitchen. A while back, I noticed my refrigerator door handle was loose, wobbling like a bad wheel bearing. It was annoying, and I knew I had to figure out how to fix a refrigerator door handle before it broke completely.
Just like troubleshooting a car issue, I dove into the problem, grabbed my tools, and learned a ton along the way. Whether you’re a gearhead like me or just someone who wants a sturdy fridge handle, I’m excited to share my experience fixing refrigerator door handles. So, grab a seat, maybe a cold drink from your fridge, and let’s walk through this step-by-step fix with a touch of automotive flair. You’ll have that handle rock-solid in no time!
Why a Loose or Broken Refrigerator Door Handle Matters
Picture this: I’m grabbing a soda from the fridge before heading to the garage, and the door handle feels like it’s about to come off. It’s frustrating, like a sticky throttle pedal on a car. A loose or broken refrigerator door handle isn’t just an inconvenience—it can make your kitchen feel sloppy and even cause damage. If the handle’s wobbly, you might pull too hard, stressing the door’s hinges or seals, which are pricey to replace.
For us car enthusiasts, a broken handle is like a scratched paint job—it messes with the vibe of your space. Plus, fixing it yourself saves money on car parts, like that new exhaust you’ve been eyeing. I’ve fixed handles on my fridge, a friend’s rental, and even my parents’ old unit, and I’ve learned it’s a straightforward job if you know what to do. Let’s dive into why handles break and how to tackle the fix.
Common Causes of Refrigerator Door Handle Issues
Before I grab my tools, I like to figure out why the handle’s acting up, just like diagnosing a misfiring car. Here’s what I’ve found causes most refrigerator door handle problems:
- Loose Screws: Over time, screws holding the handle can loosen from constant pulling, like lug nuts vibrating loose on a wheel. This was the issue with my fridge—a quick tighten fixed it.
- Worn-Out Hardware: Plastic or metal mounts can crack or wear out, like a car’s bushings failing after years of use.
- Improper Use: Yanking the handle too hard or using it to hang towels can stress it, similar to redlining an engine too often.
- Poor Design: Some budget fridges have flimsy handles that break easily, like cheap aftermarket car parts.
- Accidental Damage: Kids swinging on the door or bumping it with a cart can crack the handle, like dinging a car door in a parking lot.
Understanding the cause helps me pick the right fix, whether it’s tightening screws or replacing the whole handle. Most issues are simple, but sometimes you need a full swap, like replacing a worn-out car part.
Tools and Materials You’ll Need
Fixing a refrigerator door handle is like doing a basic car repair—you need the right tools to make it smooth. I keep a toolbox in my garage, and most of what I need is already there. Here’s my go-to list:
- Screwdriver Set: Phillips and flathead for removing screws. I use the same ones I do for car interior panels.
- Allen Wrench: Some handles use hex screws, like those on a bike or car accessory.
- Replacement Handle: If the handle’s broken, you’ll need a new one. I check the fridge’s model number to get the right part.
- Putty Knife: Handy for prying off covers hiding screws, like popping off a car’s trim.
- Cleaning Supplies: A rag and all-purpose cleaner to spruce up the fridge after, like detailing a car.
- Tape or Marker: To mark screw locations or hold parts in place, similar to labeling wires during a car stereo install.
- Replacement Screws: If the old ones are stripped, like having spare bolts for a car repair.
I got my replacement handle from Amazon for about $30, but you can also check Home Depot or the fridge manufacturer’s website. Having everything ready is like prepping for an oil change—it saves time and hassle.
Preparing to Fix the Handle
Before I start, I prep like I’m about to work on my Mustang’s brakes. A little setup makes the job cleaner and safer. Here’s what I do:
- Unplug the Fridge: I pull the plug or switch off the breaker to avoid any electrical surprises, like disconnecting a car battery before working.
- Clear the Area: I move stuff away from the fridge—dishes, magnets, or my kid’s drawings—to avoid knocking things over.
- Clean the Handle: I wipe down the handle and door with a damp rag to remove grease or grime, like cleaning a car part before installation.
- Check the Manual: I look up the fridge’s model number (usually inside the door) and check the manual or online for handle removal tips.
- Inspect the Damage: I wiggle the handle to see if it’s loose screws or a broken part, like checking a car’s suspension for play.
One time, I skipped unplugging the fridge and got a static shock—lesson learned! Always cut the power first, and you’ll be set to dive in.

Step-by-Step Guide to Fixing a Refrigerator Door Handle
Now, let’s get to the fix. I’ve done this on a few fridges, from my Samsung side-by-side to an old GE at my buddy’s place. It’s like swapping a car’s side mirror—straightforward if you follow the steps. Here’s how I do it:
Step 1: Locate the Screws or Fasteners
Most handles are held by screws hidden under covers or at the ends. I use a putty knife to gently pry off any plastic caps, like popping off a car’s interior trim. On my fridge, the screws were under small covers at the top and bottom of the handle. Some handles use Allen screws or slide-on mounts, so I check the manual if I’m unsure. It’s like finding the right bolts to remove a car part—patience pays off.
Step 2: Tighten Loose Screws
If the handle’s just loose, I grab my screwdriver and tighten the screws. I turn them clockwise until they’re snug but not overtightened, like torquing a wheel lug. On my Samsung fridge, this fixed the wobble in five minutes. If the screws are stripped, I replace them with slightly larger ones from my toolbox, like swapping a stripped bolt on a car.
Step 3: Remove the Handle (If Broken)
If the handle’s cracked or won’t tighten, I remove it completely. I unscrew all fasteners and gently pull the handle off, wiggling it if it’s stuck. Some handles slide upward or snap off, so I check the manual to avoid breaking anything. It’s like removing a car’s door panel—slow and steady to avoid damage. I set the old handle aside in case I need it for reference.
Step 4: Install the New Handle
With the old handle off, I grab the replacement. I make sure it matches the fridge’s model number, like checking part fitment for a car. I align the new handle with the mounting holes, slide it on, or snap it into place, then secure it with screws or Allen bolts. I tighten them evenly, like balancing a car’s wheels, to ensure a firm fit. On my friend’s GE fridge, the new handle clicked on in seconds, and it felt solid as a rock.
Step 5: Test the Handle
Once the handle’s on, I give it a few gentle tugs to make sure it’s secure, like test-driving a car after a repair. I open and close the door a few times, checking for wobble or noise. If it feels loose, I tighten the screws a bit more. I also check the door seal to make sure it’s closing properly, like ensuring a car door latches smoothly.
Step 6: Clean and Reconnect
I wipe down the handle and door with a cleaner to remove fingerprints, like polishing a car after a model. Then, I plug the fridge back in or flip the breaker, open the door, and make sure the light comes on and the fridge starts cooling. It’s like starting a car after a repair—pure satisfaction when it works!
Common Challenges and How to Solve Them
Fixing a handle isn’t always smooth, just like car repairs. Here’s what I’ve run into and how I handled it:
- Hidden Screws: Some handles have tricky covers. I use a thin putty knife or even a credit card to pry them off without scratching, like removing a car’s emblem.
- Stripped Screws: If screws won’t budge, I use a rubber band over the screwdriver tip for extra grip, like using a breaker bar on a stuck bolt.
- Wrong Replacement Part: I once ordered a handle that didn’t fit. Now, I double-check the model number and compare photos online, like verifying car part compatibility.
- Sticky Mounts: Some handles are glued or clipped tightly. I wiggle them gently or use a hairdryer to loosen adhesive, like heating a stuck car part.
- Door Misalignment: If the door doesn’t close right after, I adjust the hinges with a wrench, like aligning a car’s hood.
Choosing the Right Replacement Handle
Picking a replacement handle is like choosing the right car part—fit and quality matter. Here’s what I look for:
- Model Compatibility: I check the fridge’s model number (inside the door or on the back) and match it to the handle’s specs, like checking a car’s VIN for parts.
- Material: Stainless steel or brushed nickel looks sleek and lasts longer, like chrome trim on a car. Plastic handles are cheaper but can crack.
- Style: I pick a handle that matches my kitchen’s vibe, like choosing rims that fit my car’s aesthetic.
- Brand: OEM (original equipment manufacturer) handles fit best, but aftermarket ones can work if they’re high-quality. I got an OEM Samsung handle for my fridge.
- Price: Handles range from $20 to $100. I balance cost and quality, like picking a car part that’s reliable but affordable.
I learned to read reviews online to avoid junk parts, like researching a car mod before buying.
Where to Buy Replacement Handles
Finding a good handle took some digging, but here are my favorite spots:
- Amazon: Tons of options with fast shipping. I got my Samsung handle for $30 with next-day delivery.
- Home Depot: Great for in-store pickup and brands like GE or Whirlpool. I grabbed a friend’s handle there for $40.
- AppliancePartsPros: Specializes in fridge parts with model-specific handles. I used them for an older fridge part.
- Manufacturer Websites: Samsung, LG, or Frigidaire sell OEM handles. They’re pricier but guaranteed to fit, like buying from a car dealership.
- eBay: Good for deals on used or new handles, but I check seller ratings to avoid fakes, like buying car parts online.
Maintaining Your Refrigerator Door Handle
Once the handle’s fixed, I keep it in top shape, like maintaining my car after a mod. Here’s how:
- Tighten Screws Regularly: I check screws every few months with a screwdriver, like checking car bolts after a drive.
- Clean Gently: I wipe the handle with a damp cloth and mild cleaner to avoid scratches, like washing a car with a soft sponge.
- Avoid Abuse: I tell my kids not to swing on the handle, like warning them not to rev my car’s engine cold.
- Inspect for Wear: I look for cracks or looseness, catching issues early, like spotting a car’s worn-out belt.
- Lubricate if Needed: For sticky clips or mounts, I use a tiny bit of silicone spray, like lubing a car’s hinges.
How This Ties to the Automotive Lifestyle
As car enthusiasts, we’re used to rolling up our sleeves and fixing things, whether it’s a squeaky suspension or a loose fridge handle. I love how the skills I’ve honed in the garage—patience, problem-solving, and using the right tools—translate to home repairs. Fixing my fridge handle felt like swapping a car’s side mirror: a small job that makes a big difference.
A sturdy handle also keeps my kitchen running smoothly, leaving me more time to focus on my automotive passions. Whether I’m wrenching in the garage or planning a road trip, I know my fridge is ready to keep my drinks cold and my snacks fresh. Plus, it’s satisfying to tackle a household fix with the same confidence I bring to my car projects.
Comparison Table: Common Refrigerator Handle Fixes
Here’s a table I made to compare the fixes I’ve tried:
| Issue | Fix | Tools Needed | Difficulty | Cost |
|---|---|---|---|---|
| Loose Handle | Tighten screws | Screwdriver, Allen wrench | Easy | $0-$5 (screws) |
| Stripped Screws | Replace with larger screws | Screwdriver, new screws | Easy | $2-$10 |
| Cracked Handle | Replace handle | Screwdriver, putty knife | Moderate | $20-$100 |
| Sticky Mounts | Loosen with heat or lube | Hairdryer, silicone spray | Moderate | $5-$10 |
| Misaligned Door | Adjust hinges | Wrench, screwdriver | Hard | $0-$20 (parts) |
My Personal Journey with Refrigerator Handles
When my fridge handle first loosened, I ignored it, thinking it wasn’t a big deal. But after a few weeks of it wobbling, it started driving me nuts, like a rattling dashboard on a car. I grabbed my screwdriver, tightened the screws, and felt like a hero when it was solid again. That quick fix gave me the confidence to tackle tougher jobs, like replacing a cracked handle on my parents’ old fridge.
Each repair has been a learning experience, like my early days working on cars. I’ve made mistakes—like ordering the wrong handle once—but I’ve gotten better at researching parts and double-checking my work. Now, I’m the go-to guy among my car buddies for fridge fixes, and it’s fun to share my tips at car meets or over a beer in the garage.
Tips for a Successful Repair
Here are my top tips, learned from trial and error:
- Check the Model Number: Always match the handle to your fridge’s model, like verifying a car part’s fitment.
- Work Slowly: Don’t force screws or clips, or you’ll break something, like overtightening a car bolt.
- Keep Parts Organized: I use a small container for screws, like sorting bolts during a car repair.
- Test Before Finishing: Tug the handle gently before cleaning up, like test-driving a car after a mod.
- Ask for Help: If the handle’s heavy or tricky, get a friend to hold it, like having a buddy help lift an engine.
Conclusion
Fixing a refrigerator door handle is one of those projects that feels small but makes a huge difference, like tightening a loose car part to restore that perfect drive. As car enthusiasts, we know the joy of solving problems with our hands, and this repair is no different. Whether you’re tightening screws, replacing a broken handle, or just sprucing up your fridge, you’ve got the skills to make it happen.
With the right tools, a bit of patience, and the steps I’ve shared, you’ll have a sturdy handle that’s ready for years of use. So, roll up your sleeves, channel your inner gearhead, and get that fridge door handle fixed. Your kitchen will feel as slick as your freshly waxed ride, and you’ll be back to wrenching or cruising in no time. Let’s keep everything running smoothly—on the road and at home!
FAQs
How do I know if my fridge handle needs fixing or replacing?
If it’s loose, try tightening screws. If it’s cracked or won’t stay put, I replace it, like swapping a broken car part.
What tools do I need to fix a refrigerator door handle?
A screwdriver, Allen wrench, putty knife, and maybe new screws or a handle. I use the same tools as for car repairs.
Where can I buy a replacement fridge handle?
I check Amazon, Home Depot, or the fridge manufacturer’s site. AppliancePartsPros is great for model-specific parts, too.
Can I fix a fridge handle without unplugging the fridge?
You can, but I always unplug it for safety, like disconnecting a car battery before working on electrical parts.
Why does my fridge handle keep getting loose?
Screws can loosen from use, like bolts on a car. I tighten them every few months or use a thread locker for a permanent fix.
How long does it take to fix a fridge handle?
Tightening screws takes 5-10 minutes. Replacing a handle takes 20-30 minutes, like swapping a car’s side mirror.