How To Hang A Floating Shelf Without Drilling Any Holes
There are several effective methods to hang a floating shelf without drilling. These often involve strong adhesive strips, tension rods, or specialized mounting hardware designed for damage-free hanging. The best choice depends on the shelf’s weight, the wall material, and how long you need it to stay up.
Understanding Floating Shelves Without Drilling
Floating shelves look like they’re magically attached to the wall. They have no visible brackets. This gives a clean, modern look.
Many people want this style. But they avoid it due to the need for screws. Drilling holes can be daunting for many reasons.
Landlords often have strict rules about this. New homeowners might feel hesitant to make first marks. Even experienced DIYers might want a temporary solution.
The good news is that the market has evolved. There are now many clever ways to achieve this. These methods focus on using strong adhesives.
Others use pressure or existing structures. They are designed to hold weight safely. They also promise easy removal.
This means no lingering damage. You get the look you want. Your walls stay pristine.
It’s a win-win situation.
My Own Floating Shelf Scare
I remember wanting to put up a small floating shelf in my entryway. It was for keys and mail. My apartment had thin drywall.
I was terrified of hitting a pipe or wire. Even worse, I feared making a huge mess. I spent a whole weekend just staring at the blank wall.
The shelf sat in its box. I felt stuck. Then, a friend told me about adhesive solutions.
I was skeptical. Could tape really hold my keys? I decided to try it.
I picked up some heavy-duty adhesive strips made for mounting. I followed the instructions perfectly. That little shelf is still there.
It holds my keys every day. It’s a small thing, but it made a big difference. It felt like a small victory against wall damage!
Method 1: Heavy-Duty Adhesive Strips
What they are: These are strong, sticky strips. They often come in white or clear. Brands like Command are well-known.
They are designed to hold significant weight.
How they work: You stick one side to the shelf’s back. The other side goes on the wall. You press firmly.
They use a special adhesive. This helps them stick well. It also allows for cleaner removal.
Best for: Lightweight items like small decor. Small picture frames. Keys.
Think things that don’t weigh a lot.
Key tip: Always clean the wall first. Use rubbing alcohol. Make sure the wall is dry.
Press the strip firmly for 30 seconds.
Choosing the Right Adhesive Method
Not all adhesive strips are created equal. For hanging a floating shelf without drilling, you need the strongest kind. Look for packaging that specifies weight limits.
Some are rated for up to 15 or 20 pounds. This is usually enough for most small decorative shelves. Always check the product details.
Ensure it’s suitable for your wall type. Most work well on painted drywall.
There are also specialized adhesive hooks. Some have a stronger, more rigid design. These might be better for the base of a shelf.
You’d place them at key points. This distributes the weight better. It’s important to read reviews.
See what other people say. Do they hold up over time? Is removal truly damage-free?
Contrast: Standard vs. Heavy-Duty Adhesives
Standard Adhesive Strips:
- Used for small posters or lightweight decor.
- Lower weight capacity (e.g., 1-5 pounds).
- Easier to remove, less likely to damage paint.
- Not suitable for shelves holding items.
Heavy-Duty Adhesive Strips:
- Designed for mounting heavier items, including shelves.
- Higher weight capacity (e.g., 10-20+ pounds).
- Requires careful application and removal following instructions.
- Can still potentially lift paint if removed improperly.
The Power of Tension Rods
Tension rods are often overlooked for shelf mounting. But they can be surprisingly effective. Especially in certain spaces.
Think about a pantry or a linen closet. These often have two parallel walls. A tension rod can span this gap.
You can then rest a shelf on top of the rod. Or, you can use two rods. One below the shelf and one above.
This creates a secure sandwich. The rod presses against the walls. This friction holds it in place.
It’s a very simple system.
The key here is a good quality, strong tension rod. It needs to be able to handle the weight of the shelf. And whatever you plan to put on it.
Make sure the rod is the right size for your space. It shouldn’t be too tight. That could damage the walls.
But it needs to be snug enough to not slip.
Quick-Scan Table: Tension Rod Shelf Setup
| Component | Purpose | Considerations |
| Strong Tension Rod | Creates a pressure fit between walls. | Match width of opening. Ensure high weight limit. |
| Shelf Board | The surface you’ll place items on. | Choose lightweight material. Ensure flat bottom. |
| Optional: Anti-slip Pads | Prevent shelf from sliding on rod. | Use rubber or silicone pads. Place between rod and shelf. |
| Optional: Two Rods | For more stability. One above, one below. | Increases weight support. Requires precise placement. |
Real-World Use of Tension Rods
I’ve seen this work wonders in small kitchens. Imagine a narrow gap between cabinets. A tension rod placed there.
A simple wooden plank across it. Suddenly, you have extra space for spices or mugs. It’s quick to set up.
And it’s just as quick to take down. If you move, you just unscrew the rod. No marks are left behind.
It’s perfect for renters.
Another place is a bathroom. Between two walls, you can create a small shelf. This is great for extra toiletries.
Or even a rolled-up towel. The key is to not overload it. These aren’t meant for heavy books.
But for everyday items, they are fantastic. The visual impact is still there. It looks like a shelf.
But it’s a clever use of pressure.
Specialty Mounting Systems
Beyond basic strips, there are more advanced systems. Some companies offer clip-on or hook-based systems. These are designed to use existing features in your home.
Think about picture rails. Or even the top edge of a door frame.
These systems often involve a hook or clip that attaches to something already in place. Then, a wire or arm extends from that. This wire or arm supports the shelf.
It’s a very clean look. It requires no damage to the wall itself. You are leveraging other structures.
Observation Flow: Using Picture Rail Hooks
Step 1: Install Picture Rail System
Attach hooks to the existing picture rail molding. These usually slide into the rail track.
Step 2: Hang Support Wires
Connect strong wires or cords to these hooks. Let them hang down the wall.
Step 3: Attach Shelf Supports
Use small brackets or clips that attach to the wires. These will hold the shelf.
Step 4: Place Shelf
Rest the shelf onto the brackets. Ensure it’s level and secure.
Step 5: Decorate!
Add your items. Enjoy the floating look without drilling.
When Are These Methods Best?
These methods are ideal for situations where drilling is not an option. Or where you want a temporary solution. If you are decorating a rental apartment, they are perfect.
They allow you to personalize your space. Without risking your security deposit. They are also great for people who like to redecorate often.
You can move shelves easily.
They are also suitable for walls that are difficult to drill into. Some older homes have plaster walls. Or walls with unusual construction.
Trying to drill into these can be risky. Non-drilling methods offer peace of mind. They are generally safer for the wall structure.
What This Means for Your Home Decor
The availability of these no-drill solutions opens up so many possibilities. You can create displays on any wall. You can add practical storage.
You can enhance the aesthetics of a room. All without making permanent changes. This means more freedom in your design choices.
You can experiment with shelf placement. Try different sizes. See what works best for your space.
You are not tied down by the need for studs or secure screw points. This makes decorating much more accessible. It empowers you to try new looks.
When to Be Cautious
It’s crucial to understand the limitations. No-drill methods are not suitable for all situations. They generally cannot support very heavy items.
Think large plants, heavy books, or electronics. Always check the weight capacity. Overloading any adhesive or tension system can lead to failure.
Also, consider the surface of your wall. Some adhesives don’t stick well to textured walls. Or walls with wallpaper.
Always test a small, inconspicuous area first. If you are unsure, it’s better to stick with traditional methods. Or consult a professional.
Stacked Micro-Sections: Safety First!
Weight Limits: Always know how much your chosen method can hold. Exceeding this is the fastest way to failure.
Surface Prep: Clean walls thoroughly before applying any adhesive. Dirt and grease weaken the bond.
Wall Type: Ensure the method is suitable for your wall material (drywall, plaster, tile, etc.).
Removal: Follow removal instructions precisely. Yanking too hard can damage paint.
Item Choice: Select shelves and items that match the strength of your chosen hanging method.
Quick Tips for Success
Here are some final tips to make your no-drill shelf hanging a success. First, patience is key. Don’t rush the application process.
Especially with adhesives. Give them time to bond properly. Read all instructions carefully.
Second, measure twice, apply once. Ensure your shelf will be level. And positioned exactly where you want it.
Make sure you have enough space for the shelf itself. And the items you plan to put on it. A little planning goes a long way.
Third, consider the environment. Extreme temperatures or humidity can affect adhesives. Avoid applying them in very cold or very hot rooms.
Or in areas with a lot of moisture. This can weaken the bond over time.
Frequently Asked Questions
Can adhesive strips really hold a shelf safely?
Yes, heavy-duty adhesive strips designed for mounting can hold shelves safely. Always check the weight limit on the package. Make sure to apply them correctly to a clean, dry wall.
For heavier shelves, multiple strips or specialized systems might be better.
What is the best method for hanging shelves in a rental property?
For rentals, the best methods are typically those that use strong adhesive strips or tension rods. These allow you to hang shelves without drilling holes. This means no permanent damage, protecting your security deposit.
Always follow product instructions for damage-free removal.
How do I prevent adhesive strips from damaging my paint when removed?
Proper removal is crucial. Most strong adhesive strips come with a removal tab. Gently stretch the tab straight down the wall, very slowly.
Never pull the strip straight out. If resistance is met, stop and re-read the instructions. Sometimes gentle heat from a hairdryer can help soften the adhesive.
Can I use these methods on textured walls or wallpaper?
It depends on the product. Some heavy-duty adhesives are designed for various surfaces. However, textured walls and wallpaper can be tricky.
The texture might prevent a good seal. Wallpaper might peel off with the adhesive. Always test in a small, hidden area first.
Check the product’s surface compatibility.
What kind of items can I safely put on a no-drill shelf?
This depends entirely on the weight capacity of your chosen hanging method. Lightweight items like small decorative objects, framed photos, keys, mail, or small plants are usually fine for strong adhesive shelves. Tension rod shelves are also good for light items in pantry or closet spaces.
Avoid heavy books, electronics, or large potted plants.
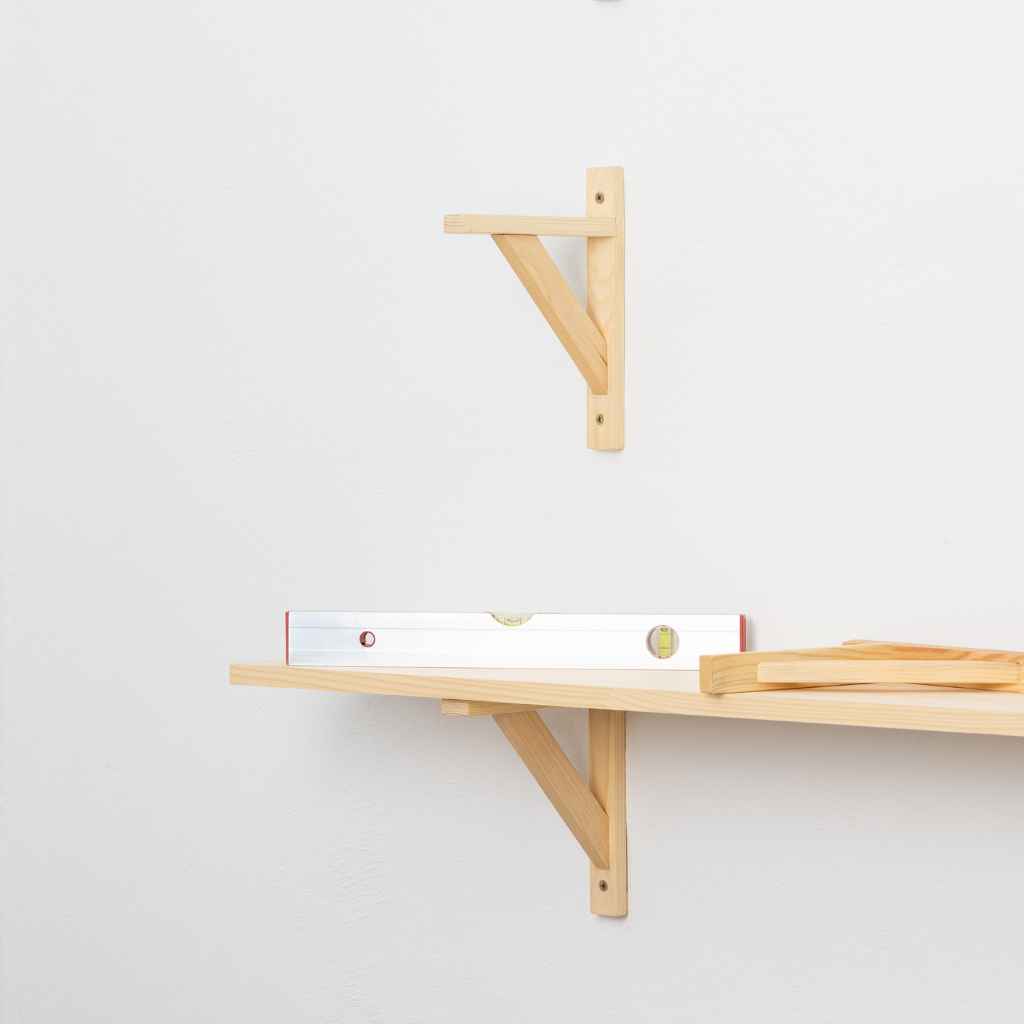
Are there any tools I absolutely need for these methods?
For most adhesive methods, you might need rubbing alcohol and a clean cloth for surface prep. A level is always recommended to ensure your shelf is straight. For tension rods, you might need a measuring tape to get the correct size rod.
Some kits may include small tools for alignment.
Final Thoughts on No-Drill Shelving
So, you see, you don’t need to dread drilling. There are plenty of smart ways to hang floating shelves. You can add style and storage.
You can keep your walls looking new. Explore the options. Choose the one that fits your needs.
You’ll be surprised how easy it can be!