How to Install a Ceiling Fan Bracket: Your Guide for Automotive Spaces
Hey there, buddy! So, you’re wondering how to install a ceiling fan bracket? I’m super excited to dive into this with you because it’s one of those projects that can totally transform your garage or shop, especially for us car folks who love a cool, breezy workspace. I still remember the first time I put up a ceiling fan bracket in my garage—it was like unlocking a whole new level of comfort while wrenching on my old pickup! After years of installing fans, tweaking setups, and keeping my automotive space just right, I’ve got all the tricks to share.
Whether you’re cooling your garage for a weekend car project, a carport for detailing, or a shop for your classic ride, this guide’s got you covered. Let’s sit down, like we’re chatting over a toolbox with a cold drink, and I’ll walk you through every step in simple terms. This article is packed with practical tips for anyone in the USA looking to install a ceiling fan bracket like a pro. Ready to get that fan up and spinning? Let’s roll!
What Is a Ceiling Fan Bracket?
A ceiling fan bracket is the mount that holds your fan to the ceiling. It’s a sturdy metal piece that screws into a ceiling joist or electrical box. I think of it as the backbone of my fan setup. The bracket supports the fan’s weight and keeps it secure, even when it’s spinning fast.
In my garage, the bracket is hidden inside the fan’s canopy, but it’s doing the heavy lifting. It connects to the fan’s motor and wiring, making sure everything stays safe and stable. Getting the bracket right is key to a wobble-free, long-lasting fan.
Why Install a Ceiling Fan in Your Garage?
Ceiling fans are awesome for automotive spaces, and the bracket is the first step. Here’s why I love them:
- Cool Comfort: Fans keep you cool while working on cars. My garage is bearable in July now.
- Air Circulation: They move stale air and reduce dust. My tools stay cleaner with the fan on.
- Energy Savings: Fans cut AC or heater use. I saved $20 a month on my shop’s power bill.
- Lighting Bonus: Many fans have lights. My fan lights up my workbench perfectly.
- Style Points: A sleek fan adds character. My industrial fan matches my garage’s vibe.
A solid bracket makes all this possible, keeping your fan safe and functional for years of car projects.
Types of Ceiling Fan Brackets
Not all brackets are the same, and I’ve tried a few. Here’s what’s out there:
- Standard Bracket: Fits most fans, screws to a joist or box. I used this for my Hunter fan.
- Low-Profile Bracket: For low ceilings, it keeps the fan close. I saw one in a buddy’s carport.
- Sloped Ceiling Bracket: For angled ceilings. I needed this for my shop’s vaulted roof.
- Heavy-Duty Bracket: For big or industrial fans. I’m eyeing one for my next upgrade.
- Universal Bracket: Works with multiple fan brands. My spare bracket’s universal for flexibility.
I chose a standard bracket for my 8-foot garage ceiling. Check your fan’s manual or box to match the bracket type.
Tools and Supplies You’ll Need
Installing a bracket needs some basic gear. I’ve got my kit dialed in. Here’s my list:
- Ceiling Fan Bracket: Comes with the fan or sold separately. Mine was included.
- Ladder: To reach the ceiling safely. My 6-foot ladder’s perfect.
- Screwdriver: Phillips and flathead for screws. My $10 set handles both.
- Drill: For pilot holes or mounting screws. I use a $40 cordless drill.
- Stud Finder: To locate ceiling joists. My $15 magnetic one works great.
- Voltage Tester: To check power. My $10 non-contact tester’s a must.
- Wire Nuts: For future wiring (fan install). I got a $3 pack.
- Screws and Anchors: For securing the bracket. My fan kit had these.
- Tape Measure: To center the bracket. My $8 tape’s always handy.
- Safety Gear: Gloves, goggles, mask. I spent $5 on disposables.
I spent $33 on tools I didn’t already own. Check Home Depot, Lowe’s, or Amazon for supplies. Your fan’s kit might include the bracket and screws.
Planning Your Ceiling Fan Bracket Installation
Good planning saves headaches. I learned this after a crooked first attempt. Here’s my approach:
- Pick a Spot: Center the fan for best airflow. I placed mine over my garage’s car bay.
- Check Ceiling Height: Ensure 7-8 feet clearance below the fan. My 8-foot ceiling’s just right.
- Find Joists: Use a stud finder to locate solid wood. I marked two joists for my bracket.
- Measure Electrical Box: Confirm it’s fan-rated (50 lbs. capacity). My box was stamped “fan approved.”
- Plan Wiring: Ensure power reaches the spot. I had an existing junction box.
- Clear Space: Move cars or tools below. I parked my truck outside to work.
I sketched a quick ceiling map on paper, marking joists and the box. It took 20 minutes, but it made my install smooth.
Checking Your Electrical Box
The electrical box is critical for safety. I always inspect mine first. Here’s how:
- Turn Off Power: Flip the breaker at the panel. I test with a voltage tester to be sure.
- Remove Cover: Unscrew the existing fixture or cover. My old light plate came off easily.
- Check Rating: Look for “ceiling fan rated” or 50 lbs. support. My box was rated for fans.
- Inspect Condition: Ensure it’s secure, no cracks. Mine was bolted to a joist.
- Plan Upgrade: If not rated, install a fan-rated box. I bought a $12 box for my shop.
This takes 10 minutes. If your box isn’t fan-rated, swap it for $12-$20 or hire an electrician for $100-$200.
Installing a Fan-Rated Electrical Box (If Needed)
If your box isn’t up to snuff, I’ve replaced one before. Here’s the process:
- Buy a Fan-Rated Box: Get a metal box rated for 50 lbs. I spent $12 at Home Depot.
- Turn Off Power: Double-check with a voltage tester. I always test twice.
- Remove Old Box: Unscrew and disconnect wires. I labeled wires with tape for reassembly.
- Cut Hole: Trace the new box and cut drywall with a $10 saw. I cut slowly for a clean edge.
- Secure Box: Screw to a joist or use a brace bar. I used a $15 brace for extra strength.
- Run Wiring: Feed existing wires into the box. I secured mine with clamps.
- Tighten Screws: Lock the box in place. I checked for wobble before moving on.
This took me an hour. If wiring’s new to you, hire a pro to avoid shocks or code issues.
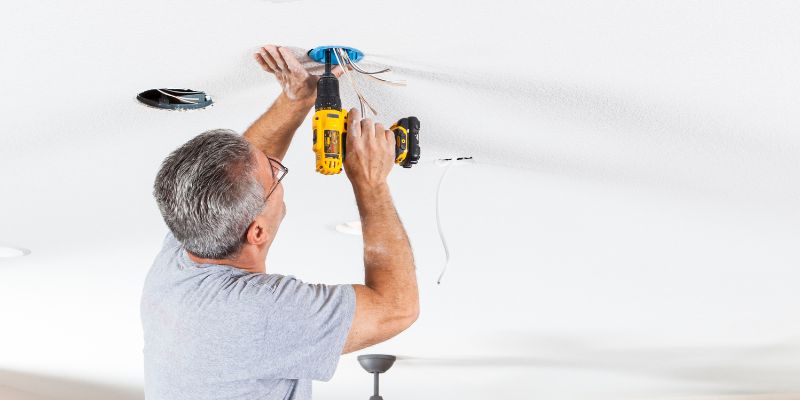
Installing the Ceiling Fan Bracket
Now for the main event—mounting the bracket. I’ve done this a few times. Here’s my step-by-step:
- Turn Off Power: Confirm no juice with a voltage tester. I test every time.
- Prep Bracket: Check the fan kit for screws and parts. My Hunter bracket had everything.
- Align Bracket: Hold it against the electrical box or joist. I centered mine over the box.
- Mark Holes: Trace screw holes with a pencil. I marked four spots for accuracy.
- Drill Pilot Holes: Use a 1/8-inch bit for wood or box screws. I drilled shallow holes to guide screws.
- Screw Bracket In: Use the kit’s screws and a screwdriver. I tightened mine snugly.
- Check Stability: Tug gently to ensure it’s secure. My bracket didn’t budge.
This took 20 minutes. I used a ladder for reach and kept my tools on a nearby bench. If screws don’t bite, use anchors or check your joist.
Ensuring Proper Bracket Alignment
A crooked bracket means a wobbly fan, and I’ve fixed this mistake. Here’s how I keep it straight:
- Use a Level: Place a $5 level on the bracket. I adjusted mine until the bubble was centered.
- Double-Check Holes: Confirm they line up with the box or joist. I re-measured twice.
- Tighten Evenly: Screw in opposite corners first, like a car wheel. I alternated screws for balance.
- Test Fit: Attach the fan’s canopy (if included) to check fit. My canopy sat flush.
- Adjust if Needed: Loosen and realign if off. I shifted mine a hair for perfection.
This adds 5 minutes but saves wobbles later. I keep a level in my toolbox for projects like this.
Safety Tips for Installing a Ceiling Fan Bracket
Safety’s my top priority—I’ve had a ladder slip once! Here’s my advice:
- Power Off: Always cut the breaker and test. My voltage tester’s a lifesaver.
- Stable Ladder: Use a rated ladder, not a chair. I level mine on my garage floor.
- Wear Gear: Gloves, goggles, mask for dust. I spent $5 on safety gear.
- Secure Tools: Keep them on a bench, not the ladder. I dropped a screwdriver once.
- Work with a Buddy: Have someone hold the ladder. My wife spotted me last time.
I keep a first-aid kit in my shop. Safety lets me install brackets with confidence, knowing I’m good to go.
Troubleshooting Common Bracket Installation Issues
Things can go wrong, but I’ve fixed most. Here’s what to watch for:
- Loose Bracket: Screws missed the joist. I re-drilled into solid wood.
- Wobbly Box: The Old box wasn’t secure. I swapped mine for a fan-rated one.
- Misaligned Holes: The Bracket didn’t match the box. I used a universal bracket instead.
- Stripped Screws: Overtightened or soft wood. I used bigger screws from my shop.
- No Joist Nearby: The Box wasn’t supported. I added a $15 brace bar.
I test each step to catch issues early. If you’re stuck, an electrician can help for $50-$100.
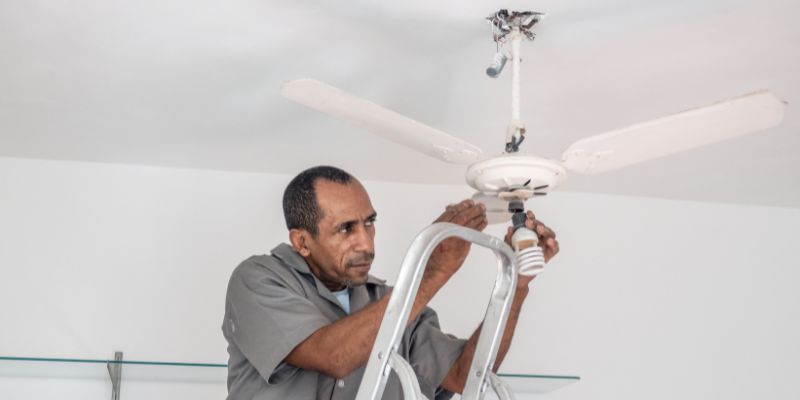
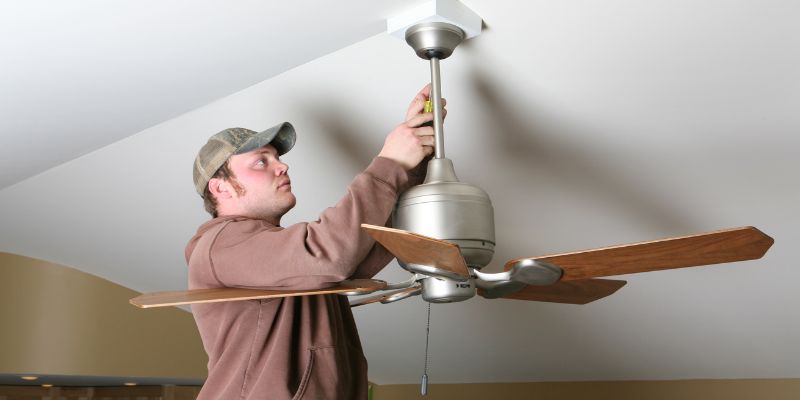
Preparing for the Fan Installation
The bracket’s just step one—next is the fan. I prep like this to make it smooth:
- Check Fan Parts: Ensure the motor, blades, and canopy are ready. My Hunter kit was complete.
- Read Manual: Note wiring or bracket specifics. I skimmed mine for quirks.
- Gather Wiring Tools: Wire strippers, nuts, tape. I spent $10 on a wiring kit.
- Plan Downrod: Use the right length for the ceiling height. My 8-foot ceiling needed no downrod.
- Test Remote: If included, check batteries. My remote was ready out of the box.
This takes 15 minutes. I stage parts on my workbench to keep the fan install quick after the brackets’s up.
Maintaining Your Ceiling Fan Bracket
Once installed, the bracket needs little care. I check mine yearly. Here’s how:
- Inspect Screws: Tighten any loose ones. I gave mine a twist last spring.
- Check Stability: Tug gently to confirm it’s solid. My bracket’s rock-steady.
- Clean Dust: Wipe with a damp cloth. I clean during shop tidying.
- Look for Rust: Rare in garages, but check. My metal bracket’s rust-free.
- Test Fan: Run it to ensure no wobble. My fan spins smoothly.
Maintenance takes 5 minutes a year. I do it with my fan’s annual blade cleaning, keeping my shop breezy.
Cost of Installing a Ceiling Fan Bracket
This is a budget-friendly project. Here’s my breakdown:
- Bracket: $0-$20 (often included with fan). Mine was free with my Hunter.
- Fan-Rated Box: $12 if needed. I bought one for my shop.
- Tools: Stud finder, tester, drill ($35 if bought). I had most already.
- Supplies: Screws, wire nuts, anchors ($5). My kit had these.
- Ladder: $50 (I owned one). Borrow to save.
- Total DIY: $17-$72 for most folks. I spent $12.
- Pro Cost: $100-$200 for an electrician. I saved by DIY.
I shopped at Home Depot and Amazon. Sales or borrowing tools keep costs low.
Using Ceiling Fans in Automotive Spaces
Fans are perfect for car folks. Here’s how I use mine:
- Garage Work: Cools me during oil changes. My fan’s breeze is a game-changer.
- Detailing: Moves air to dry polish. I keep dusting off my car with it.
- Carport: Cools parked vehicles. My buddy’s carport fan’s awesome.
- Tool Area: Reduces rust on sockets. My toolbox stays dry.
- Hangout Spot: Makes chilling comfy. I relax under my fan post-wrenching.
My garage feels like a pro shop, cool and functional for any project. A solid bracket makes it all possible.
Table: Standard vs. Sloped Ceiling Brackets
Here’s a quick comparison:
| Bracket Type | Pros | Cons | Cost | Best For |
|---|---|---|---|---|
| Standard | Cheap, universal | Flat ceilings only | $0-$15 | Garages, shops |
| Sloped | Fits angled roofs | Pricier, specific | $10-$25 | Vaulted ceilings |
I used a standard bracket for my flat garage ceiling. Sloped ones are great for shops with high roofs.
Why I Love Installing Ceiling Fan Brackets
Installing a bracket is like prepping a car for a mod—it’s the foundation for something awesome. I feel like a pro when I screw that bracket in and know my fan’s going to spin perfectly. It’s a cheap, fun project that makes my garage a better place to work or chill. My fan’s been a champ for years, keeping my shop cool and stylish. I’m hooked on the comfort and vibe it brings to my automotive world.
Wrapping It Up with a Breezy Shop
Hey, friend, you’re now a ceiling fan bracket installation pro! From picking the right bracket to screwing it in like a champ, you’ve got all the skills to make your automotive space cool and comfy. I remember my first install, nervous about the wiring, but now I grin every time my fan spins smoothly. Head to your garage, grab that bracket, and get it up with confidence. Whether you’re wrenching on a hot rod or kicking back by your ride, your fan will make it awesome. So, drill those holes, tighten those screws, and enjoy the breeze—I’m cheering you on!
FAQ: Your Questions Answered
What is a ceiling fan bracket?
It’s a metal mount that holds your fan to the ceiling. I used one for my garage fan.
Do I need a fan-rated electrical box?
Yes, for safety and support. I swapped my old box for a $12 fan-rated one.
Can I install a ceiling fan bracket myself?
Yes, with basic tools and care. I did mine in 20 minutes.
How much does it cost to install a ceiling fan bracket?
DIY costs $0-$70; pros charge $100-$200. I spent $12.
What if my ceiling is sloped?
Use a sloped ceiling bracket. I saw one in a buddy’s vaulted shop.
Where can I buy ceiling fan brackets?
Home Depot, Lowe’s, Amazon, or fan brands. My Hunter fan included one.
Why does my fan wobble after installing the bracket?
The bracket might be misaligned. I leveled mine to stop wobbling.