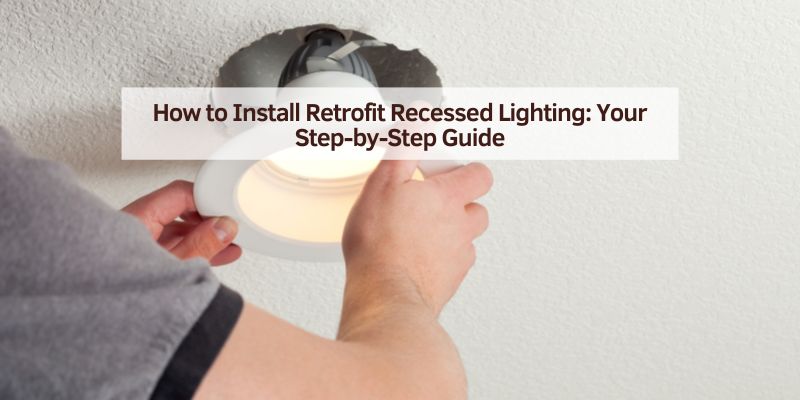
How to Install Retrofit Recessed Lighting: Your Step-by-Step Guide
Hey there, friend! Have you ever walked into a room and wished the lighting was just a bit… better? Maybe it’s too dim for reading, or that old fixture is screaming, “outdated.” I’ve been there, staring at the tired lights in my living room, dreaming of a sleek, modern glow. That’s when I discovered retrofit recessed lighting, and let me tell you, it’s a game-changer! After installing these lights in my home and helping a few buddies with theirs, I’ve learned how to make any space feel bright and welcoming.
Retrofit recessed lights are perfect for upgrading existing ceilings without major renovations. In this guide, I’ll walk you through how to install retrofit recessed lighting, step by step, like we’re tackling it together. Let’s make your room shine!
What Is Retrofit Recessed Lighting?
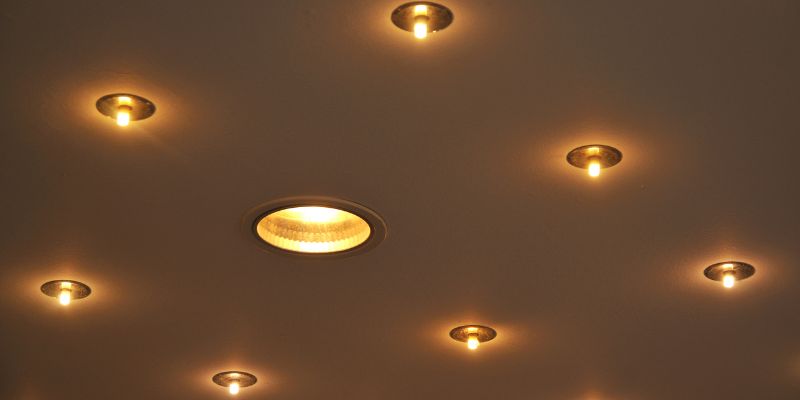
Let’s start with the basics. Recessed lighting, sometimes called can lights or downlights, sits flush with your ceiling, giving a clean, modern look. Retrofit recessed lights are special because they’re designed to fit into existing ceilings without replacing the old housing or cutting new holes. I love them because they’re a quick way to upgrade without tearing up your home.
These lights clip into the ceiling where an old fixture, like a flush-mount light, used to be. They’re usually LED, which means they’re bright, energy-efficient, and long-lasting. When I swapped out my kitchen’s old light for retrofit recessed lights, it felt like I added a whole new room! They’re perfect for kitchens, living rooms, or bathrooms, and you don’t need to be an electrician to install them.
Why Choose Retrofit Recessed Lighting?
Why go with retrofit instead of traditional recessed lights? I’ve got a few reasons from my own experience. First, they’re super easy to install. Traditional recessed lights need new housing and big ceiling holes, which can mean drywall dust everywhere. Retrofit lights use the existing opening, so it’s less mess and hassle.
Second, they save money. I spent about $30 per light for my retrofit kit, compared to $50-$100 for new recessed housing, plus labor if you hire a pro. Third, they’re energy-efficient. My LED retrofit lights use 10-15 watts but shine like 60-watt bulbs, cutting my electric bill. Finally, they look amazing. My living room went from drab to modern with four retrofit lights, and everyone notices the difference.
Types of Retrofit Recessed Lighting
Not all retrofit recessed lights are the same, and picking the right one makes the job easier. Here’s a table of the main types I’ve worked with.
| Type | Description | Best For | Features |
|---|---|---|---|
| Baffle Trim | Textured, cone-shaped trim | Living rooms, bedrooms | Reduces glare, soft light |
| Reflector Trim | Shiny, smooth trim | Kitchens, bathrooms | Bright, focused light |
| Adjustable (Eyeball) | Movable trim to direct light | Art displays, task areas | Flexible beam direction |
| Slim (Wafer) | Ultra-thin, no housing needed | Low ceilings, tight spaces | Easy install, modern look |
Baffle Trim
These have a ribbed, cone-like trim that softens light and cuts glare. I used baffle trims in my bedroom, and they create a cozy, warm glow. They’re great for general lighting in living spaces.
Reflector Trim
Reflector trims are smooth and shiny, bouncing light for a bright, crisp effect. I put these in my kitchen to light up the counters. They’re perfect for task areas where you need clear visibility.
Adjustable (Eyeball) Trim
These let you tilt the light to focus on specific spots, like artwork or a reading nook. I installed one in my office to highlight a painting, and it adds such a cool vibe. They’re ideal for accent lighting.
Slim (Wafer) Lights
Slim or wafer lights are super thin, needing no housing at all. I used these in my basement with a low ceiling, and they were a breeze to install. They’re great for tight spaces or modern designs.
Tools You’ll Need
You don’t need a ton of tools, which is why I love this project. Here’s what I grab before starting:
- Step Ladder: To reach the ceiling safely. I use a 6-foot ladder for standard 8-foot ceilings.
- Screwdriver: Phillips or flathead, depending on your old fixture’s screws.
- Voltage Tester: To make sure the power’s off. My non-contact tester cost $15 and gives me peace of mind.
- Wire Strippers: For preparing wires, if needed.
- Gloves: To keep my hands clean and protect the new lights.
- Soft Cloth: For wiping down the new lights or cleaning the ceiling.
- Retrofit Recessed Light Kit: Make sure it fits your ceiling opening (usually 4-6 inches).
I also keep a small bowl for screws and a flashlight for dark corners. Dropping a screw in a dim room is a headache I’ve learned to avoid!
Safety Tips Before You Start
Working with electricity can be risky, so safety is my top priority. I’ve had a few “oops” moments, and I want you to stay safe. Here’s what I do:
- Turn Off the Power: Flip the breaker for the room at the electrical panel. I use a voltage tester to confirm the wires are dead.
- Use a Stable Ladder: Set it on flat ground and lock it in place. I have someone hold it if I’m reaching high.
- Let Bulbs Cool: If the old light was on, wait 10-15 minutes to avoid burns. I burned my fingers once—lesson learned!
- Check Ceiling Space: Make sure there’s enough room above the ceiling for the retrofit light’s clips. I check for pipes or joists with a stud finder.
- Wear Safety Glasses: Dust can fall when removing old fixtures. I got debris in my eyes once, and now I always wear glasses.
Safety keeps this project fun and stress-free.
How to Install Retrofit Recessed Lighting
Let’s get to the good stuff—installing those lights! I’ll walk you through it like we’re standing under your ceiling together. It usually takes me 20-30 minutes per light.
Step 1: Turn Off the Power
Head to your breaker box and switch off the circuit for the room. I flip the light switch a few times to confirm it’s off, then use my voltage tester on the ceiling wires. No shocks for us today!
Step 2: Remove the Old Fixture
Climb your ladder and start with the old light. Most flush-mount or recessed fixtures have screws or a nut holding the cover. I unscrew them and lower the cover carefully. Then, I unscrew the fixture’s base from the ceiling’s electrical box and disconnect the wires (black, white, and ground). I take a quick photo of the wiring to remember how it’s set up. If your old light is heavy, have a friend hold it while you disconnect.
Step 3: Check the Ceiling Opening
Retrofit lights need a specific hole size, usually 4-6 inches. I measure the old fixture’s opening with a tape measure to make sure the new light fits. If the hole’s too small, I use a drywall saw to enlarge it, following the light’s template. If it’s too big, I pick a retrofit light with a larger trim to cover the gap. My kitchen had a 5-inch hole, and my 6-inch retrofit light covered it perfectly.
Step 4: Prepare the Retrofit Light
Unpack your retrofit light and check its parts. Most kits include the light, a trim, and a connector box. I make sure the clips or springs (for securing the light) are intact. If the light uses a separate bulb, I install it now—LEDs are my go-to for brightness and efficiency.
Step 5: Connect the Wires
The retrofit light comes with a connector box that links to your ceiling wires. I open the box and match the wires:
- Black light wire to black ceiling wire (hot).
- White light wire to white ceiling wire (neutral).
- Green or copper light wire to green or copper ceiling wire (ground).
I twist each pair together, secure with wire nuts, and wrap with electrical tape for extra safety. Then, I tuck the connector box into the ceiling, making sure it’s secure and not dangling.
Step 6: Install the Retrofit Light
Here’s the fun part—popping the light into place! I push the light’s clips or springs upward and insert the light into the ceiling hole. The clips snap against the drywall, holding the light flush. I give it a gentle tug to ensure it’s secure. For adjustable trims, I tilt the light to aim it where I want. In my living room, I angled one toward a bookshelf, and it looks so cool.
Step 7: Attach the Trim
Most retrofit lights have a trim that snaps onto the light for a finished look. I push the trim firmly until it clicks. Some trims screw in or twist on—my kitchen lights twisted, which was super easy. I wipe the trim with a soft cloth to remove fingerprints.
Step 8: Test the Light
Time to see it shine! I turn the breaker back on and flip the switch. If the light works, I’m done! If not, I turn off the power and check the wire connections or bulb. I had a loose wire nut once that caused a flicker, but tightening it fixed it.
Step 9: Repeat for Additional Lights
If you’re installing multiple lights, repeat the steps for each one. I did four in my living room, spacing them 5 feet apart for even lighting. It took me about an hour total, and the room looks amazing.
Step 10: Clean Up
I sweep up any dust, put away my tools, and give the new lights a final wipe. A clean room makes the new lighting pop!
Planning Your Retrofit Lighting Layout
Before you install, plan where your lights will go. A bad layout can leave dark spots or feel too bright. Here’s how I do it:
- Measure the Room: I note the length and width. My 12×15-foot living room is 180 square feet.
- Calculate Lights Needed: For general lighting, I use one light every 4-6 square feet. For 180 square feet, that’s 6 lights.
- Space evenly: I place lights 4-6 feet apart in a grid. In my living room, I spaced them 5 feet apart.
- Avoid Walls: I keep lights 2-3 feet from walls to prevent shadows. In my kitchen, I placed them closer to the counters.
- Consider Purpose: Task areas like kitchens need more lights; cozy bedrooms need fewer. I used 8 lights in my 150-square-foot kitchen for bright task lighting.
I sketch the ceiling on paper, marking light positions. You can also tape paper circles on the ceiling to visualize before installing.
Choosing the Right Retrofit Lights
Picking the right lights makes all the difference. Here’s what I look for:
- Size: 4-inch lights are great for small rooms; 6-inch lights are standard. I used a 6-inch in my living room for broad coverage.
- Trim Style: Baffle for soft light, reflector for bright, or adjustable for focus. I mix styles in my home for variety.
- Brightness (Lumens): 800-1000 lumens per light for general use; 1200-1500 for task areas. My kitchen lights are 1000 lumens each.
- Color Temperature: 2700 K- 3000 K for warm light; 3500 K- 4000 K for crisp. I use 3000K for a cozy yet clear glow.
- Dimmable: I love dimmable lights for flexibility. My living room lights dim for movie nights.
I shop at Home Depot, Lowe’s, or Amazon for brands like Philips or Halo. Prices range from $20-$50 per light.
Common Problems and How to Fix Them
Sometimes, things don’t go smoothly. I’ve hit a few snags, and here’s how I deal with them:
- Light won’t fit: If the hole’s too small, I enlarge it with a drywall saw. If it’s too big, I choose a light with a larger trim. Measure first to avoid this.
- Light Doesn’t Work: Check the bulb, wire connections, or breaker. I had a loose wire once that needed tightening.
- Clips Won’t Hold: If the ceiling’s too thick, I pick a light with adjustable clips. My basement needed these for a thicker drywall.
- Flickering Light: This can mean a loose connection or an incompatible dimmer. I swapped my old dimmer for an LED-compatible one, and it fixed the flicker.
If you’re stuck, check the light’s manual or watch a quick YouTube tutorial for visuals.
Maintaining Your Retrofit Lights
Once your lights are up, a little care keeps them shining. Here’s my routine:
- Clean Trims: I dust the trims every few months with a damp cloth. It keeps the light bright and the room fresh.
- Check Connections: If a light flickers, I turn off the power and inspect the wires. Loose nuts are a common culprit.
- Replace Bulbs (If Needed): Most retrofit lights have built-in LEDs that last 50,000 hours, but if yours uses bulbs, keep spares handy.
- Update Dimmers: Ensure your dimmer is LED-compatible to avoid buzzing or flickering. I upgraded mine for $20.
Regular maintenance means your lights stay beautiful for years.
When to Call a Professional
Most retrofit installations are DIY-friendly, but sometimes a pro is needed. I’ve called electricians for tricky jobs, and here’s when I suggest it:
- Old Wiring: If your home has outdated wiring, a pro can upgrade it safely. I saw frayed wires in an old house and left it to an expert.
- Multiple Lights: If you’re wiring several lights or adding a new circuit, an electrician ensures it’s up to code. They charge $50-$150 per hour.
- High Ceilings: For ceilings over 12 feet, pros have the right ladders. I’m not risking a fall!
Find a licensed electrician through friends or sites like HomeAdvisor for peace of mind.
Conclusion: Brighten Your Home with Ease
Installing retrofit recessed lighting is one of those projects that feels like a big win. After lighting up my home and helping friends with theirs, I’ve learned it’s all about planning, safety, and a little patience. These lights transform any room, making it modern, bright, and inviting without major renovations. Grab your tools, pick the perfect lights, and enjoy the glow of a job well done. Here’s to a home that shines exactly the way you want it to!
FAQs
What’s the difference between retrofit and regular recessed lighting?
Retrofit lights fit into existing ceiling holes without new housing, making them easier to install. Regular recessed lights need new cans and bigger holes. I love retrofit for quick upgrades.
How many retrofit recessed lights do I need for my room?
Aim for one light every 4-6 square feet for general lighting. My 180-square-foot living room has 6 lights, spaced 5 feet apart, for even coverage.
Can I install retrofit recessed lights myself?
Yes, if you’re comfortable with basic wiring. I always turn off the power and use a voltage tester for safety. If you’re unsure, hire a pro.
What size retrofit light should I choose?
4-inch lights work for small rooms or accents; 6-inch lights are standard for most spaces. I used a 6-inch piece in my living room to cover a 5-inch hole.
Are LED retrofit lights worth it?
Definitely! They’re energy-efficient, last up to 50,000 hours, and give bright, clear light. I use them in every room to save on bills and maintenance.