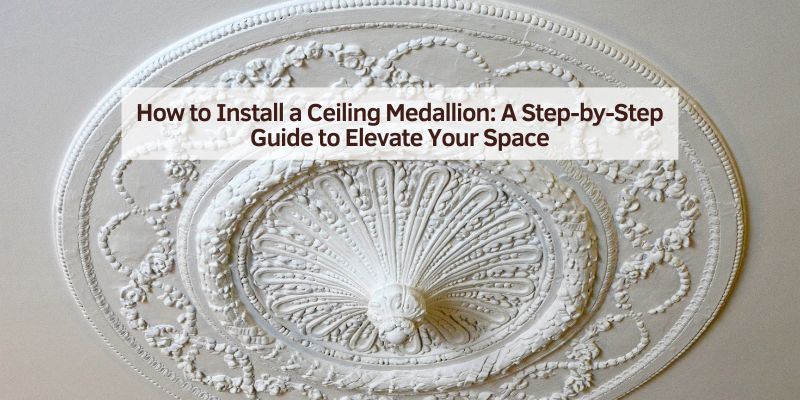
How to Install a Ceiling Medallion: A Step-by-Step Guide to Elevate Your Space
Hey there! If you’ve ever looked up at your ceiling and thought it could use a little pizzazz, let me tell you about my love affair with ceiling medallions. A couple of years ago, I decided to install one in my home’s dining room, and it completely transformed the space. It was like adding a piece of jewelry to the ceiling! If you’re wondering how to install a ceiling medallion, I’m thrilled to share my experience with you.
This project is perfect for anyone who loves cars and wants to spruce up their garage or a homeowner looking to add elegance to their living space. It’s easier than you might think, and I’ll walk you through every step. So, grab a cup of coffee, and let’s get started on this fun DIY adventure!
What Is a Ceiling Medallion and Why Install One?
When I first heard about ceiling medallions, I pictured something fancy only found in old mansions. But I quickly learned they’re just decorative pieces that go around ceiling light fixtures or fans. They come in all sorts of styles, from simple and modern to ornate and vintage. I chose a classic floral design for my dining room, but I’ve seen sleek, geometric ones that would look awesome in a garage.
Why bother with a medallion? For me, it was about making a statement. In my garage, where I spend hours working on my car, I wanted a touch of class to make the space feel less like a workshop and more like a showroom. Medallions draw the eye upward, making any room feel bigger and more polished. They also hide imperfections around light fixtures, like cracks or uneven paint. Plus, they’re a budget-friendly way to add character without a major renovation.
Choosing the Right Ceiling Medallion for Your Space
Picking out a medallion was one of the most fun parts of this project. I spent hours browsing at home improvement stores and online, and here’s what I learned. First, size matters. A medallion that’s too small looks puny, while one that’s too big overwhelms the room. As a rule of thumb, I measured the diameter of my light fixture and chose a medallion about 1.5 to 2 times that size. For my dining room chandelier, a 24-inch medallion was perfect.
Next, think about style. I went with a traditional design for my home, but for my garage, I’m eyeing a modern, minimalist medallion to complement the industrial vibe. Material is another factor. Most medallions are made of polyurethane, which is lightweight and easy to install. I avoided plaster ones because they’re heavy and trickier to work with. Finally, check if the medallion has a pre-cut center hole for your fixture’s wiring. If not, you’ll need to cut one yourself, which I’ll cover later.
Tools and Materials You’ll Need
Before I started, I made sure I had everything ready to go. Nothing’s worse than being halfway through a project and realizing you’re missing a tool! Here’s what I used:
- Ceiling medallion: Choose one that fits your space and style.
- Measuring tape: To size up your ceiling and fixture.
- Pencil: For marking where to cut or place the medallion.
- Caulk gun and adhesive: I used construction adhesive to stick the medallion to the ceiling.
- Screwdriver: To remove and reattach your light fixture.
- Jigsaw or utility knife: If you need to cut a center hole in the medallion.
- Sandpaper: To smooth any rough edges after cutting.
- Paint and brush: To match the medallion to your ceiling or fixture.
- Ladder: To reach the ceiling safely.
- Drop cloth: To catch any mess.
- Safety glasses and gloves: To protect yourself while cutting or gluing.
I also grabbed some painter’s tape to hold the medallion in place while the adhesive dried. For my garage, I made sure to pick a medallion and adhesive rated for humid or dusty environments, since garages can get grimy.
Preparing Your Space for Installation
Getting ready is half the battle. I started by clearing the area under the light fixture. In my dining room, I moved the table and chairs out of the way and laid down a drop cloth to catch any dust or adhesive drips. In my garage, I pushed my car to one side and covered my workbench with a tarp.
Next, I turned off the power to the light fixture at the breaker box. I can’t stress this enough—always make sure the electricity is off before messing with any wiring. I used a voltage tester to double-check, because I once got a tiny zap from a “dead” circuit, and it was not a good time. Then, I climbed up my ladder and removed the light fixture or chandelier. Most fixtures come off with a few screws, but I took a picture of the wiring setup just in case I forgot how it went back together.
Measuring and Cutting the Medallion (If Needed)
Some medallions come with a pre-cut hole for the fixture’s wiring, but mine didn’t. I had to cut one myself, which was a bit nerve-wracking at first. I measured the diameter of the fixture’s canopy (the part that covers the wiring) and marked a circle on the medallion with a pencil. I made the hole slightly larger than the canopy to give myself some wiggle room.
Using a jigsaw, I carefully cut along the marked line. If you don’t have a jigsaw, a utility knife works for polyurethane medallions, but it takes more elbow grease. After cutting, I sanded the edges to make them smooth. I held the medallion up to the ceiling to test the fit, and it was perfect. If your medallion already has a hole, you can skip this step, but always double-check that it’s big enough for the fixture’s wiring.
Painting or Finishing the Medallion
I wanted my medallion to blend seamlessly with my ceiling, so I painted it before installing. I chose a high-gloss white to match the ceiling trim, but you can get creative. I’ve seen medallions painted in bold colors or metallic finishes to make them pop. For my garage, I’m thinking about a matte black medallion to match the industrial vibe.
I laid the medallion on a drop cloth and applied two coats of paint, letting each coat dry for a few hours. A small foam brush worked great for getting into the intricate details of my floral design. If you’re using a primer, apply it first to help the paint stick better. I skipped primer and had no issues, but it depends on the material of your medallion. Once the paint was dry, I was ready to install.

Installing the Ceiling Medallion
Now for the main event! Here’s how I got that medallion up on the ceiling.
Step 1: Apply Adhesive
I loaded my caulk gun with construction adhesive and applied a generous zigzag pattern to the back of the medallion. I made sure to cover the edges and any raised areas that would touch the ceiling. Some folks use screws for extra security, but I found adhesive was plenty strong for my lightweight polyurethane medallion.
Step 2: Position the Medallion
With the adhesive applied, I climbed back up the ladder and carefully threaded the fixture’s wiring through the center hole of the medallion. I pressed the medallion firmly against the ceiling, making sure it was centered around the junction box. This part was a bit awkward because the adhesive was sticky, but I used painter’s tape to hold the edges in place while it set.
Step 3: Secure and Let It Dry
I held the medallion in place for a minute to make sure it bonded well. The adhesive I used took about 24 hours to fully cure, so I left the painter’s tape up overnight. If you’re in a humid garage, check the adhesive’s instructions for drying times—it might take longer. I also wiped away any excess adhesive that oozed out with a damp cloth before it hardened.
Step 4: Reinstall the Light Fixture
Once the adhesive was dry, I removed the painter’s tape and reattached my light fixture. I connected the wires exactly as they were before, using my phone photo as a guide. After securing the fixture to the junction box, I screwed on the canopy and popped in the bulbs. I turned the power back on, flipped the switch, and bam—my dining room looked like it belonged in a magazine!
Caulking and Touching Up
To make the medallion look seamless, I ran a thin bead of caulk around the edges where it met the ceiling. I used my finger to smooth the caulk for a clean line, then wiped away any excess with a damp rag. This step made a huge difference in hiding any tiny gaps.
I also touched up the paint where the medallion met the ceiling. A small artist’s brush was perfect for blending the paint with the ceiling color. In my garage, I’ll probably skip the caulk since the industrial look doesn’t need to be as polished, but for home spaces, it’s worth the extra effort.
Benefits of Adding a Ceiling Medallion
Installing a medallion was one of the best upgrades I’ve made. Here’s why I’m obsessed:
- Instant Elegance: My dining room went from plain to posh with one simple addition. It’s like putting a frame around your light fixture.
- Versatility: Medallions work in any room, from garages to bedrooms. I can’t wait to add one to my garage for that showroom feel.
- Affordable Upgrade: My medallion cost about $40, and the whole project was under $100. Compare that to a new chandelier or remodel!
- Hides Imperfections: The medallion covered some ugly cracks around my fixture’s junction box, saving me from patching the ceiling.
For car enthusiasts, a medallion in the garage makes your workspace feel special. It’s a small touch that says, “This is where magic happens,” whether you’re restoring a classic car or just changing the oil.
Common Challenges and How to Fix Them
I hit a few bumps along the way, so let me save you some trouble. One issue was getting the medallion perfectly centered. I messed up the first time and had to peel it off before the adhesive set, which was a sticky mess. To avoid this, I marked the ceiling with a pencil to guide my placement.
Another challenge was cutting the center hole. My first cut was a little uneven, but sanding fixed it. If you’re nervous about cutting, practice on a piece of cardboard first. Also, some ceilings aren’t perfectly flat, especially in older homes like mine. If your medallion doesn’t sit flush, use extra caulk to fill any gaps.
Finally, working alone can be tricky, especially when you’re balancing a medallion and a ladder. I roped in a friend to hold the medallion while I positioned it, and it made life so much easier. If you’re flying solo, use lots of painter’s tape to hold things in place.
Safety Tips for a Smooth Project
Safety first, always. Here’s what kept me safe:
- Turn off the power at the breaker and use a voltage tester to confirm it’s off.
- Wear safety glasses when cutting or sanding to protect your eyes.
- Use a sturdy ladder and have someone nearby to steady it if you’re high up.
- Handle adhesives and paints in a well-ventilated area, especially in a garage.
- If you’re unsure about wiring, call an electrician. It’s not worth the risk.
I had my wife spot me while I was on the ladder, and it gave me peace of mind. Plus, she got to admire my handiwork as it went up!
Why Ceiling Medallions Are Worth the Effort
After installing my medallion, I’m hooked. It’s such a simple project, but the impact is huge. My dining room feels like a fancy restaurant now, and every time I walk in, I smile. In my garage, I’m excited to add a medallion to make my car workspace feel more like a custom shop. The project was affordable, fun, and didn’t take a whole weekend.
Whether you’re a gearhead or just want to upgrade your home, a ceiling medallion is a small change with big rewards. It’s a chance to flex your DIY skills and add a touch of your personality to any space. I’m already scouting out medallions for other rooms in my house!

Conclusion
So, there you have it—everything I learned about how to install a ceiling medallion. From picking the perfect design to gluing it up and wiring the fixture back, this project was a blast. It’s amazing how something so simple can make such a big difference. My dining room is now the talk of every dinner party, and I can’t wait to bring that same wow factor to my garage. If you’re ready to add some flair to your ceiling, grab a medallion and give it a try. You don’t need to be a pro to pull this off—just a little patience and a willingness to have fun. Here’s to making your space shine, one medallion at a time!
Frequently Asked Questions
What is a ceiling medallion?
It’s a decorative piece that goes around a ceiling light fixture or fan. I used one to make my dining room chandelier look fancier, and it’s like a frame for your light.
Can I install a ceiling medallion myself?
Yes, you can! It’s a straightforward DIY project. I had no experience and managed it with basic tools and some patience. Just follow the steps and stay safe.
Do I need to paint the medallion?
Not always, but I painted mine to match my ceiling. It makes it look seamless. You can also paint it a bold color to stand out, depending on your style.
Will a ceiling medallion work in a garage?
Absolutely! I’m planning to add one to my garage for a showroom vibe. Just pick a durable material and adhesive that can handle dust or humidity.
How do I know what size medallion to buy?
Measure your light fixture’s canopy and choose a medallion 1.5 to 2 times that size. My 24-inch medallion was perfect for my dining room chandelier.
Is it hard to cut the center hole in a medallion?
It’s not too bad. I used a jigsaw and sanded the edges smooth. If you’re nervous, practice on cardboard first. Some medallions come pre-cut, which is easier.
Do I need an electrician for this project?
Usually, no. If you’re comfortable removing and reinstalling your light fixture, you can do it yourself. But if the wiring looks sketchy, call a pro for safety.