How to Install a Dummy Door Handle: A Step-by-Step Guide for Homeowners
Hey there! If you’re looking to spruce up your home with a touch of style or functionality, installing a dummy door handle might be just the project for you. I’ve tackled this task a few times myself, and let me tell you, it’s easier than it sounds. A dummy door handle is perfect for doors that don’t need a latch, like closet doors, pantry doors, or even decorative double doors. It’s all about adding that polished look without the complexity of a full door lock system.
In this guide, I’m going to walk you through everything I’ve learned about installing a dummy door handle, from picking the right one to getting it securely in place. By the end, you’ll feel like a pro, ready to make your home look sharper than ever. Let’s dive in!
What Is a Dummy Door Handle?
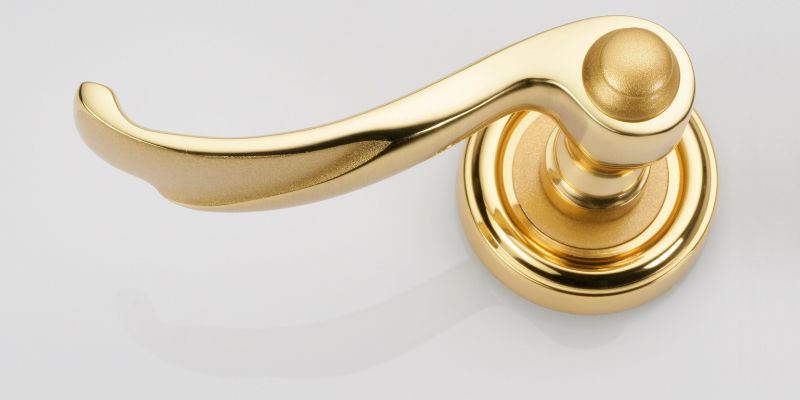
So, what exactly is a dummy door handle? I remember wondering this myself the first time I heard the term. It’s a door handle that doesn’t turn or lock. Unlike a standard doorknob that latches or locks, a dummy handle is purely decorative or used for pulling a door open or closed. You’ll often see them on closet doors, shallow pantry doors, or one side of a double door where only one door needs to function.
I love how dummy handles give a door a finished, elegant look without needing a full locking mechanism. They’re also super practical for spaces where a latch isn’t necessary but you still want the door to feel substantial when you grab it. Plus, they come in all sorts of styles—modern, vintage, sleek, or ornate—so you can match them to your home’s vibe.
Why Choose a Dummy Door Handle?
When I first started my home improvement journey, I didn’t realize how versatile dummy door handles could be. They’re not just for show; they serve a real purpose in certain situations. For example, I used one on my hallway closet door because I didn’t need a lock, but I wanted the door to blend seamlessly with the rest of my home’s hardware. Here’s why you might want to consider one:
- Aesthetic Appeal: Dummy handles add a cohesive look to your home. If all your doors have matching hardware, it ties the design together.
- Ease of Use: They’re great for doors that don’t need to latch, making them simple to open and close.
- Cost-Effective: Since they don’t have moving parts, dummy handles are often cheaper than full locksets.
- Low Maintenance: No moving parts means nothing to break or wear out over time.
I’ve found that dummy handles are especially handy for double doors where one door is fixed in place. Instead of leaving the fixed door bare, a dummy handle makes it look intentional and polished.
Tools and Materials You’ll Need
Before I start any project, I like to gather everything I need so I’m not scrambling halfway through. Installing a dummy door handle is pretty straightforward, but you’ll still need a few tools and materials. Here’s what I always have on hand:
| Item | Purpose |
|---|---|
| Dummy door handle kit | The main hardware, usually includes the handle, mounting plate, and screws. |
| Screwdriver (Phillips) | For securing the screws that hold the handle in place. |
| Measuring tape | To ensure the handle is positioned correctly on the door. |
| Pencil | For marking where to drill or place the handle. |
| Drill (optional) | If your door doesn’t have pre-drilled holes for the screws. |
| Level | To make sure the handle is straight and even. |
| Cleaning cloth | To wipe down the door and handle for a polished finish. |
Most dummy handle kits come with everything you need, including screws, so check the packaging before buying extras. I learned this the hard way after buying a pack of screws I didn’t end up needing!
Choosing the Right Dummy Door Handle
Picking the right dummy door handle can feel overwhelming with so many options out there. I’ve stood in the hardware aisle for way too long, debating between brushed nickel and oil-rubbed bronze. Here’s what I’ve learned to focus on when choosing:
- Style: Match the handle to your home’s aesthetic. Modern homes look great with sleek, minimalist handles, while traditional homes might call for something with more detail, like a vintage lever.
- Finish: Common finishes include chrome, brass, bronze, or matte black. I always check my existing door hardware to make sure the new handle doesn’t clash.
- Door Thickness: Most dummy handles fit standard door thicknesses (1-3/8 to 1-3/4 inches), but double-check your door’s measurements.
- Brand Quality: I’ve had good luck with brands like Schlage, Kwikset, and Baldwin. They tend to be durable and easy to install.
One tip I wish I’d known earlier: bring a photo of your existing door hardware to the store. It makes matching the finish and style so much easier.
Preparing Your Door for Installation
Before you start screwing anything in, you need to prep your door. I’ve rushed this step before and ended up with a crooked handle, so take your time here. First, clean the door surface where the handle will go. Dust or grime can make it harder for the handle to sit flush.
Next, check if your door already has holes from a previous handle. If it does, you’re in luck—most dummy handles are designed to fit standard hole patterns. If not, you’ll need to measure and mark where the handle will go. Here’s how I do it:
- Measure the Height: Standard door handles sit about 36 inches from the floor. Use a measuring tape to find this spot and mark it with a pencil.
- Check Alignment: If you’re installing handles on both sides of the door, make sure the marks line up perfectly. I use a level to double-check.
- Test the Fit: Hold the handle’s mounting plate against the door to see if it aligns with your marks. This helps avoid drilling mistakes.
If your door is brand new or doesn’t have holes, you may need to drill pilot holes for the screws. I use a drill bit slightly smaller than the screws to make sure they grip tightly.
Step-by-Step Guide to Installing a Dummy Door Handle
Alright, let’s get to the fun part—actually installing the handle! I’ve done this enough times to know that following a clear process makes it a breeze. Here’s how I install a dummy door handle, step by step:
Step 1: Unpack and Inspect the Handle Kit
When I open a new dummy handle kit, I always lay out all the pieces to make sure nothing’s missing. Most kits include the handle, a mounting plate, and screws. If your kit has instructions, give them a quick read. They’re usually pretty simple, but it’s good to know if there’s anything specific to your model.
Step 2: Position the Mounting Plate
Take the mounting plate (the part that screws into the door) and hold it against your marked spot. If you’re installing handles on both sides of the door, do this for both plates. Use a level to make sure it’s straight. I once skipped this step and ended up with a slightly tilted handle that bugged me every time I looked at it.
Step 3: Mark and Drill (If Needed)
If your door doesn’t have pre-drilled holes, use the mounting plate as a template to mark where the screws will go. Then, carefully drill pilot holes. I keep my drill steady and don’t push too hard to avoid splintering the wood.
Step 4: Attach the Mounting Plate
Line up the mounting plate with the holes and screw it into place using the provided screws. I use a manual screwdriver for this because it gives me better control and prevents over-tightening. If you’re using a power drill, go slow to avoid stripping the screws.
Step 5: Attach the Dummy Handle
Most dummy handles snap or screw onto the mounting plate. Follow the instructions for your specific model. I usually give the handle a gentle tug to make sure it’s secure. If it feels loose, double-check the screws on the mounting plate.
Step 6: Test and Adjust
Once the handle is attached, give it a good look. Is it straight? Does it feel sturdy? If anything’s off, loosen the screws, adjust the plate, and retighten. I’ve had to do this a couple of times to get it just right.
Step 7: Clean and Admire
Wipe down the handle and door with a clean cloth to remove fingerprints or dust. Step back and admire your work! It’s amazing how much a small detail like a dummy handle can elevate a door’s look.
Common Mistakes to Avoid
I’ve made my fair share of mistakes installing dummy door handles, so let me save you some trouble. Here are a few things to watch out for:
- Not Measuring Properly: If your handle is too high or low, it’ll look odd and might not feel right when you use it. Always measure twice.
- Over-Tightening Screws: This can strip the screws or damage the door. Tighten just enough to make it secure.
- Ignoring Door Thickness: If the handle doesn’t fit your door’s thickness, it won’t sit flush. Check this before buying.
- Skipping the Level: A crooked handle is a dead giveaway of a rushed job. Take the extra minute to use a level.
Maintaining Your Dummy Door Handle
One thing I love about dummy door handles is how low-maintenance they are. Since there are no moving parts, they don’t wear out like regular door knobs. Still, a little care goes a long way. I wipe mine down every few months with a damp cloth to keep them shiny. Avoid harsh chemicals, as they can damage the finish, especially on brass or bronze handles.
If you live in a humid area like I do, check the screws every year or so. They can loosen over time, especially on wooden doors that expand and contract. A quick tighten with a screwdriver keeps everything secure.
When to Call a Professional
Most of the time, installing a dummy door handle is a DIY-friendly project. But there are moments when I’ve wished I’d called a pro. If your door is made of a tricky material like metal or glass, or if you’re dealing with an antique door that needs special care, a professional can save you from costly mistakes. Also, if you’re installing multiple handles across your home and want them to look perfectly uniform, a handyman or locksmith can get it done faster and with precision.
Cost of Installing a Dummy Door Handle
When I first started shopping for dummy door handles, I was pleasantly surprised by how affordable they are. A decent-quality handle can cost anywhere from $10 to $50, depending on the brand and finish. If you’re doing it yourself, that’s your main expense, since the tools are likely things you already own. If you hire a professional, expect to pay $50 to $150 for labor, depending on where you live in the USA and how many handles you’re installing.
Why I Love This Project
There’s something so satisfying about installing a dummy door handle. It’s a quick project—usually under 30 minutes—but the impact is huge. Every time I walk by my closet door with its sleek new handle, I smile a little. It’s those small upgrades that make your home feel more like you. Plus, it’s a great way to dip your toes into DIY if you’re new to home improvement. No complicated mechanisms, no heavy tools—just a straightforward job that leaves you feeling accomplished.
Conclusion
Installing a dummy door handle is one of those home improvement projects that’s simple, affordable, and instantly rewarding. Whether you’re upgrading a closet door, adding a touch of style to a pantry, or making double doors look cohesive, a dummy handle gets the job done with minimal effort. I’ve walked you through everything I’ve learned from my own projects: choosing the right handle, gathering tools, prepping the door, and avoiding common pitfalls.
With a little patience and a few basic tools, you can transform your doors and give your home a polished, professional look.
So, grab that screwdriver, pick out a handle that matches your style, and give it a go. I promise you’ll love the result. And if you run into any hiccups, don’t worry—I’ve got you covered with some FAQs below to answer the most common questions. Happy DIY-ing!
Frequently Asked Questions
Can I Install a Dummy Door Handle on Any Type of Door?
Yes, you can install a dummy door handle on most doors, like wood, fiberglass, or composite. I’ve put them on closet doors and even a decorative barn door. Just make sure the door’s thickness matches the handle’s specifications. If you’re dealing with a glass or metal door, you might need special screws or a professional’s help to avoid damage.
Do I Need to Drill Holes for a Dummy Door Handle?
It depends. If your door already has holes from a previous handle, you probably won’t need to drill. Most dummy handles fit standard hole patterns. If your door is new or blank, you’ll need to drill pilot holes for the screws. I always mark the spots carefully and use a small drill bit to keep things clean.
How Long Does It Take to Install a Dummy Door Handle?
For me, it usually takes about 15 to 30 minutes per handle. If you’re new to DIY, it might take a bit longer to get the measurements and alignment just right. The process is quick because there’s no latch or lock mechanism to deal with—just a mounting plate and screws.
Can I Use a Dummy Door Handle on Both Sides of a Door?
Absolutely! I’ve done this on double doors where one door is fixed. You just install a dummy handle on each side, making sure they line up perfectly. Use a level and measure carefully to keep everything symmetrical. It gives the door a balanced, professional look.
What’s the Difference Between a Dummy Door Handle and a Passage Knob?
Great question! I used to mix these up. A dummy door handle doesn’t turn or latch—it’s just for looks or pulling. A passage knob, on the other hand, turns and has a latch to keep the door closed, like on a bedroom or bathroom door. If you don’t need the door to latch, go with a dummy handle.