How to Assemble a Door Handle: Spindle and Grub Screw Fit
Assemble a door handle by sliding the spindle through the latch at a 90-degree angle, then tightening the small grub screw on the lever neck with an Allen key to lock it in place. Skip the grub screw and the handle will wobble loose within weeks, especially on heavier lever-style handles. This guide covers the tools needed, spindle alignment, grub screw tightening, and testing the latch for a secure fit.
Why You Might Need to Assemble a Door Handle
I remember the first time I had to replace a door handle. The old one was loose, squeaky, and just didn’t match the vibe of my newly painted living room. Sometimes, you need to assemble a door handle because the old one’s worn out, or maybe you’re installing a new door entirely. Other times, it’s about upgrading to a fancier model for better security or style. Whatever the reason, knowing how to do it yourself saves time, money, and that trip to the hardware store wondering if you’re buying the right thing. Plus, there’s something satisfying about fixing stuff with your own hands, right?
Door handles come in all shapes and sizes—lever handles, knob handles, or even smart locks. Each type might have slight differences, but the core process is pretty similar. You’re essentially attaching a handle to a door, making sure it latches properly and feels secure. If the handle’s part of a lockset, you’ll also need to align the locking mechanism. Don’t worry if that sounds like a lot; I’ll break it down step by step.
Best Door Handle Assembly Pick
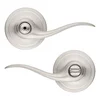
Kwikset Tustin Interior Privacy Door Handle – $23.99
A complete lever handle and privacy lock set that matches the assembly steps this guide walks through, from spindle fit to latch alignment.
- Best for: Bedroom and bathroom doors needing a privacy lock
- Why we picked it: Matches the lever, spindle, and latch parts this guide covers
- Main drawback: Privacy lock only, not keyed for exterior use
Tools for door handle assembly
 Option 1 Amazon Basics Hex Key Set – $10.49
|
 Option 2 Klein Tools 11-in-1 Screwdriver Set – $15.97
|
 Option 3 Replacement Door Handle Spindle – $7.39
|
As an Amazon Associate we earn from qualifying purchases.
Tools and Materials You’ll Need
Before we start, let’s talk about what you’ll need. I learned the hard way that having the right tools makes all the difference. One time, I tried assembling a handle with a butter knife instead of a screwdriver—big mistake! Here’s a quick rundown of what you should have on hand:
| Tool/Material | Purpose |
|---|---|
| Screwdriver (Phillips/Flathead) | Tightens screws to secure the handle and latch. Check your handle’s screws! |
| Tape Measure | Measures the door thickness and backset for proper fit. |
| Pencil | Marks spots for drilling or aligning parts. |
| Drill (optional) | Makes holes for screws or latch if your door isn’t pre-drilled. |
| Chisel (optional) | Carves out space for the latch plate if needed. |
| New Door Handle Kit | Includes the handle, latch, strike plate, and screws. |
| Level (optional) | Ensures the handle is straight, especially for lever types. |
| Safety Glasses (optional) | Protects your eyes if you’re drilling or chiseling. |
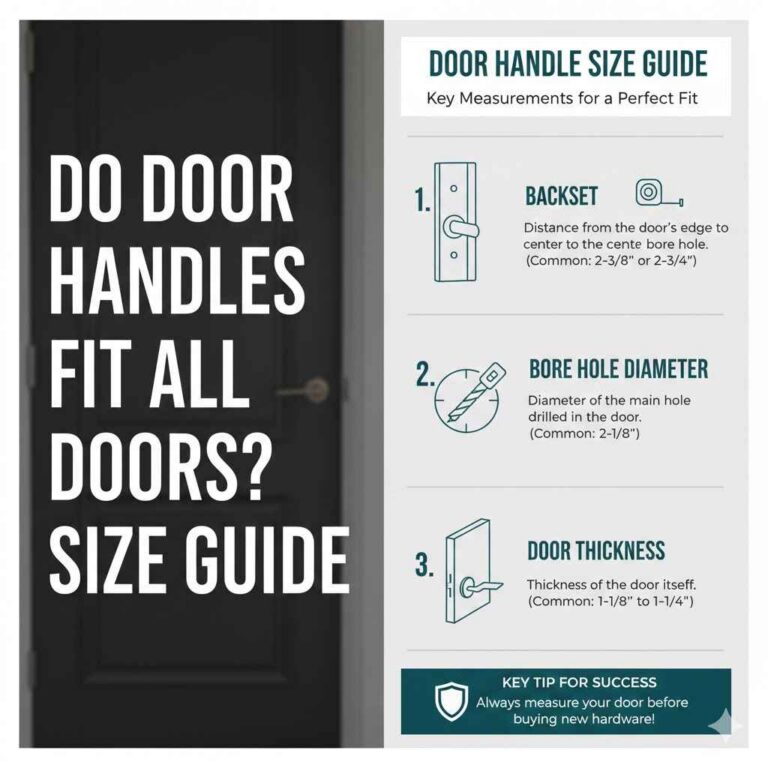
Most door handle kits come with everything you need, including a template for installation. If you’re replacing an old handle, make sure the new one matches the door’s thickness (usually 1-3/8 to 1-3/4 inches for standard doors) and the backset (the distance from the edge of the door to the center of the handle, typically 2-3/8 or 2-3/4 inches). I always double-check these measurements to avoid headaches later.
Step-by-Step Guide to Assembling a Door Handle
Alright, let’s get to the fun part—putting the handle together! I’ll walk you through the process as if we’re sitting in my garage, working on this together. Each step builds on the last, so take your time and follow along.
Step 1: Remove the Old Handle (If Replacing)
If you’re replacing an old handle, start by taking it off. I’ve done this enough to know it’s usually straightforward but can be a bit fiddly. Look for screws on the interior side of the handle. Most handles have two screws holding the interior and exterior halves together. Grab your screwdriver (Phillips or flathead, depending on the screws) and loosen them. Once the screws are out, the handle should pull apart easily.
If there’s a latch or strike plate on the edge of the door, unscrew those too. Sometimes, the latch is stuck, so wiggle it gently to free it. I once spent 20 minutes tugging at a stubborn latch before realizing I missed a hidden screw—check everywhere! Set the old parts aside in case you need to reference them (see our door handle parts guide if any piece looks unfamiliar).
Step 2: Prepare the Door
Now, let’s make sure your door is ready. If you’re working with a new door, it might not have holes for the handle or latch yet. This is where the template from your handle kit comes in handy. It shows exactly where to drill. Measure the backset (usually marked on the template) and use a pencil to mark the spots for the handle hole (typically 2-1/8 inches in diameter) and the latch hole (usually 1 inch).
If you’re drilling, use a hole saw for the handle and a spade bit for the latch. Go slow to avoid splintering the wood. I’ve learned to drill halfway from one side, then switch to the other to keep things clean. If the door needs a recess for the latch plate, use a chisel to carve out a shallow pocket. Test-fit the latch to make sure it sits flush.
For a replacement, check that the existing holes match your new handle’s specs. Sometimes, old holes are too big or misaligned, and you might need to fill them with wood filler and redrill. I had to do this once with an old farmhouse door—patience is key!
Step 3: Install the Latch
The latch is the part that catches the door frame to keep the door closed. Slide the latch into the hole on the edge of the door, making sure the beveled side (the slanted part) faces the direction the door closes. For example, if the door swings toward you, the bevel should face you. This helps the door close smoothly without jamming.
Secure the latch with the screws provided. I always hand-tighten these to avoid stripping the wood. If the latch plate needs a recess, double-check that it’s flush with the door’s edge. A wobbly latch can make the handle feel loose, so take your time here.
Step 4: Attach the Exterior Handle
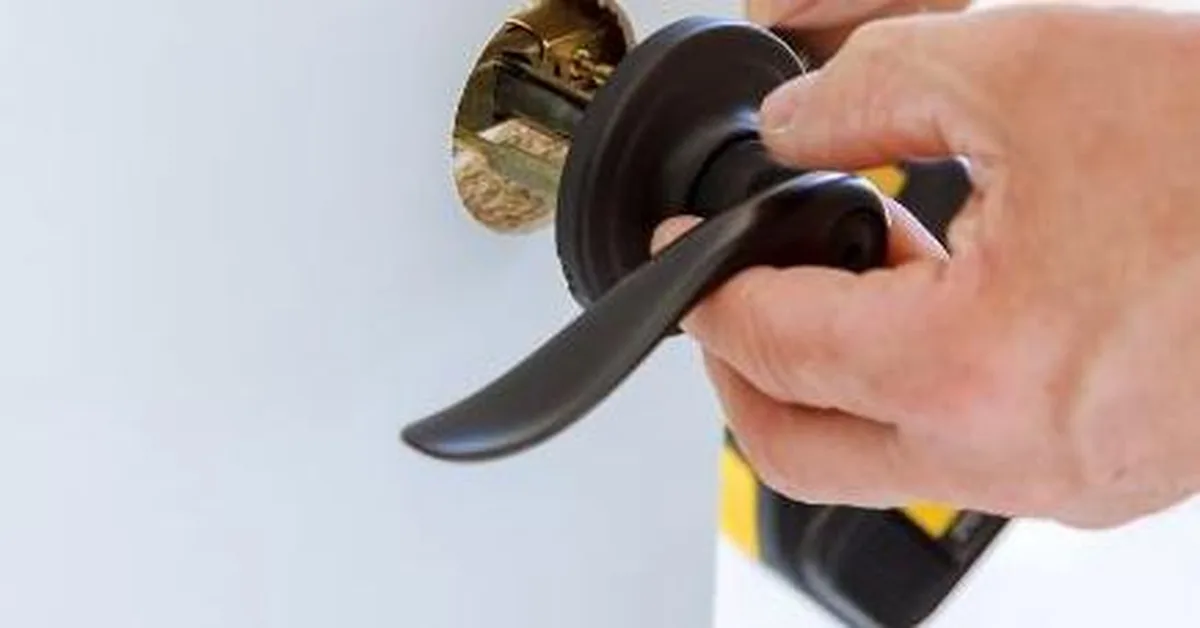
Now, let’s put on the exterior half of the handle. This is the part that goes on the outside of the door (or the side opposite the room if it’s an interior door). Feed any spindles or connecting rods through the latch mechanism. The spindle is the square rod that turns when you twist the handle, making the latch move. Make sure it’s aligned with the latch’s slot.
Hold the exterior handle in place and check that it sits flush against the door. If it’s a lockset, ensure the keyhole (if there’s one) is oriented correctly, usually with the key slot pointing up. I once installed a lock upside down, and let me tell you, it’s not a good look!
Step 5: Secure the Interior Handle
Next, grab the interior handle and align it with the exterior half. The spindle or screws from the exterior side should fit into the interior handle. Most kits use long screws that go through the interior handle, through the door, and into the exterior handle to hold everything together. Tighten these screws gently but firmly. I like to alternate sides to keep the handle even.
If it’s a lever handle, use a level to make sure it’s straight. A crooked lever is super noticeable and can bug you every time you walk by. For locksets, test the key or thumb-turn to ensure the locking mechanism works smoothly.
Step 6: Install the Strike Plate
The strike plate is the metal piece that goes on the door frame, where the latch catches. Close the door to see where the latch hits the frame, and mark that spot with a pencil. You might need to chisel out a small recess for the strike plate to sit flush. I’ve found that holding the strike plate in place and marking the screw holes helps keep it aligned.
Screw the strike plate into the frame, and test the door by closing it. The latch should click into place without too much force. If it’s sticky, you might need to adjust the strike plate or deepen the recess. I had a door that wouldn’t latch properly until I slightly widened the strike plate’s hole—small tweaks make a big difference.
Step 7: Test and Adjust
Now for the moment of truth! Open and close the door a few times. Turn the handle or knob to make sure the latch retracts smoothly. If it’s a lockset, test the lock with the key or thumb-turn. Wiggle the handle to check for looseness. If anything feels off, go back and tighten screws or adjust the alignment.
I once installed a handle that felt perfect until I locked it and realized the key was sticking. A quick tweak to the spindle alignment fixed it. Don’t rush this step—testing ensures your handle works like it should.
Common Mistakes to Avoid
I’ve made my fair share of mistakes assembling door handles, so let me save you some trouble. First, don’t overtighten screws. It can strip the wood or crack the handle. Second, double-check the backset measurement before drilling. A mismatched backset means the handle won’t fit properly. Third, make sure the latch’s bevel faces the right way, or the door won’t close smoothly. Finally, don’t skip testing the lock or latch before calling it done—nothing’s worse than a handle that jams when you’re in a rush.
Tips for a Professional Finish
Want your door handle to look like a pro installed it? Here are a few tricks I’ve picked up. Use a level for lever handles to keep them perfectly straight. Clean any smudges or fingerprints off the handle with a damp cloth before you finish. If you’re installing multiple handles (like for a whole house), keep the style consistent for a cohesive look. And if you’re working with a glass or metal door, check if your handle kit is compatible—some require special adapters.
Why DIY Door Handle Assembly Is Worth It
I love the feeling of stepping back and seeing a door handle I installed myself. It’s not just about saving a few bucks (though that’s nice). It’s about knowing you can handle home repairs with confidence. Plus, you get to pick a handle that matches your style—maybe a sleek modern lever or a classic brass knob. Every time you open that door, you’ll feel a little proud of your work.
Conclusion
Assembling a door handle is one of those projects that seems intimidating but turns out to be pretty straightforward once you get the hang of it. I’ve walked you through every step, from gathering tools to testing the final setup, and shared some lessons I’ve learned from my trial and error. Whether you’re fixing a loose handle, upgrading your home’s look, or installing a brand-new door, this guide has you covered. Take your time, double-check your measurements, and don’t be afraid to tweak things until they’re just right. There’s nothing like the satisfaction of a job well done—and a door that opens and closes perfectly every time. So grab your screwdriver, pick out a shiny new handle, and get to work. You’ve got this!
FAQs
What if my door doesn’t have pre-drilled holes?
You’ll need to drill holes for the handle and latch. Use the template from your handle kit to mark the spots. A 2-1/8-inch hole saw works for the handle, and a 1-inch spade bit is good for the latch. Go slow and drill from both sides to avoid splintering.
Can I install a door handle without a drill?
If your door already has the right holes, you might not need a drill. But if you’re working with a new door or need to adjust holes, a drill is usually necessary. A chisel can help with the latch plate if no drilling is required.
How do I know if my new handle will fit my door?
Check the door’s thickness (usually 1-3/8 to 1-3/4 inches) and the backset (2-3/8 or 2-3/4 inches). Your handle’s packaging should list compatible measurements. Measure twice to be sure!
What if the handle feels loose after installation?
A loose handle usually means the screws aren’t tight enough or the spindle isn’t properly aligned. Double-check that all screws are secure and that the spindle fits snugly through the latch. If it is still wobbling, see our guide on how to fix a loose door knob.
Can I use the same screws from my old handle?
It’s best to use the screws that come with your new handle. Old screws might not fit properly or could be worn out, which can cause the handle to loosen over time.
Sponsored / affiliate links. As an Amazon Associate I earn from qualifying purchases. I may earn additional commission from eligible campaigns.