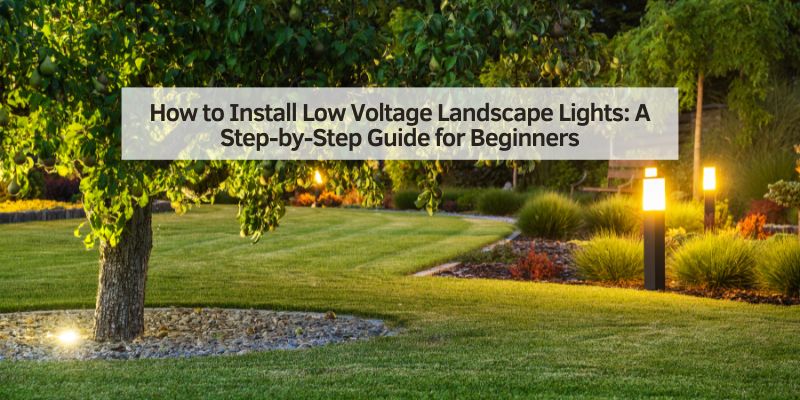
How to Install Low Voltage Landscape Lights: A Step-by-Step Guide for Beginners
Hey there! Want to make your yard look amazing at night? I’ve been there, staring at my dark driveway or garden, wishing it had that warm, inviting glow. Installing low-voltage landscape lights is the perfect way to add beauty, safety, and charm to your outdoor space. As a car enthusiast who loves tinkering with projects, I’ve installed these lights around my home to highlight my driveway and garden paths. It’s easier than you might think! In this article, I’ll walk you through every step, share tips I’ve learned, and make sure you feel confident to light up your yard. Whether you’re a DIY newbie or a seasoned pro, let’s get started on this fun project together!
Why Choose Low-Voltage Landscape Lights?
Let’s start with why low-voltage lights are awesome. They run on 12 volts instead of the standard 120 volts, which makes them safer and easier to install. I was nervous about working with electricity at first, but these lights are beginner-friendly. They use less energy, so they’re cheaper to run, and they’re perfect for highlighting your driveway, garden, or even your car parked outside.
I chose low-voltage lights for my yard because they’re versatile. You can use them for path lights, spotlights, or even to show off a cool car in your driveway. Plus, they’re safer around kids and pets. If you’re like me and love a well-lit yard that looks professional without breaking the bank, low voltage is the way to go.
Planning Your Lighting Layout
Before you grab your tools, you need a plan. I learned this the hard way when I first tried installing lights without thinking it through. They ended up uneven and didn’t light up the right spots! Start by walking around your yard at night. Picture where you want light—maybe along the driveway, a garden path, or around a tree.
Sketch a simple map of your yard. Mark where you’ll place the lights and where the power source will be. I used my garage outlet as the power source since it’s close to my driveway. Think about what you want to highlight. For me, it was the path to my front door and a spotlight on my vintage car. Plan for about 6-10 feet between path lights for even lighting. Don’t overdo it—too many lights can look cluttered.
Choosing the Right Low-Voltage Lighting Kit
Picking the right kit is key. I spent hours at the hardware store comparing options, and here’s what I learned. Most low-voltage lighting kits come with a transformer, lights, and wiring. The transformer converts 120-volt household power to 12 volts. Look for a kit with enough wattage for your needs—add up the wattage of all your lights and choose a transformer with at least 20% more capacity.
I went with LED lights because they last longer and use less energy. They’re pricier upfront, but they save money over time. Choose fixtures that match your style—sleek stainless steel for a modern look or bronze for a classic vibe. I picked path lights for my driveway and a spotlight for my car. Make sure the kit includes enough wire for your layout. I needed about 100 feet to cover my yard.
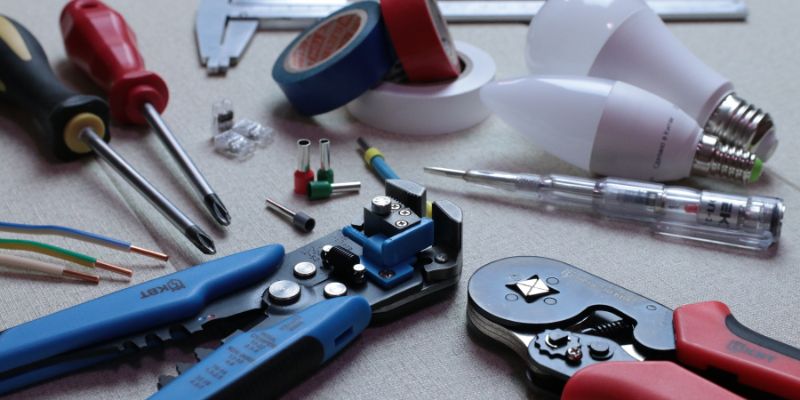
Gathering Tools and Materials
You don’t need a ton of tools, which is great. Here’s what I used: a shovel, wire cutters, a screwdriver, a voltage tester, and a tape measure. You’ll also need the lighting kit, stakes (if not included), and maybe some extra wire connectors. I keep a toolbox in my garage for car projects, so I already had most of this.
If you’re installing lights in hard soil, a small garden trowel helps. I also grabbed some landscaping pins to secure the wire. Double-check that your kit has weatherproof connectors—rain can ruin cheap ones. If you’re like me and live in a rainy part of the USA, this is a must.
Preparing the Installation Area
Before you dig, make sure your yard is ready. I walked my driveway and garden path to clear rocks, weeds, or debris. If you’re installing lights along a path, mow the grass or trim plants to make space. I learned to check for underground utilities first. Call 811 (in the USA) to mark gas, water, or electric lines. It’s free and keeps you safe.
Mark where each light will go with chalk or small stakes. I spaced my path lights about 8 feet apart for a clean look. If you’re lighting a driveway, place lights along the edges to guide cars safely. For spotlights, aim them at features like trees or your parked car for a dramatic effect. I tested my spotlight angles at night to get it just right.
Installing the Transformer
The transformer is the heart of your system. I mounted mine on the side of my garage, near an outdoor outlet. Choose a spot that’s dry and easy to access. Most transformers have mounting holes—use screws to secure it about 12 inches off the ground to avoid water damage.
Plug the transformer into a GFCI outlet for safety. I made sure mine was on a circuit that could handle the load. If you’re not sure, check your breaker box or ask an electrician. Once the transformer is mounted, don’t connect it to power yet—you’ll do that after wiring the lights.
Laying Out and Connecting the Wiring
Now comes the fun part—laying the wire. I started by unrolling the low-voltage cable from the transformer to the first light location. Keep the wire loose for now; you’ll bury it later. Follow your layout plan and run the wire along the path or driveway. I looped mine around the garden beds to reach all my lights.
To connect the lights, most kits use snap-on connectors. Place the wire in the connector and snap it onto the light fixture’s leads. I found it easier to connect all the lights before burying the wire. Double-check each connection is tight—loose ones can cause flickering. If your kit has a hub system, connect all wires to a central hub near the transformer. I tested each light as I went to make sure they worked.
Installing the Light Fixtures
Placing the lights is where your yard starts to shine. For path lights, I pushed the stakes into the ground at my marked spots. If the soil is hard, use a trowel to loosen it. Make sure the lights are straight and at the same height for a polished look. I used a level to check mine.
For spotlights, angle them toward your target, like a tree or your car. I adjusted my spotlight to hit my car’s chrome bumper, and it looked amazing at night. Secure spotlights with stakes or mounting brackets, depending on the design. If you’re installing deck or step lights, screw them into place carefully. I added a step light to my porch, and it made a huge difference for safety.
Burying the Wiring
Once your lights are in place, bury the wire to keep it safe and hidden. I used a shovel to dig a shallow trench—about 3-6 inches deep—along the wire’s path. Lay the wire in the trench and cover it with soil or mulch. Be gentle so you don’t damage the wire. I pinned my wire down with landscaping pins to keep it from shifting.
If you’re running wire under a driveway or sidewalk, use a PVC pipe or conduit to protect it. I had to do this for part of my driveway, and it was worth the extra effort. Avoid sharp bends in the wire—it can weaken the connection over time.
Testing and Adjusting the System
Before you call it a day, test everything. I plugged in the transformer and flipped the switch at dusk to see the magic. Walk around and check each light. If one doesn’t work, check the connector or bulb. I had one light flicker because the connector wasn’t snug—tightening it fixed the issue.
Adjust the angles of spotlights or path lights if needed. I tweaked my spotlight a few times to get the perfect glow on my car. If your lights are too bright or dim, check the transformer’s wattage settings. Some transformers let you adjust the output for different effects.
Adding a Timer or Photocell
To make your lights hassle-free, add a timer or photocell. I installed a photocell that turns the lights on at dusk and off at dawn. It’s super convenient and saves energy. Most kits include a photocell, but you can buy one separately if needed. I mounted mine near the transformer, making sure it wasn’t blocked by shadows.
A timer is another option. I used one for a while to set specific hours, like 6 PM to midnight. It’s great if you want to control when the lights are on. Both options are easy to install—just follow the kit’s instructions.
Maintaining Your Low-Voltage Lights
Keeping your lights looking great is simple. I check mine every few months to clean the lenses and make sure no dirt or grass is covering them. Use a soft cloth to wipe off dust or bugs. If a light stops working, check the bulb or connector first. LED bulbs last for years, but they can burn out eventually.
In winter, clear snow or ice from the fixtures to keep them shining. I also check the transformer and wires after big storms to make sure everything’s dry and secure. If you live in a wet area, like I do, seal connections with waterproof tape for extra protection.
Safety Tips for Installation
Safety comes first. I was cautious when installing my lights, and you should be too. Always turn off the power when working with the transformer or outlet. Use a voltage tester to confirm there’s no current before touching wires. I keep one in my toolbox from my car repair days.
Wear gloves when digging or handling wires to avoid cuts. If you’re digging near utilities, double-check with 811 to avoid hitting a gas or water line. If you’re unsure about any electrical step, call a professional. I did this for my first installation just to be safe.
Enhancing Your Yard’s Look with Lights
Low-voltage lights aren’t just practical—they make your yard pop. I love how my driveway looks now, with soft lights guiding the way. It’s safer to park my car at night, and it adds curb appeal. I also used spotlights to highlight my garden’s best features, like a small fountain and my favorite tree.
Think about mixing different light types. Path lights are great for walkways, but spotlights add drama. I’ve seen friends use string lights with low-voltage systems for a cozy vibe. Experiment with placement to create a look that’s uniquely yours.

Common Mistakes to Avoid
I made a few mistakes when I started, so let me save you some trouble. Don’t overload the transformer—check the wattage of your lights and stay within the limit. I tried adding too many lights once, and the system flickered. Also, don’t bury wires too deep; 3-6 inches is enough to keep them safe without making repairs a hassle.
Avoid placing lights too close together—it looks crowded and wastes energy. I spaced mine too tightly at first and had to redo them. Finally, don’t skip testing the system before burying the wires. It’s a pain to dig them up if something’s wrong.
Here’s a quick table to summarize common mistakes and how to avoid them:
| Mistake | Why It’s a Problem | How to Avoid |
|---|---|---|
| Overloading the transformer | Causes flickering or burnout | Check the wattage and stay within the limit |
| Burying wires too deep | Hard to access for repairs | Keep trenches 3-6 inches deep |
| Placing lights too close | Looks cluttered, wastes energy | Space lights 6-10 feet apart |
| Not testing before burying | Hard to fix wiring issues after burial | Test all lights before covering wires |
This table helped me stay on track during my second installation, and I hope it helps you too.
Cost and Budget Considerations
Low-voltage lighting is affordable, but costs add up. A basic kit with 6-8 lights costs $50-$150, depending on quality. LED kits are pricier but save money long-term. I spent about $100 on my kit, plus $20 for extra wire and connectors. If you need a professional to install it, expect to pay $200-$500, depending on your yard’s size.
Shop around at hardware stores or online for deals. I found a great kit on sale at a local store. If you’re on a budget, start with a small setup and add more lights later. That’s what I did, and it worked out perfectly.
Connecting to the Automotive Lifestyle
As a car lover, I see lighting as part of the automotive lifestyle. A well-lit driveway makes it easier to park or show off your car at night. I’ve had friends compliment how my vintage Mustang looks under a spotlight. It’s like giving your car its stage! Plus, lights along the driveway keep you from tripping when you’re carrying car parts or groceries.
If you host car meets or work on your car at night, good lighting is a game-changer. I added path lights to my garage area, and it’s so much easier to see what I’m doing. It ties the whole automotive vibe together with a polished, professional look.
Conclusion
Installing low-voltage landscape lights is one of the best projects I’ve tackled. It’s transformed my yard, made my driveway safer, and even highlighted my car in a way that turns heads. From planning the layout to burying the wires, every step is doable, even if you’re new to DIY. I’ve shared my mistakes, tips, and tricks to help you avoid pitfalls and create a yard that shines. Whether you’re lighting up a path or showcasing your pride-and-joy car, this project is worth the effort. So grab a kit, get out there, and light up your world! Thanks for joining me on this journey—here’s to brighter nights and a stunning outdoor space!
FAQs
What are low-voltage landscape lights?
They’re outdoor lights that run on 12 volts instead of 120 volts. They’re safer, use less energy, and are easy to install for things like paths or driveways.
Do I need an electrician to install low-voltage lights?
No, most people can do it themselves. The low voltage makes it safe, but call a pro if you’re unsure about electrical work.
How far apart should I place path lights?
Space them 6-10 feet apart for even lighting. I used 8 feet for my driveway, and it looks great.
Can I use low-voltage lights in the rain?
Yes, as long as the fixtures and connectors are weatherproof. Check your kit and seal connections if you live in a wet area.
How much does a low-voltage lighting kit cost?
A basic kit costs $50-$150. LED kits are more expensive but last longer and save energy.