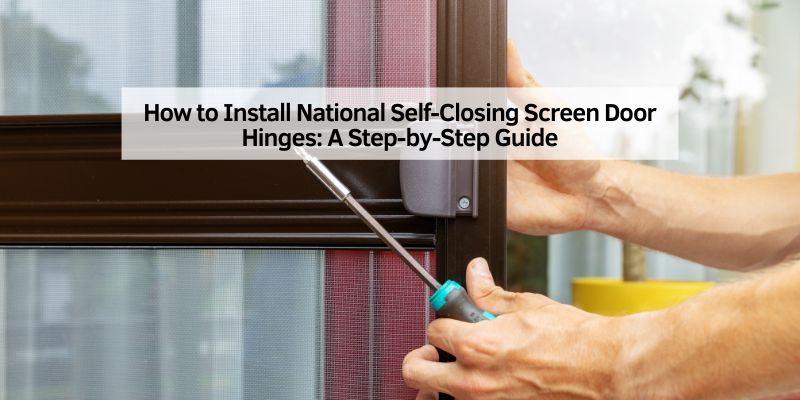
How to Install National Self-Closing Screen Door Hinges: A Step-by-Step Guide
Hey there! So, you’ve got a screen door that keeps swinging open, or maybe you’re just tired of reminding everyone to shut it behind them? I totally get it. When I noticed my back porch screen door was letting in bugs because it wouldn’t stay closed, I decided to install National self-closing screen door hinges. These handy little hinges make sure your door closes on its own, keeping your home bug-free and your air conditioning inside where it belongs.
After some trial and error—and a few YouTube tutorials for inspiration—I figured out how to install them like a pro. In this article, I’m sharing everything I’ve learned about installing National self-closing screen door hinges, step by step, so you can do it yourself with confidence. Whether you’re a DIY beginner or a seasoned handyman, I’ve got you covered. Let’s get started!
Why Choose National Self-Closing Screen Door Hinges?
Before we jump into the installation, let’s talk about why National self-closing screen door hinges are a great choice. National Hardware is a trusted brand in the USA, known for making durable, reliable hinges for all kinds of doors. I picked their self-closing hinges for my screen door because they’re adjustable, easy to install, and built to last. These hinges have a built-in spring that automatically pulls the door closed, which is perfect for high-traffic areas like porches or garages.
When I was shopping for hinges, I noticed National offers different finishes, like satin nickel and brass, so you can match your door’s style. Plus, they’re affordable, which is a big win for any DIY project. The self-closing feature is a game-changer if you’ve got kids or pets who forget to close the door. Trust me, after installing these on my porch, I haven’t had to chase a single fly out of my kitchen!
Tools and Materials You’ll Need
Installing National self-closing screen door hinges is pretty straightforward, but you’ll need a few tools and materials to get the job done. When I did this project, I made sure to gather everything beforehand so I wouldn’t have to run to the hardware store mid-installation. Here’s what I used:
| Item | Purpose |
|---|---|
| National self-closing hinges | The main hardware to make your screen door close automatically |
| Screwdriver (Phillips) | For driving screws into the door and frame |
| Drill and drill bits | For pre-drilling holes to prevent wood splitting |
| Measuring tape | To ensure accurate hinge placement |
| Pencil | For marking where to place the hinges |
| Level | To make sure the door hangs straight |
| Hex wrench | For adjusting the spring tension (usually included with the hinges) |
| Safety glasses | To protect your eyes while drilling |
| Screws | Usually included with the hinges, but have extras just in case |
Pro tip: Check the hinge packaging to make sure you’ve got the right size for your screen door. Most National hinges are 3 to 4 inches, which works for standard screen doors. I used 3-inch hinges for my lightweight aluminum screen door, and they were perfect.
Preparing Your Screen Door for Installation
Before you start screwing in hinges, you need to prep your screen door and frame. When I installed my hinges, I learned that a little prep work goes a long way toward making the process smooth. Here’s what I did.
First, I removed the old hinges if there were any. My screen door already had standard hinges, so I unscrewed them carefully with a screwdriver. If your door is new or doesn’t have hinges yet, you can skip this step. Just make sure the door and frame are clean and free of dirt or old paint.
Next, I checked the door’s fit in the frame. I held it in place with a friend’s help and used a level to make sure it was straight. If your door is sagging or doesn’t fit right, you might need to sand or trim it slightly. My door was a bit tight at the top, so I sanded it down with some sandpaper to get a perfect fit.
Finally, I decided where to place the hinges. Most screen doors need two hinges—one near the top and one near the bottom. For heavier doors, you might need three. I went with two hinges for my lightweight door, and they’ve held up great.
Step-by-Step Guide to Installing National Self-Closing Screen Door Hinges
Now, let’s get to the fun part—actually installing the hinges! I’ll walk you through the process step by step, just like I did it. It took me about an hour, but if you’re new to this, give yourself a couple of hours to take your time.
Step 1: Mark the Hinge Placement
Start by deciding where your hinges will go. I placed my top hinge about 7 inches from the top of the door and the bottom hinge about 10 inches from the bottom. This spacing keeps the door stable and looks balanced. Hold the hinge against the door and use a pencil to mark the screw holes. I also marked the frame where the other side of the hinge would go to make sure everything lined up.
Step 2: Pre-Drill the Holes
To avoid splitting the wood or damaging your door, pre-drill the screw holes. I used a drill bit slightly smaller than the screws that came with the hinges. Drill shallow holes where you marked the screw spots on both the door and the frame. This step saved me a lot of frustration because it made screwing in the hinges so much easier.
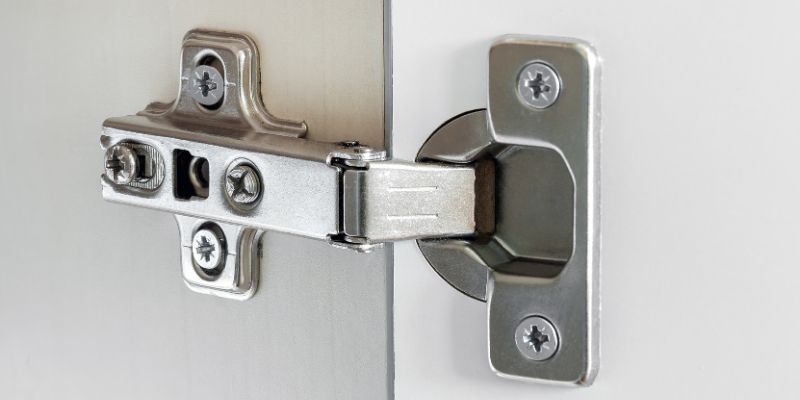
Step 3: Attach the Hinges to the Door
Now, line up the hinge with the pre-drilled holes on the door. I started with the top hinge to keep the door steady. Use your screwdriver to drive the screws into the holes. Don’t overtighten them—just make them snug. Repeat this for the bottom hinge. I had my friend hold the door in place while I did this, but you can prop it up with a stack of books or a box if you’re working solo.
Step 4: Attach the Hinges to the Frame
With the hinges attached to the door, it’s time to connect them to the frame. Line up the door in the frame and check that it’s level. I used my level here to make sure everything was straight. Then, screw the other side of the hinges into the pre-drilled holes on the frame. Again, don’t overtighten the screws. Once both hinges are attached, open and close the door to test the fit.
Step 5: Adjust the Spring Tension
National self-closing hinges come with adjustable spring tension, which is awesome because you can control how fast or slow the door closes. My hinges had a hex wrench included for this. To adjust the tension, close the door and insert the hex wrench into the slot at the top of the hinge. Turn it clockwise to increase tension (faster closing) or counterclockwise to decrease tension (slower closing). I started with a light tension and tested the door a few times until it closed smoothly without slamming.
Adjusting the Hinges for Perfect Performance
After installing the hinges, you might need to tweak them to get the door closing just right. When I first installed mine, the door closed too fast and made a loud bang. Not ideal! Here’s how I fixed it.
The key is adjusting the spring tension. If your door slams, reduce the tension by turning the hex wrench counterclockwise. If it doesn’t close all the way, increase the tension by turning it clockwise. I found that small adjustments—about a quarter turn at a time—worked best. Test the door after each adjustment to find the sweet spot.
If the door still doesn’t close properly, check the alignment. My door was slightly off at first, so I loosened the screws on the frame side of the hinges and shifted the door until it sat right. Then I tightened everything back up. It took a few minutes, but it made a huge difference.
Common Mistakes to Avoid
I made a couple of rookie mistakes when I installed my hinges, so let me save you some trouble. Here are the big ones to watch out for:
- Not Pre-Drilling Holes: I skipped this on one screw and ended up splitting the wood. Always pre-drill to make your life easier.
- Overtightening Screws: Tight screws are good, but too tight can strip the holes or damage the hinges. Snug is enough.
- Ignoring the Level: If your door isn’t level, it won’t close properly, no matter how perfect your hinges are. Double-check with a level before finalizing the screws.
- Setting Tension Too High: A super-tight spring makes the door slam like a horror movie. Start with low tension and adjust gradually.
- Using the Wrong Hinge Size: Make sure your hinges match your door’s weight and size. My lightweight screen door was fine with two 3-inch hinges, but a heavier door might need three 4-inch ones.
Maintaining Your National Self-Closing Screen Door Hinges
Once your hinges are installed, you’ll want to keep them working smoothly. I’ve had mine for over a year now, and with a little care, they’re still as good as new. Here’s what I do:
- Lubricate the Hinges: Every few months, I spray a little silicone lubricant on the hinge pins to keep them moving freely. It prevents squeaking and rust.
- Check the Screws: Screws can loosen over time, especially on a door that gets a lot of use. I check mine every six months and tighten them if needed.
- Clean the Door and Frame: Dirt and grime can build up around the hinges, so I wipe them down with a damp cloth when I clean my porch.
- Re-Adjust Tension as Needed: Weather changes can affect how your door closes. I noticed my door closed more slowly in the humid summer, so I tweaked the tension slightly.
Why YouTube Tutorials Are Helpful for This Project
I’ll be honest—YouTube was a lifesaver when I was learning how to install my National self-closing screen door hinges. Watching someone else do it gave me confidence and showed me little tricks I wouldn’t have thought of. For example, one video showed how to use a piece of cardboard as a shim to keep the door aligned while screwing in the hinges. Genius!
If you’re a visual learner like me, search for “how to install National self-closing screen door hinges” on YouTube. You’ll find tons of videos from DIYers and pros. Look for ones that show the exact hinge model you’re using, since some details (like adjusting the tension) can vary. I watched a few different videos to get a well-rounded idea before starting.
Choosing the Right National Hinges for Your Screen Door
National Hardware makes several types of self-closing hinges, so it’s worth picking the right ones for your door. When I was shopping, I considered a few factors:
- Door Weight: My aluminum screen door is lightweight, so I went with 3-inch hinges. For heavier wooden screen doors, 4-inch hinges or three hinges might be better.
- Finish: I chose satin nickel to match my door’s handle, but brass or black are also popular. Pick a finish that blends with your home’s style.
- Adjustability: All National self-closing hinges are adjustable, but some models have more tension settings than others. Check the packaging to make sure it suits your needs.
- Quantity: Two hinges are usually enough for a standard screen door, but heavier or wider doors might need three. I stuck with two and haven’t had any issues.
Benefits of Installing Self-Closing Screen Door Hinges
After installing these hinges, I can’t imagine going back to a regular screen door. Here’s why I love them:
- Bug Protection: No more flies or mosquitoes sneaking in because someone left the door open.
- Energy Savings: The door closes automatically, keeping your cool air inside during hot USA summers.
- Convenience: Perfect for when your hands are full of groceries or you’re chasing after kids or pets.
- Safety: A closed door reduces the chance of kids running out unnoticed or pets escaping.
- Durability: My National hinges have held up through rain, heat, and constant use without rusting or breaking.
Troubleshooting Common Issues
Even with a great installation, you might run into a few hiccups. Here’s how I handled some issues with my screen door:
- Door Slams Too Hard: Reduce the spring tension with the hex wrench. I turned mine counterclockwise a few times, and it stopped slamming.
- Door Doesn’t Close Fully: Increase the tension slightly or check for alignment issues. My door was rubbing against the frame, so I sanded it down a bit.
- Hinges Squeak: A quick spray of silicone lubricant fixed this for me. Avoid oil-based lubricants, as they attract dirt.
- Screws Keep Loosening: If screws won’t stay tight, try using slightly longer screws or adding a dab of thread-locking adhesive.
Conclusion
Installing National self-closing screen door hinges was one of the best DIY projects I’ve tackled. It’s amazing how such a small change can make such a big difference in keeping my home bug-free, energy-efficient, and convenient. With just a few tools and about an hour of your time, you can transform your screen door into a self-closing marvel. From prepping the door to adjusting the spring tension, I’ve shared every step I took to get it right—and the mistakes I made so you can avoid them. Whether you’re upgrading your porch, garage, or patio door, these hinges are a game-changer.
I hope this guide has given you the know-how and confidence to install your own National self-closing screen door hinges. Grab your tools, maybe check out a YouTube video or two for extra tips, and get ready to enjoy a door that closes itself like magic. You’ve got this! Happy DIY-ing!
FAQs
What tools do I need to install National self-closing screen door hinges?
You’ll need a screwdriver, drill, measuring tape, pencil, level, hex wrench, and safety glasses. The hinges usually come with screws and a hex wrench.
How many hinges do I need for my screen door?
Two hinges are enough for most lightweight screen doors. For heavier or wider doors, use three hinges for extra support.
Can I install these hinges on a wooden screen door?
Yes, National self-closing hinges work great on wooden, aluminum, or vinyl screen doors. Just make sure to pre-drill holes to avoid splitting the wood.
How do I stop my screen door from slamming?
Reduce the spring tension by turning the hex wrench counterclockwise. Make small adjustments and test the door until it closes smoothly.
Where can I find National self-closing screen door hinges?
You can buy them at hardware stores like Home Depot or Menards, or online at Amazon or Hinge Outlet. Check for the right size and finish for your door.