How to Make Door Handle Hole Bigger: Easy DIY Guide
Ever found yourself struggling with a door handle that just won’t fit right? It might be because the hole is too small.
This common issue can leave you frustrated, especially if you’re eager to update your home with new hardware. But don’t worry—you’re not alone, and there’s a simple solution. In this guide, you’ll discover how to make a door handle hole bigger with ease, ensuring a perfect fit for your new handle.
Imagine the satisfaction of seeing your door look polished and complete, without the hassle of ill-fitting hardware. With our step-by-step instructions, you’ll gain the confidence to tackle this task yourself. Ready to transform your doors and elevate your home’s aesthetic? Let’s dive in and explore how you can make this quick fix today!

Credit: www.reddit.com
Tools Needed
A power drill is key to making holes bigger. It spins fast and cuts wood easily. Use a drill bit that fits the hole size you want. Safety goggles protect eyes from wood dust. Work gloves keep hands safe. A ruler helps measure the hole correctly. A marker is needed to mark spots for drilling. Using a dust mask keeps you safe from breathing dust. Screwdrivers might be needed for removing and installing door handles.
Safety Precautions
Always wear protective gearlike gloves and goggles. Tools can be dangerous. Keep toolsaway from kids. Make sure the area is clear and safe. Check for any wires or pipes. Use the correct toolsfor the job. A drill or file works best. Secure the doorbefore starting. It should not move. This prevents accidents.
Ensure good lightingin the work area. You need to see clearly. Take breaks if you feel tired. Never rush the job. Safety is more important. If unsure, ask for help. Better safe than sorry.
Measuring The Existing Hole
A ruleror tape measurewill help to check the hole size. Measure the diameterof the current hole. This tells you how big the hole is now. Write it down. You will need this information later. Make sure to measure it accurately. If it’s hard to measure, use a caliper. A caliper will give you a precisemeasurement. Always double-checkyour measurements. This ensures everything fits well.
Look for any damageor weararound the hole. This can affect the size change. A clean hole is easy to work with. If the hole is not round, it might need fixing first. Keep the area around the hole cleanand clear. This helps when you make changes.
Choosing The Right Drill Bit
Picking the correct drill bitis important. A drill bit should match the size you want. Do not use a bit that’s too small. It will not make the hole bigger.
Use a bit with a sharp point. It helps in making clean holes. A dull bit can break. You might need a special bit for wood or metal. Check the material of your door.
Always use a drill guide. It keeps the drill steady. This helps in making a straight hole. Keep hands safe. Wear gloves and goggles.
Preparing The Door
Start by removing the door handle. Use a screwdriver to unscrew it. Keep the screws in a safe place. Next, check the size of the current hole. Use a tape measure for this. You need the right size before making changes. Gather tools like a drill and a hole saw. These are important for the task. Make sure the drill is charged and ready. Keep the door steady while working. You might need an extra pair of hands. Safety is key. Wear safety glasses. Protect your eyes from dust and debris. Clear the area around the door. This gives you space to work freely. A tidy area helps avoid accidents. Ready the tools and workspace. You’re now set to make the hole bigger.
Drilling The Hole
Securing the doorbefore drilling is important. Use a clampto hold it steady. This stops the door from moving. It keeps you safe. Make sure the clamp is tight. You don’t want the door to wiggle.
Guiding the drillneeds care. Start with a pilot hole. It helps the drill stay in place. Use a small drill bit first. This makes it easier to start. Then, switch to the bigger bit. Move slowly and don’t rush. It prevents mistakes and keeps the hole clean.
Smoothing The Edges
First, choose the right tool. A file or sandpaper works well. Start by gently rubbing the tool around the hole. This helps to smooth rough edges. Use light pressure. Be careful not to damage the door. Work slowly for best results. Check the hole often. See if it’s getting bigger. Take breaks when needed. This keeps your work neat.
After smoothing, remove any dust. Use a clean cloth. Make sure the edges are even. This makes the door look nice. A smooth hole is safer. It prevents scratches or cuts. Always wear safety gloves. This protects your hands.
Installing The Handle
First, gather all the tools you need. You will need a drill. A hole saw is helpful too. Make sure you have a screwdriver. Begin by marking the spot for the hole. Use a pencil for this step. Attach the hole saw to the drill. Drill slowly to avoid mistakes. Check if the hole is big enough. If not, repeat the drilling process. Test the handle in the hole. Ensure it fits well. If it does not, make the hole larger. Be careful not to damage the door. Secure the handle using screws. Tighten all screws. Make sure the handle is firm.
Troubleshooting Common Issues
Sometimes the door handle doesn’t fit. This can be frustrating. The hole might be too small. You need to make it bigger. Use a drillwith the right bit. Choose a bit that’s slightly largerthan the hole. Be careful while drilling. You don’t want to damage the door. Wear safety gogglesto protect your eyes. Go slowly. Check the size often. Stop when the handle fits perfectly.
Another issue could be the hole is uneven. Sandpaper can help here. Sand the inside until smooth. This ensures a snug fitfor the handle. It also prevents any splinters. Always remember to clean up after. Dust can affect the door’s movement. A clean area is a safe area.
Maintenance Tips
Keep your tools ready before you start. A drill and sandpaper are must-haves. Wear safety goggles to protect your eyes. Check the door material. Wood is different from metal. Choose the correct drill bit size. Drill slowly to avoid mistakes. Use sandpaper to smooth rough edges. Clean the area after drilling. Dust can affect the handle. If unsure, ask an adult for help. Practice on scrap wood first. This helps you learn better. Measure twice, drill once. It’s important to be precise. Mistakes are hard to fix. Patience is key. Rushing might spoil the job.

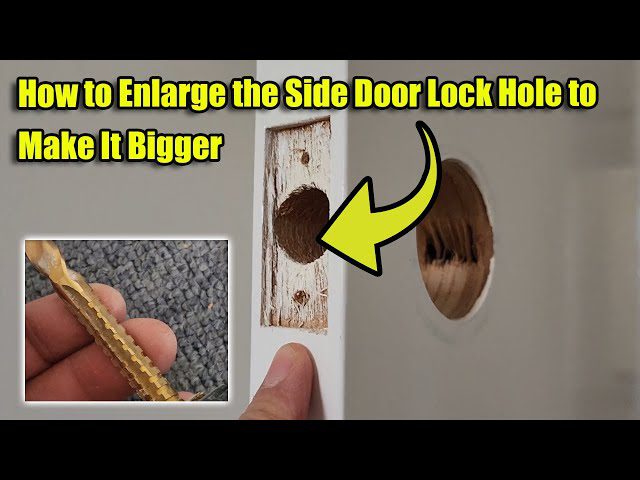
Credit: www.youtube.com
Frequently Asked Questions
How Can I Enlarge A Door Handle Hole?
To enlarge a door handle hole, use a hole saw bit. First, ensure the correct size. Secure the door and mark the center. Drill slowly to avoid splintering. Sand the edges for a smooth finish. Always wear safety goggles and follow manufacturer instructions for best results.
What Tools Are Needed For This Task?
You need a power drill and a hole saw bit. Ensure the bit matches your desired hole size. Safety goggles and a clamp for securing the door are essential. Sandpaper can help smooth the edges. Optional tools include a measuring tape and pencil for marking.
Is It Safe To Enlarge A Door Handle Hole?
Yes, it’s safe when using the right tools and techniques. Secure the door properly to prevent movement. Wear safety goggles to protect your eyes. Drill slowly to avoid damage. Follow manufacturer instructions for each tool. If unsure, consult a professional for assistance.
Can I Use A Regular Drill Bit For Enlarging?
A regular drill bit isn’t recommended for enlarging door handle holes. Use a hole saw bit instead. Hole saw bits are designed for cutting larger diameters. They provide a cleaner and more precise finish. Regular bits may cause splintering or uneven holes.
Ensure you choose the correct size.
Conclusion
Making the door handle hole bigger is simple with the right tools. Follow the steps carefully for a clean finish. Measure twice, cut once. Use protective gear for safety. Sand edges for a smooth surface. Double-check fit before installing the handle.
A well-done job lasts long. Remember, patience is key. Take your time and enjoy the process. You’ll gain confidence in DIY projects. Share your experience with friends. Inspire others to try. With practice, you’ll get better. Happy crafting!