How to Make Recessed Lighting Look Better: Genius Tips
Quick Summary:
To make recessed lighting look better, focus on the right trim, bulb type, and placement. Choose decorative trims, warm-toned LED bulbs, and ensure they’re spaced evenly to avoid harsh shadows and create a more inviting atmosphere. Simple upgrades can transform your room’s feel.
Recessed lighting, often called “can lights,” is a popular choice for modern homes. It offers a clean, minimalist look and great general illumination. But sometimes, these lights can feel a bit… clinical. They might cast unflattering shadows or just not feel as cozy as you’d like. If your recessed lights aren’t quite hitting the mark, don’t worry! You can absolutely make them look better without a huge renovation. It’s all about making a few smart, simple tweaks. We’ll go through some easy, beginner-friendly tips that will help you transform your space and make your recessed lighting shine in the best way possible.
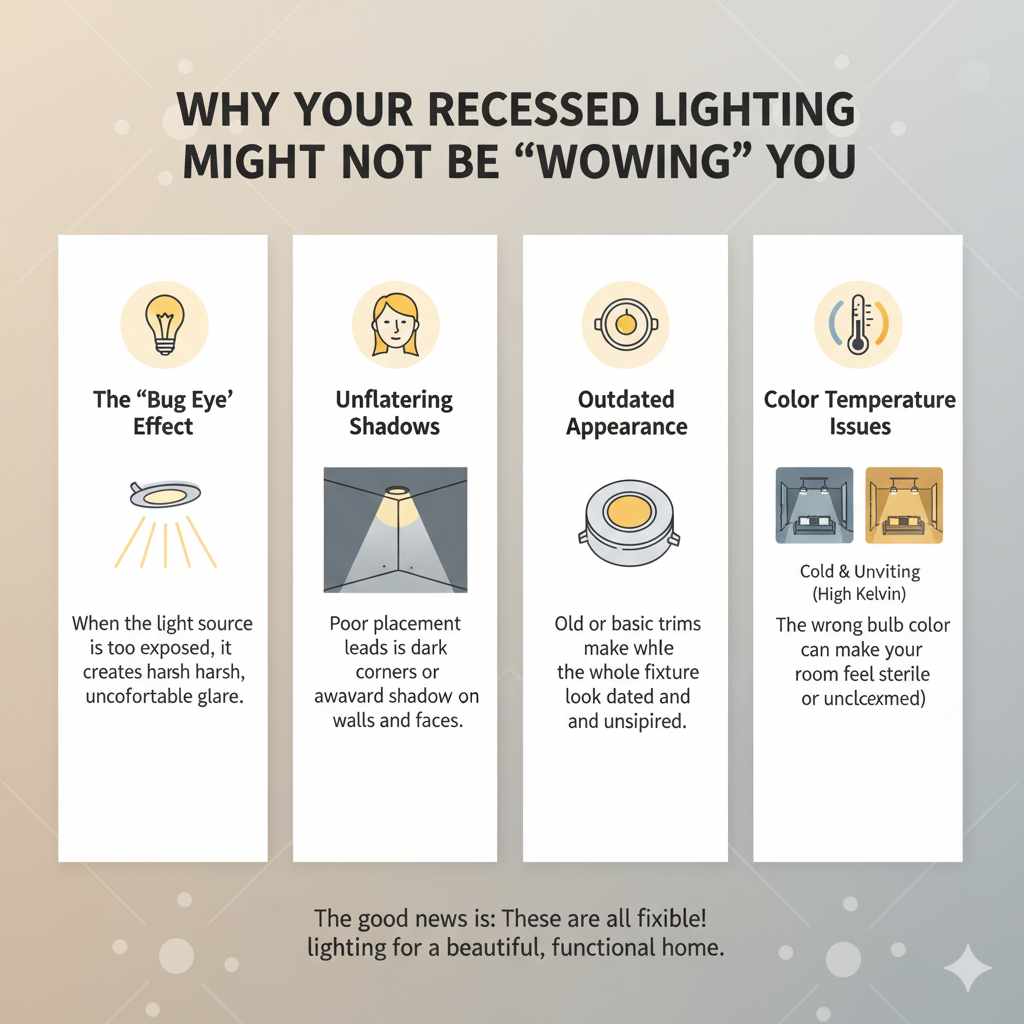
Why Your Recessed Lighting Might Not Be “Wowing” You
It’s a common situation. You installed recessed lighting hoping for a sleek, modern feel, but instead, you’re left with a room that feels a bit stark or even like a stage. Several factors can contribute to this:
- The “Bug Eye” Effect: When the light source is too exposed, it can create a harsh glare.
- Unflattering Shadows: Poor placement or the wrong type of bulb can lead to dark corners or awkward shadows on walls and faces.
- Outdated Appearance: Old or basic trims can make the whole fixture look dated.
- Color Temperature Issues: The wrong bulb color can make your room feel cold or uninviting.
The good news is that these are all fixable! With a few straightforward upgrades, you can make your recessed lighting a beautiful and functional part of your home’s design.
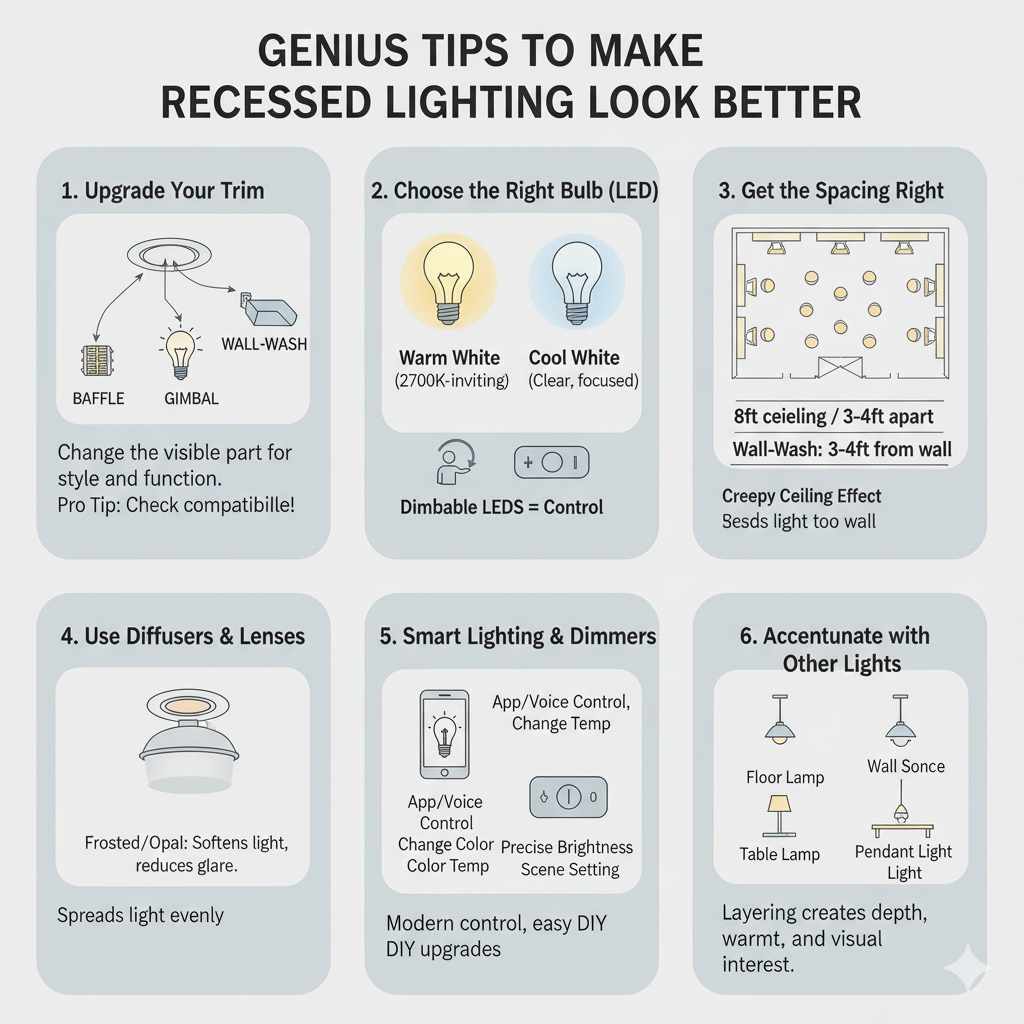
Genius Tips to Make Recessed Lighting Look Better
Let’s dive into some practical, easy-to-implement ideas. These tips are perfect for anyone looking to enhance their home’s lighting without needing to be an expert electrician.
1. Upgrade Your Trim and Housings
The trim is the part of the recessed light that you actually see. It’s like the frame around a picture – it makes a big difference! Standard trims can be bland, but there are many stylish options available that can completely change the look of your fixtures.
Types of Recessed Lighting Trims
When you’re looking at trims, you’ll find a variety of styles. Each serves a purpose and adds a different aesthetic touch.
- Standard/Baffle Trim: These have ribbed interiors to reduce glare. They’re functional but can sometimes look a bit industrial.
- Recessed/Mud-in Trim: These are designed to be plastered over, making the light fixture almost disappear into the ceiling for a super seamless look. This is a more advanced option but creates a very clean finish.
- Decorative Trim: These come in many styles, like antique brass, brushed nickel, or even frosted glass, adding a decorative element.
- Gimbal/Adjustable Trim: These allow you to angle the light, which is great for highlighting artwork or specific areas.
- Wall-Wash Trim: Designed with a specific angle to direct light evenly down walls, reducing shadows and making artwork or features pop.
Pro Tip: When choosing a new trim, make sure it’s compatible with your existing recessed light housing. You can often find this information on the housing itself or in the manufacturer’s documentation. If you’re unsure, taking a picture of your current housing to a lighting store or looking up its model number can help.
When to Consider New Housings
Sometimes, the trim is fine, but the housing (the part that sits inside the ceiling) is outdated or not suitable for modern bulbs. Older housings might not be airtight, which can affect your home’s energy efficiency. Newer, IC-rated (Insulation Contact) housings are designed to be safely installed directly against insulation, preventing heat transfer and saving energy. Replacing old housings is a bigger job, often requiring attic access, but it’s a great investment for safety and efficiency. For a beginner, focusing on just replacing the trim is usually a much easier and more impactful first step.
2. Choose the Right Bulb: LED is Your Best Friend
The type of bulb you use has a massive impact on how your recessed lighting looks and feels. Forget those old incandescent bulbs – LEDs are the way to go for efficiency, longevity, and better light quality.
Understanding Color Temperature (Kelvin)
This is crucial for setting the mood. Color temperature is measured in Kelvin (K). Here’s a simple breakdown:
- Warm White (2700K – 3000K): This is similar to incandescent bulbs and creates a cozy, inviting atmosphere. Great for living rooms, bedrooms, and dining areas.
- Cool White/Bright White (3500K – 4000K): This is a more neutral light, good for kitchens, bathrooms, and workspaces where you need clear visibility.
- Daylight (5000K+): This is a very bright, bluish light that mimics natural daylight. Best for task lighting or areas where true color rendering is important, but can feel too stark for general living spaces.
Recommendation for making lights look better: For most living spaces, aim for bulbs in the 2700K to 3000K range. This warm, soft light makes a room feel much more welcoming and less like an office or a sterile environment.
Brightness (Lumens) and Beam Angle
Lumens tell you how bright a bulb is. Don’t just go for the highest lumen count; consider what’s appropriate for the room size and purpose. A 6-inch recessed can typically uses a bulb equivalent to a 60-75 watt incandescent, which is around 800-1100 lumens in LED. The beam angle refers to how widely the light spreads. Wider beam angles (90-120 degrees) provide more general illumination, while narrower angles (less than 60 degrees) are good for accent lighting.
Dimmable LEDs for Ultimate Control
If your existing dimmer switch is compatible with LED bulbs, choosing dimmable LEDs is a game-changer. This allows you to adjust the light intensity for different activities or times of day, further enhancing the mood and functionality of your space.
External Resource: For more on understanding light bulbs, check out the U.S. Department of Energy’s Energy Saver website on lighting choices. They offer great insights into energy efficiency and different bulb types.
3. Get the Spacing Right: Avoid the “Creepy Ceiling” Effect
The placement of your recessed lights is critical. If they’re too close together, you get a lot of overlapping light and a busy ceiling. If they’re too far apart, you end up with dark spots and shadows.
General Spacing Guidelines
A common rule of thumb for general ambient lighting is to space recessed lights about half the height of the ceiling apart. For example, in a standard 8-foot ceiling room, you might space them roughly 4 feet apart. However, this is just a starting point.
Table: Recessed Light Spacing vs. Ceiling Height
| Ceiling Height | Recommended Spacing (Approx.) |
|---|---|
| 8 feet | 3-4 feet |
| 9 feet | 4-5 feet |
| 10 feet | 5-6 feet |
Important Note: These are for general illumination. If you’re placing lights near walls for task lighting or to illuminate artwork, the spacing will be different. For wall washing, lights are typically placed 3-4 feet from the wall.
Consider the Room’s Purpose
- Living Rooms/Bedrooms: Softer, more diffused light is key. Lights might be spaced further apart and often supplemented with other light sources like lamps.
- Kitchens: Brighter, more even light is needed. Lights are often placed in a grid pattern over countertops and work areas.
- Hallways: Lights are usually placed in a single line down the center, spaced evenly.
DIY Tip: Before you commit to any drilling or installation, use a piece of tape or a pencil to mark potential locations on your ceiling. Step back, look at it from different angles, and even turn on any existing lights you have. This visual test can save you a lot of headaches.
4. Use Diffusers and Lens Options
Some recessed trims come with built-in diffusers or offer lens options. These can significantly soften the light and reduce glare, making the fixture more pleasing to the eye.
- Frosted or Prismatic Lenses: These can help spread the light more evenly and reduce the harshness of the bulb.
- Opal Diffusers: Similar to frosted lenses, these create a softer, more ambient glow.
If your current trims don’t have these features, you might be able to find replacement trims that do. This is a great way to upgrade the quality of light without replacing the entire fixture.
5. Consider Smart Lighting and Dimmers
For ultimate control and a modern touch, consider integrating smart lighting or upgrading to smart dimmer switches.
- Smart Bulbs: These can be controlled via an app or voice assistant. You can change their color temperature, brightness, and even color (for some bulbs). This offers incredible flexibility in setting the mood.
- Smart Dimmer Switches: Even with standard LED bulbs, a smart dimmer allows for precise control over brightness, scene setting, and even scheduling.
While this might seem like a more involved step, many smart systems are designed for easy DIY installation, often replacing your existing light switch. It’s a fantastic way to add ambiance and functionality.
6. Accentuate with Other Light Sources
Recessed lighting is excellent for general illumination, but it shouldn’t be your only light source. Layering different types of lighting creates depth, warmth, and visual interest in a room.
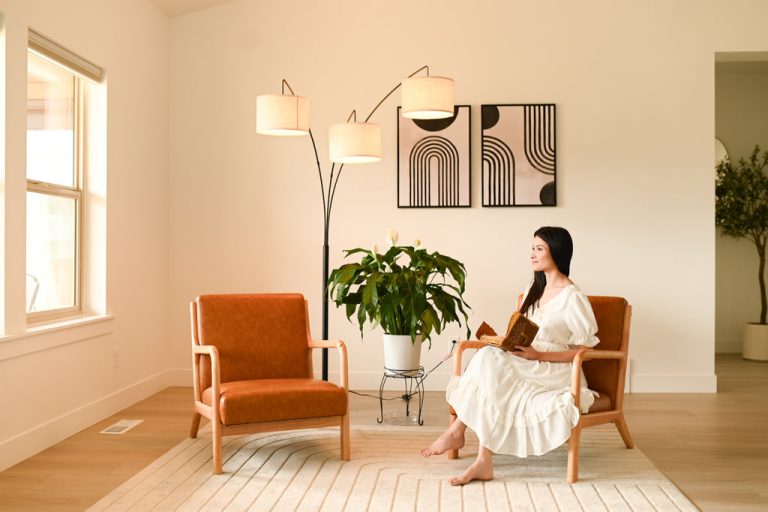
- Table Lamps and Floor Lamps: These add warm, localized light, perfect for reading or creating cozy nooks.
- Wall Sconces: These can add ambient light and decorative flair without taking up floor space.
- Pendant Lights or Chandeliers: In certain areas, like over a dining table or in an entryway, a statement fixture can draw the eye and add a focal point.
By combining recessed lighting with these other sources, you can balance the light, reduce harshness, and make your room feel much more inviting and professionally designed.
7. Clean Your Fixtures Regularly
It sounds simple, but dust and grime can accumulate on your recessed light trims and bulbs, dimming the light and making them look dingy. Regular cleaning can make a surprising difference!
How to Clean:
- Turn off the power: Ensure the light switch is off and, for extra safety, consider turning off the breaker for that circuit.
- Let bulbs cool: If lights were recently on, let them cool down completely.
- Wipe down trims: Use a soft, damp cloth (with a little mild soap if needed) to wipe down the trims. For stubborn grime, a gentle all-purpose cleaner can work, but test it in an inconspicuous spot first.
- Clean lenses/diffusers: If your fixtures have glass or plastic lenses, clean them carefully with a glass cleaner or a damp cloth.
- Dust bulbs: For LED bulbs that are easily accessible, a quick dusting with a dry microfiber cloth can help.
This simple maintenance step keeps your lights performing at their best and looking their cleanest.
8. Consider “Airtight” Housings for Energy Efficiency
While not directly about aesthetics, energy efficiency plays a role in the overall value and comfort of your home. Older recessed light housings can be a significant source of air leakage. Upgrading to “airtight” certified housings can prevent conditioned air from escaping into your attic, saving you money on energy bills and improving comfort.
Why Airtight Matters:
- Energy Savings: Reduces heating and cooling costs.
- Improved Comfort: Helps maintain consistent temperatures throughout your home.
- Reduced Drafts: Less air infiltration means fewer drafts.
- Moisture Control: Can help prevent moisture buildup in attics, reducing the risk of mold and mildew.
While replacing housings is a more involved DIY project, it’s worth considering for older homes or if you’re doing a larger renovation. Always ensure any new housing you install is IC-rated if it will be in contact with insulation. You can find more information on energy-efficient lighting from sources like ENERGY STAR.
Frequently Asked Questions (FAQ)
Q1: How can I make my old recessed lights look more modern?
A1: The easiest way is to replace the old trims with new, stylish ones. Look for finishes like brushed nickel or matte black, or consider decorative trims with unique designs. Also, switching to warm-toned LED bulbs instantly updates their appearance and feel.
Q2: What’s the best bulb color temperature for a living room?
A2: For a cozy and inviting atmosphere, opt for warm white bulbs with a color temperature of 2700K to 3000K. This mimics the glow of traditional incandescent bulbs and makes the room feel more comfortable.
Q3: Can I install recessed lighting myself?
A3: Yes, with the right tools and safety precautions, you can install recessed lighting yourself. However, it involves working with electricity, so if you’re not comfortable, it’s best to hire an electrician. For beginners, upgrading trims and bulbs is a much safer and simpler DIY project.
Q4: How do I avoid glare from my recessed lights?
A4: Use baffle trims, which have ribbed interiors to absorb light and reduce glare. Choosing bulbs with a diffused lens or a lower lumen output can also help. Ensure your lights are not aimed directly at seating areas if possible.
Q5: Do I need special dimmer switches for LED recessed lights?
A5: Not always, but it’s recommended. Many newer LED bulbs are “dimmable,” but they perform best with LED-compatible dimmer switches. Using a standard dimmer with non-dimmable LEDs can cause flickering or buzzing. Always check the bulb and dimmer compatibility.
Q6: What’s the difference between a recessed light trim and a housing?
A6: The trim is the visible ring around the opening of the can, acting as a decorative finish. The housing is the metal box that sits inside the ceiling, containing the electrical components and supporting the trim.
Conclusion
Making your recessed lighting look better is more achievable than you might think. By focusing on simple yet impactful changes like upgrading your trims, selecting the right LED bulbs with the perfect color temperature, and ensuring proper spacing, you can transform your home’s ambiance. Remember to layer your lighting with other sources like lamps and sconces to create a warm, inviting, and functional space. Don’t forget the power of regular cleaning and considering energy-efficient options for long-term benefits. With these tips, you can turn those utilitarian ceiling lights into a stylish and comforting feature of your home. Happy improving!