How to Make Wooden Christmas Tree Decorations: Local Guide
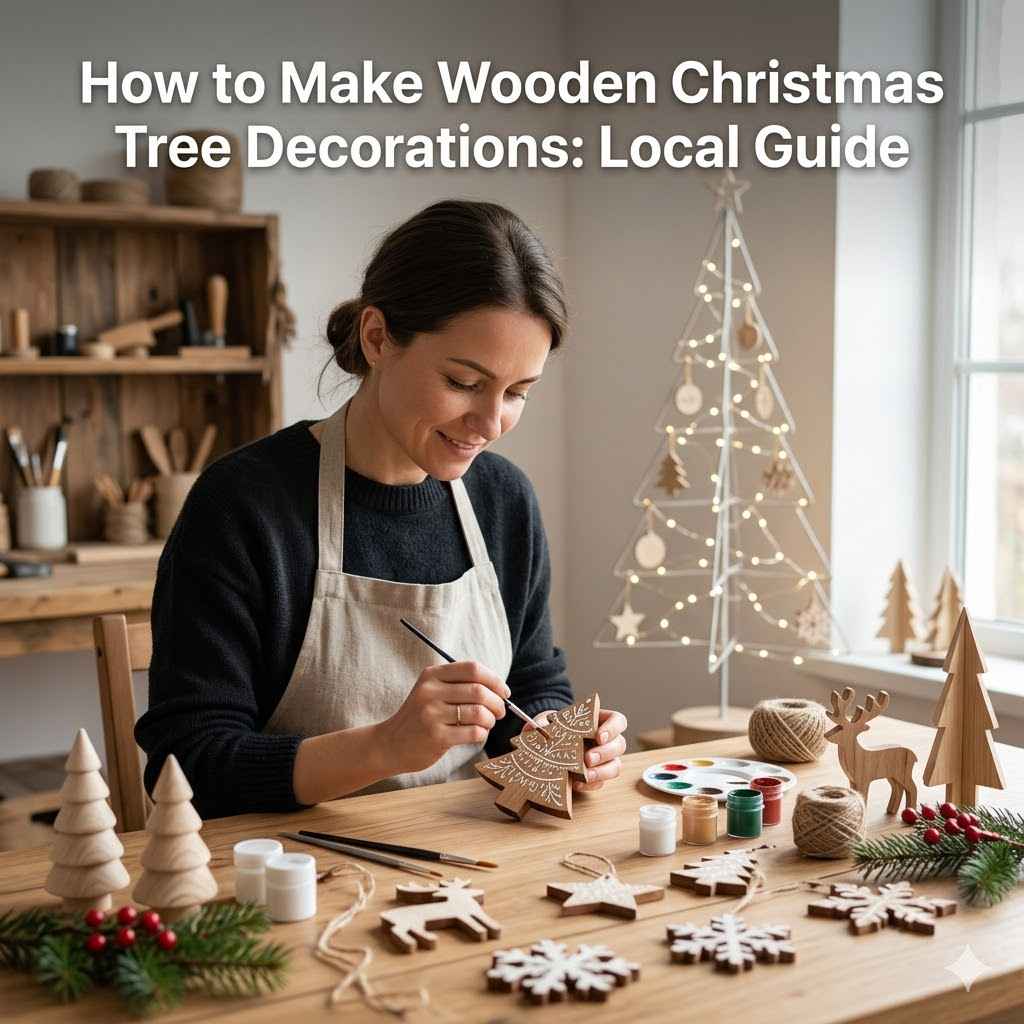
Making your own wooden Christmas tree decorations is a wonderful way to add a personal touch to your holiday. For beginners, How to Make Wooden Christmas Tree Decorations: Local Guide might seem a bit tricky with all the tools and techniques involved. But don’t worry!
We’re going to break it down into simple steps that anyone can follow. Get ready to create beautiful, handmade ornaments that will be cherished for years to come. We’ll cover everything from choosing the right wood to adding the final festive touches.
Get Started How to Make Wooden Christmas Tree Decorations Local Guide
This section will guide you through the very first steps of creating your wooden Christmas ornaments. We’ll talk about what you need to begin, like the types of wood that work best and the basic tools required for simple designs. You’ll learn how to prepare your wood and understand the importance of safety when working with tools.
This is where your crafting adventure truly begins, setting the foundation for all the beautiful decorations you’ll make.
Choosing Your Wood
When you’re thinking about How to Make Wooden Christmas Tree Decorations: Local Guide, picking the right wood is your first big decision. Not all wood is created equal for crafting ornaments. You want something that’s easy to work with, doesn’t splinter too much, and looks good when finished.
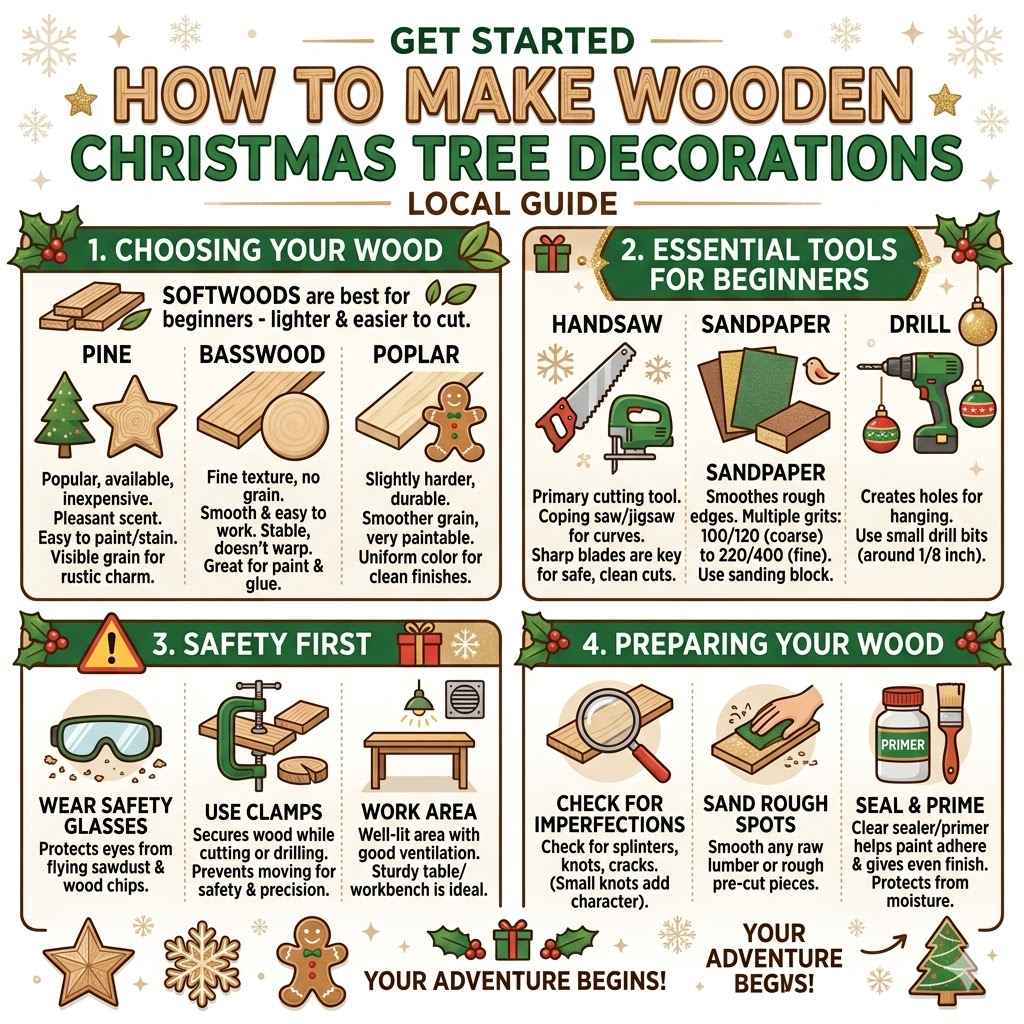
Softwoods are generally a great choice for beginners because they are lighter and easier to cut.
Pine is a very popular choice for wood crafts. It’s widely available, inexpensive, and has a pleasant, natural scent. Its light color makes it easy to paint or stain. Pine wood is also quite soft, meaning it’s not too difficult to saw or carve, which is perfect for simple shapes like stars, circles, or gingerbread men. The grain in pine is usually quite visible, adding a rustic charm to your finished decorations.
Basswood is another excellent option for wood carving and small craft projects. It’s known for its fine, even texture and lack of prominent grain, making it very smooth and easy to work with. Basswood is very stable and doesn’t warp easily, which is a plus for ornaments that you want to last. It takes paint and glue very well, and it’s soft enough that even a beginner can achieve clean cuts with simple tools.
Poplar is a hardwood, but it’s on the softer side of the hardwood family. It’s a bit stronger than pine and has a smoother grain. Poplar is great if you want a slightly more durable ornament. It’s also very paintable and accepts stains well, giving you a variety of finishing options. Its uniform color makes it ideal for ornaments where a clean, painted finish is desired.
Essential Tools for Beginners
You don’t need a whole workshop to start making wooden Christmas ornaments. A few basic tools will get you going on your How to Make Wooden Christmas Tree Decorations: Local Guide journey. The key is to start with simple tools that are safe and easy to handle.
As you get more comfortable, you can always add more specialized equipment.
A good handsaw is your primary cutting tool. For small ornaments, a coping saw or a small hand-held jigsaw is perfect. These saws allow for curved cuts, which are great for making shapes like snowflakes or animals.
Always make sure your saw blades are sharp. Sharp blades cut cleaner and require less effort, making the process safer and more enjoyable.
Sandpaper is essential for smoothing out rough edges after cutting. You’ll want a few different grits. Start with a coarser grit, like 100 or 120, to remove any major imperfections.
Then, move to a finer grit, like 220 or even 400, for a super smooth finish. A sanding block can help you keep the pressure even while you sand.
For creating holes to hang your ornaments, a drill is very handy. A simple hand drill or a power drill with small drill bits (around 1/8 inch) will work. If you don’t have a drill, you can sometimes use a sharp awl or even carefully punch a hole with a nail and hammer, though this is more difficult and can split the wood.
- Safety First: Always wear safety glasses when cutting or sanding wood. This protects your eyes from flying sawdust or wood chips.
- Clamping is Key: Use clamps to hold your wood securely to your work surface while you cut or drill. This prevents the wood from moving and makes your work safer and more precise.
- Work Area: Set up in a well-lit area with good ventilation. A sturdy table or workbench is ideal.
Preparing Your Wood
Before you start cutting your shapes, it’s important to get your wood ready. This preparation ensures your ornaments turn out well and prevents frustration. For most beginner projects, you’ll likely be working with pre-cut pieces of wood, perhaps from a craft store or a local lumber yard that offers custom cuts.
If you’re using raw lumber, you might need to plane or sand it to get a smooth surface. However, for many ornament projects, especially those using smaller pieces of wood like dowels or thin planks, the wood may already be smooth enough. Always check the wood for any splinters or rough spots and sand them down.
You can also check for any imperfections like knots or cracks. While some knots can add character, large cracks can weaken the ornament.
Some crafters like to seal their wood before painting or staining. A clear wood sealer or primer can help the paint adhere better and give a more even finish. It also helps protect the wood from moisture.
Let any sealer dry completely according to the product instructions before moving on to the next step of decorating.
Designing Your Wooden Christmas Decorations
Now that you have your wood and tools ready, it’s time to think about what your ornaments will look like. Design is a fun part of How to Make Wooden Christmas Tree Decorations: Local Guide. You can keep it super simple or get a bit more creative.
For beginners, starting with basic shapes is a great way to build confidence. Think about classic Christmas symbols that you love.
Simple Shapes and Stencils
For your first few ornaments, sticking to straightforward shapes is the best approach. These are easier to cut and require less intricate detail work. You can find free templates online or simply trace basic shapes onto your wood.
Think about things like stars, circles, hearts, or squares. These can be easily cut out with a coping saw or jigsaw.
Stencils are fantastic for beginners. You can buy pre-made stencils from craft stores or create your own. To make your own stencil, draw your desired shape onto cardstock or thin plastic.
Then, carefully cut out the shape using a craft knife. Once you have your stencil, place it on the wood and trace around it. This gives you a clean outline to follow when you cut.
Consider using different thicknesses of wood for your shapes. Thicker wood might be better for ornaments you want to stand up, while thinner wood is ideal for hanging. You can also layer shapes together to create more dimensional ornaments.
For example, a small star cut from a different wood or color could be glued onto a larger circle.
- Classic Christmas Icons: Stars, trees, angels, snowflakes, and bells are always a hit.
- Geometric Designs: Circles, squares, and triangles can be very modern and stylish.
- Animal Shapes: Little wooden reindeer, birds, or squirrels can be very charming.
- Initials or Names: Personalize ornaments by cutting out the first initial of family members.
Adding Personal Touches
Once you have your basic shapes cut out, you can really start to make them your own. Decoration is where the personality of your How to Make Wooden Christmas Tree Decorations: Local Guide shines through. This is where you can get creative with paints, markers, wood burning tools, or even small embellishments.
The possibilities are endless, and you can tailor each ornament to a specific person or memory.
Painting is one of the most straightforward ways to decorate. You can use acrylic paints, which are water-based and easy to clean up. Consider a base coat of white or cream, and then add festive colors like red, green, gold, or silver.
You can paint simple patterns like dots, stripes, or swirls. For a more artistic touch, try painting small scenes like snowy landscapes or carolers.
Wood burning, also known as pyrography, is another popular technique. It involves using a heated tool to burn designs into the wood. This creates a permanent, etched look that can be very beautiful.
You can burn simple patterns, intricate designs, or even write messages. If you’re new to wood burning, start with simple lines and dots. Be sure to use a wood-burning tool designed for crafts and always follow the safety instructions.
Small embellishments can add a lot of charm. Think about gluing on tiny jingle bells, small buttons, or even bits of felt. You can also tie ribbons or twine around the ornaments for a rustic look.
Consider using glitter for a touch of sparkle, but be mindful that glitter can be messy! A light coat of glitter glue and a sprinkle of fine glitter works well for a subtle shine.
Here’s a simple process for adding paint:
- Ensure the wood is clean and dry.
- Apply a thin, even coat of your chosen base paint color. Let it dry completely.
- Add decorative elements like stripes, dots, or images. Let them dry.
- Consider a clear sealant to protect your painted design.
Cutting Out Your Shapes
This is the part where your design starts to become a tangible object. When you’re learning How to Make Wooden Christmas Tree Decorations: Local Guide, cutting accurately is important, but don’t stress too much if your cuts aren’t perfectly straight, especially at first. Small imperfections often add to the handmade charm.
For simple shapes like circles or stars, a jigsaw is often the easiest tool. It allows you to make smooth curves. Clamp your wood firmly to a workbench or sturdy surface.
If you’re using a jigsaw, you’ll need to drill a pilot hole first, large enough to insert the saw blade. Then, slowly guide the saw along your traced line. Go at a comfortable pace, and let the saw do the work.
A coping saw is a good option for more detailed work or if you don’t have a power jigsaw. It’s a hand-powered saw with a thin, flexible blade. You’ll need to draw your design carefully and then carefully maneuver the saw around the lines.
This method requires a bit more patience and control but can produce very lovely results.
After you’ve cut out your shape, it’s time to sand. Start with a medium-grit sandpaper (around 120 grit) to smooth down any rough edges or saw marks. Then, move to a finer grit (220 grit or higher) for a very smooth finish.
Pay attention to the edges of the ornament. You want them to be smooth to the touch and free of splinters. If you’re painting, a smooth surface is crucial for a good finish.
A common mistake beginners make is trying to rush the cutting process.
- Take your time and breathe.
- Let the saw do the work; don’t force it.
- If you make a small mistake, you can often sand it away.
- Don’t be afraid to try again if a cut doesn’t go as planned.
Decorating and Finishing Your Wooden Ornaments
Once your wooden shapes are cut and sanded smooth, it’s time for the fun part: decorating! This is where your How to Make Wooden Christmas Tree Decorations: Local Guide really comes to life. You can use a variety of techniques to add color, texture, and personality to your handmade ornaments.
Think about the overall look you want for your tree and choose your decorations accordingly.
Painting Techniques
Painting is one of the most versatile ways to decorate wooden ornaments. Acrylic paints are highly recommended for their ease of use, quick drying time, and bright colors. You can achieve many different looks with just a few basic painting techniques.
A solid color base is a great starting point. Apply one or two coats of your chosen color and let it dry completely between coats. This creates a clean canvas for further decoration.
You can then add details. Simple polka dots are easy to create by dipping the end of a paintbrush handle or a pencil eraser into paint and dabbing it onto the wood.
Stripes can be added freehand or by using painter’s tape. Masking tape or painter’s tape can be used to create sharp, clean lines. Apply the tape where you want the color to stop, paint the exposed area, and then carefully remove the tape while the paint is still slightly wet.
This prevents the paint from peeling off with the tape.
For a rustic or distressed look, you can use a dry-brush technique. Dip a brush lightly into paint, then wipe most of it off onto a paper towel. Then, lightly brush over the surface of the wood.
This leaves a weathered, textured appearance. You can also lightly sand over painted areas once dry to create a distressed effect.
Here are some popular color palettes for wooden ornaments:
- Traditional Red and Green: Classic and festive, perfect for any tree.
- Winter White and Silver/Gold: Elegant and sophisticated, giving a frosty look.
- Natural Wood Tones with Accents: Let the wood grain show through with minimal color pops.
- Pastel Blues and Pinks: A softer, more whimsical approach, great for themed trees.
Adding Embellishments and Details
Beyond paint, a world of embellishments awaits to make your How to Make Wooden Christmas Tree Decorations: Local Guide truly unique. These small additions can elevate a simple wooden shape into something special and eye-catching. Consider the scale of your ornament and choose embellishments that fit its size without overwhelming it.
Small jingle bells are a charming addition, especially for reindeer or Santa-themed ornaments. They add a festive sound and a metallic sparkle. Tiny pom-poms can be glued on to create fluffy Santa hats or reindeer noses.
Buttons, especially vintage or colorful ones, can add a homespun charm to ornaments.
Ribbons and twine are excellent for adding texture and a place to hang your ornament. You can tie a bow around the top of the ornament, weave a ribbon through pre-drilled holes, or simply loop twine through a hole for hanging. Natural twine or burlap ribbon adds a rustic, earthy feel, while satin or velvet ribbons add a touch of elegance.
Glitter is a classic way to add sparkle. Use glitter glue or apply a thin layer of craft glue and then sprinkle glitter over it. For less mess, try fine glitter or glitter pens.
A little bit of glitter can go a long way in adding festive magic to your wooden creations.
Consider these embellishment ideas:
- Glue tiny googly eyes onto animal shapes for a playful look.
- Sew or glue small fabric scraps onto the ornaments to create patterns.
- Use puff paint or dimensional paint to add raised details or outlines.
- Attach small beads to create wreaths or other intricate designs.
Sealing and Finishing Your Ornaments
Once all your decorating is done, the final step for your How to Make Wooden Christmas Tree Decorations: Local Guide is to seal them. This protects the paint and the wood, making your ornaments last for many holidays to come. It also gives them a nice finished look.
There are several types of sealants you can use. A clear acrylic spray sealant is very popular because it’s quick and easy to apply. Make sure to spray in a well-ventilated area and hold the can at the recommended distance.
You might need two thin coats for good coverage.
Another option is a brush-on clear coat, like a polyurethane or a clear acrylic varnish. These come in matte, satin, or glossy finishes. A matte finish will give a natural, understated look, while a glossy finish will make the colors pop and provide a protective sheen.
Apply it with a soft brush, ensuring you cover all the surfaces evenly.
If you’ve used a lot of glitter, some sealants can help keep it from flaking off. For very intricate designs or if you’re concerned about durability, a thicker varnish might be a better choice. Allow the sealant to dry completely before hanging your ornaments on the tree.
This drying time can vary from a few hours to overnight, depending on the product and humidity.
What kind of finish to choose:
- Glossy Finish: Makes colors vibrant and adds a shiny, reflective surface.
- Satin Finish: A subtle sheen, not too shiny, offers a smooth look.
- Matte Finish: No shine, provides a natural, flat appearance, good for rustic styles.
Tips for Local Sourcing and Community
When you decide to tackle How to Make Wooden Christmas Tree Decorations: Local Guide, looking locally for your materials and inspiration can make your project even more special. Supporting local businesses not only provides you with unique materials but also connects you to your community. It’s a wonderful way to make your holiday crafting a more meaningful experience.
Finding Local Wood Suppliers
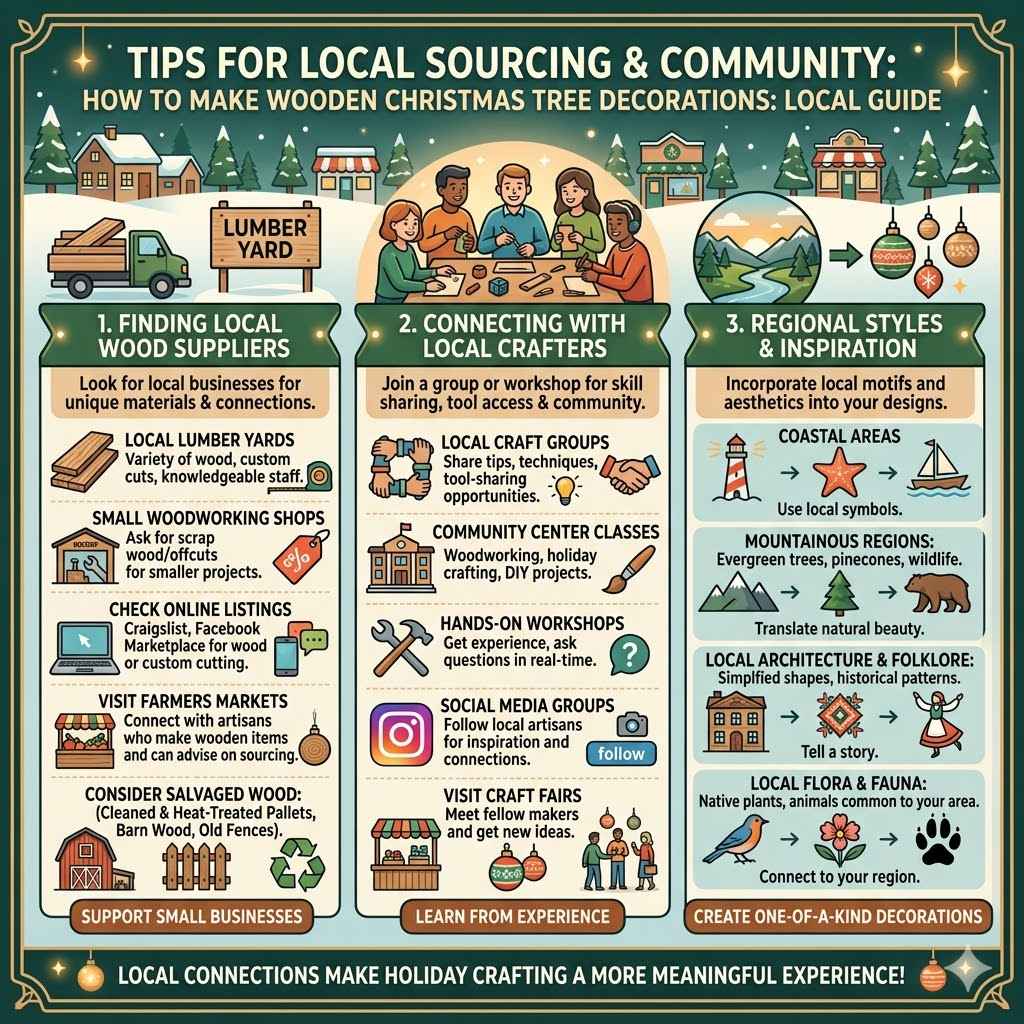
Your local lumber yard is often the best place to start for wood. Many lumber yards cater to both professionals and hobbyists. They can offer a variety of wood types and can often cut pieces to your specific dimensions.
Don’t be afraid to ask questions about the wood; the staff are usually very knowledgeable and happy to help beginners.
Sometimes, small woodworking shops or even furniture makers might have scrap wood available for sale at a reduced price. These scraps can be perfect for smaller craft projects like ornaments. Check online marketplaces or community bulletin boards for local woodworkers who might be selling offcuts.
For a truly unique approach, consider salvaged wood. Old fence boards, barn wood, or even pallets (ensure they are heat-treated, not chemically treated, and safe for crafts) can be a source of characterful, rustic wood. Always clean and prepare salvaged wood thoroughly before using it for crafts.
- Support Small Businesses: Local lumber yards and craft supply stores often carry unique wood types or locally sourced materials.
- Ask for Scraps: Many woodworking shops sell smaller pieces of wood or offcuts at a discount.
- Check Online Local Listings: Platforms like Craigslist or Facebook Marketplace might have individuals selling wood or offering custom cutting services.
- Visit Farmers Markets: Sometimes, local artisans sell handmade wooden items and can provide advice on sourcing.
Connecting with Local Crafters
Joining a local crafting group or workshop can be an invaluable resource when you’re learning How to Make Wooden Christmas Tree Decorations: Local Guide. These groups often share tips, techniques, and sometimes even tool-sharing opportunities. It’s a great way to learn from experienced crafters and get inspired by their work.
Many community centers, libraries, or local art studios offer craft classes. These can be specifically focused on woodworking, holiday crafting, or general DIY projects. Attending a workshop provides hands-on experience and the chance to ask questions in real-time.
You might even meet fellow crafters who become friends.
If there aren’t formal groups or classes available, try connecting with local artisans through social media or by visiting craft fairs. Many artisans are passionate about their craft and are happy to share their knowledge. They can offer insights into local material sourcing and techniques that work well in your specific climate or region.
Local connections provide many benefits:
- Skill Sharing: Learn new techniques and tips from experienced crafters.
- Tool Access: Sometimes groups have shared tools that members can borrow.
- Inspiration: See what others are creating and get new ideas for your own projects.
- Community Support: Feel encouraged and motivated by working alongside others.
Regional Styles and Inspiration
Thinking about regional styles can add a special layer to your How to Make Wooden Christmas Tree Decorations: Local Guide. Different areas might have unique woodworking traditions, local motifs, or popular aesthetics that can inspire your ornament designs. For instance, if you live near a coastal area, you might incorporate seashell motifs or nautical themes into your wooden ornaments.
If you’re in a mountainous region, perhaps pinecones or evergreen shapes would be fitting.
Look at local architecture, folklore, or natural landscapes for inspiration. Are there specific historical symbols or patterns common in your area? Perhaps certain local flora or fauna could be simplified into wooden ornament shapes.
This connection to your locality makes your handmade decorations truly one-of-a-kind and tells a story about where you live.
Even if your region doesn’t have a strong, defined woodworking tradition for ornaments, you can still draw inspiration from local materials and the environment. The type of wood readily available in your area can influence the look and feel of your ornaments. The natural beauty of your surroundings can be translated into artistic choices for colors, textures, and shapes.
Frequently Asked Questions
Question: What is the easiest wood to start with for making ornaments?
Answer: Pine and basswood are excellent choices for beginners. They are soft, easy to cut, and readily available. They don’t require very sharp tools to work with.
Question: Do I need a lot of expensive tools to make wooden ornaments?
Answer: No, you can start with just a few basic tools like a handsaw, sandpaper, and a drill. Many simple designs can be achieved with just these items.
Question: How do I make sure my ornaments are safe to hang on the tree?
Answer: Ensure all edges are smooth and free of splinters. For hanging, create a secure loop with twine or ribbon that is attached firmly to the ornament.
Question: Can I paint over stained wood?
Answer: Yes, you can paint over stained wood, but it’s best to ensure the stain is fully dry and consider applying a primer first. Painting over stain might require more coats to achieve solid coverage.
Question: How can I make my wooden ornaments look professional?
Answer: Focus on smooth sanding, clean paint lines, and a good sealing coat. Precise cutting and thoughtful design also contribute significantly to a professional look.
Conclusion
You now have a clear path to creating beautiful wooden Christmas tree decorations. You’ve learned about selecting the right wood, gathering basic tools, and simple yet effective design and decoration techniques. Embracing your local resources and community adds a unique, personal touch to every ornament you make.
Enjoy the process of crafting your special holiday treasures!