How to Mount a Ceiling Light Fixture: Step-by-Step Guide
Imagine transforming your room with just a flick of a switch. Yes, that’s the power of a ceiling light fixture!
It’s an easy and effective way to elevate your space, adding warmth and style. But how do you mount one yourself without calling an electrician? You might think it’s complicated, but with the right guidance, it’s simpler than you imagine.
Picture this: you, confidently installing a ceiling light fixture, saving money and gaining a sense of accomplishment. This article is here to walk you through the process, step by step, ensuring your success. Ready to make your home shine? Let’s dive in!

Credit: www.youtube.com
Tools And Materials Needed
Start with the right tools. Screwdriver is a must. You need a drill too. Use a tape measure for accuracy. Wire strippers help with wires. Ladder is important for height.
Gather materials next. Light fixture is key. Wire nuts are essential. Don’t forget the mounting bracket. Keep some screws handy. Lightbulbs complete the setup.
Safety gear is crucial. Use safety goggles to protect eyes. Gloves protect your hands. Mask keeps dust away. Always keep a first aid kit nearby.
Safety Precautions
Always turn off the power at the circuit breaker. Electricity is dangerous. Use a voltage tester to ensure no electricity flows. Wear rubber gloves for added protection. Ensure your ladder is stable before climbing. A shaky ladder can cause falls. Keep your work area clean. Avoid stepping on clutter. Use safety goggles to protect your eyes from dust. If unsure, ask an adult for help. Check the fixture’s weight. Heavy fixtures need strong support. Don’t rush the process. Take your time for safety.
Preparing The Ceiling
Safety first. Turn off the power at the main switch. Check twice. Ensure lights and appliances are off. Use a voltage tester. Verify the wires aren’t live. This step prevents shocks.
Unscrew the old fixture. Hold it steady. Disconnect wires carefully. Note wire colors. Black, white, and green. Keep wire nuts safe. Remove the mounting bracket. Clean the area. Ensure no dust or debris remains. It’s ready for the new fixture.
Assembling The New Fixture
Unpacking and Inspecting:Open the box gently. Take out all parts. Check for damage. Look for missing pieces. Ensure all screws are included. Inspect the wiring. Make sure everything matches the list. If anything is wrong, contact the store. Keep all packaging for returns.
Reading the Instructions:Find the instruction manual. Read it carefully. Understand each step. Follow safety tips. Check the tools needed. Get all tools ready. Make notes if needed. Ask for help if confused. Instructions guide the process. Follow each step closely.
Installing The Mounting Bracket
First, gather all the necessary tools. You will need a drill, screws, and a screwdriver. Ensure the power is off at the main switch. This keeps everyone safe. Hold the bracket against the ceiling. Make sure it is level. Mark the holes with a pencil. Use the drill to create small starter holes.
Next, place the bracket back on the ceiling. Use screws to secure it tightly. Check the bracket to ensure it does not move. If it wiggles, tighten the screws more. Proper securing is key for safety. Always ensure the bracket is stable.
A stable bracket prevents accidents. Check all screws are tight. Wobbling can be dangerous. If the bracket moves, check your work. Make sure the ceiling is strong. Use anchors for extra support if needed. Stability is crucial for the light fixture.
:max_bytes(150000):strip_icc()/how-to-replace-ceiling-light-fixture-1824657-03-d0831082affb46be9ab0fb2652da8092.jpg)
Credit: www.thespruce.com
Wiring The Fixture
Start by turning off the electricity. Always be safe. Remove the old light. Locate the wires. Typically, there are three: black, white, and green. The black wire is the hot wire. White is neutral. Green is the ground. Strip the ends of each wire. Connect the black wire to the black wire from the fixture. Repeat with the white wires. Connect the green wire to the fixture’s ground wire.
Use wire nuts for safety. Twist the wires together first. Place the nut over the twisted ends. Turn the nut clockwise. Make sure it’s tight. Check each connection. A loose connection can be dangerous. Test the wires. Tug gently to ensure they stay connected. Secure the fixture to the ceiling. Use screws and a bracket. Turn the electricity back on. Your light should work.
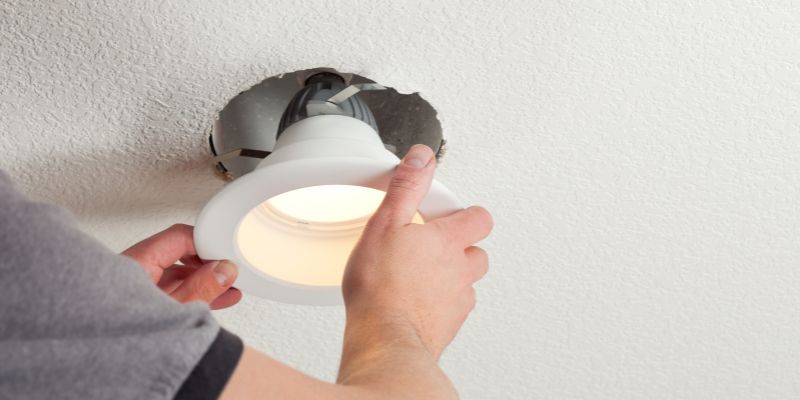
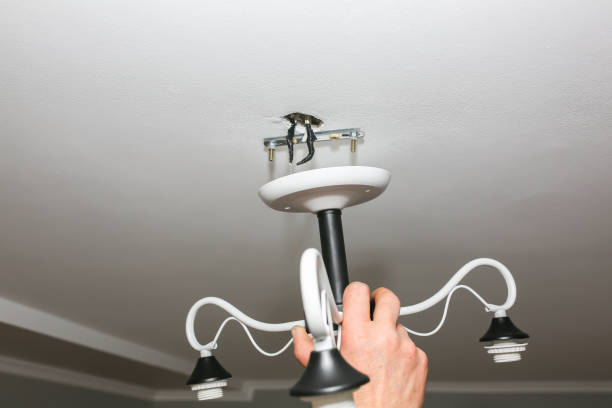
Attaching The Fixture
Aligningthe ceiling light fixture is important. Hold the fixture in place. Ensure the wires match the colors. Connect the wires correctly. Secure them with wire nuts. Twist the nuts tightly. Check that no wires are exposed. Attach the fixture plate to the ceiling box. Use a screwdriver to tighten screws. Make sure the plate is stable.
Securingthe fixture needs care. Align the fixture with the plate holes. Insert screws into the holes. Tighten each screw firmly. Ensure the fixture doesn’t wobble. It’s important for safety. Double-check all connections. Everything should be tight and secure.
Checking for Loose Endsis crucial. Inspect all parts carefully. Look for loose wires or screws. Tighten any loose parts. Ensure everything is secure. Test the light switch. The fixture should light up. If not, check connections again.
Testing The Installation
Testing the installation ensures your ceiling light fixture is secure and functional. Confirm the electrical connections are tight and the fixture is stable. Switch on the power to check that the light illuminates properly, guaranteeing a successful installation.
Restoring Power
First, go to the main power switch. Turn the power back on. Make sure everything is safe. Check for any sparks or burning smells. If you notice anything odd, turn the power off. Safety comes first.
Switching On The Light
Go to the room with the new light. Flip the light switch on the wall. Look up at the ceiling. Did the light turn on? If not, check the wiring again. Make sure all connections are tight. If the light works, great job! You did it right.
Final Touches
Start by ensuring the power is off. Secure the mounting bracket to the ceiling. Connect wires matching colors. Attach the fixture to the bracket. Tighten screws for stability. Install bulbs and check for proper function. Adjust the fixture for the desired look.
Adjusting Fixture Height
Check the fixture height. Ensure it’s not too high or low. Adjust it to match room style. Use a ladder for safety. Hold the fixture steady. Tighten any loose screws. Make sure it hangs straight. A crooked fixture looks odd. Align it with other room elements. Perfect height adds elegance. Test the light switch. Bright light should fill the room. Adjust as needed for the best look.
Cleaning The Fixture
Dust gathers quickly on fixtures. Use a soft cloth to wipe. Avoid harsh chemicals. They can damage the surface. Clean gently. Remove any fingerprints. Dirty fixtures look dull. A clean fixture shines bright. Clean every few months. This keeps it looking new. Clean light bulbs too. Dirt reduces brightness. Shine the fixture for a fresh look. A clean fixture enhances the room’s beauty.
Credit: lightingshs.com
Frequently Asked Questions
How Do I Choose The Right Ceiling Light Fixture?
Selecting the right ceiling light fixture involves considering the room’s size, style, and lighting needs. Opt for fixtures that complement your décor and provide adequate illumination. Ensure the fixture fits the ceiling height and is energy-efficient. Consulting a lighting specialist can also help you make an informed decision.
What Tools Are Needed To Mount A Ceiling Light?
To mount a ceiling light, you’ll need a screwdriver, wire stripper, voltage tester, and ladder. Additional tools may include a drill and pliers, depending on the fixture’s installation requirements. Make sure to follow the fixture’s installation instructions for any specific tools needed for a successful installation.
How Do I Safely Disconnect Power Before Installation?
To safely disconnect power, turn off the circuit breaker controlling the light’s area. Use a voltage tester to confirm that the power is off. It’s essential to ensure no electricity flows to the fixture. This prevents any electrical hazards during the installation process, keeping you and your home safe.
Can I Install A Ceiling Light Fixture By Myself?
Yes, you can install a ceiling light fixture by yourself if you’re comfortable with basic electrical work. Ensure you follow safety precautions and use the correct tools. If you’re unsure, hiring a professional electrician is advisable. They ensure the installation is done safely and correctly.
Conclusion
Mounting a ceiling light fixture can seem daunting. But it’s doable. Follow the steps carefully for success. Ensure all tools and materials are ready. Safety first. Turn off the power before starting. Double-check your connections. Secure the fixture firmly. Test the light after installation.
Brighten your space with confidence. Enjoy the new look and feel. Practice makes perfect. Consider seeking help if unsure. It’s okay to ask for assistance. A well-lit room enhances comfort and style. Congratulations on your new ceiling light fixture!