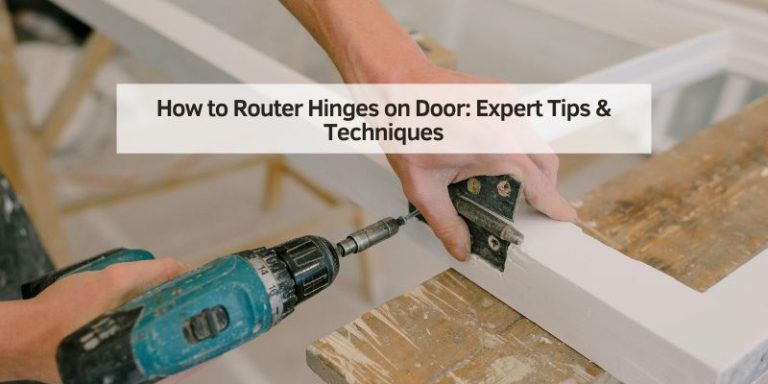
How to Mount a Door Hinge: A Step-by-Step Guide for Beginners
Hey there! If you’ve ever looked at a door hinge and thought, “How do I even start with this?”—don’t worry, I’ve been there too. Mounting a door hinge might seem tricky at first, but it’s one of those home improvement tasks that feels so rewarding once you get the hang of it. Whether you’re installing a new door, replacing old hinges, or just fixing a squeaky one, I’m here to walk you through the process like we’re tackling it together. I’ve spent plenty of time fiddling with hinges in my own home, and I’m excited to share what I’ve learned to make this easy for you. Let’s dive into everything you need to know about mounting a door hinge, from picking the right tools to getting that perfect, smooth swing.
Why Mounting a Door Hinge Matters
Let’s start with the basics. Door hinges are the unsung heroes of your home. They hold your doors in place, let them swing open and closed smoothly, and keep everything secure. A poorly mounted hinge can make your door stick, sag, or even come loose over time. I’ve seen it happen in my own house—creaky doors that don’t close right can drive you nuts! Getting the hinge mounted correctly ensures your door works like a dream and lasts for years. Plus, it’s a great way to boost your DIY confidence. Trust me, there’s nothing like standing back and admiring a door you’ve hung yourself.
Tools and Materials You’ll Need
Before we get started, let’s gather everything you need. I always like to have my tools ready so I’m not scrambling halfway through the job. Here’s what you’ll want to have on hand:
| Item | Purpose |
|---|---|
| Door hinges | The hardware that connects the door to the frame. Choose the right size and finish. |
| Screwdriver or drill | For driving screws into the door and frame. A drill with a screwdriver bit is faster. |
| Chisel | To carve out a recess (mortise) for the hinge to sit flush. |
| Hammer | For tapping the chisel when cutting the mortise. |
| Measuring tape | To measure hinge placement accurately. |
| Pencil | For marking where the hinges will go. |
| Level | To ensure the door is aligned properly. |
| Wood screws | Usually come with the hinges, but check the size and length. |
| Sandpaper | To smooth out any rough edges in the mortise. |
| Safety glasses | To protect your eyes while chiseling or drilling. |
I recommend picking hinges that match your door’s style and weight. For example, heavier doors like solid wood ones need sturdier hinges than lightweight hollow-core doors. When I replaced the hinges on my front door, I went with ball-bearing hinges for extra durability, and they’ve been amazing. Also, make sure your screws are long enough to grip the door and frame securely—usually 1 to 1.5 inches for most interior doors.
Choosing the Right Hinge for Your Door
Not all hinges are created equal, and picking the right one can make or break your project. I learned this the hard way when I tried using cheap hinges on a heavy oak door—they started sagging within months! Here are a few things to keep in mind:
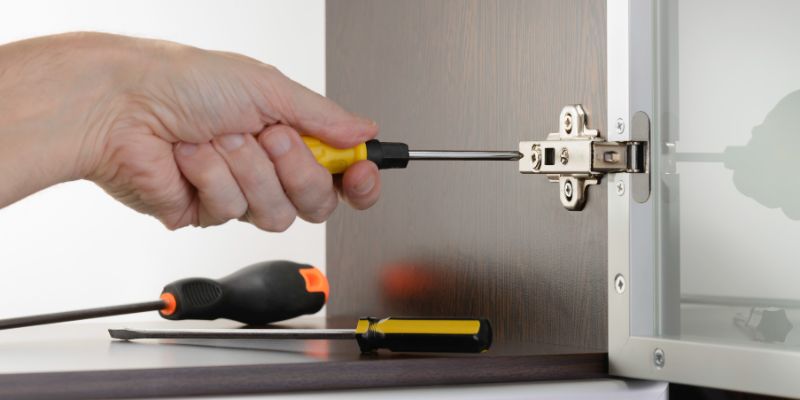
- Hinge Type: Butt hinges are the most common for interior and exterior doors. They’re simple, reliable, and easy to install. If you’re working on a cabinet door, you might need smaller hinges like flush or overlay hinges.
- Size and Weight: Check the door’s weight and dimensions. Standard interior doors usually use 3.5-inch hinges, while exterior doors might need 4-inch ones. Heavier doors may require three or four hinges instead of two.
- Finish: Hinges come in finishes like brass, nickel, or black. I always try to match the finish to other hardware in the room, like doorknobs or cabinet pulls, for a cohesive look.
- Ball-Bearing vs. Standard: Ball-bearing hinges are smoother and more durable, especially for heavy doors. They’re a bit pricier, but worth it in my opinion.
When I was upgrading my bedroom door hinges, I went to the hardware store and brought the old hinge with me to compare sizes and screw patterns. It saved me a lot of guesswork. If you’re unsure, ask the staff—they’re usually happy to help.
Preparing the Door and Frame
Okay, let’s get to the fun part—prepping the door and frame. This step is all about making sure everything is ready before you start screwing in hinges. Trust me, a little prep goes a long way.
First, decide where the hinges will go. For most doors, you’ll place two hinges—one about 7 inches from the top and one about 11 inches from the bottom. If you’re using three hinges, add a third one in the middle. I use a measuring tape and pencil to mark these spots on both the door and the frame. Double-check with a level to make sure everything lines up.
If you’re replacing old hinges, remove them first. Unscrew the old hinges and check the mortises (the recessed areas where the hinges sit). Sometimes, old mortises are damaged or too big, so you might need to fill them with wood putty and sand them smooth. I had to do this on an old door in my house, and it made a huge difference in getting the new hinges to sit flush.
If you’re working with a new door or frame, you’ll need to cut mortises for the hinges. This is where the chisel comes in. Place the hinge on the door edge, trace around it with a pencil, and carefully chisel out a shallow recess (about 1/8 inch deep) so the hinge sits flush with the wood. Take your time here—rushing can lead to uneven cuts. I like to score the outline with a utility knife first to keep the chisel from slipping.
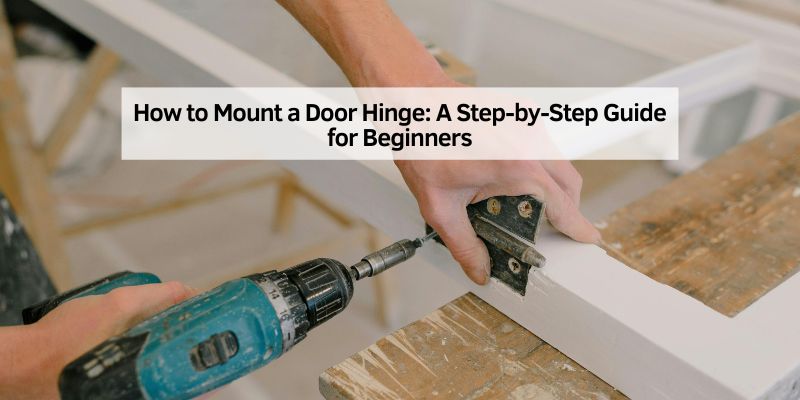
Mounting the Hinges on the Door
Now that your door is prepped, it’s time to attach the hinges. This part always feels like the project is coming together. Here’s how I do it:
- Position the Hinge: Place the hinge in the mortise you carved. Make sure it’s flush with the door’s edge. If it’s sticking out, chisel a bit deeper.
- Mark Screw Holes: Use a pencil to mark where the screws will go. Some hinges have slightly offset holes, so don’t assume they’re perfectly centered.
- Drill Pilot Holes: Use a drill bit slightly smaller than your screws to make pilot holes. This prevents the wood from splitting. I learned this trick after cracking a door edge early in my DIY days!
- Screw in the Hinge: Attach the hinge with the screws provided. I usually hand-tighten them with a screwdriver for better control, but a drill works too if you’re careful not to overtighten.
Repeat this for each hinge on the door. Once they’re all attached, hold the door up to the frame to check alignment. It’s easier to make adjustments now than after everything’s mounted.
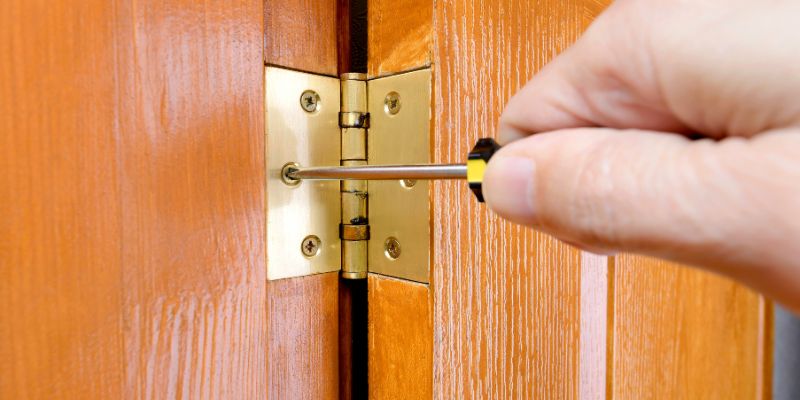
Attaching the Door to the Frame
This is where the magic happens—hanging the door! It’s a bit like putting the final piece in a puzzle. If you’re working alone, like I often do, a doorstop or wedge can help hold the door in place. Here’s how to do it:
- Align the Door: Hold the door in the frame so the hinges line up with the mortises on the frame. I sometimes prop the door on a book or shim to get the height right.
- Mark the Frame: Trace the hinge outlines on the frame with a pencil, just like you did on the door.
- Cut Mortises: Chisel out the mortises on the frame, keeping them the same depth as the door’s mortises. Sand any rough edges for a clean fit.
- Attach the Hinges: Screw the hinges into the frame’s mortises. Start with one screw per hinge to hold the door, then add the rest once you’re sure everything’s aligned.
Once the hinges are attached, gently swing the door to test it. If it sticks or doesn’t close smoothly, you might need to adjust the mortises or tighten the screws. I had a door that rubbed at the top, and shaving a tiny bit off the edge with a planer fixed it right up.
Troubleshooting Common Hinge Problems
Even with careful planning, things can go wrong. Here are some issues I’ve run into and how to fix them:
- Door Sags: If the door doesn’t hang level, check that the hinges are flush and the screws are tight. You might need longer screws or to reposition a hinge slightly.
- Hinge Binds: If the door sticks when opening or closing, the hinges might be too deep or not aligned. Loosen the screws and shim the hinge with cardboard to adjust.
- Squeaky Hinges: A little lubricant like WD-40 can work wonders. I spray it on the hinge pins and wipe off any excess to keep things quiet.
One time, I mounted a hinge upside down by mistake, and the door wouldn’t close properly. Flipping it around solved the problem in minutes. Don’t be afraid to double-check your work—it’s all part of the process.
Maintaining Your Door Hinges
Once your hinges are mounted, a little maintenance goes a long way. I check my hinges every year or so to make sure they’re tight and lubricated. Tighten any loose screws and apply a light coat of lubricant to the hinge pins to prevent squeaking. If you live in a humid area, like I do, keep an eye out for rust on metal hinges. A quick wipe with a damp cloth can keep them looking sharp.
For exterior doors, consider hinges with a weather-resistant finish, like stainless steel. I switched to these for my back door, and they’ve held up great against rain and sun.
Tips for a Professional Finish
Want your door to look like a pro installed it? Here are a few tricks I’ve picked up:
- Use a Template: Some hardware stores sell hinge templates that make cutting mortises a breeze. They’re worth the investment if you’re doing multiple doors.
- Check Alignment Often: Use a level at every step to avoid a crooked door. It’s a small thing that makes a big difference.
- Paint or Stain First: If you’re painting or staining the door, do it before mounting the hinges. It’s easier to get a clean finish without hardware in the way.
- Clean Up: Sand and wipe down the door and frame after chiseling to remove any dust or splinters.
When I redid my kitchen door, I took the extra time to paint it first, and it gave the whole project a polished look. Little details like that really add up.
Safety First
Working with tools can be fun, but safety is key. Always wear safety glasses when chiseling or drilling—I’ve had wood chips fly at me more times than I’d like to admit. Keep your work area clear, and if you’re using a drill, make sure the battery is charged or the cord is safely out of the way. If you’re new to chiseling, practice on a scrap piece of wood first to get the hang of it.
Conclusion
Mounting a door hinge might seem intimidating at first, but it’s one of those projects that feels so satisfying once you’re done. I still remember the first door I hung in my home—it wasn’t perfect, but it worked, and I was so proud. With the right tools, a bit of patience, and the steps I’ve shared, you’ll have your door swinging smoothly in no time. Whether you’re fixing a creaky hinge or installing a brand-new door, you’re building skills that will come in handy for years. So grab your screwdriver, pick out some sturdy hinges, and get started. You’ve got this! If you run into any snags, just come back to this guide, and I’ll be here to help you through it.
Frequently Asked Questions
What type of hinge is best for an interior door?
For most interior doors, standard butt hinges work great. They’re affordable and reliable. I’d go with 3.5-inch hinges for lightweight or hollow-core doors. If your door is heavier, like solid wood, consider ball-bearing hinges for smoother operation.
How many hinges do I need for my door?
Most doors need two hinges—one near the top and one near the bottom. For heavier doors or ones taller than 7 feet, I recommend adding a third hinge in the middle for extra support.
Can I mount hinges without a chisel?
It’s tough to get a clean fit without a chisel because the hinge needs to sit flush in a mortise. If you don’t have a chisel, you could try a router with a straight bit, but it’s trickier. I’d borrow or buy a chisel—it’s worth it for the precision.
Why does my door stick after mounting the hinges?
A sticking door usually means the hinges aren’t aligned or the mortises are too deep or shallow. Check that the hinges are flush and use a level to ensure the door is straight. You might need to adjust the mortises or add shims behind the hinges.
How do I fix a squeaky hinge?
Squeaky hinges are usually caused by friction. I spray a little WD-40 or silicone lubricant on the hinge pin and work the door back and forth. Wipe off any excess to avoid drips. If it keeps squeaking, check for loose screws or rust.