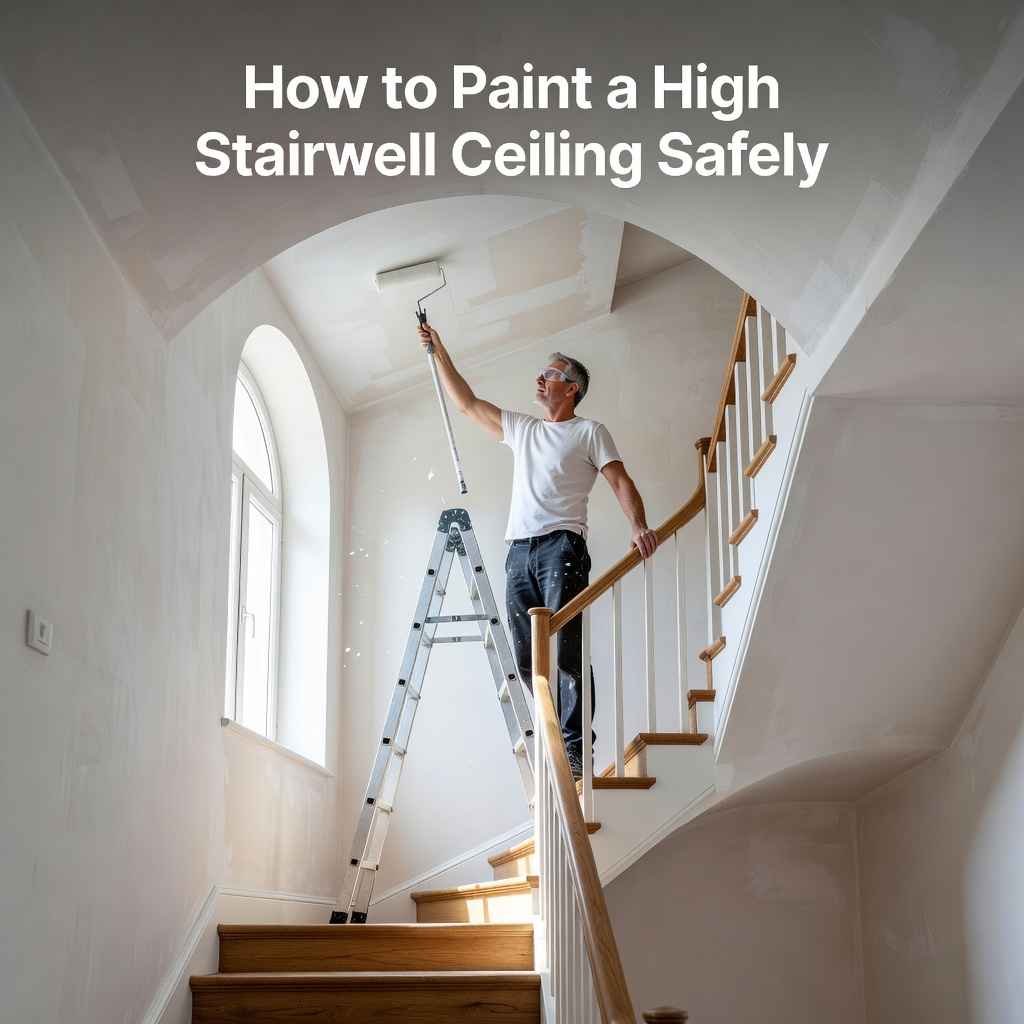
How to Paint a High Stairwell Ceiling Safely
Painting a high stairwell ceiling can seem like a big challenge, especially for those new to DIY projects. Reaching those high spots without the right setup can be tricky and even a little scary. But don’t worry, this guide will show you a simple, step-by-step way to get the job done safely and effectively.
We’ll walk you through everything you need to know so you can tackle this project with confidence and achieve a great result.
Painting a High Stairwell Ceiling Safely
This section focuses on the core aspects of how to paint a high stairwell ceiling safely. It covers the essential preparations and safety measures needed to tackle this often daunting task. We will explore the tools and techniques that make working at heights much less risky and more manageable for the average homeowner.
Assessing Your Stairwell Space
Before you even think about paint colors, take a good look at your stairwell. How high is the ceiling, really? Are there any tricky angles or obstacles like railings or light fixtures?
Understanding the space helps you pick the right equipment.
- Measure the height of the ceiling. This is crucial for determining how tall your ladder or scaffolding needs to be. A simple tape measure or laser measure will work. Knowing the exact height prevents you from buying equipment that’s too short or unnecessarily cumbersome.
- Note any permanent fixtures. Things like chandeliers, smoke detectors, or decorative molding can affect your painting path. You’ll need to decide if these need to be removed or carefully worked around. Plan your approach to avoid bumping into them.
- Check the floor condition. Stairwells often have stairs made of wood, carpet, or tile. You need to protect these surfaces from paint drips. Knowing what you’re dealing with helps you choose the right drop cloths and masking materials.
Gathering Essential Safety Equipment
Safety is the top priority when painting any high area. Having the right gear protects you from falls and other potential hazards. This isn’t the place to cut corners; invest in good quality safety items.
- A sturdy, stable ladder is a must. Opt for an extension ladder or a multi-position ladder that can be configured safely for your stairwell’s needs. Ensure it has non-slip feet and is rated for your weight plus any tools you’ll carry. Always check the ladder for damage before use.
- Work gloves provide a better grip on tools and surfaces, reducing the chance of slips. They also protect your hands from paint and potential scrapes. Look for gloves that are comfortable and breathable.
- Safety glasses are vital to protect your eyes from falling debris or paint splatters. You don’t want anything to interfere with your vision when you’re balancing on a ladder. Clear lenses are best for most lighting conditions.
- A dust mask or respirator can be helpful, especially if sanding is involved or if the area is dusty. This keeps you from inhaling fine particles. Choose one that fits snugly to your face for maximum protection.
Choosing the Right Painting Tools
The right tools make the job easier and safer. For high ceilings, you’ll need tools that extend your reach without compromising control or stability.
- An extension pole for your roller is a lifesaver. It allows you to reach a large area without constantly repositioning a ladder. Make sure the pole is lightweight but strong.
- A good quality paint roller with a suitable nap is important for even coverage. For ceilings, a medium nap is usually best. A smaller roller or a brush might be needed for corners and edges.
- A paint tray or bucket with a grid can help load the roller evenly. This prevents overloading and dripping, which is especially important when working overhead.
Preparing the Area for Painting
Proper preparation is key to a successful and clean painting job. This involves protecting surfaces, cleaning the area, and making sure everything is ready for the paint application. Skipping these steps can lead to more work later.
Protecting Your Floors and Furniture
Paint drips are the enemy of clean floors and furniture. Taking the time to cover everything properly will save you hours of scrubbing later.
- Use heavy-duty drop cloths made of canvas or thick plastic. For staircases, you might need to tape them down securely to prevent them from shifting, especially on the steps themselves. Overlap the edges of your drop cloths to catch any stray drips.
- Mask off any trim, baseboards, windows, or doors with painter’s tape. This tape is designed to create a clean line and peel off easily without damaging the surface. Run your finger along the edge of the tape to ensure a good seal against paint bleed.
- If you have any built-in elements or fixtures you can’t remove, cover them carefully with plastic sheeting and tape. This includes light fixtures, vents, or thermostats.
Cleaning the Ceiling Surface
A clean surface ensures paint adheres properly and provides a smooth finish. Dust, cobwebs, and grease can all interfere with paint adhesion.
- Start by sweeping or vacuuming the ceiling to remove loose dust and cobwebs. Use a long-handled broom or a vacuum with an extension wand. Pay close attention to corners and edges.
- For any grease or grime, use a mild detergent solution or a specialized ceiling cleaner. Wipe down the ceiling with a damp sponge or cloth. Be careful not to saturate the ceiling, as this can damage drywall.
- Allow the ceiling to dry completely before painting. Moisture can affect how the paint dries and adheres. This is a critical step for long-lasting results.
Prepping for Paint Application
Once the area is clean and protected, you can prepare for the actual painting. This includes having your paint ready and setting up your tools for easy access.
- Stir your paint thoroughly. If you’re using multiple cans of the same color, mix them together in a larger container to ensure color consistency throughout the project. This avoids subtle shade differences.
- Set up your ladder or scaffolding in a stable position. Ensure it’s on a level surface. If using an extension ladder, make sure it’s at the correct angle (about 75 degrees).
- Have all your tools, including rollers, brushes, extension poles, and paint trays, within easy reach. This minimizes the need to climb up and down repeatedly, which is safer and more efficient.
Mastering the Painting Process
This is where the magic happens. With your area prepped and your tools ready, you can now focus on how to apply the paint smoothly and evenly to your high stairwell ceiling. Safety remains paramount throughout this stage.
Using Extension Poles Effectively
Extension poles are essential for reaching high ceilings. They allow you to paint from a stable position without overextending yourself.
- Attach your roller to the extension pole securely. Ensure the connection is tight to prevent the roller from detaching while you’re painting.
- Load the roller with paint by rolling it in your paint tray or over the grid in your paint bucket. Don’t overload it, as this can lead to drips. A light, even coat of paint on the roller is best.
- Apply the paint to the ceiling using long, overlapping strokes. Start in a corner and work your way across the ceiling. Apply gentle, consistent pressure. Aim for a steady pace to avoid lap marks.
Painting in Sections
Breaking the ceiling down into smaller, manageable sections makes the job less overwhelming and helps ensure an even finish.
- Paint one small section at a time, typically a few feet wide. This allows you to maintain a wet edge, meaning you can blend the new paint into the previous section before it dries. This is key to avoiding visible brush or roller marks.
- Work in a consistent direction. For most ceilings, painting in parallel strokes from one wall to the other is effective. When you reach the end of a section, feather the edges slightly by applying less pressure.
- Continuously assess your work as you go. Look for any missed spots or areas that need more paint. Make touch-ups while the paint is still wet to blend them seamlessly.
Tackling Edges and Corners
The edges where the ceiling meets the walls, and any corners, require careful attention. These areas often need a brush or a smaller roller.
- Use an angled brush to “cut in” the edges around the perimeter of the ceiling. This involves painting a strip about two to three inches wide along the walls. Do this before rolling the main ceiling area.
- If there are intricate details or crown molding, use a smaller artist’s brush for precision. Take your time and make sure the brush strokes are smooth and even.
- For corners where two walls meet the ceiling, use the same cutting-in technique with your angled brush. Ensure you get a clean line that meets the wall paint perfectly.
Dealing with Obstacles and Tricky Spots
Light fixtures, vents, or architectural features can present unique challenges. Adapt your approach for these areas.
- For light fixtures, paint up to their edges carefully with your brush. If the fixture is protruding significantly, you may need to use a smaller roller or a specialized trim tool for a clean finish.
- If you need to paint around a vent, use a smaller roller or a brush to get into the tight spaces. Ensure you don’t get paint inside the vent itself.
- For areas that are difficult to reach even with an extension pole, consider a small artist’s brush or a trim roller. Sometimes, a different angle or a slight repositioning of your ladder can provide access.
Two Real-Life Examples
1. Sarah, a homeowner, was painting her tall entryway ceiling. She used a 12-foot extension ladder and a 4-6 foot extension pole for her roller.
She worked in 3-foot wide sections, moving from the top of the stairs across the landing. By carefully maintaining a wet edge, she achieved a perfectly smooth finish without any noticeable lap marks, transforming her entryway.
2. Mark had a vaulted ceiling in his living room that was difficult to reach. He opted to rent a small, mobile scaffolding unit instead of using a ladder.
This gave him a stable platform and allowed him to move around the large area with ease. He found he could apply paint much more quickly and comfortably, completing the job in one weekend.
Safety Considerations and Best Practices
Safety is not just about equipment; it’s about mindset and habits. Implementing these practices will significantly reduce the risks associated with painting high areas. Prioritizing safety ensures you can complete the project without injury.
Ladder Safety
Ladders can be dangerous if not used correctly. Understanding ladder safety is fundamental to how to paint a high stairwell ceiling safely.
- Always place your ladder on a firm, level surface. Never set it up on an uneven floor or a stack of books. If the ground is uneven, use a ladder stabilizer or a sturdy, flat board underneath the feet.
- Maintain three points of contact while climbing and working on the ladder. This means having either two hands and one foot or two feet and one hand on the ladder at all times. Avoid overreaching; move the ladder instead.
- Never stand on the top rung or the cap of an extension ladder. These parts are not designed to support your weight and can lead to a fall. Ensure the ladder is extended to the appropriate height for your task.
- Inspect your ladder before each use for any cracks, bends, loose rungs, or damaged feet. If you find any issues, do not use the ladder. Regular maintenance is crucial for longevity and safety.
Working at Heights
Painting at height introduces unique challenges beyond just using a ladder. Being aware of your surroundings and limitations is key.
- Never paint alone when working at significant heights. Have someone present who can stabilize the ladder, hand you tools, or call for help if needed. This second person is your safety net.
- Take frequent breaks. Working at heights can be physically and mentally draining. Fatigue can lead to errors in judgment and increase the risk of accidents. Step down from the ladder regularly to rest and rehydrate.
- Be mindful of your center of gravity. Avoid leaning too far in any direction while on the ladder. If you can’t reach a spot comfortably, reposition the ladder rather than risking a fall.
- Secure all your tools. Use tool belts or buckets with hooks to keep tools accessible but out of the way. Dropped tools can be a hazard to anyone below.
Ventilation and Air Quality
Proper ventilation is important for your health and for the paint to dry correctly. Especially in enclosed spaces like stairwells.
- Open windows and doors in the area to create cross-ventilation. This helps fumes dissipate quickly and ensures fresh air circulates. If your stairwell has windows, open them.
- Consider using a fan to help move air through the space. Position it so it blows air out of the room rather than directly at your wet paint. This can speed up drying times.
- Wear a respirator or dust mask if the paint has strong fumes or if you are sanding. Follow the manufacturer’s instructions for the best protection.
Common Mistakes to Avoid
Learning from others’ mistakes can save you time and prevent accidents. Knowing these common pitfalls will help you prepare for your painting project.
- Using the wrong equipment. This is a primary cause of accidents. Using a ladder that is too short, unstable, or not rated for the job is incredibly dangerous. Always use equipment designed for the task.
- Not preparing the surface thoroughly. A lack of proper cleaning or priming can lead to paint peeling or an uneven finish. This means more work down the line.
- Rushing the job. Painting a high stairwell requires patience. Trying to rush through the process can lead to poor quality work and increased safety risks. Slow and steady wins the race here.
Statistics on Home Improvement and Safety
Home improvement projects, especially those involving heights, are common. Safety statistics highlight the importance of proper preparation and execution. According to the U.S.
Bureau of Labor Statistics, falls are a leading cause of fatal work injuries in construction and extraction occupations, which often involve working at heights. While residential DIY projects may have different statistics, the risks are still significant. Many injuries are preventable with the right knowledge and equipment.
A survey by the National Association of Home Builders found that a significant percentage of homeowners undertake DIY projects each year. Stairwells are a frequent area of focus for home improvement due to their visibility. The Occupational Safety and Health Administration (OSHA) emphasizes that proper ladder safety training can reduce falls by up to 50%.
This underscores the value of understanding and implementing safety protocols for tasks like painting high ceilings.
| Risk Factor | Potential Outcome | Prevention Measure |
|---|---|---|
| Unstable Ladder | Falls, broken bones, head injuries | Use on level ground, check for damage, maintain three points of contact |
| Overreaching | Loss of balance, falls | Reposition ladder, use extension poles |
| Poor Ventilation | Fume inhalation, dizziness, headaches | Open windows, use fans, wear respirator |
| Slippery Surfaces | Slips and falls | Use drop cloths, wear non-slip shoes, clean spills immediately |
Frequently Asked Questions
Question: What is the safest way to reach a very high ceiling?
Answer: For very high ceilings, especially those over 12-15 feet, consider renting scaffolding or a boom lift. These provide a stable platform and are often safer than tall ladders for extended work. Always ensure you are trained to operate any rented equipment.
Question: How do I avoid paint drips when painting overhead?
Answer: To avoid paint drips, load your roller evenly by using a paint tray with a grid or roller screen. Don’t overload the roller with paint. Apply light, consistent pressure and roll in smooth, overlapping strokes.
Wipe excess paint off the roller before applying it to the ceiling.
Question: Can I use a paint sprayer for a high stairwell ceiling?
Answer: Paint sprayers can be an option, but they require significant preparation to mask off surrounding areas to prevent overspray. For stairwells, they can be challenging due to the confined space and the risk of paint getting on walls, railings, and floors. Rollers and brushes are often more practical for precise control in stairwells.
Question: How much paint do I need for a stairwell ceiling?
Answer: Measure the square footage of your ceiling. A general rule of thumb is one gallon of paint covers about 350-400 square feet. It’s always better to buy a little extra to account for touch-ups or a second coat.
Check the paint can for its specific coverage rate.
Question: What kind of roller cover is best for a textured ceiling?
Answer: For textured ceilings, you’ll want a roller cover with a longer nap (e.g., 3/4 inch or 1 inch). This longer nap will help fill in the texture and provide more even coverage. A thicker roller cover can hold more paint, which is beneficial for uneven surfaces.
Conclusion
Painting a high stairwell ceiling safely is achievable with careful planning and the right tools. Focus on sturdy ladders, extension poles, and protecting your space. Taking your time and working in sections ensures a smooth finish.
Prioritize safety at every step for a successful project.