How to Paint Kitchen Cabinets: Proven, Effortless Guide
Quick Summary:
Painting kitchen cabinets is a budget-friendly DIY project to refresh your kitchen’s look. This guide provides clear, step-by-step instructions for beginners to achieve a professional, durable finish on cabinets, even if they’re already painted. Follow these tips for a beautiful transformation you can be proud of!
Hello there! I’m Md Meraj, and I’m so glad you’re here. Dreaming of a kitchen makeover but not ready for a full renovation? Painting your kitchen cabinets is a fantastic way to breathe new life into your space without breaking the bank. It might seem a bit daunting, especially if your cabinets have seen a coat of paint before, but I promise, with the right approach and a little patience, you can achieve stunning results. Forget those frustrating, patchy finishes! We’ll walk through this together, step by step, making sure you feel confident and capable. Get ready to transform your kitchen with a fresh, beautiful coat of paint!
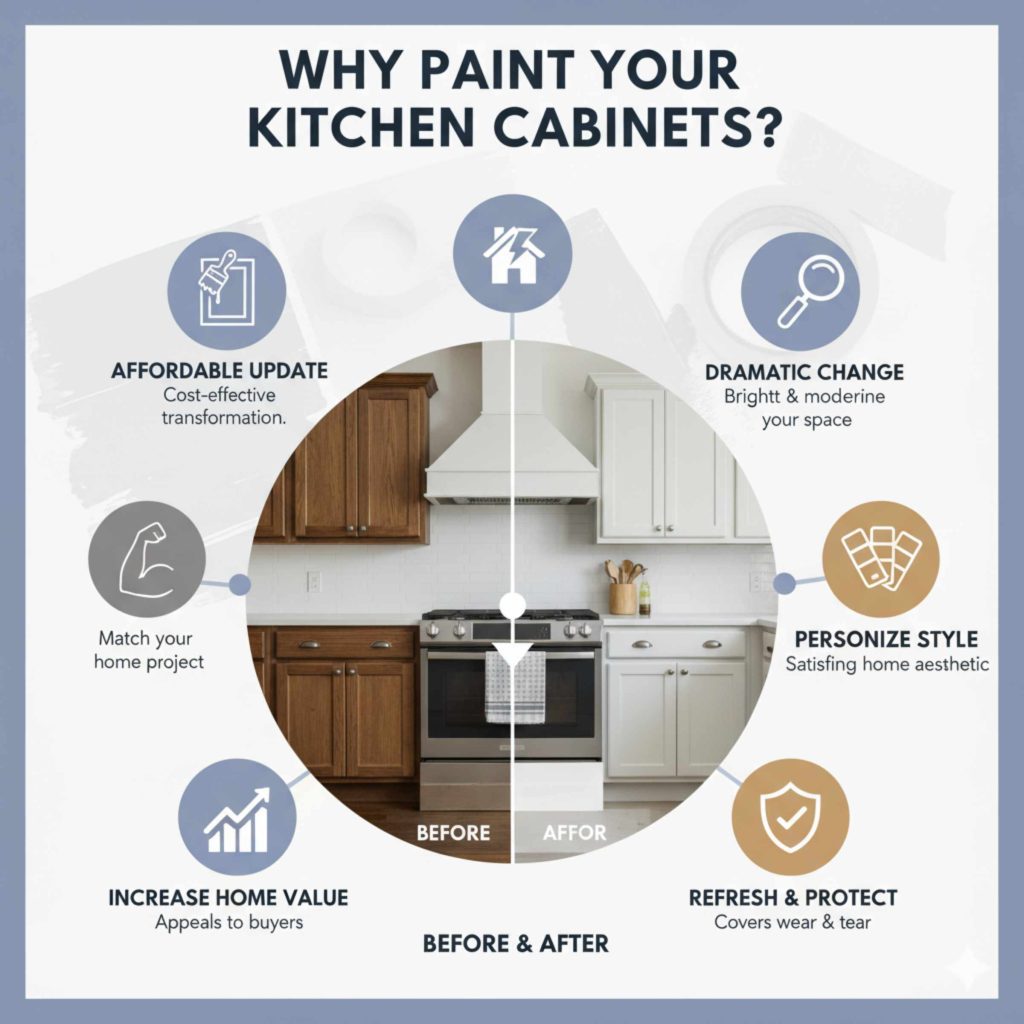
Why Paint Your Kitchen Cabinets?
Kitchen cabinets are often the largest visual element in your kitchen. Over time, their color might feel dated, or the finish might start to show wear and tear. Instead of expensive replacements, a fresh coat of paint offers a powerful and affordable solution. It’s a project that can dramatically change the entire feel of your kitchen, making it brighter, more modern, or more aligned with your personal style. Plus, it’s a rewarding DIY project that adds real value and beauty to your home.
Is Painting Over Existing Paint a Good Idea?
Absolutely! Painting over existing paint is not only common but often the best approach for older cabinets or those that have been previously refinished. The key is proper preparation. If the old paint is in good condition (no peeling or significant damage), you can often paint right over it after cleaning and light sanding. This saves you the significant effort of stripping everything down to bare wood. Think of it as giving your cabinets a fresh start with a new, modern look that’s built on a stable foundation.
Choosing the Right Paint and Supplies
The success of your cabinet painting project hinges on using the right materials. Don’t skimp here – quality supplies make a world of difference in the final look and durability.
Types of Paint for Kitchen Cabinets
Kitchen cabinets endure a lot of daily use, from cooking splatters to frequent touching. Therefore, you need a paint that’s tough, durable, and easy to clean. Here are the top contenders:
- Cabinet & Furniture Paint: These are specifically formulated for high-traffic furniture and cabinets. They offer excellent adhesion, durability, and a smooth finish. Many are water-based (latex or acrylic) with a hard, enamel-like finish.
- Alkali-Resistant Enamel Paint: This type of paint is very durable and resistant to moisture and grease, making it ideal for kitchens. It typically has a slight sheen.
- Chalk Paint: While popular for its matte, vintage look, chalk paint requires a durable topcoat (like polycrylic) to withstand kitchen wear and tear. It’s best for cabinets that don’t see extremely heavy use or for a specific aesthetic.
- Milk Paint: Similar to chalk paint, milk paint offers a beautiful matte finish but also requires a protective topcoat. It can sometimes chip naturally, creating a distressed look.
For most DIYers and for the most durable, easy-to-clean finish, I highly recommend a high-quality cabinet and furniture paint or an alkali-resistant enamel. Look for paints labeled “self-leveling” as they minimize brush strokes.
Sheen Matters
The sheen of your paint affects both the look and the durability. For kitchen cabinets, a sheen is your friend:
- Satin: A popular choice, offering a soft sheen that’s easy to clean and fairly durable.
- Semi-Gloss: This is an excellent option for kitchens. It’s very durable, moisture-resistant, and wipes clean easily. It provides a noticeable shine.
- Gloss: Offers the highest shine and is the most durable and easiest to clean. However, it will highlight every imperfection in your cabinet surface, so prep must be flawless.
I generally steer beginners towards satin or semi-gloss for a good balance of appearance and practicality.
Essential Supplies Checklist
Gathering everything you need before you start will save you time and frustration. Here’s what you’ll want:
- Paint: Your chosen cabinet paint (ensure you have enough for two coats).
- Primer: A good quality bonding primer is crucial, especially over existing paint or laminate.
- Screwdriver/Drill: To remove cabinet doors and hardware.
- Cleaning Supplies: Degreaser (like TSP substitute or a good kitchen cleaner), sponges, clean cloths, bucket.
- Sandpaper: Medium-grit (120-150) and fine-grit (220) sandpaper. A sanding block or an orbital sander can speed things up.
- Painter’s Tape: High-quality tape for masking areas you don’t want to paint.
- Drop Cloths/Plastic Sheeting: To protect your floors and countertops.
- Paint Brushes: High-quality synthetic brushes (angled sash brushes are great for detail).
- Paint Rollers: Small foam rollers (3/8″ nap) for smooth surfaces.
- Paint Tray: For rolling.
- Optional: Tack cloths, wood filler, putty knife, caulk, HVLP sprayer (for a professional finish).
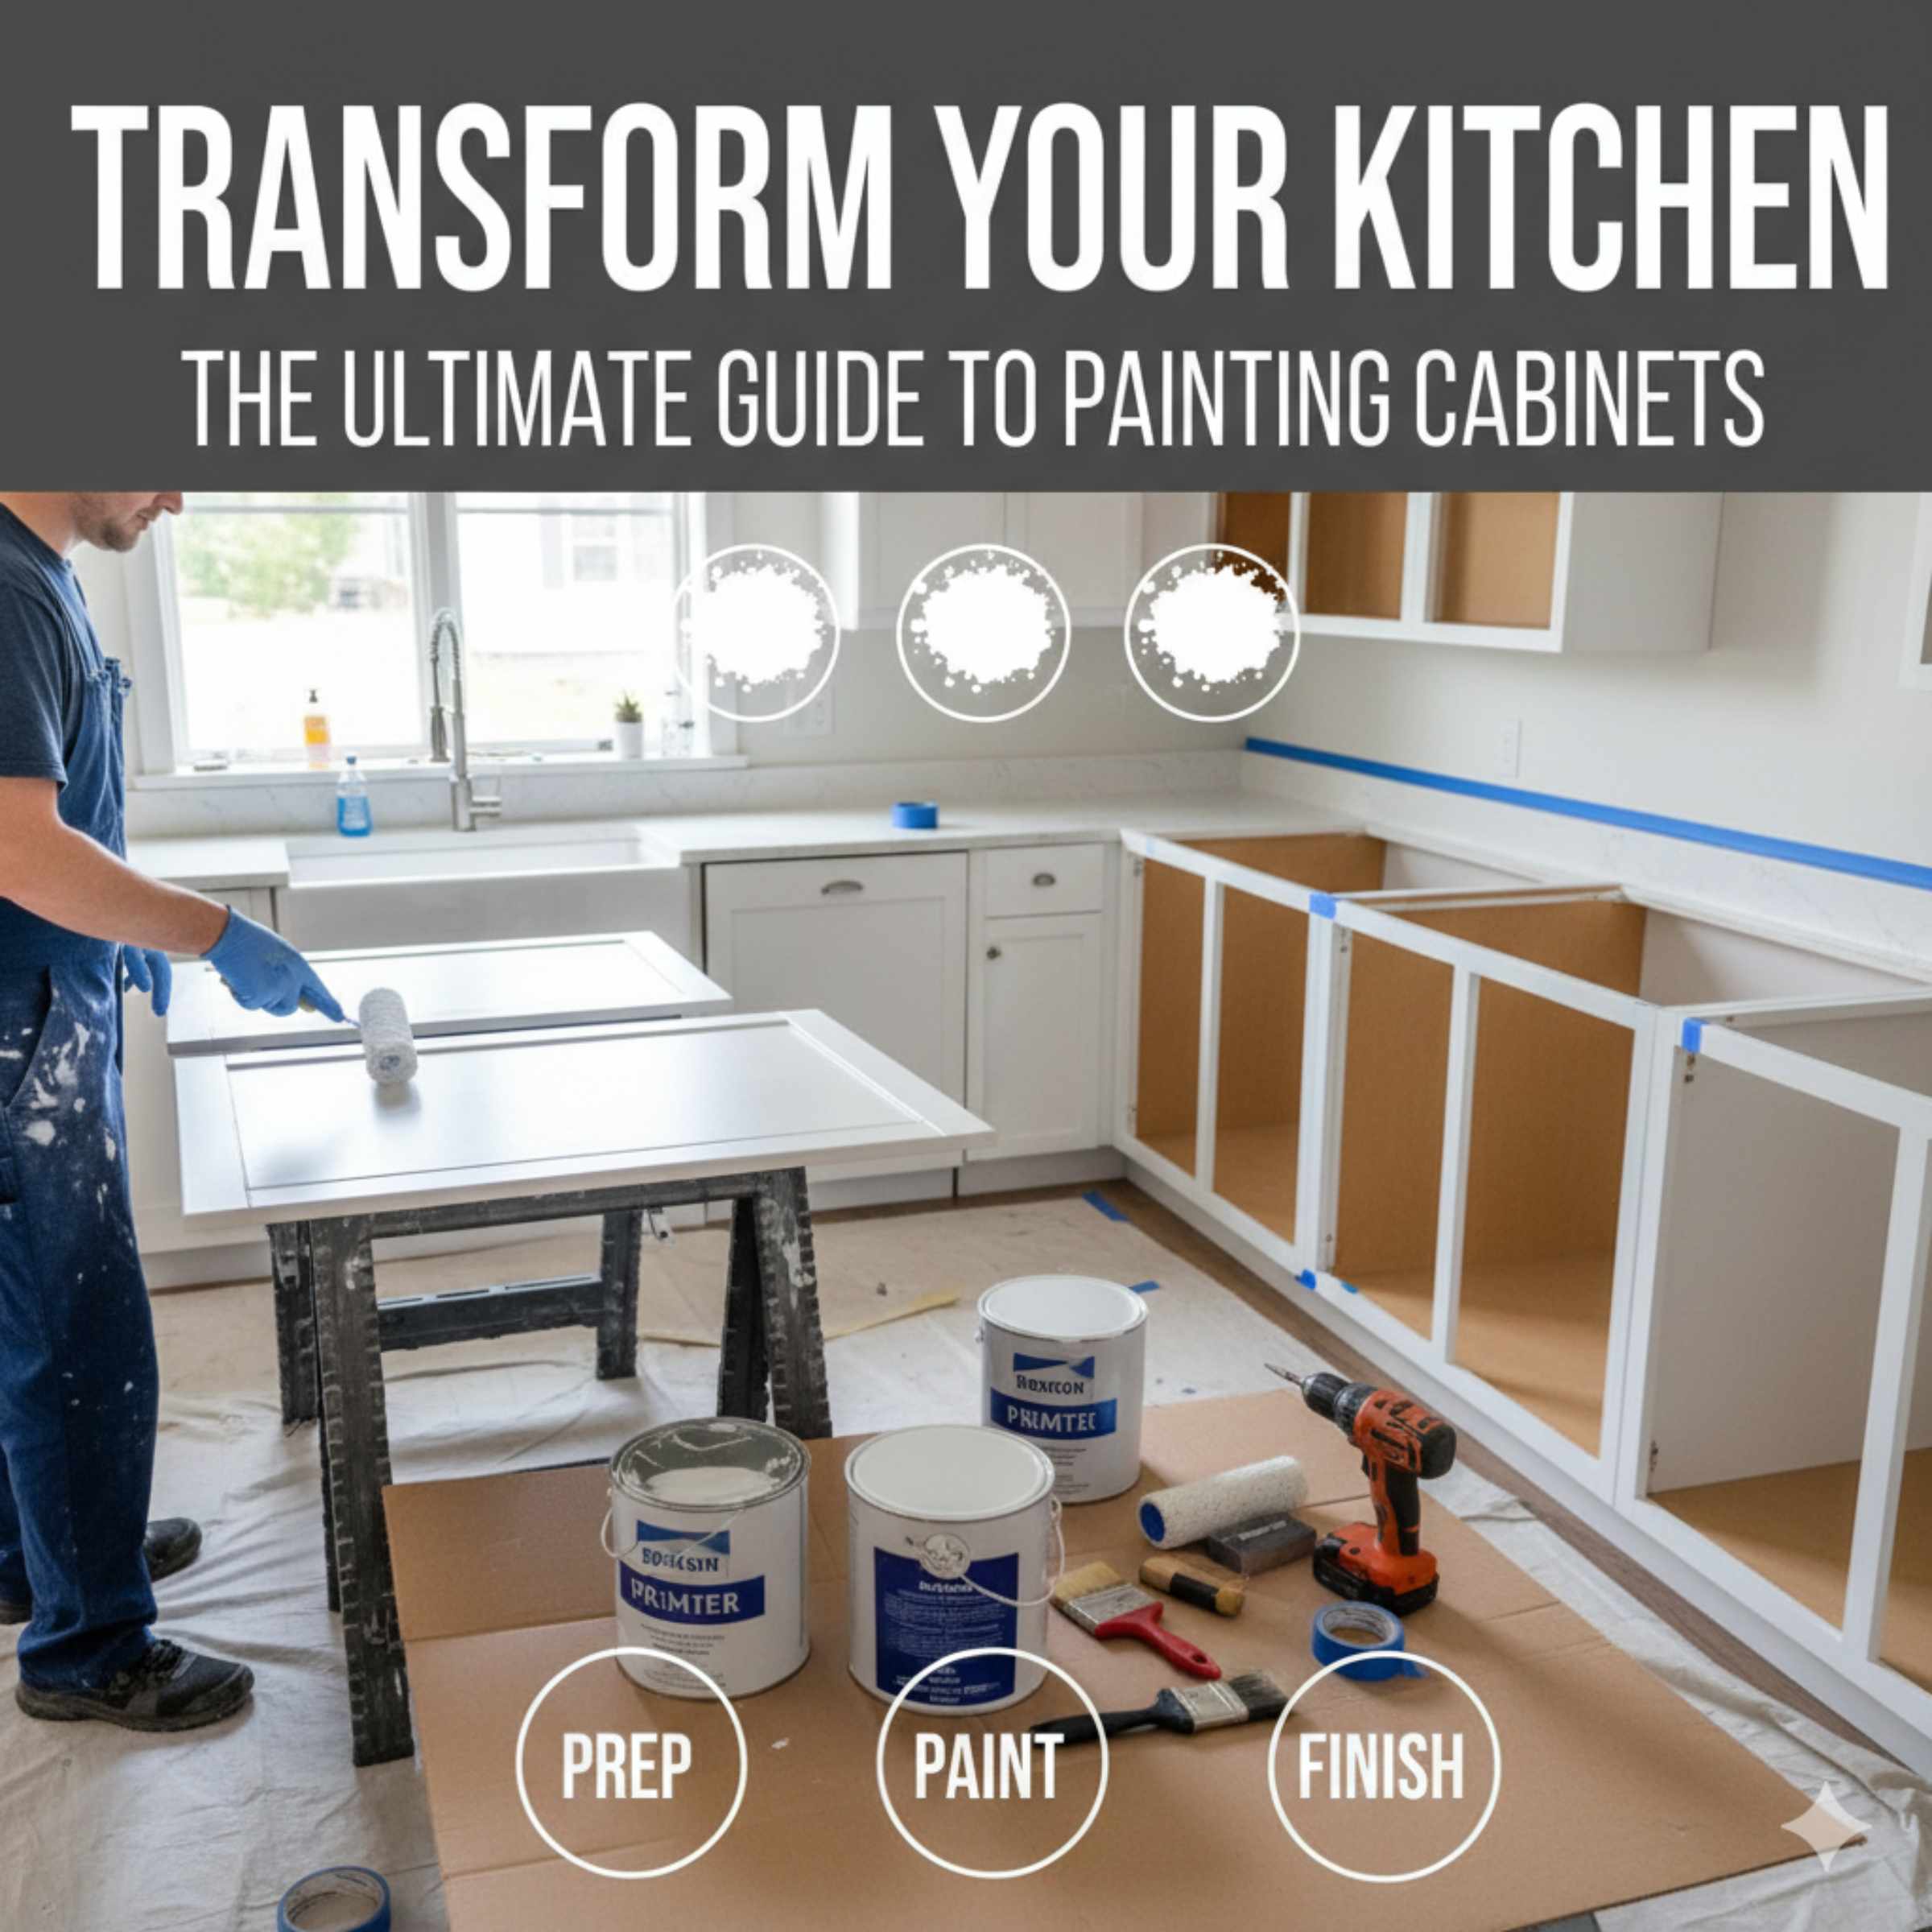
Step-by-Step Guide: Painting Kitchen Cabinets
Alright, let’s get down to business! This is where we’ll transform those cabinets. Take your time, follow each step carefully, and you’ll be amazed at the results.
Step 1: Empty and Clean Your Cabinets
Start by removing everything from inside your cabinets and drawers. Then, it’s time for a deep clean. Kitchen cabinets accumulate grease, grime, and food splatters. Using a good degreaser and a sponge, thoroughly clean all surfaces – doors, drawer fronts, and frames. Rinse with clean water and allow them to dry completely. This step is critical for paint adhesion.
Step 2: Remove Doors, Drawers, and Hardware
Carefully remove all cabinet doors and drawer fronts. It’s helpful to label them (e.g., with painter’s tape on the inside) so you know exactly where they go back. Use your screwdriver or drill to remove hinges, handles, and knobs. Keep all hardware and screws organized in labeled bags.
Step 3: Prepare Your Workspace
Lay down drop cloths or plastic sheeting to protect your floors and countertops. If you’re painting in place, use painter’s tape to mask off any adjacent walls, backsplashes, or appliances you don’t want to paint. Ensure the area is well-ventilated. If possible, set up a dedicated painting station in a garage or a well-ventilated room for the doors and drawer fronts.
Step 4: Sanding is Key!
This is arguably the most important step for a smooth, lasting finish. Lightly sand all the surfaces you plan to paint. For cabinets that are already painted, a 120-150 grit sandpaper is usually sufficient to scuff up the surface and create “tooth” for the new paint and primer to adhere to. If you have any glossy or slick surfaces, sanding is essential. For bare wood or cabinets with minor imperfections, you might use a bit more sanding to smooth them out. After sanding, use a vacuum or a damp cloth to remove all dust. A tack cloth is excellent for picking up the finest dust particles.
Safety Tip: If your cabinets are old, consider testing for lead paint before sanding. The Environmental Protection Agency (EPA) provides guidance on safely handling potential lead paint hazards: EPA Lead Information.
Step 5: Repair Imperfections
Before priming, inspect your cabinets for any dents, dings, or holes. Fill these with wood filler or putty. Let it dry completely, then sand it smooth with fine-grit sandpaper (220 grit) so it’s flush with the surrounding surface.
Step 6: Prime Your Cabinets
Apply a thin, even coat of high-quality bonding primer. A good primer will seal the surface, block stains, and create an ideal base for your paint. Pay attention to detail, especially around edges and details. Allow the primer to dry thoroughly according to the manufacturer’s instructions. You might need a second coat of primer if you’re painting over a dark color or if the original finish is uneven.
Step 7: Sand Lightly (Again!)
Once the primer is completely dry, give it a very light sanding with fine-grit sandpaper (220 grit). This smooths out any minor imperfections or brush marks from the primer and ensures a super-smooth surface for your paint. Wipe away all dust with a tack cloth.
Step 8: Apply the First Coat of Paint
Now for the fun part! Stir your paint gently; don’t shake it, as this can create air bubbles. Apply a thin, even coat of your chosen paint. Work in sections, painting the detailed areas first with your brush, then using your foam roller for the larger, flat surfaces. Aim for smooth, consistent strokes. Avoid applying the paint too thickly, as this can lead to drips and an uneven finish. Let this coat dry completely, which can take several hours depending on humidity and paint type.
Step 9: Light Sanding Between Coats
After the first coat of paint is dry, lightly sand the entire surface with your fine-grit sandpaper (220 grit). This might seem tedious, but it’s crucial for achieving a smooth, professional finish. It knocks down any tiny bumps or imperfections and ensures the next coat adheres perfectly. Wipe away all dust with a tack cloth.
Step 10: Apply the Second Coat of Paint
Apply your second coat of paint, following the same technique as the first. Again, work in thin, even layers. Most cabinet painting projects require two coats for full coverage and durability. If after the second coat you notice any areas that need more attention, you can apply a third coat after another light sanding and dusting.
Step 11: Reassemble
Once the final coat of paint is completely dry (and I mean completely dry – check the paint can for recommended drying and curing times, which can be 24-72 hours for full hardness), it’s time to reattach the hardware and rehang your doors and drawers. Reinstall the hinges, handles, and knobs. Carefully put the doors and drawers back in place, ensuring everything aligns correctly. If you labeled them, this step will be a breeze!
Step 12: Final Touches and Curing
Step back and admire your work! Clean up your workspace, remove painter’s tape, and put your kitchen back in order. Remember that paint takes time to fully cure and reach its maximum hardness. Be gentle with your newly painted cabinets for the first few weeks. Avoid abrasive cleaners or heavy scrubbing.
Painting Cabinets In Place vs. Removing Them
You have two main options for painting your cabinets: painting them while they are still installed on the walls, or removing them to paint in a more controlled environment. Each has pros and cons:
| Method | Pros | Cons |
|---|---|---|
| Painting In Place |
|
|
| Removing Doors & Drawers |
|
|
For the best possible finish, especially for beginners, I strongly recommend removing the doors and drawer fronts. This allows you to lay them flat and paint them evenly, significantly reducing the chances of drips and ensuring a smooth, professional look. It does take more time, but the results are usually worth it.
When to Consider a Sprayer
If you’re aiming for that ultra-smooth, factory-like finish, an HVLP (High Volume, Low Pressure) sprayer is the way to go. These tools atomize the paint, spraying a very fine mist that coats surfaces evenly. While they offer a superior finish, they also come with a learning curve:
- Pros: Unmatched smoothness, fastest application, can get into nooks and crannies easily.
- Cons: Requires significant practice to master, creates overspray that needs careful containment, more expensive to buy or rent, requires thinning paint to specific consistencies.
For a first-time cabinet painting project, I’d suggest sticking with brushes and rollers. If you’re feeling adventurous and have the budget, renting an HVLP sprayer and practicing on scrap wood first can be a great option for a truly professional outcome.
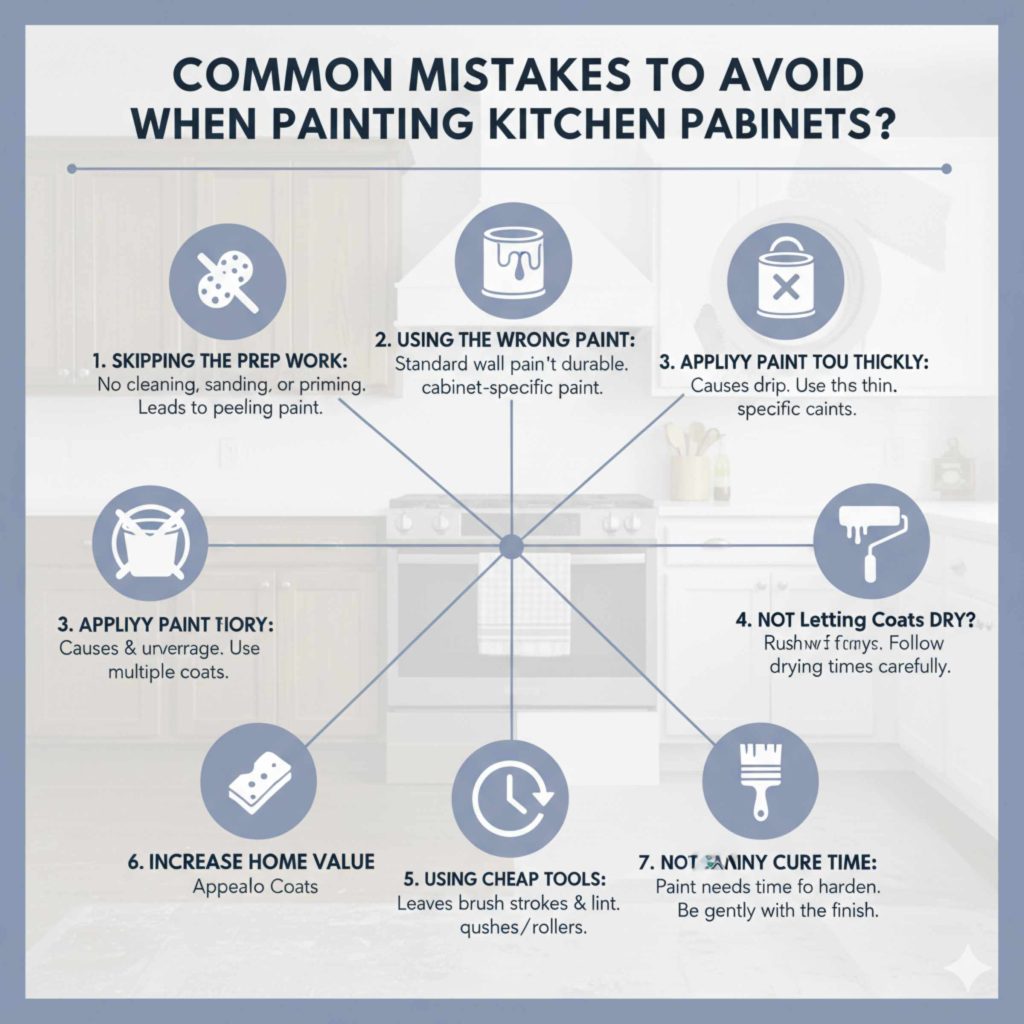
Common Mistakes to Avoid
Even with the best intentions, a few common pitfalls can derail your cabinet painting project. Let’s make sure you dodge them:
- Skipping the Prep Work: This is the number one mistake. Not cleaning thoroughly, not sanding enough, or not priming properly will lead to paint that peels, chips, or doesn’t adhere well.
- Using the Wrong Paint: Standard wall paint isn’t durable enough for cabinets. Always use paint designed for cabinets or high-traffic furniture.
- Applying Paint Too Thickly: Thick coats lead to drips, uneven coverage, and longer drying times. Thin, multiple coats are always better.
- Not Letting Coats Dry Completely: Rushing between coats can cause the paint to peel or become gummy. Always follow drying times.
- Using Cheap Brushes/Rollers: Low-quality tools leave brush strokes and lint, ruining the finish. Invest in good-quality applicators.
- Not Sanding Between Coats: This step is vital for smoothness. Don’t skip it!
- Forgetting to Cure Time: Paint needs time to harden fully. Being too rough too soon can damage the finish.
Frequently Asked Questions (FAQ)
Q1: How long does it take to paint kitchen cabinets?
A: The time can vary greatly depending on your cabinet size, how many doors and drawers you have, and whether you remove them. A typical DIY project can take anywhere from 3 days to a full week, including drying and curing times. Rushing the process is the biggest mistake you can make.
Q2: What’s the best primer for kitchen cabinets?
A: A high-quality bonding primer is essential. Look for one that is specifically designed for cabinets or furniture, or a stain-blocking primer. Brands like Kilz or Zinsser offer excellent options that adhere well to various surfaces and provide a good base for paint.
Q3: Can I paint laminate cabinets?
A: Yes, you can! Laminate can be tricky because paint doesn’t always stick well. The key is thorough cleaning, sanding (often with a slightly coarser grit, like 80-100, to create texture), and using a strong bonding primer. Some people even use a liquid deglosser before sanding. Always test in an inconspicuous area first.
Q4: What if my cabinets have a glossy finish?
A: Glossy finishes are the most challenging for paint adhesion. You absolutely must scuff sand the surface thoroughly with 120-150 grit sandpaper to create a matte surface that the primer and paint can grip. A good bonding primer is also non-negotiable.
Q5: How do I prevent brush strokes?
A: Use high-quality synthetic brushes, apply paint in thin, even coats, and try to maintain a consistent direction of your strokes. Letting the paint self-level helps. For large, flat areas, foam rollers are best. Don’t overwork the paint; apply it and then lightly smooth it out.
Q6: How do I clean my painted cabinets after they are done?
A: Use a soft cloth or sponge with mild dish soap and water. Wipe gently. Avoid abrasive cleaners, scrub brushes, or harsh chemicals, as these can damage the paint finish. For stubborn grease spots, a bit more dish soap and a gentle wipe should do the trick. Always dry the cabinets with a clean cloth after washing.
Conclusion
There you have it – a comprehensive guide to painting your kitchen cabinets like a pro, even if you’ve never tackled a project like this before. Remember, the secret to a beautiful, lasting finish lies in meticulous preparation: thorough cleaning, diligent sanding, and a quality primer. Don’t rush the process; allow ample drying time between coats and for the paint to cure. By following these steps, you’ll not only save money but also gain the immense satisfaction of transforming your kitchen with your own hands. Your newly painted cabinets will be a source of pride and a beautiful backdrop for many meals and memories to come. Happy painting!