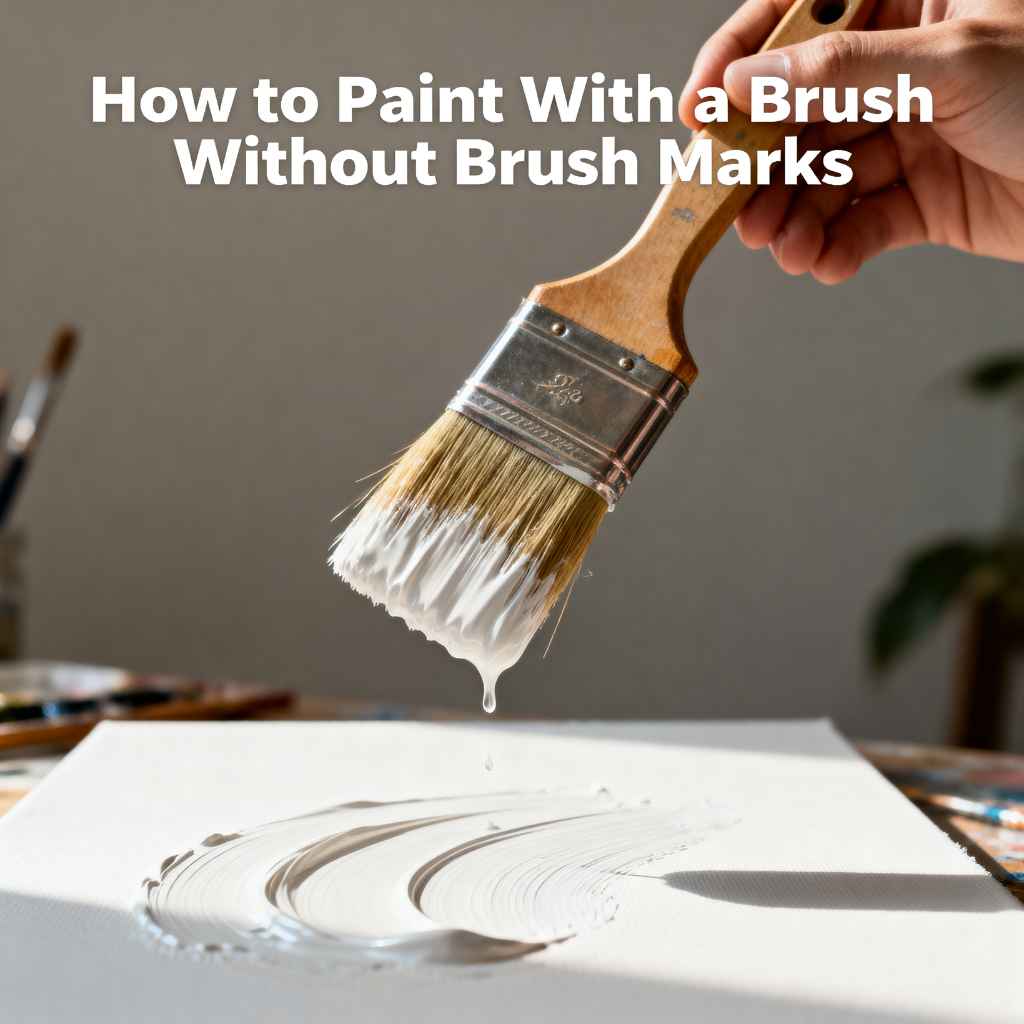
How to Paint With a Brush Without Brush Marks
Learning to paint without seeing those annoying brush strokes can feel tricky, especially when you’re just starting out. It’s a common challenge because getting that smooth finish takes a little know-how. But don’t worry, it’s totally achievable!
We’re going to break down how to paint with a brush without brush marks in a super simple way. Follow these easy steps, and you’ll be painting like a pro in no time. Let’s get that perfect, smooth look!
Achieving a Smooth Finish How to Paint With a Brush Without Brush Marks
Getting a smooth paint finish is what many painters aim for. Brush marks can sometimes distract from the overall look of your artwork or project. This section will explore the foundational techniques and principles that help you achieve a surface free from visible brush strokes.
We will cover the essential tools and how to use them correctly, along with the preparation steps that make a big difference. Understanding these basics is key to making your paintings look polished and professional.
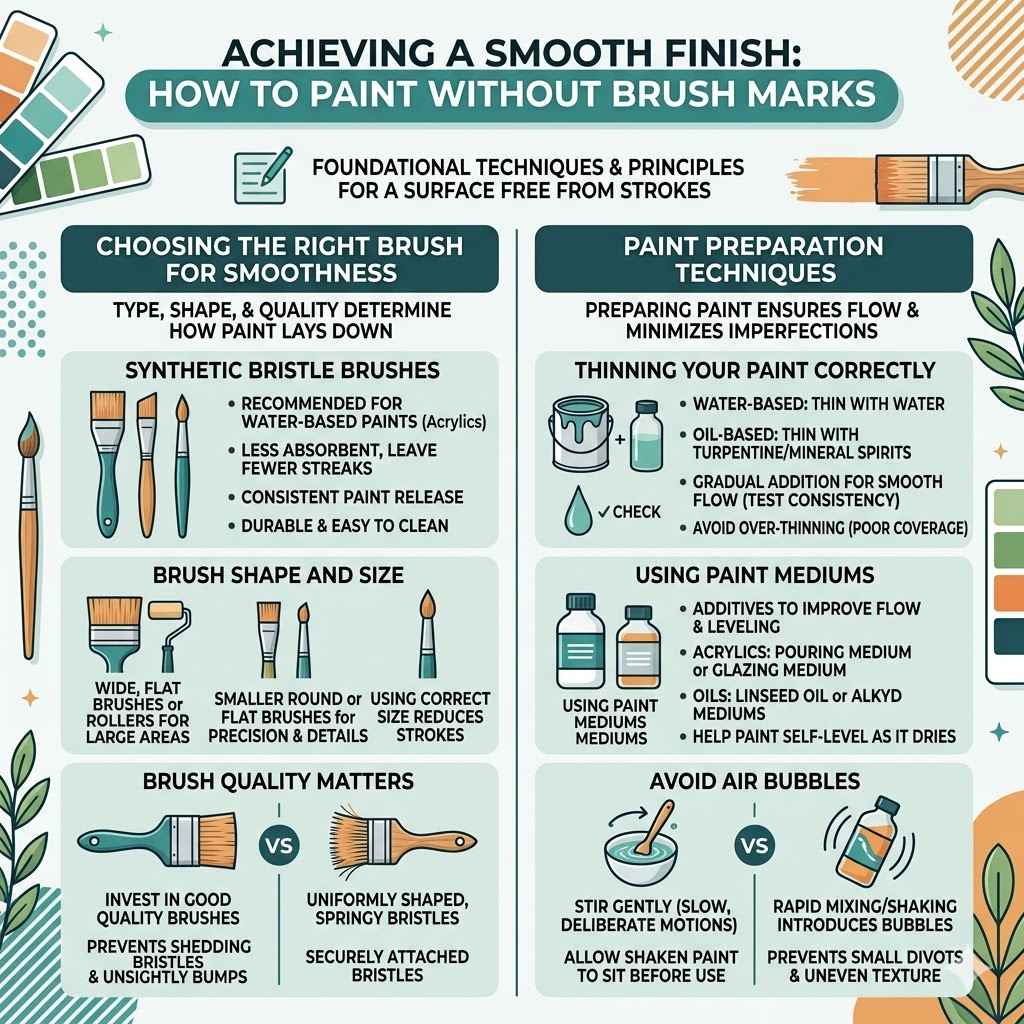
Choosing the Right Brush for Smoothness
The type of brush you use plays a huge role in how your paint lays down. Different brush hairs have different properties. Synthetic brushes are often recommended for acrylics and latex paints because they are less absorbent and tend to leave fewer streaks.
Natural bristle brushes can be great for oil paints but might leave more texture if not used carefully. The shape and size of the brush also matter; flat brushes are good for broad strokes, while round brushes offer more control for details.
Synthetic Bristle Brushes
Synthetic bristles, like nylon or polyester, are designed to be smooth and durable. They don’t soak up as much paint as natural bristles, which helps prevent overloading the brush and leaving thick, uneven marks. These are excellent for water-based paints like acrylics and latex, offering a consistent release of paint for a seamless application. Their resilience means they can withstand rigorous cleaning without losing their shape, ensuring longevity and continued smooth performance.
Brush Shape and Size
The shape and size of your brush influence the application and the resulting texture. For large, smooth areas, a wide, flat brush or a roller is ideal. For smaller details or areas where precision is needed, a smaller round or flat brush works best. Using a brush that’s too small for a large area will inevitably lead to more strokes and less coverage. Conversely, a brush that’s too large for a small detail can be difficult to control, resulting in unwanted marks.
Brush Quality Matters
Don’t skimp on brush quality. Cheaper brushes often shed bristles, which embed in your paint, creating unsightly bumps and marks. They also tend to have poorly shaped bristles that don’t hold their form well. Investing in a good quality brush ensures that the bristles are uniformly shaped, springy, and securely attached, leading to a much smoother and more predictable paint application. A well-made brush feels better in your hand and performs better on the surface.
Paint Preparation Techniques
How you prepare your paint before it even hits the brush is just as important as the brush itself. Thinning the paint to the right consistency ensures it flows smoothly and evenly. Adding a medium can also improve the paint’s flow and help it level out.
Stirring the paint gently, rather than shaking it vigorously, prevents air bubbles from forming, which can cause imperfections on the surface. Proper preparation sets the stage for a flawless finish.
Thinning Your Paint Correctly
Paint that is too thick will grab onto the brush and leave obvious strokes. For water-based paints, you can thin them with a little water. For oil-based paints, use turpentine or mineral spirits. The key is to add thinning agents gradually, stirring gently until you reach a consistency that flows smoothly but isn’t watery. A good test is to see if it drips off the brush in a steady stream without being too thick or too runny. Over-thinning can lead to poor coverage and a chalky finish.
Using Paint Mediums
Paint mediums are additives that can improve the paint’s properties. For acrylics, a pouring medium or a glazing medium can help the paint flow more easily and level out. For oils, linseed oil or alkyd mediums are common choices. These mediums can extend the paint, enhance its sheen, and improve its ability to blend smoothly. They help the paint self-level as it dries, minimizing the appearance of brush marks.
Avoiding Air Bubbles
When you stir or mix paint, try to do so gently. Rapid mixing or vigorous shaking can introduce tiny air bubbles into the paint. These bubbles can pop as the paint dries, leaving small divots or an uneven texture on the surface. Always stir your paint from the bottom up, slowly and deliberately, to incorporate any settled pigment without whipping air into it. If you’ve shaken a can of paint, let it sit for a while before use to allow any trapped air to escape.
Applying Paint for a Smooth Finish How to Paint With a Brush Without Brush Marks
The actual act of applying paint is where many beginners struggle. It’s not just about spreading color; it’s about technique. This section will guide you through the methods that help create that desirable seamless look.
We’ll cover how to load your brush, the direction of your strokes, and how to handle overlapping areas. Mastering these application techniques is crucial for achieving a professional and polished final product.
Loading Your Brush Properly
How much paint you put on your brush, and where you put it, makes a big difference. Too little paint means you’ll have to go over the same spot many times, creating streaks. Too much paint can lead to drips and globs.
The goal is to have enough paint to cover the area in one or two smooth passes. Distribute the paint evenly across the bristles, not just on the tips.
Even Distribution of Paint
Dip your brush into the paint and then gently swirl it on a palette or in a clean container. Load the brush so that paint covers about half to two-thirds of the bristles. Avoid overloading the brush, which can cause drips and thick marks. Ensure the paint is distributed evenly across the entire working surface of the brush, not just clumped at the tip. This allows for a consistent transfer of paint to your surface.
Avoiding Too Much or Too Little Paint
Having just the right amount of paint is key. If you don’t have enough, you’ll press too hard and leave thin spots or have to go over an area repeatedly, causing brush marks. If you have too much, you’ll get drips and thick ridges of paint. Practice loading your brush until you feel comfortable with the amount needed for a single, smooth stroke. It’s often better to apply multiple thin coats than one thick one.
Using a Palette Knife for Loading
For some paints, especially thicker ones like oil or heavy body acrylics, using a palette knife to load your brush can be beneficial. This method allows you to scoop up a controlled amount of paint and then gently press it onto the bristles of your brush, ensuring it’s evenly distributed. This avoids the problem of dipping directly into a can or tub, which can lead to uneven loading and potential contamination of your paint supply.
Stroke Direction and Overlapping
The way you move your brush across the surface is critical. Long, consistent strokes in one direction are often best for minimizing visible lines. Overlapping strokes need to be done carefully.
If you overlap wet paint with wet paint, you can blend them smoothly. Overlapping dried paint requires a lighter touch.
Consistent Stroke Direction
Always try to paint in long, continuous strokes in a single direction. For horizontal surfaces, paint from left to right or right to left. For vertical surfaces, paint from top to bottom or bottom to top. Maintaining a consistent direction helps the paint lay down evenly and reduces the jarring effect of varying stroke patterns. Think of it like laying down a carpet; you want the fibers all going the same way.
Working Wet-on-Wet
When you apply a new layer of paint while the previous layer is still wet, it’s called working wet-on-wet. This technique allows the paints to blend seamlessly, and the brush strokes from the second layer can easily meld into the first, effectively hiding them. This is particularly useful for creating smooth gradients or soft transitions between colors without distinct lines.
Feathering Your Strokes
As you reach the end of a stroke, lighten the pressure on your brush. This technique, often called “feathering,” helps to fade the paint out gently, leaving a softer edge and reducing the harsh stop of a stroke. It’s like fading out a pencil line rather than making a sharp stop. This gradual release of paint minimizes the visible edge of your brush mark.
Dealing with Overlapping Strokes
When you need to overlap strokes, do so with care. If the paint is still wet, you can gently overlap and blend. If the paint has started to dry, use very light pressure. Sometimes, going over a dried stroke with a clean, slightly damp brush can help smooth out any ridges left behind. This helps to unify the surface and make the transition between strokes almost invisible.
The Role of Brush Pressure
The pressure you apply with your brush directly impacts how much paint is deposited and how it spreads. Too much pressure will force the bristles apart, pushing paint into distinct lines. Too little pressure means the paint won’t spread effectively, leading to patchy coverage.
Finding that sweet spot is essential for smooth application.
Light and Consistent Pressure
The goal is to use light, consistent pressure throughout your stroke. This allows the paint to flow smoothly from the brush onto the surface without the bristles splaying out and creating harsh lines. Imagine you are gently guiding the paint rather than scrubbing it on. Consistent pressure ensures that each stroke looks similar to the last, contributing to an overall even finish.
Adjusting Pressure for Blending
You can also use pressure changes to help blend colors or soften edges. As you finish a stroke, gradually reduce the pressure to feather the paint out. If you’re blending two colors, a light, back-and-forth motion with the brush can help them merge smoothly, provided they are both still wet. The key is to be deliberate and gentle with your movements.
Practicing Stroke Techniques
It’s a good idea to practice your brush strokes on a scrap piece of material before working on your actual project. This allows you to experiment with different levels of pressure and paint consistency without the risk of ruining your main work. You can try applying paint in various directions and at different speeds to see how the pressure affects the outcome. This practice builds muscle memory and confidence.
Advanced Techniques for a Flawless Finish
Beyond the basics, there are more advanced methods to achieve an incredibly smooth and professional look. These techniques build upon the foundational knowledge, offering ways to refine your application and correct minor imperfections. We will explore the use of specialized tools, layering strategies, and finishing touches that elevate your painting from good to great.
These methods require a bit more practice but yield impressive results.
The Magic of Layering
Applying paint in multiple thin layers is one of the most effective ways to build depth and achieve a perfectly smooth surface. Each layer is applied after the previous one has dried. This technique allows for better control and a more even distribution of paint, naturally minimizing brush marks.
It’s like building a smooth wall with many thin coats of plaster instead of one thick one.
Thin Coats for Smoothness
Instead of trying to achieve full coverage in one go, apply several thin coats of paint. Each thin coat will lay down more evenly and with less texture. This process also allows you to build up color intensity gradually and correct any minor mistakes as you go. Patience is key here, as you’ll need to let each layer dry before applying the next.
Allowing Dry Time Between Coats
Ensure each layer of paint is completely dry before applying the next. This prevents the new paint from lifting or smudging the layer underneath. Drying times can vary depending on the type of paint, humidity, and thickness of the application. Using a fan on a low setting can help speed up drying, but avoid direct heat which can cause cracking.
Sanding Between Layers (Optional)
For an ultra-smooth finish, especially on furniture or cabinetry, you can lightly sand between layers. Use a very fine-grit sandpaper (like 220-grit or higher) and sand gently. This removes any slight imperfections or dried paint nibs. Wipe away the dust thoroughly with a tack cloth or a damp rag before applying the next coat of paint. This step is crucial for achieving a glass-like finish.
Using Glazing Techniques
Glazing involves applying very thin, transparent or semi-transparent layers of paint over an existing dried layer. This technique can create luminous effects, deepen colors, and blend transitions smoothly, all while obscuring brush strokes. It’s a sophisticated method that adds a professional touch to any piece.
What is Glazing
Glazing is the application of a thin, translucent layer of paint. This layer is typically made by mixing a small amount of pigment with a glazing medium (like a flow improver for acrylics or a glazing liquid for oils). The medium allows the paint to spread thinly and evenly, and it dries clear or with just a hint of color. This layer is applied over a fully dried underlayer.
How Glazing Hides Marks
Because glazes are so thin and translucent, they essentially “float” over the surface, filling in any microscopic ridges left by previous brush strokes without adding significant texture. The light then reflects off the underlayer, giving the illusion of depth and smoothness. If done correctly, the brush strokes used to apply the glaze itself become virtually invisible.
Creating Depth and Richness
Glazing is not just about hiding marks; it’s also a powerful way to add depth, richness, and subtle shifts in color. By applying multiple glazes, you can build up complex hues and create a luminous quality that is hard to achieve with opaque paint alone. This method is often used in classical oil painting to achieve fine detail and subtle color blending.
The Benefits of Using a High-Quality Topcoat
Once your painting is complete and fully dry, applying a protective topcoat can seal in your work and further enhance its smoothness. Varnishes and sealers can provide a uniform sheen and fill in any remaining micro-imperfections, giving the final piece a polished and professional look.
Types of Topcoats
There are various types of topcoats, including varnishes, sealers, and lacquers. They come in different finishes such as matte, satin, and gloss. A gloss finish tends to enhance smoothness the most, as it creates a very flat, reflective surface. Matte finishes can sometimes highlight texture, so choose wisely based on your desired effect.
Applying Topcoats Evenly
Just like with paint, apply topcoats in thin, even layers. Use a high-quality brush or a foam roller for application. Work in consistent directions and avoid overworking the area. Allow each coat to dry completely before applying the next. Following the manufacturer’s instructions is crucial for achieving the best results and avoiding issues like peeling or cracking.
Improving Durability and Shine
Beyond aesthetics, topcoats protect your painted surface from wear, tear, and environmental damage. They can make the surface more durable, easier to clean, and provide a consistent level of shine across the entire piece. This final step is an investment in the longevity and appearance of your work.
Common Mistakes and How to Avoid Them
Even with the best intentions, beginners often fall into common traps that lead to visible brush marks. Recognizing these pitfalls is the first step to overcoming them. This section will highlight these frequent errors and provide practical advice on how to steer clear of them.
Learning from these mistakes can significantly speed up your progress towards a smooth painting technique.
Over-Working the Paint
One of the most common mistakes is going back over paint that has already started to dry. This action tends to drag the paint, creating streaks and uneven textures. It’s better to apply paint carefully and then leave it alone, or wait until it’s fully dry for corrections.
The Problem with Revisiting Dry Paint
When you try to smooth out or adjust paint that has begun to set, you often end up pushing the partially dried paint around. This creates a fuzzy, uneven texture and makes the brush strokes more prominent. It’s like trying to iron a wrinkled piece of fabric that’s already been creased in the wrong place.
Focus on One Pass Application
Aim to apply the paint smoothly and evenly in as few passes as possible. If you notice a mistake, it’s often better to let it dry completely and then either sand it down or apply a new layer over it. For areas that require blending, ensure you’re working with wet paint to allow seamless transitions.
Knowing When to Stop
Learn to recognize when a section is finished. Resist the urge to keep fiddling with it. Over-working can degrade the paint film and lead to a less desirable finish. Trust your initial application if it looks good; often, over-correction is worse than the original perceived flaw.
Using Old or Damaged Brushes
Worn-out or damaged brushes can be a major source of frustration. Bristles that are bent, splayed, or missing will inevitably leave marks. Using a brush that is shedding its bristles is even worse, as you’ll be left picking them out of your paint.
The Impact of Damaged Bristles
If your brush bristles are bent out of shape, they won’t lay down paint evenly. They might create sharp lines or uneven coverage. If bristles are splayed, they can leave wide, scratchy marks. A brush that has lost its spring or shape will not provide the control needed for a smooth finish.
Regular Brush Maintenance
Properly cleaning and storing your brushes is vital. After each use, wash them thoroughly with soap and water for water-based paints, or with appropriate solvent for oil-based paints. Reshape the bristles and store them flat or bristle-side up so they maintain their form. Regularly inspect your brushes for damage.
When to Retire a Brush
Don’t be sentimental about old brushes. If a brush is shedding, its bristles are permanently bent, or it has lost its shape, it’s time to replace it. Using a damaged brush will almost always result in a less-than-perfect finish, no matter how good your technique. A good brush is an investment in your work.
Ignoring Surface Preparation
A smooth painting surface is crucial for a smooth paint finish. If the surface you’re painting on is rough, uneven, or dirty, the paint will highlight these imperfections. Proper preparation is non-negotiable for achieving a flawless outcome.
The Importance of a Clean Surface
Always ensure your surface is clean and free from dust, grease, or debris. These contaminants can interfere with paint adhesion and create bumps or rough spots. Wipe down the surface with a damp cloth or a cleaner appropriate for the material. For wood, a light sanding and dusting is often necessary.
Sanding for Smoothness
For materials like wood, plaster, or even old painted surfaces, sanding is essential. Start with a medium-grit sandpaper to smooth out major imperfections and then follow up with a fine-grit sandpaper to create a smooth, receptive surface. Always wipe away all dust created by sanding before painting.
Priming the Surface
Applying a primer can help create a uniform surface for your paint. Primer can seal porous materials, hide underlying colors, and provide a smooth, consistent base that allows the paint to adhere evenly. Choose a primer that is compatible with your paint type and the surface material. A good primer is like a foundation for your paint job.
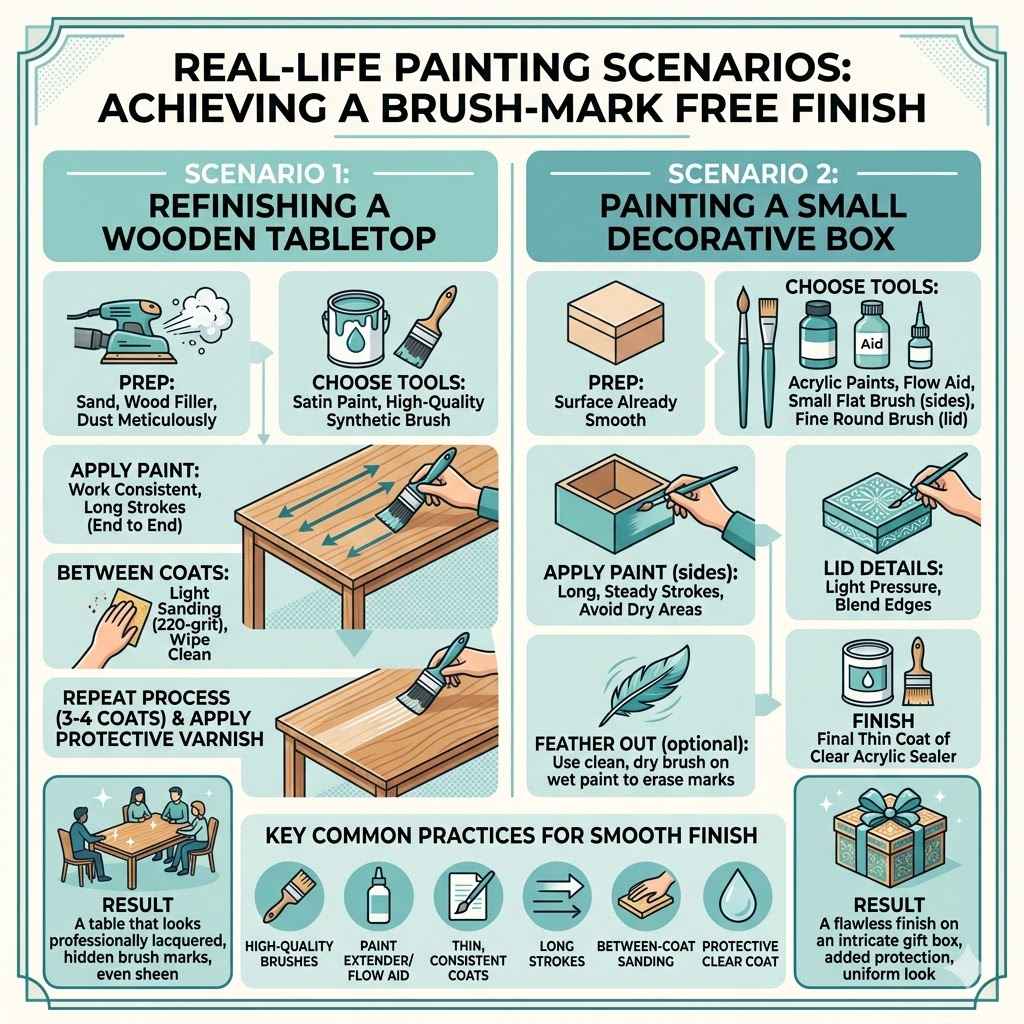
Real-Life Painting Scenarios
Let’s look at a couple of common situations where learning how to paint with a brush without brush marks is essential. These examples will show you how the techniques we’ve discussed can be applied in practical painting projects, helping you visualize the results and gain confidence.
Scenario 1: Painting a Wooden Tabletop
Imagine you’re refinishing a wooden dining table. You’ve sanded it smooth, applied a wood filler to any imperfections, and dusted it meticulously. You’ve chosen a beautiful satin paint. To achieve a smooth, durable finish, you’d use a high-quality synthetic bristle brush and thin your paint slightly with a water-based extender medium. You’d apply thin coats, working in consistent, long strokes from one end of the table to the other.
After the first coat dries, you might lightly sand with 220-grit sandpaper and wipe clean. You’d repeat this process for 3-4 coats. Finally, you’d apply a durable clear varnish in thin layers, again following a consistent direction, to protect the paint and give it a beautiful, even sheen that hides any trace of brush marks. The result would be a table that looks professionally lacquered.
Scenario 2: Painting a Small Decorative Box
Suppose you’re painting a small, intricate wooden box for a gift. The surface is already quite smooth, but you want a flawless finish. You opt for a high-quality small flat brush for the sides and a fine round brush for the lid details. You’ll use acrylic paints and ensure they are at a perfect consistency, perhaps with a drop of flow aid.
You load your brush just enough to cover the area. You paint in long, steady strokes, avoiding going over areas that are already drying. For the lid, you might use lighter pressure and blend the edges of your strokes to make them disappear. If any slight marks appear, you can use a clean, dry brush to gently feather them out while the paint is still wet. A final thin coat of clear acrylic sealer would add protection and a uniform finish.
Frequently Asked Questions
Question: What is the most common mistake beginners make when trying to avoid brush marks
Answer: The most common mistake is over-working the paint, meaning going back and forth on areas that have started to dry, which tends to drag and streak the paint.
Question: Can I use any kind of brush to achieve a smooth finish
Answer: No, the quality and type of brush matter a lot. High-quality synthetic brushes are generally recommended for water-based paints for a smoother application than worn-out or natural bristle brushes.
Question: How much should I thin my paint to avoid brush marks
Answer: Thin your paint gradually with the recommended medium or water until it flows smoothly from the brush in a steady stream, but is not too watery. Too thick paint leaves marks, and too thin paint can have poor coverage.
Question: Is it okay to paint over dried brush marks
Answer: Yes, if you have dried brush marks, the best approach is to lightly sand them down once fully dry and then apply thin, even coats of new paint. This helps to build a smooth surface gradually.
Question: How long should I wait between paint coats
Answer: You should wait until each coat of paint is completely dry before applying the next. Drying times vary based on paint type, temperature, and humidity, but touching the surface to ensure it’s not tacky is a good indicator.
Summary
Mastering how to paint with a brush without brush marks is about careful preparation, the right tools, and consistent application. By choosing quality brushes, properly thinning your paint, and using smooth, long strokes with light pressure, you can achieve a flawless finish. Layering thin coats and allowing proper drying time are key.
These techniques ensure your painted surfaces look smooth, professional, and beautiful.