How to Put in Recessed Lighting: A Step-by-Step Guide for Homeowners
Hey there! If you’re looking to brighten up your home with sleek, modern lighting, recessed lighting is a fantastic choice. I’ve tackled this project myself, and let me tell you, it’s a game-changer for any room. Whether you’re sprucing up your living room, kitchen, or even a cozy bedroom, recessed lights add a clean, polished look while saving space. In this guide, I’m sharing everything I’ve learned about how to put in recessed lighting. I’ll walk you through each step, share tips from my own experience, and make sure you feel confident to take on this project. Let’s dive in and light up your home!
Why Choose Recessed Lighting for Your Home?
Recessed lighting, often called can lights or downlights, sits flush with your ceiling, giving a seamless and modern vibe. I love how it doesn’t clutter the space like bulky fixtures do. It’s perfect for highlighting artwork, brightening workspaces, or creating a cozy ambiance. Plus, it’s versatile—you can use it in almost any room. When I installed recessed lights in my kitchen, it made the space feel bigger and more inviting. Another perk? It boosts your home’s value. Buyers in the USA love modern upgrades like this, and it’s a project you can often do yourself to save on costs.
But it’s not just about looks. Recessed lighting offers practical benefits too. It provides even illumination, reduces shadows, and works well with dimmers for mood control. I found it especially helpful in my dining area, where I can dim the lights for a cozy dinner or brighten them for game nights. Before we get into the how-to, let’s talk about what you’ll need to make this happen.
Tools and Materials You’ll Need
Getting the right tools and materials is half the battle. When I started my project, I made a checklist to stay organized. Here’s what you’ll likely need:
| Item | Purpose |
|---|---|
| Recessed lighting kits | Includes the housing and trim for each light. Choose LED for energy savings. |
| Stud finder | Locates ceiling joists to avoid cutting into them. |
| Drywall saw or hole saw | Cuts precise holes in the ceiling for the lights. |
| Voltage tester | Ensures the power is off for safety. |
| Wire strippers and cutters | Prepares electrical wires for connection. |
| Electrical tape and connectors | Secures wire connections safely. |
| Drill and bits | Helps with mounting and running wires. |
| Ladder | Reaches the ceiling comfortably. |
| Measuring tape and pencil | Marks exact spots for light placement. |
| Safety gear (gloves, goggles) | Protects you while cutting and wiring. |
I recommend LED recessed lights because they last longer and save on energy bills. When I bought my kits, I chose 4-inch lights for a sleek look, but 6-inch ones are great for larger rooms. Check the housing type too—new construction housings work if you have open ceiling access, but remodel housings are better for existing ceilings. I used remodel housings since my ceiling was already up, and they were a breeze to install.
Planning Your Recessed Lighting Layout
Before you start cutting holes, you need a solid plan. Trust me, I learned this the hard way when I almost put a light right under a ceiling joist! Start by deciding where you want the lights. Think about the room’s purpose. In my living room, I wanted general lighting, so I spaced the lights evenly. In the kitchen, I focused them over the countertops for task lighting.
Here’s how to plan your layout:
- Measure the room. Use a measuring tape to get the length and width. This helps you decide how many lights you need.
- Space the lights. A good rule is to place lights 4 to 6 feet apart for even coverage. For a 12×12 room, I used four lights in a square pattern.
- Avoid joists. Use a stud finder to mark ceiling joists. You don’t want to cut into them—it’s a headache to fix.
- Consider focal points. If you have artwork or a dining table, position a light to highlight it. I placed one directly above my kitchen island, and it looks amazing.
- Check for symmetry. Step back and visualize the layout. I marked spots with a pencil to make sure everything looked balanced.
If you’re unsure, sketch the layout on paper first. I did this and taped it to the wall to double-check. Also, check local building codes. Some areas, like parts of California, require energy-efficient lights or specific wiring setups. A quick call to your local building department can save you trouble later.
Preparing Your Space for Installation
Safety first! Before you touch any wires, turn off the power at the circuit breaker. I used a voltage tester to double-check that the wires were dead. It’s a small step that can save your life. Next, clear the room. Move furniture, lay down drop cloths, and set up your ladder. I also wore safety goggles and gloves because drywall dust gets everywhere.
If you’re working in an attic, check for insulation or obstacles. I had to move some insulation in my attic to access the ceiling, which was a bit messy but manageable. Make sure you have enough clearance above the ceiling for the light housing—most need about 6 to 8 inches. If your ceiling is tight, look for low-profile housings designed for shallow spaces.
Cutting Holes for the Lights
Now comes the fun part—cutting the holes! This step can feel daunting, but it’s straightforward if you’re careful. Each recessed light kit comes with a template or measurement for the hole size. Mine was 4 inches, so I used a hole saw for clean cuts. Here’s how I did it:
- Mark the spots. Use your pencil marks from the layout. Double-check with a stud finder to avoid joists.
- Trace the template. Most kits include a paper template. Tape it to the ceiling and trace the circle with a pencil.
- Cut carefully. If you’re using a drywall saw, go slow to avoid jagged edges. A hole saw attached to a drill is faster and neater. I used a hole saw and was amazed at how quick it was.
- Clean up. Remove the cut drywall piece and vacuum any dust. Trust me, you don’t want dust falling into your eyes later!
Take your time here. A clean hole makes the light sit flush and look professional. I messed up one hole by rushing, and it took extra patching to fix. If you’re nervous, practice on a piece of scrap drywall first.
Wiring the Recessed Lights
Wiring might sound intimidating, but it’s manageable with basic skills. If you’re not comfortable with electrical work, hire a pro—this isn’t worth risking. Since I’d done some wiring before, I felt okay tackling it. Here’s the process I followed:
- Run the cable. Feed electrical cable (usually 14/2 or 12/2 Romex) from your power source to the first light. I ran mine from a nearby junction box.
- Connect the housing. Each light housing has a junction box. Open it and connect the wires: black to black (hot), white to white (neutral), and green or copper to ground. I used wire nuts and wrapped them with electrical tape for extra security.
- Daisy-chain the lights. If you’re installing multiple lights, run cable from one light to the next. I connected my four kitchen lights in a series, which worked great.
- Test connections. Before closing everything up, turn the power back on briefly to test. I flipped the breaker on, checked that the lights worked, then turned it off again.
Always follow local codes. In my area, I needed to secure cables with staples every 4.5 feet. If you’re adding a dimmer switch, install it now and connect it to the circuit. I added a dimmer in my dining room, and it’s been a total game-changer for setting the mood.
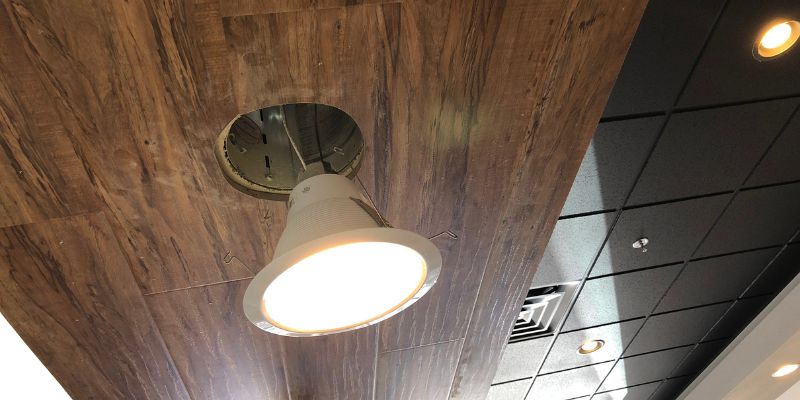
Installing the Light Housings
With the holes cut and wiring done, it’s time to install the housings. Remodel housings are designed to slide into the ceiling and lock in place. Here’s what I did:
- Insert the housing. Push the housing into the ceiling hole. Most have clips or springs that grip the drywall. Mine snapped in easily, but I had to wiggle one to get it flush.
- Secure the wires. Make sure the wiring is tucked neatly into the junction box and not pinched.
- Check alignment. Look from below to ensure the housing is flush with the ceiling. Adjust if needed.
New construction housings are different—they mount to joists before the drywall goes up. Since my project was a retrofit, remodel housings were perfect. If you’re doing new construction, you’ll need to install these earlier in the process.
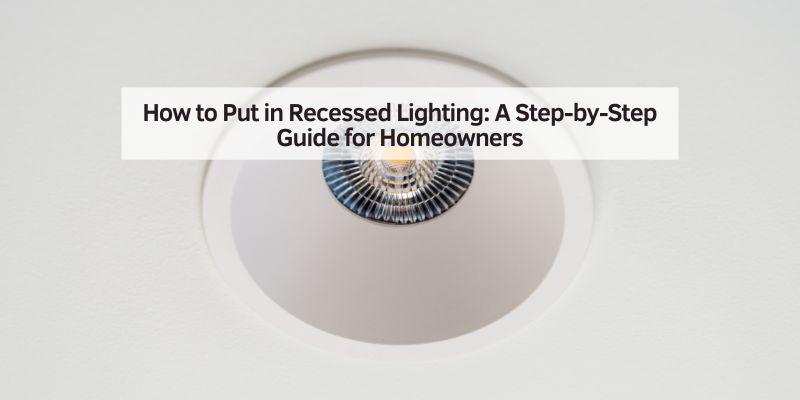
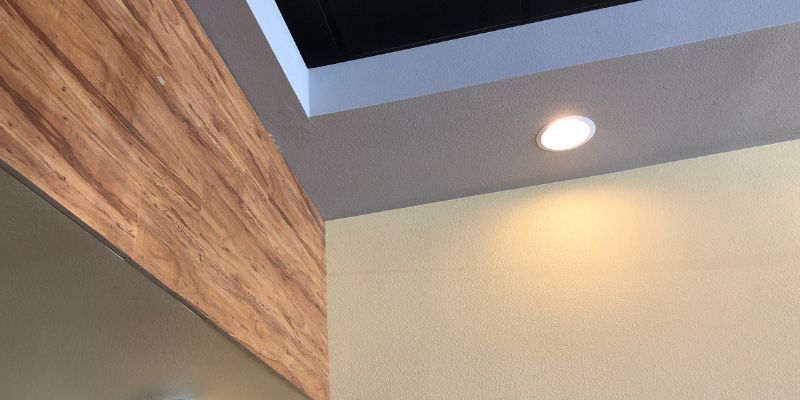
Adding the Trim and Bulbs
The trim is the visible part of the recessed light, and it’s what gives it that polished look. My kit came with baffle trims, which reduce glare and look sleek. Other options include adjustable trims for directing light or decorative ones for flair. Here’s how to finish up:
- Install the bulb. Most LED recessed lights have built-in bulbs, but if yours doesn’t, screw in an LED bulb. I used 2700K bulbs for a warm glow, but 3000K or 4000K work for brighter, cooler light.
- Attach the trim. Push the trim into the housing until it clicks. Mine had springs that held it tight against the ceiling.
- Test again. Turn the power on and admire your work. I flipped the switch and couldn’t believe how professional my kitchen looked!
If you’re painting the ceiling, do it before adding the trim to avoid messes. I learned this after getting paint on one of my trims—oops!
Tips for a Professional Finish
To make your recessed lighting look top-notch, here are some tricks I picked up:
- Patch imperfections. If your holes aren’t perfect, use drywall compound to smooth them out. I had to patch one slightly oversized hole, and it was barely noticeable after painting.
- Clean regularly. Dust can dull the light output. I wipe my trims every few months with a damp cloth.
- Use dimmers. They’re great for versatility. I installed dimmers in every room with recessed lights, and it’s so worth it.
- Choose the right color temperature. Warm white (2700K) feels cozy, while cool white (4000K) is crisp and modern. Test a bulb in the space before buying a full set.
Common Mistakes to Avoid
I made a few blunders along the way, so let me save you some trouble:
- Skipping the stud finder. Cutting into a joist is a pain. Always check first.
- Overcrowding lights. Too many lights can make a room feel harsh. Stick to the 4- to 6-foot spacing rule.
- Ignoring insulation ratings. If your lights will touch insulation, get IC-rated housings to prevent fire hazards. I double-checked this for my attic install.
- Rushing the wiring. Loose connections can cause flickering or outages. Take your time to secure every wire.
Cost of Installing Recessed Lighting
The cost depends on whether you DIY or hire a pro. For my four-light kitchen setup, I spent about $150 on materials (kits, wires, and a dimmer). Each LED recessed light kit cost me $25–$40, and wiring supplies were around $30. If you hire an electrician, expect to pay $100–$200 per light, including labor and materials. In the USA, costs vary by region—urban areas like New York or San Francisco are pricier than rural spots. Doing it myself saved me hundreds, but it took a weekend of work. If you’re not confident, the peace of mind from hiring a pro is worth it.
Maintaining Your Recessed Lights
Once your lights are in, maintenance is easy. LED bulbs last 10–15 years, so you won’t need to replace them often. I check mine yearly for dust or loose trims. If a light flickers, it’s usually a loose wire connection—turn off the power and check the junction box. For dimmable lights, ensure your dimmer is compatible with LEDs to avoid buzzing or flickering. I had to swap out an old dimmer for an LED-compatible one, and it solved the issue.
Conclusion
Installing recessed lighting was one of the best home improvement projects I’ve tackled. It transformed my spaces, making them feel modern, spacious, and inviting. From planning the layout to flipping the switch, every step taught me something new. With the right tools, a bit of patience, and this guide, you can do it too. Imagine the satisfaction of looking up at your ceiling, knowing you created that sleek, professional look yourself. So grab your tools, plan carefully, and light up your home! If you run into questions, check out the FAQs below or reach out to a local electrician for advice. Happy installing!
Frequently Asked Questions
Can I install recessed lighting in a finished ceiling?
Yes, you can! I used remodel housings for my finished ceiling, and they worked perfectly. These housings are designed to slide into pre-cut holes without needing attic access. Just make sure you have enough clearance above the ceiling for the housing.
How many recessed lights do I need for my room?
It depends on the room’s size and purpose. For general lighting, I spaced my lights 4 to 6 feet apart. A 12×12 room typically needs 4–6 lights. For task lighting, like over a kitchen counter, place them closer to the work area.
Do I need a permit to install recessed lighting?
In some areas, yes. I called my local building department to check. Minor electrical work often doesn’t need a permit, but adding new circuits might. It’s best to confirm with your local codes to avoid fines.
Are LED recessed lights worth the cost?
Absolutely! I chose LEDs because they last longer (up to 15 years) and use less energy than traditional bulbs. They’re pricier upfront, but they save money on your electric bill over time.
Can I install recessed lighting myself, or should I hire a professional?
If you’re comfortable with basic electrical work, you can DIY. I did it myself and saved a lot, but it took careful planning. If you’re unsure about wiring or cutting, hire an electrician for safety and peace of mind.