How to Rekey a Kwikset Door Knob: Step-by-Step Guide
Rekeying a Kwikset door knob is a simple process. It saves you money and enhances security.
With the right tools, you can do it yourself. Home security is crucial. Sometimes, you need to change your locks. But buying new locks can be expensive. Rekeying is a cost-effective solution. It allows you to use the same lock with a new key.
This can be necessary after moving into a new home or losing your keys. Many homeowners choose Kwikset for its reliability and ease of use. Learning to rekey a Kwikset door knob can be empowering. It gives you control over your home’s security. Plus, it’s an easy skill to acquire. This guide will walk you through the process. You’ll soon see how straightforward it can be.
Tools Needed
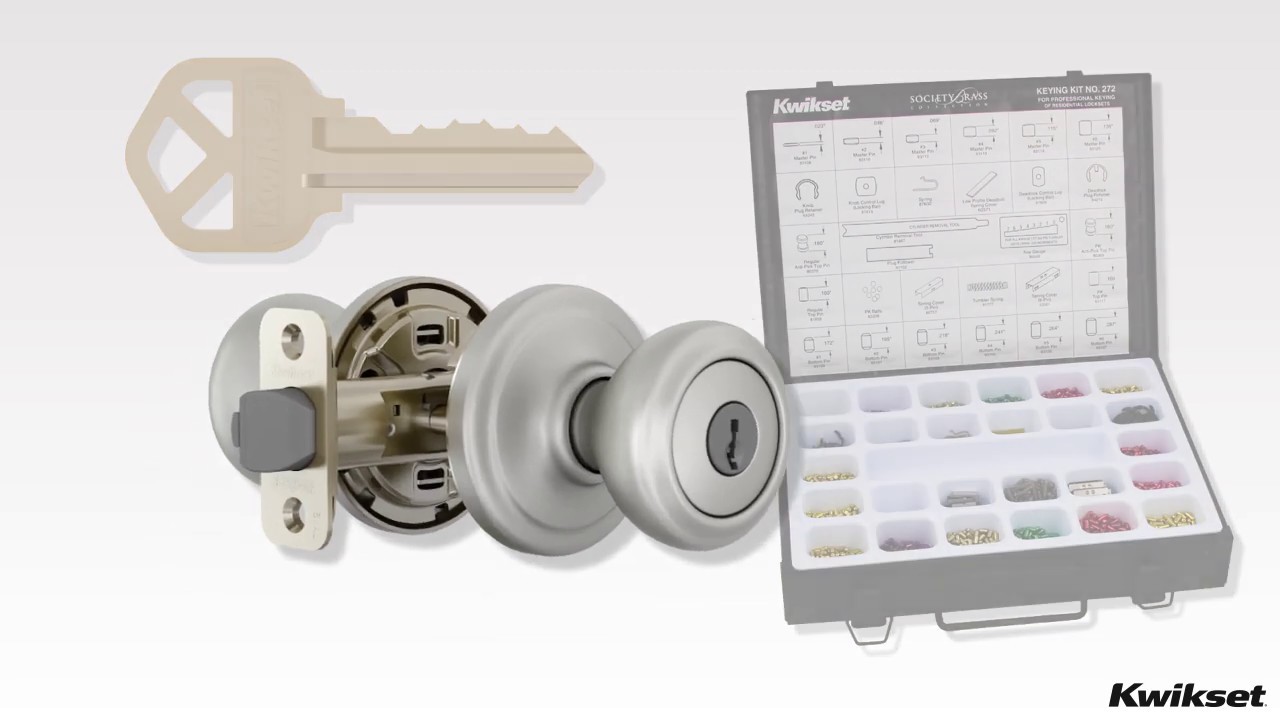
Essential tools for rekeying a Kwikset door knob include a screwdriver, Kwikset Smart Key tool, and new keys. Precision and care with these items ensure a smooth rekeying process.
Essential Items
A Kwikset SmartKey tool is needed for rekeying. Have a new key ready. A screwdriver is important to open the knob. Safety gloves keep hands safe. Use a container for small parts. Lubricant helps smooth the process. All items must be organized for easy access.
Optional Tools
Needle-nose pliers can be useful. They help with small parts. Flashlight is handy for dark areas. Magnifying glass helps see details. Marker can label parts. Cleaning cloth keeps areas clean. These tools make rekeying easier.

Credit: m.youtube.com
Preparing The Workspace
Always wear protective gear while working. Safety goggles keep your eyes safe. Gloves protect your hands from sharp tools. Keep your workspace tidy to avoid accidents. Make sure you have good lighting. This helps you see clearly while working. Check tools for any damage before use. Damaged tools can cause injuries. Keep children and pets away from the workspace.
Gather all necessary tools before starting. You will need a screwdriver, new lock, and a rekeying kit. Place tools in an easy-to-reach spot. This saves time and effort. Label parts as you remove them. This helps with reassembly later. Use a small container for screws and small parts. This prevents losing them. A clean cloth can be handy for wiping surfaces.
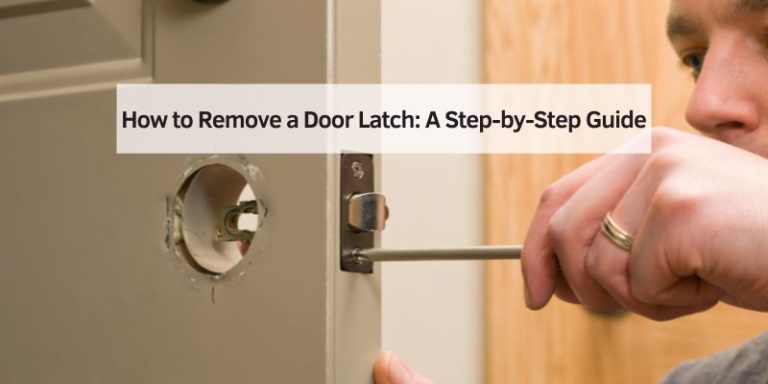
Removing The Door Knob
First, find the screws on the door knob. Usually, they are on the inside. Use a screwdriver to turn the screws to the left. This will loosen them. Once the screws are out, gently pull the knob away from the door. Be careful not to drop it. Keep all parts in a safe place.
Now, look for the latch plate on the edge of the door. Remove the screws holding the latch in place. Slide the latch out carefully. This part can be tricky, so take your time. Make sure to store all small parts safely. You’re now ready for the next step in rekeying.
Accessing The Cylinder
Locate the small hole near the knob base. This is the keyhole. Insert the key and turn it. The knob will come loose. Find the cylinder behind the knob. It’s usually metal. Check if it’s secured with screws or clips. Observe its position and connections.
Unscrew any screws holding the cylinder. Keep them safe for later. Carefully pull the cylinder out. Sometimes, it’s tight. Wiggle it gently to free it. Ensure no parts fall out. Place the cylinder on a flat surface. Inspect for any damage or wear.
Rekeying The Cylinder
To rekey a Kwikset knob, start by removing the knob. Use a screwdriver to take off the screws. Once the knob is off, you can see the cylinder. Remove the cylinder plug using a plug follower tool. Keep an eye on the pins as they might fall out. Be careful while doing this step.
Inside the cylinder, you will see small metal pins. Take these out and replace them with new ones. Each pin must match the new key. Use a Kwikset rekeying kit for this. The kit has pins of different colors. Match colors to the new key using the chart in the kit. This step is important for the key to work well.
After replacing the pins, put the cylinder back. Reattach the knob to the door. Insert the new key into the lock. Turn the key to check if it works. If the lock turns smoothly, your rekeying was successful. If it doesn’t work, check the pins again. Make sure they fit right.
Credit: www.kwikset.com
Reassembling The Door Knob
Place the cylinder into the knob. Ensure it fits snugly. Align it properly with the knob’s slot. The key slot must face the correct direction. Slide the cylinder gently until it clicks. This secures it inside the knob.
Find the screw holes on the knob. Align them with the door holes. Push the knob into place. Hold it firmly. Use a screwdriver for the screws. Tighten them evenly. Check if the knob is secure. Turn the key in the knob. Ensure it works smoothly. If it does, the knob is attached correctly.
Final Checks
Test the door knob after rekeying. Turn the knob smoothly. Make sure it locks and unlocks easily. Check the new key in the lock. It should fit perfectly. Ensure the key turns without resistance. If it sticks, recheck the rekeying steps. A smooth operation means the rekeying was successful.
Adjust the door knob if it feels tight. Tight knobs can wear out quickly. Loosen screws slightly for a better fit. Align the latch properly. A misaligned latch can cause issues. Test the knob movement again. It should be easy and smooth now. Check the door alignment too. Proper alignment ensures easy locking.

Credit: www.ifixit.com
Troubleshooting Tips
Rekeying a Kwikset door knob can be simple with the right steps. Start by removing the knob and locating the cylinder. Follow the instructions in the rekeying kit to change the pins. Reassemble the knob, and your door is secure with a new key.
Common Issues
Many people face stuck locks when rekeying a Kwikset door knob. This happens if the pins are not aligned. Check if the new key matches the old one. If not, the lock won’t turn. Sometimes, the lock cylinder is jammed. Clean it with a spray to remove dirt. Always ensure the key is inserted fully before turning. A loose door knob can cause issues too. Tighten any screws to fix it.
When To Seek Professional Help
If the lock still doesn’t work, a professional can help. They have the right tools and skills. If the key breaks in the lock, call a locksmith. Avoid using force, as it can damage the lock. If the lock is old, it might need replacing. A professional can advise on the best solution. Always consider safety first.
Frequently Asked Questions
Can All Kwikset Door Knobs Be Rekeyed?
Most Kwikset door knobs can be rekeyed. Check if your model supports SmartKey technology for easy rekeying. Models without SmartKey may require professional assistance. Rekeying enhances security and convenience, allowing you to change keys without replacing locks.
How Do I Change The Key On A Kwikset Lock?
Use a Kwikset SmartKey tool to change the key. Insert the tool, turn the old key clockwise, remove, and insert the new key. Turn counterclockwise to secure. Follow the manufacturer’s instructions for precise steps.
How Many Times Can You Rekey Kwikset Smartkey?
You can rekey Kwikset SmartKey locks an unlimited number of times. These locks feature advanced technology. Rekeying is easy and quick, offering flexibility and security. With a SmartKey tool, homeowners can rekey without professional help. This makes it convenient for changing keys frequently.
How Do I Reset My Kwikset Smartkey Door Knob?
To reset your Kwikset SmartKey door knob, insert the current key, turn it 90 degrees clockwise, insert the SmartKey tool, remove the key, insert the new key, and turn it back to the starting position. Your door knob is now reset with the new key.
Conclusion
Rekeying a Kwikset door knob is simple and rewarding. With basic tools, you can enhance your home’s security. Follow the steps carefully for the best results. Practice makes the process easier over time. Remember to test the knob after rekeying.
Ensure it works smoothly with the new key. This DIY project saves money and boosts confidence. Plus, it ensures only you have key access. Always keep extra keys safe and secure. Rekeying gives you peace of mind. Enjoy your newly rekeyed door knob!