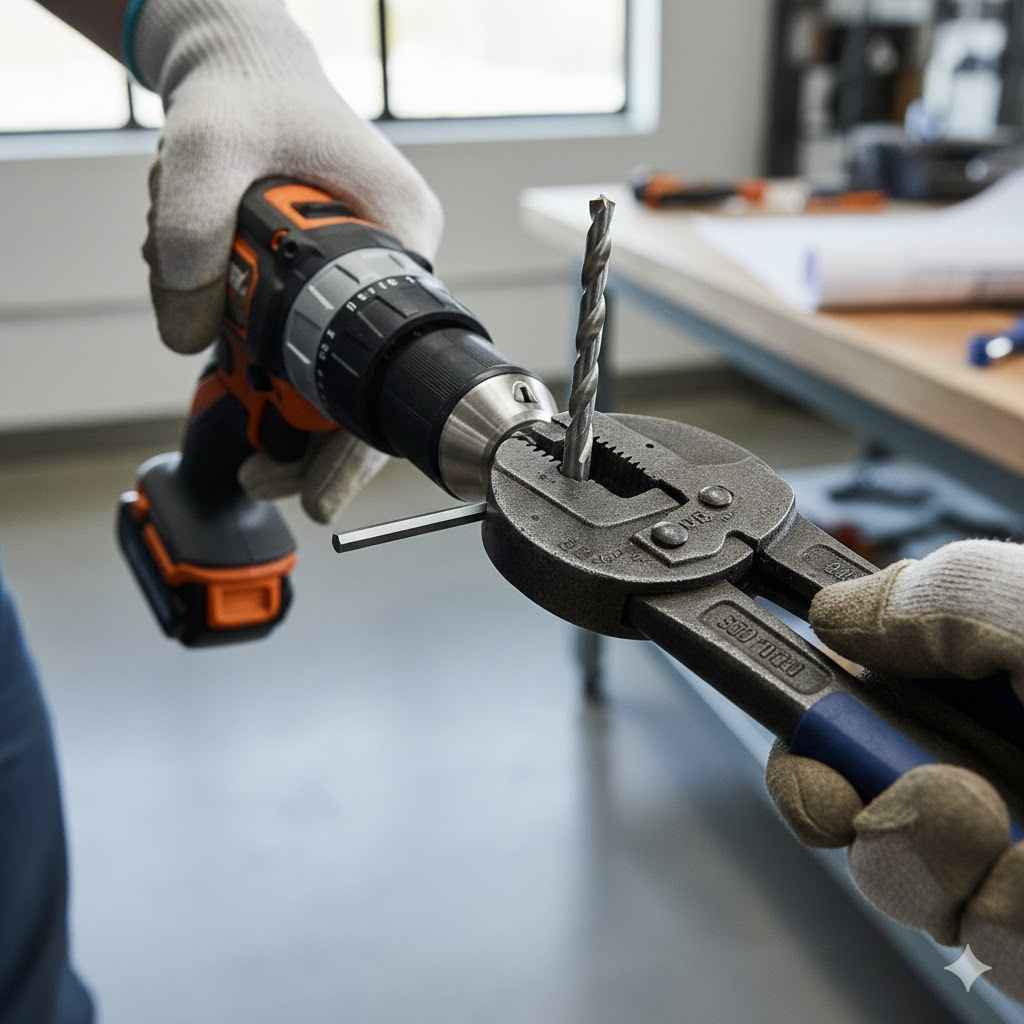
How To Remove A Stuck Drill Bit From A Keyless Chuck
It happens to the best of us sometimes, especially when you’re just starting out with DIY projects. You’re trying to drill a hole, and suddenly the drill bit gets stuck right inside the chuck. It feels like it’s cemented in there, and you’re not sure how to get it out.
Don’t worry, it’s a common issue, and there are simple ways to fix it. This guide will walk you through exactly how to remove a stuck drill bit from a keyless chuck without any fuss. We’ll get that bit out and get you back to your project in no time.
Why Drill Bits Get Stuck In Keyless Chucks
A keyless chuck on a drill is designed for quick and easy bit changes, relying on friction and tightening pressure to hold the drill bit securely. However, several factors can cause a drill bit to become stubbornly stuck. One common reason is excessive force applied during drilling, especially when drilling into hard materials like concrete or metal.
This can cause the bit to bind or wedge itself into the chuck jaws. Another culprit is a build-up of debris, dust, or metal shavings within the chuck mechanism. Over time, this material can accumulate and act like glue, preventing the jaws from retracting properly.
Also, if the chuck is not properly aligned or if the bit itself has burrs or damage from previous use, it can lead to a tight fit. For beginners, identifying the exact cause and applying the right technique can be tricky, leading to frustration.
Understanding Keyless Chuck Mechanics
A keyless chuck is a marvel of mechanical engineering, allowing for rapid tool changes without the need for a separate chuck key. It typically consists of three hardened steel jaws that are actuated by a rotating sleeve. As you twist the sleeve, the jaws move in or out, gripping or releasing the drill bit shank.
The sleeve has internal gearing or splines that engage with the jaw mechanism, providing leverage to tighten or loosen them. The front part of the chuck, often called the “collar,” is what you grip and twist. The jaws themselves are designed to create a strong, non-slip grip on the bit shank.
When a bit gets stuck, it’s usually because these jaws cannot retract sufficiently to release their hold on the bit. This can be due to mechanical issues within the chuck, or simply extreme binding of the bit itself. A properly functioning keyless chuck should allow for smooth operation, with no significant resistance when tightening or loosening.
The internal workings involve a series of springs and cams that help to apply consistent pressure. The jaws are tapered, so as they move inward, they create a stronger grip. When you loosen the chuck, these jaws are supposed to spread apart evenly.
If debris or damage prevents this free movement, the bit will remain clamped. Think of it like trying to open a hand that’s tightly clenched around something; if the fingers are stuck or jammed, they won’t release. The same principle applies to the drill chuck.
Understanding this basic mechanism is the first step in troubleshooting why a bit might be stuck.
Common Causes of a Jammed Drill Bit
Several scenarios can lead to a drill bit refusing to budge from a keyless chuck. Over-tightening is a prime suspect. While it feels counterintuitive, sometimes extreme tightening can warp the jaws slightly or cause them to bind, especially with cheaper or older chucks.
If you’ve used excessive force to seat the bit or during a tough drilling job, this could be the issue. Dust and metal shavings are notorious troublemakers. As you drill, fine particles can get worked into the chuck mechanism.
These particles can accumulate, harden, and essentially jam the moving parts. Imagine sand getting into a delicate gear mechanism; it stops it from turning smoothly. This is a frequent problem, especially if you’re not cleaning your tools regularly.
Damaged drill bits also play a role. If the shank of the drill bit is bent, burred, or has mushroomed from impact, it can get caught in the chuck jaws. The jaws might grip it, but then be unable to release it because the damaged area prevents them from retracting properly.
This is why inspecting your drill bits before and after use is a good habit.
Sometimes, the issue isn’t the bit but the chuck itself. If the chuck has been dropped or subjected to impacts, internal components might be misaligned or damaged. This can lead to uneven jaw pressure or a failure of the jaws to retract fully.
Heat generated during intense drilling can also cause materials to expand, temporarily making a snug fit even tighter. When the tool cools, it might loosen, but if it was very tight, it might remain stuck. Another factor is drilling at an angle.
If the bit isn’t perfectly perpendicular to the material, it can create lateral stress on the chuck and bit, leading to binding. These seemingly small issues can add up and create a significant problem when you need to change your drill bit.

Simple Methods to Free a Stuck Drill Bit
When you face a drill bit that seems permanently lodged in your keyless chuck, don’t despair. There are several straightforward techniques you can employ. The most common approach involves using leverage and controlled force.
First, ensure the drill is unplugged or the battery is removed to prevent accidental activation. Then, try to grip the chuck collar firmly. You might need gloves for a better grip.
Attempt to twist the collar in the loosening direction (usually counter-clockwise). If it doesn’t budge, you can gently tap the chuck collar with a rubber mallet or the handle of a screwdriver. The vibration can sometimes break the seal of debris or loosen the jaws.
Be careful not to hit too hard, as you could damage the chuck.
Another effective method involves using another tool for leverage. You can use a strap wrench or even a piece of textured rubber material (like an old bicycle inner tube) around the chuck collar. This will give you a much better grip.
Then, try to rotate the collar. If the bit is still stuck, you can try holding the drill body firmly with one hand and using the other to twist the chuck collar. Sometimes, a slight back-and-forth wiggling motion while applying loosening pressure can help dislodge the bit.
The key is patience and applying force incrementally. Forcing it too aggressively can damage the chuck or the drill itself, making the problem worse. Remember to always work with a powered-off tool.
Using Gripping Aids for Better Torque
When your hands aren’t enough to loosen a stubborn chuck, external gripping aids become your best friends. A strap wrench is an excellent tool for this. Unlike pliers, which can mar or damage the chuck’s surface, a strap wrench distributes pressure evenly.
You simply wrap the rubber or fabric strap around the chuck collar and tighten it. This provides a superior grip, allowing you to apply more torque without slipping. It’s particularly useful if the chuck surface is smooth or oily.
You can also improvise with household items. A piece of a rubber jar opener or even a thick rubber band wrapped multiple times around the collar can provide the extra friction needed. Another effective improvisation is using a section of an old bicycle inner tube.
Its textured rubber offers a fantastic grip.
For even more leverage, you can use two strap wrenches, one on the chuck collar and one on the drill’s body to prevent the drill from rotating. This allows you to focus all your effort on loosening the chuck. When using any gripping aid, remember the basic principle: counter-clockwise to loosen.
If the drill bit is really wedged, a combination of steady pressure and a few sharp, jarring twists can be more effective than prolonged, slow turning. Always ensure your grip is secure on the aid and the chuck before applying force. This method is especially helpful if the bit is stuck due to extreme binding, where the jaws are under immense pressure.
The increased grip prevents your hands from slipping, which is critical for applying consistent torque.
The Gentle Tap Technique
Sometimes, the most effective solution is a bit of percussive maintenance. The gentle tap technique can dislodge a stuck drill bit by introducing vibrations that break any binding or debris seal. Start by ensuring the drill is completely powered off.
Grip the drill firmly and locate the chuck collar. With a rubber mallet, the handle of a screwdriver, or even the palm of your hand, give the chuck collar a few firm but not violent taps. The direction of your taps should ideally be in line with the loosening rotation of the chuck.
You’re not trying to hammer it out; you’re trying to shock the mechanism slightly. The vibrations can help loosen any grit or debris that’s wedged between the jaws and the bit shank. After tapping, try to loosen the chuck collar by hand again, perhaps with a gripping aid for extra purchase.
If the first round of tapping doesn’t work, you can try tapping different parts of the chuck assembly. Sometimes, tapping the side of the chuck can help free up the jaws. You can also try combining the tapping with a slight loosening twist.
Hold the drill steady and apply a loosening twist with one hand while gently tapping the collar with the other. This combination can often be more effective than either method alone. The key word here is “gentle.” Excessive force can damage the delicate internal components of the chuck.
If you hear any crunching or grinding sounds, stop immediately. This technique is particularly useful when a bit is stuck due to minor debris accumulation or a slightly warped jaw. It’s a non-invasive first step before resorting to more forceful methods.
Utilizing Lubricants Effectively
When mechanical force alone isn’t doing the trick, a lubricant can be your secret weapon. Certain lubricants can penetrate the tight spaces within the chuck and help to free up the jaws, especially if the sticking is due to rust or dried-on grime. Penetrating oil, like WD-40 or a similar product, is often recommended.
Spray a small amount directly into the gap between the drill bit shank and the chuck jaws. You might also want to spray some around the rotating collar itself. Let the lubricant sit for a few minutes, or even longer, to allow it to seep into the mechanism.
This waiting period is crucial for the oil to work its magic. After it has had time to penetrate, try loosening the chuck collar again, using your hands or a gripping aid.
Sometimes, a combination of lubricant and gentle tapping is very effective. Apply the penetrating oil, let it soak, and then use the gentle tap technique described earlier. The oil can help loosen the debris, making it more susceptible to being dislodged by vibration.
If the chuck or bit is particularly rusted, you might need to repeat the application of lubricant and allow more soaking time. For persistent cases, you can try heating the chuck slightly with a hairdryer (not a torch, which could melt plastic parts). Heat can expand the metal slightly, potentially breaking a rust bond, and then the lubricant can work its way in as it cools.
Always ensure the drill is unplugged before applying any liquids or heat. After freeing the bit, clean the chuck thoroughly to remove any residual lubricant and debris before inserting a new bit.
Advanced Techniques for Stubborn Bits
When the basic methods fail, it’s time to consider more advanced strategies. These are for those particularly tenacious drill bits that refuse to budge. The key here is to apply force strategically and sometimes in unconventional ways, always prioritizing the integrity of your drill and chuck.
These techniques often involve using tools that provide more leverage or apply force in a way that bypasses the normal loosening mechanism. It’s important to assess the situation carefully before proceeding, as some of these methods carry a slightly higher risk of damage if not executed properly. Patience and a methodical approach are still vital, even with these more forceful options.
The Vice and Pliers Method
This method requires an extra set of hands or a workbench setup. It’s a reliable option when you need significant, controlled torque to break a stubborn bond. First, ensure the drill is unplugged or the battery removed.
Secure the drill body firmly in a vise. You can protect the drill housing by placing a piece of cloth or rubber between the vise jaws and the drill body. Then, use a pair of large, sturdy pliers or a pipe wrench to grip the chuck collar.
Position the pliers so you can apply maximum leverage. With the drill body held steady, carefully but firmly rotate the chuck collar in the loosening direction. The vise provides a stable anchor, allowing you to apply all your turning force directly to the chuck.
This greatly increases your chances of freeing a deeply jammed bit.
If the pliers slip, try wrapping the chuck collar with a rubber strap or an old bicycle inner tube for better grip. You can also use two pairs of pliers, one gripping the chuck and the other gripping the drill body to prevent it from turning, although a vise is generally more secure. Be mindful of the material of your drill’s body.
If it’s plastic, excessive force from the vise could crack it. Adjust the vise pressure accordingly. This method is especially effective when the bit is wedged very tightly or if there’s some rust binding the components.
Remember to work slowly and feel for any movement. If you feel significant resistance that might indicate something is about to break, ease up and reassess. Sometimes, a brief pause and a fresh attempt can be more successful.
Impact Driver Application (with Caution)
An impact driver can be a powerful tool for freeing stuck objects, and it can sometimes be used on a stuck drill bit. However, this method requires extreme caution, as the forceful impacts can damage a drill chuck if not used correctly. The idea is to use the tool’s rotational impacts to shock the chuck jaws and break them free.
Set your impact driver to the “unscrew” or “forward” mode. Select a low to medium impact setting. Grip the drill firmly, and position the chuck collar so you can apply the impact driver’s bit directly to a flat surface on the collar (if possible) or around the gripping area.
Engage the impact driver in short bursts, listening and feeling carefully. The goal is to use the hammering action to loosen the bind, not to force it open with brute strength.
It’s crucial to understand that drill chucks are not designed to withstand the direct, repeated impacts of an impact driver. This is an advanced technique for emergency situations only. If you use this method, be prepared for the possibility of damaging your drill chuck.
Avoid using the highest impact settings. If you don’t have an impact driver, you might be able to simulate a similar effect by using a hammer and chisel set at a very shallow angle against the chuck collar, tapping gently in the loosening direction. However, the controlled impacts of an impact driver are generally more effective and less damaging than brute-force hammering.
Always err on the side of caution; it’s better to try a less aggressive method again than to break your tool.
Disassembling the Chuck (Last Resort)
If all else fails, and the drill bit is still firmly stuck, you may need to consider disassembling the chuck itself. This is typically a last resort because it can be complex, and reassembling the chuck correctly can be challenging. Not all drill chucks are designed for easy disassembly.
You’ll need to identify how your specific chuck is attached to the drill. It’s usually either threaded onto the drill spindle or secured with a retaining screw. If it’s threaded, you’ll need to remove the bit first if possible, then use a pipe wrench or specialized chuck removal tool to unscrew the chuck from the drill spindle.
If there’s a retaining screw, it’s often located at the very back of the chuck, accessible through a hole in the spindle. This screw is usually reverse-threaded.
Once you’ve detached the chuck from the drill, you can work on freeing the bit from the detached chuck. Sometimes, soaking the chuck in a rust-penetrating solution for an extended period can help. You might also be able to use a vise to hold the chuck and then use pliers or a pipe wrench on the bit itself to try and twist it out.
If the jaws are the problem, you might be able to gently pry them open with thin, strong tools, but be extremely careful not to damage them further. Reassembling a chuck can be tricky, involving precise alignment of springs, cams, and jaws. If you’re not comfortable with mechanical disassembly, it might be more cost-effective to replace the chuck or even the entire drill.
Before attempting disassembly, search for specific guides or videos for your drill model, as chuck attachment methods can vary significantly.
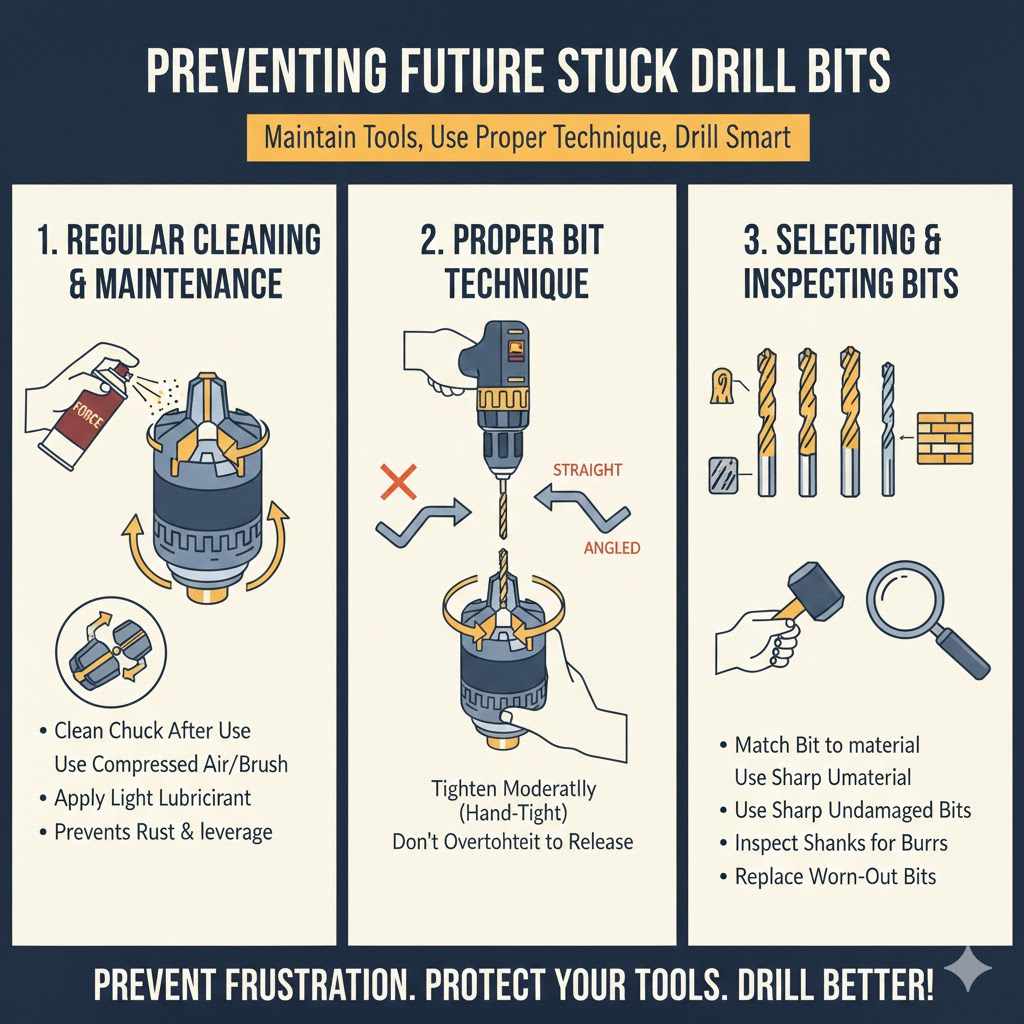
Preventing Future Stuck Drill Bits
The best way to deal with a stuck drill bit is to prevent it from happening in the first place. A few simple habits and maintenance practices can save you a lot of frustration. Regularly cleaning your tools is paramount.
After each use, especially when drilling into materials that produce a lot of dust or metal shavings, take a moment to clean the chuck mechanism. A blast of compressed air or a quick wipe with a dry cloth can remove accumulating debris. Periodically, you can apply a small amount of light oil or graphite lubricant to the chuck’s moving parts to ensure smooth operation.
This helps to prevent rust and keep the jaws moving freely.
Using the right drill bit for the job and ensuring it’s in good condition is also important. Avoid using dull or damaged drill bits. A sharp bit requires less force, reducing the chance of binding.
Inspect the shank of your drill bits for any burrs or damage before inserting them into the chuck. When drilling, apply steady pressure and avoid excessive force, especially when breaking through the material. Let the drill bit do the work.
If you encounter significant resistance, check if the bit is dull or if you’re drilling at an angle. Proper technique not only prevents stuck bits but also prolongs the life of your drill bits and your drill.
Regular Cleaning and Maintenance
Think of your drill’s keyless chuck as a precision tool that requires a little care to perform at its best. Regular cleaning is one of the most overlooked but effective maintenance steps. After you finish a drilling session, especially if you’ve been working with dusty materials like wood, drywall, or metal, take a moment to clean the chuck.
A small brush or a can of compressed air is ideal for blowing out any dust, metal filings, or wood chips that may have accumulated inside the chuck mechanism. Pay attention to the gaps between the jaws and the area where the collar rotates. You can also use a clean, dry cloth to wipe down the exterior of the chuck.
This simple act prevents debris from building up and causing future binding issues.
Beyond cleaning, occasional lubrication is beneficial. A very small amount of light machine oil or a silicone-based lubricant applied to the rotating collar and the jaw mechanism can help ensure smooth operation. Be careful not to over-lubricate, as excess oil can attract more dust.
For heavily used chucks, or if you notice any stiffness, a more thorough cleaning might be needed. You could use a mild degreaser followed by a light lubricant. This maintenance routine is similar to how you’d care for other tools; a little effort goes a long way in preventing problems.
Most modern keyless chucks are quite durable, but neglect can lead to premature wear and sticking issues. A well-maintained chuck will offer reliable performance for years.
Proper Drill Bit Insertion and Removal
The way you insert and remove drill bits significantly impacts how securely they are held and how easily they can be released. When inserting a drill bit, ensure the drill is powered off. Open the keyless chuck jaws wide enough to accommodate the entire shank of the drill bit.
Insert the bit straight and as far as it will comfortably go. Then, with the drill held steady, grip the chuck collar firmly and tighten it until you feel a solid grip. You don’t need to overtighten; the chuck’s mechanism is designed to hold the bit securely with moderate force.
A slight “click” or a feeling of solid resistance usually indicates it’s tight enough. Avoid forcing it past this point.
When removing a bit, always ensure the drill is powered off. Grip the chuck collar and rotate it in the loosening direction (usually counter-clockwise). You should feel the jaws retract.
If the bit feels stuck, don’t just keep cranking. Check for any debris around the shank or jaws. Sometimes, a gentle wiggle of the bit while loosening the chuck can help.
If it’s still tight, try opening the jaws as wide as they will go. A common mistake is to try and pull the bit out while only partially loosening the chuck, which can cause it to bind. Always ensure the jaws are fully retracted before attempting to remove the bit.
Practicing these simple steps consistently will minimize the chances of a bit becoming difficult to remove.
Selecting the Right Drill Bit and Material
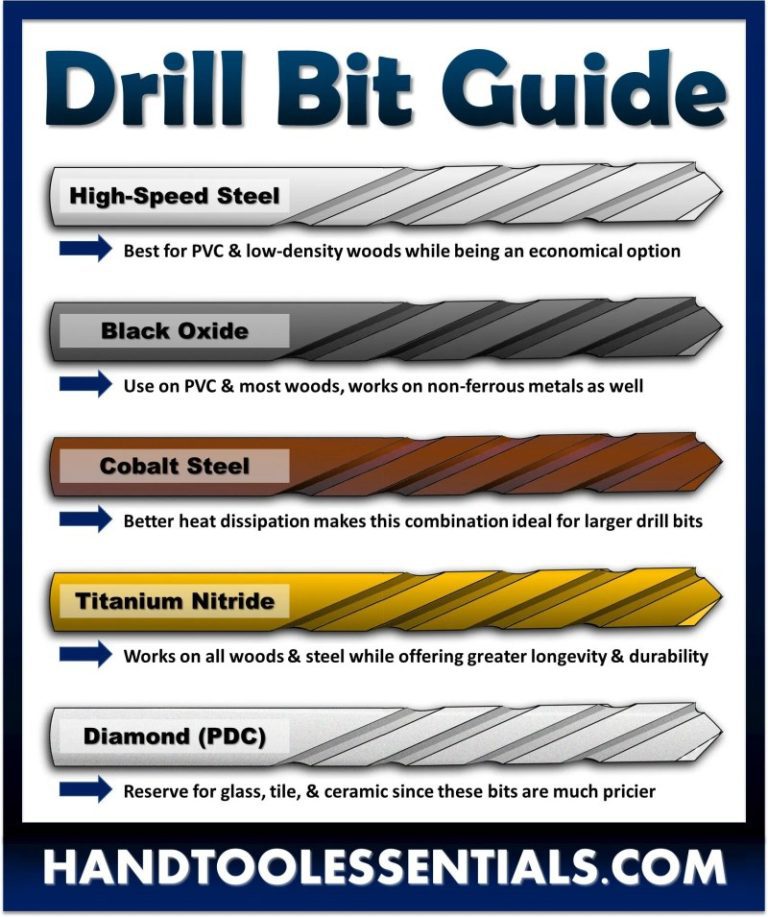
Choosing the correct drill bit for the material you’re working with is fundamental to avoiding problems, including stuck bits. Using a wood bit in metal, for example, will cause excessive friction, heat, and likely binding. Always match the bit type to the material.
For wood, standard twist bits or spade bits work well. For metal, you’ll need HSS (High-Speed Steel) bits, often with a titanium or cobalt coating for harder metals. Masonry requires specialized carbide-tipped bits.
Using the wrong bit leads to increased strain on both the bit and the chuck.
Furthermore, the quality of the drill bit itself matters. Cheap, poorly manufactured bits can have uneven shanks or burrs that catch in the chuck jaws. Invest in good quality drill bits from reputable brands.
Inspect your drill bits regularly. A bit that has been significantly dulled, bent, or has a damaged tip is more likely to cause issues. A dull bit requires more pressure, increasing the risk of binding.
A bent bit will not seat properly in the chuck and can cause uneven pressure, leading to sticking. Replacing worn-out bits promptly is a small cost that prevents bigger headaches down the line. The material composition of the bit and its cutting edges directly influence how it interacts with the material and the chuck, so always prioritize the right bit for the job.
Frequently Asked Questions
Question: What should I do if my drill bit is spinning but not coming out of the keyless chuck
Answer: If the drill bit spins but doesn’t release, the chuck jaws likely aren’t retracting properly. Try applying some penetrating oil into the chuck mechanism, then firmly grip the chuck collar with a strap wrench and try to loosen it again. Sometimes a slight back-and-forth wiggling motion while turning can help dislodge it.
Question: Can I use pliers to remove a stuck drill bit
Answer: Yes, large, sturdy pliers or a pipe wrench can be used to grip the chuck collar for extra leverage. However, be cautious not to damage the chuck’s surface. Using a rubber strap or cloth for grip can help prevent marring.
Always ensure the drill is powered off before attempting this.
Question: How tight should I make a drill bit in a keyless chuck
Answer: You should tighten a drill bit until it feels secure and the chuck collar offers firm resistance. Overtightening can actually cause the jaws to bind, making removal difficult. A good rule of thumb is to tighten it firmly but without excessive force.
Listen for a slight click or feel solid resistance.
Question: Is it safe to use lubricants on my drill chuck
Answer: Yes, light lubricants like penetrating oil or a small amount of machine oil can help free stuck drill bits and maintain the chuck’s mechanism. Ensure you use them sparingly and clean off any excess afterward, as too much can attract dust. Always power off the drill before applying lubricants.
Question: What if the drill chuck itself is damaged
Answer: If the chuck mechanism appears visibly damaged, bent, or if none of the methods work, the chuck itself might need replacement. For minor damage, some chucks can be disassembled and repaired, but often it’s more practical to buy a new chuck or a new drill if it’s an integrated unit.
Wrap Up
Dealing with a stuck drill bit in a keyless chuck is a common challenge. You’ve learned how debris, overtightening, or damaged bits can cause this. Simple methods like using gripping aids, gentle tapping, and lubricants can often resolve the issue.
For tougher situations, advanced techniques like using a vise or impact driver cautiously can be employed. Most importantly, consistent cleaning, proper bit insertion, and using the right bit for the job will prevent future frustrations. Keep these solutions in mind, and you’ll be back to drilling with confidence.