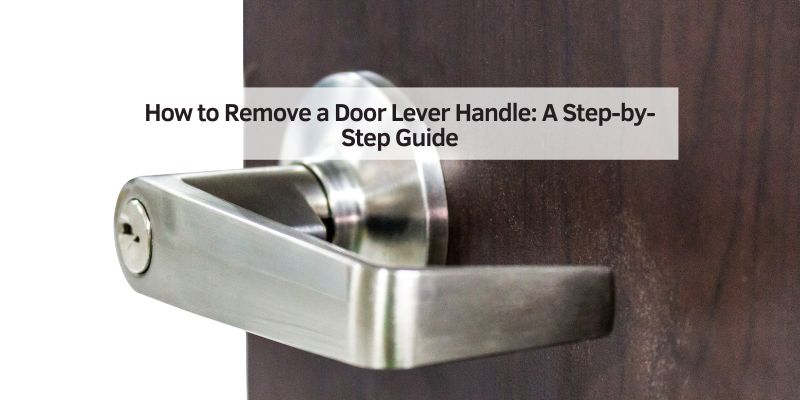
How to Remove a Door Lever Handle: A Step-by-Step Guide
Hey there! So, you’re looking to remove a door lever handle, huh? Maybe it’s sticking, looking outdated, or you’re just ready to swap it out for something new and shiny. Whatever the reason, I’ve got you covered. I’ve tackled this task a few times in my own home, and trust me, it’s not as tricky as it seems. With a little patience and the right tools, you’ll have that handle off in no time. In this guide, I’m going to walk you through every step, share some tips I’ve learned along the way, and make sure you feel confident doing this yourself. Let’s dive in and get that door lever handle removed!
Why You Might Need to Remove a Door Lever Handle
Let’s start with why you’d even want to take off a door lever handle. I remember the first time I had to do this—it was because the handle in my guest room was loose and wobbly. It was driving me nuts every time I opened the door! Sometimes, the handle gets stuck, or maybe it’s scratched up and doesn’t match your new decor. Other times, you might need to replace it with a locking handle for extra privacy or security. I’ve also had to remove one to repaint a door without making a mess. Whatever your reason, knowing how to do this is a handy skill for any homeowner. It saves you from calling a handyman and gives you a little DIY bragging rights.
Tools You’ll Need to Get Started
Before we jump into the process, let’s talk about tools. You don’t need a fancy toolbox, but having the right stuff makes this job so much easier. Here’s what I grab when I’m about to remove a door lever handle:
| Tool | Purpose |
|---|---|
| Flathead screwdriver | To pry off covers or loosen small screws. |
| Phillips screwdriver | For removing screws that hold the handle or plate in place. |
| Allen wrench (hex key) | Some handles have a small set screw that needs an Allen wrench to loosen. |
| Small container | To keep screws and small parts safe so they don’t get lost. |
| Cloth or rag | To clean the handle or door surface as you work. |
| Optional: needle-nose pliers | Handy for gripping tiny parts if they’re stuck. |
I always keep a small bowl on hand for screws. There’s nothing worse than losing one and crawling around on the floor looking for it! If you’re not sure what type of handle you have, grab both a flathead and Phillips screwdriver. Most handles use one or the other.
Understanding Your Door Lever Handle
Not all door lever handles are the same, and I learned this the hard way. The first time I tried removing a handle, I was tugging at it, thinking it would just pop off. Nope! You need to know what kind you’re dealing with. There are two main types: handles with visible screws and handles with hidden screws.
Handles with visible screws are straightforward—you’ll see the screws on the faceplate or the handle itself. Hidden screw handles are sneakier. They often have a small cover plate or a tiny set screw that you need to loosen first. Check your handle closely. If you see a small hole on the base or side of the lever, that’s likely where a set screw is hiding. Knowing this upfront will save you a lot of frustration.
Step-by-Step Guide to Removing a Door Lever Handle
Alright, let’s get to the good part—actually removing that handle. I’m going to break this down into clear steps so you can follow along easily. I’ve done this enough times to know what works and what doesn’t, so let’s do this right.
Step 1: Gather Your Tools and Prep the Area
First things first, grab all your tools and set them nearby. I like to lay down a towel or cloth under the door to catch any screws that might fall. It also protects the floor if you’re working on hardwood or tile. Make sure the door is open and stable. You don’t want it swinging shut while you’re working. If it’s a wobbly door, prop it open with a doorstop or ask someone to hold it for you.
Step 2: Locate the Screws or Set Screw
Take a good look at your door lever handle. If you see screws on the faceplate (the metal or plastic part around the handle), you’re in luck—that’s the easy kind. If not, look for a small hole or slot on the base of the lever. That’s where a set screw usually hides. I once spent 10 minutes trying to pry off a handle before realizing there was a tiny set screw I missed. Don’t make my mistake—check carefully!
Step 3: Remove the Set Screw (If Present)
If your handle has a set screw, grab your Allen wrench. The size can vary, so try a few if the first one doesn’t fit. Insert the wrench into the hole and turn counterclockwise to loosen the screw. You don’t need to remove it completely—just loosen it enough so the handle feels a bit wiggly. I keep a small flashlight handy to see inside the hole, especially if it’s dark or the screw is tiny.
Step 4: Remove the Cover Plate
Some handles have a cover plate that hides the screws. This is common with fancier or modern handles. To remove it, use a flathead screwdriver to gently pry it off. Slide the screwdriver under the edge of the plate and wiggle it carefully. It should pop off without too much force. Be gentle—you don’t want to scratch the door or the plate. I’ve found that twisting the screwdriver slightly works better than pulling straight out.
Step 5: Unscrew the Handle or Faceplate
Now it’s time to get those screws out. Use your Phillips or flathead screwdriver, depending on the screw type. Most handles have two screws—one on each side of the door. Turn them counterclockwise to loosen. I like to turn both screws a little at a time rather than removing one completely first. It keeps the handle steady and prevents it from falling off unexpectedly. Place the screws in your small container so they don’t roll away.
Step 6: Pull Off the Handle
Once the screws are out, the handle should come off easily. Gently pull it away from the door. If it’s stuck, wiggle it a bit or check for any remaining screws or clips. Sometimes, the handle on one side of the door comes off first, leaving the other side attached. That’s normal—just remove the other side the same way. I’ve had handles that felt stuck because of paint or grime, so a quick wipe with a cloth can help loosen things up.
Step 7: Remove the Spindle and Latch (Optional)
If you’re replacing the handle or doing a bigger repair, you might need to remove the spindle (the metal rod that connects the two handles) and the latch (the part that catches in the door frame). To do this, look inside the hole where the handle was. You’ll see the spindle and latch assembly. Most latches have a faceplate held by two screws. Remove those screws, and the latch should slide out. I usually give it a gentle tug if it’s stuck.
Step 8: Clean and Inspect
With the handle off, take a moment to clean the area. I like to wipe down the door and the handle parts with a damp cloth to remove dust or grime. This is also a good time to check for any damage. Is the latch worn out? Are the screw holes stripped? I once found that my door’s screw holes were too loose, so I filled them with wood filler before installing a new handle. It made a huge difference in how secure the new handle felt.
Common Issues and How to Fix Them
Sometimes, things don’t go as smoothly as planned. Here are a few problems I’ve run into and how to handle them:
- Stuck Set Screw: If the set screw won’t budge, try applying a bit of penetrating oil like WD-40. Let it sit for a few minutes before trying again. Be patient—forcing it can strip the screw.
- Stripped Screws: If the screws are stripped, use a larger screwdriver or needle-nose pliers to grip them. If that doesn’t work, a screw extractor tool is a lifesaver.
- Painted-Over Handle: If paint is sealing the handle or screws, use a utility knife to carefully score around the edges. This breaks the paint seal and makes removal easier.
- Handle Won’t Come Off: Double-check for hidden screws or clips. Some handles have a small release pin you need to push with a screwdriver.
Tips for a Smooth Removal Process
I’ve picked up a few tricks over the years that make removing a door lever handle easier. First, work in good lighting. It’s so much easier to see tiny screws or holes when the room is bright. Second, take pictures as you go. If you’re not sure how things go back together, a quick photo with your phone can save you a headache later. Finally, don’t rush. If you’re feeling frustrated, take a break and come back to it. I’ve learned that forcing things usually leads to broken parts or scratched doors.
What to Do After Removing the Handle
Once the handle is off, you’ve got a few options. If you’re replacing it, make sure the new handle matches the door’s bore (the hole size) and backset (the distance from the edge of the door to the center of the hole). Most standard handles fit a 2-3/8-inch or 2-3/4-inch backset, but double-check. If you’re painting the door, cover the exposed latch area with painter’s tape to keep it clean. And if you’re just cleaning or repairing, now’s the time to do it before reassembling.
Why DIY Is Worth It
Doing this yourself is so rewarding. I remember the first time I removed a handle and installed a new one—it felt like I’d conquered a mini home improvement mountain! Plus, it saved me a chunk of change. Hiring a handyman can cost $50-$100 for a simple job like this, and new handles are often under $20 at hardware stores. You also get to learn more about your home, which is always a win in my book.
Conclusion
Removing a door lever handle might seem intimidating at first, but it’s one of those projects that’s way easier than it looks. With a few tools and some patience, you can tackle this like a pro. I’ve walked you through every step, from gathering your tools to handling tricky situations like stuck screws. Whether you’re sprucing up your home, fixing a wobbly handle, or just curious about how it’s done, you’ve got this. So grab that screwdriver, take your time, and enjoy the satisfaction of a job well done. Your door will thank you, and you’ll have a new skill to show off!
Frequently Asked Questions
How long does it take to remove a door lever handle?
It usually takes me about 10-15 minutes to remove a door lever handle. If it’s your first time or the handle is stuck, it might take a bit longer—maybe 20-30 minutes. Just go slow and steady.
Can I remove a door lever handle without tools?
You’ll need at least a screwdriver or Allen wrench to remove most handles. Some handles with a push-pin release might not need tools, but those are rare. I always keep a basic screwdriver set handy for jobs like this.
What if I can’t find the set screw on my handle?
If there’s no visible set screw, check for a cover plate hiding the screws. Look for a small slot or seam on the base of the handle. Gently pry it off with a flathead screwdriver to reveal the screws underneath.
Will removing the handle damage my door?
If you’re careful, it shouldn’t damage the door. Use the right tools and don’t force anything. I’ve scratched a door before by rushing, so take your time and protect the surface with a cloth if needed.
Can I reuse the same handle after removing it?
Yes, you can reuse the handle if it’s in good condition. Just keep all the parts, like screws and the spindle, in a safe place. I’ve reinstalled handles after cleaning or repainting, and they worked fine.
What do I do if the screws are rusted?
Rusted screws can be tricky. Spray them with a penetrating oil like WD-40 and let it sit for 5-10 minutes. Then try loosening them with a screwdriver. If they’re really stuck, a screw extractor tool might be your best bet.