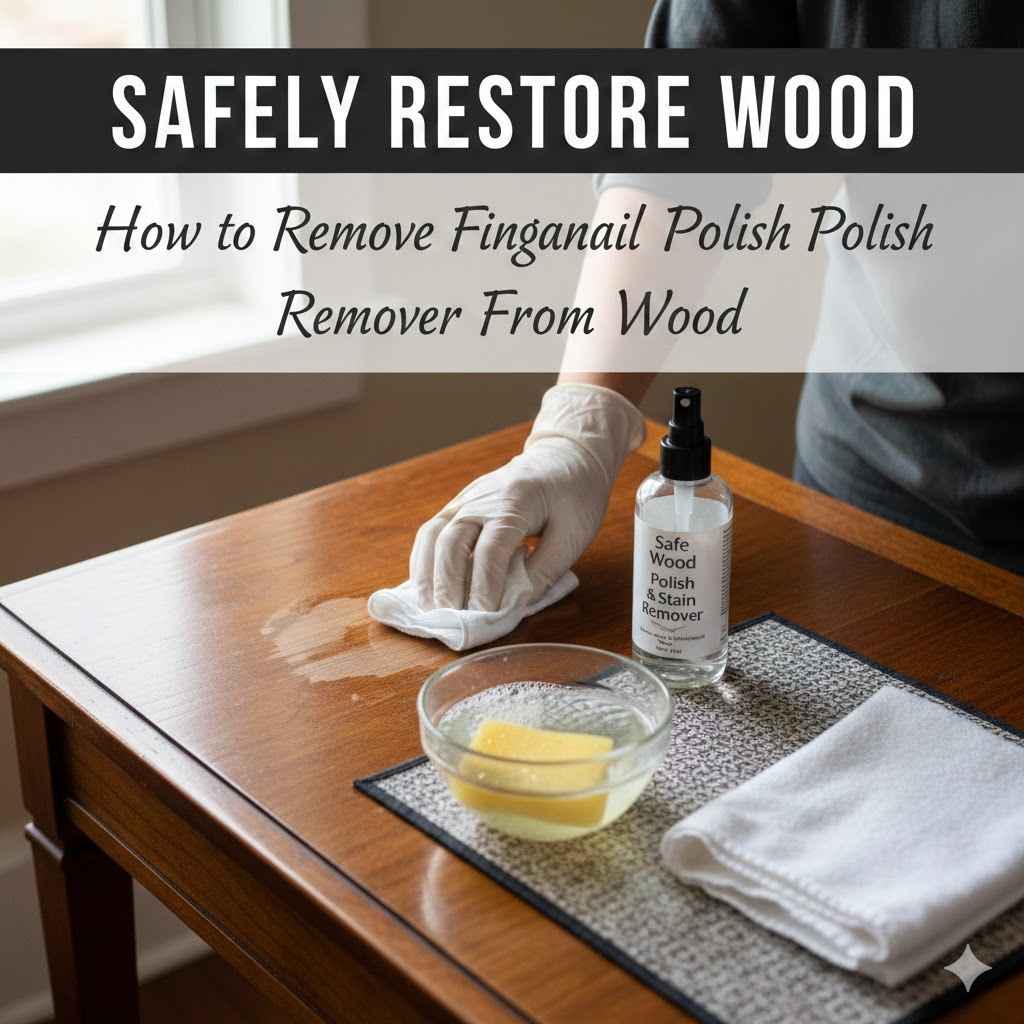
How to Remove Fingernail Polish Remover From Wood Safely
Accidents happen, and a spilled bottle of nail polish remover can leave you worried about your wood surfaces. Many people find it tricky to tackle this common household mishap, especially beginners who fear causing more damage. But don’t fret!
Removing nail polish remover from wood safely is totally doable with the right steps. We’ll walk you through a simple process to help you fix this issue without a fuss. Get ready to learn how to make that spill disappear like magic.
Understanding Wood and Polish Remover Interactions
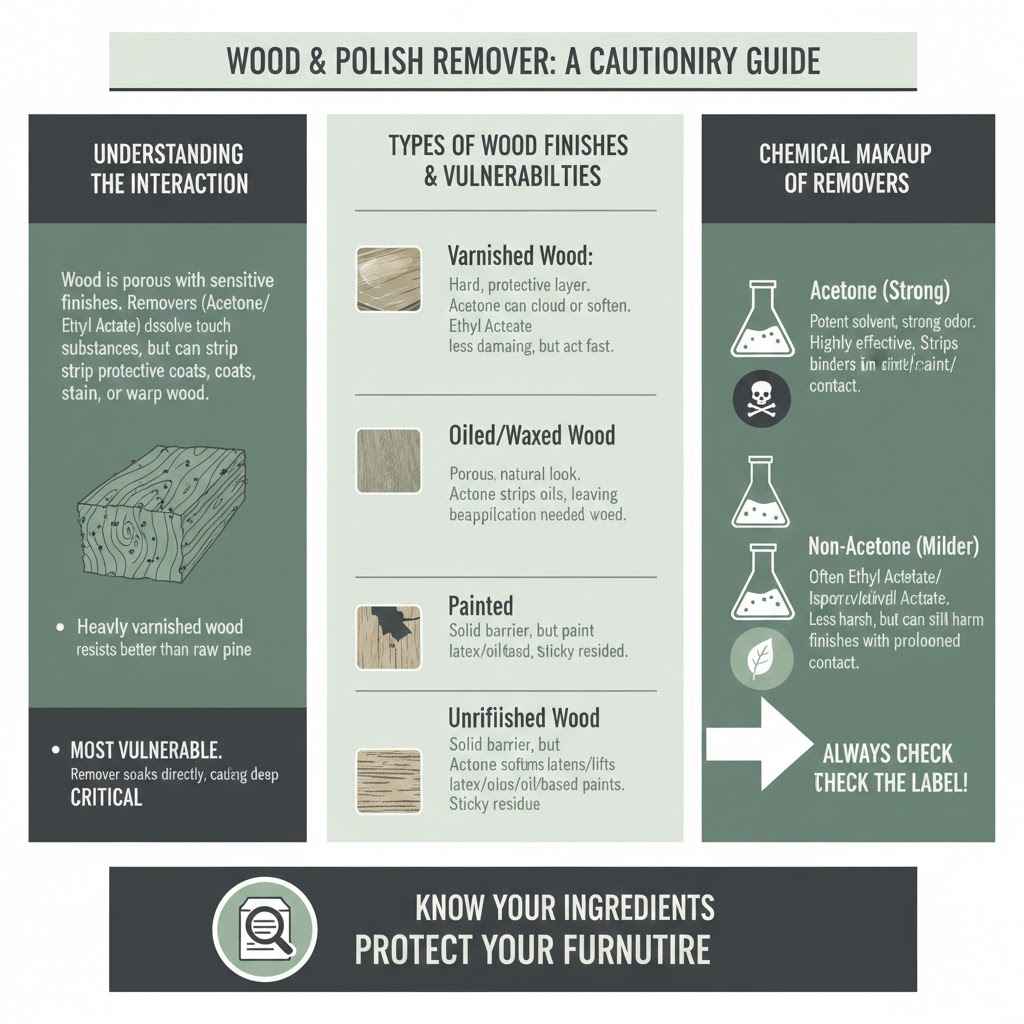
Wood is a natural material with pores and finishes that can be sensitive to harsh chemicals. Fingernail polish remover, typically containing acetone or ethyl acetate, is designed to dissolve tough substances like nail polish. When it comes into contact with wood, especially unfinished or poorly sealed wood, these solvents can strip away protective coatings, stain the wood, or even warp its structure.
Different types of wood and different finishes react differently. For instance, a heavily varnished table might resist the remover better than a raw pine shelf.
Acetone is a powerful solvent. It works by breaking down the chemical bonds in nail polish, allowing it to be wiped away. However, it doesn’t discriminate.
On wood, it can break down the binders in paint and varnish, effectively lifting the finish. This can leave a dull spot or a noticeable ring. Ethyl acetate, found in non-acetone removers, is generally milder but can still damage certain finishes with prolonged exposure.
Knowing the ingredients in your nail polish remover is a good first step. Always check the label.
Types of Wood Finishes and Their Vulnerabilities
The finish on your wood is its primary defense against spills and damage. Understanding these finishes helps you predict how they’ll react to nail polish remover. Some finishes are very durable, while others are quite delicate.
The type of finish dictates the urgency and method needed for removal. Even subtle changes can make a big difference.
Varnished Wood
Varnish creates a hard, protective layer over the wood. It’s often glossy and very resistant to water and minor spills. However, acetone can still attack the varnish if left for too long.
It might cause the varnish to become cloudy or soft. Ethyl acetate is less likely to cause significant damage to a good varnish layer, but it’s still wise to act quickly.
Oiled or Waxed Wood
Wood with an oil or wax finish is more porous and natural-looking. These finishes offer less protection than varnish but are often easier to repair if damaged. Acetone can easily strip away oils and waxes, leaving the wood bare and dry.
This can lead to staining and potential water damage if not addressed promptly. Repairing these finishes usually involves reapplication.
Painted Wood
Paint provides a solid barrier, but the paint itself can be compromised by solvents. Acetone can soften or lift certain types of paint, especially latex or oil-based paints. This can result in a sticky residue or the paint peeling away.
The type of paint and its age play a big role in how it will react.
Unfinished Wood
This is the most vulnerable type of wood. Without any protective coating, nail polish remover will soak directly into the wood fibers. Acetone can deeply stain unfinished wood, and its oily components can spread, making the spot difficult to remove.
Immediate action is critical for unfinished wood.
The Chemical Makeup of Nail Polish Remover
Nail polish removers are formulated to break down tough coatings. Their active ingredients are solvents. The most common and potent is acetone.
Acetone is a colorless liquid with a strong odor. It’s highly effective at dissolving nail polish but also quite aggressive towards many other materials, including wood finishes.
Non-acetone removers often use ethyl acetate or isopropyl acetate. These are still solvents, but they are generally considered less harsh than acetone. They work more slowly and are less likely to damage artificial nails or certain surfaces.
However, for wood, even these can cause harm if left to sit. Understanding these components helps you choose the right approach for cleaning up a spill.
The difference in chemical strength means you need to be aware of what’s in your bottle. A quick glance at the ingredients list can save your furniture from damage. This knowledge empowers you to make the best decisions when spills happen.
Safe Removal Methods for Different Wood Types
Knowing how to remove fingernail polish remover from wood safely depends on the type of wood and its finish. A gentle approach is always best, especially when dealing with delicate surfaces. Start with the mildest methods and only escalate if necessary.
It’s like treating a minor cut; you don’t use strong disinfectants right away if a simple wash will do.
The goal is to lift the spilled remover without damaging the wood’s integrity or its appearance. This often involves a combination of absorption and gentle cleaning. Patience is key, as rushing the process can lead to permanent marks or damage that is hard to fix.
Let’s explore the best ways to handle this common household problem.
Immediate Action for Fresh Spills
The sooner you act, the easier it will be to remove the spill and prevent damage. Time is your best friend when dealing with nail polish remover on wood. Don’t wait for it to soak in or dry.
Grab your cleaning supplies right away and get to work. This proactive step can save you a lot of trouble later.
Blotting is crucial in the first few minutes. Use a clean, soft, absorbent cloth or paper towel. Gently press down on the spill to soak up as much of the liquid as possible.
Avoid rubbing, as this can spread the remover and push it deeper into the wood or finish. The aim is to lift the liquid off the surface.
Here’s a typical scenario for a fresh spill:
- Grab a clean, dry cloth or paper towel.
- Gently blot the spill, starting from the outside and working inward.
- Continue blotting with fresh sections of the cloth until no more liquid is absorbed.
- Dispose of the soiled cloth or paper towel immediately.
This initial blotting action removes the bulk of the liquid, significantly reducing the chance of the chemicals damaging the wood’s finish or the wood itself.
Using Mild Cleaning Agents
After blotting the excess liquid, you might need to clean the affected area. For most finishes, starting with the mildest agents is recommended. This minimizes the risk of stripping the finish or causing discoloration.
Even a small amount of mild cleaner can go a long way.
Mild dish soap is often effective. It helps to break down any oily residue left behind by the remover without being too harsh. Mix a few drops of mild dish soap with lukewarm water.
Dampen a clean, soft cloth with the soapy water. Wring it out very well so it’s just damp, not wet.
Gently wipe the affected area. Again, blot rather than rub. Follow this with a clean cloth dampened with plain water to rinse away any soap residue.
Finally, use a dry cloth to pat the area completely dry. This multi-step process ensures a thorough yet gentle cleaning.
Method 1 Mild Soap and Water
This is your go-to method for most accidental spills on finished wood. It’s safe, accessible, and effective for lifting residues without harming the surface. It’s particularly good for removing the lingering scent or slight stickiness.
- Mix a few drops of mild dish soap with one cup of warm water.
- Dip a clean, soft cloth into the mixture.
- Wring the cloth out thoroughly so it is barely damp.
- Gently blot the stained area. Do not rub.
- Use a separate damp cloth with plain water to rinse the area.
- Dry the wood completely with a clean, soft towel.
This method is designed to be safe for most common wood finishes, including polyurethane, lacquer, and shellac, provided the spill is addressed quickly. The key is minimal moisture and gentle blotting.
Method 2 Baking Soda Paste (For Stubborn Stains)
If a mild soap doesn’t fully remove the mark, a baking soda paste can be a slightly more potent option. Baking soda is a mild abrasive and can help lift stains. However, use this with caution on high-gloss finishes, as it can dull them if rubbed too hard.
Test in an inconspicuous spot first.
- Mix baking soda with a small amount of water to form a thick paste.
- Apply the paste to the stained area with a soft cloth.
- Gently rub the paste in a circular motion.
- Let the paste sit for a few minutes.
- Wipe away the paste with a damp cloth.
- Rinse the area with a clean, damp cloth.
- Dry the wood thoroughly.
This method is effective for absorbing residual chemicals and lifting surface stains. It’s important to ensure all baking soda is removed, as dried residue can be abrasive.
Dealing with Dried or Stubborn Stains
Sometimes, spills aren’t discovered immediately, or they leave behind marks that don’t budge with basic cleaning. Dried stains can be more challenging because the remover has had more time to interact with the wood’s finish or surface. You may need a slightly more targeted approach, but always proceed with caution.
If the stain is on a finished surface and mild methods haven’t worked, you might consider a specialized wood cleaner. Look for products designed for wood furniture that are safe for your specific finish. Always follow the product instructions precisely and test in a hidden area first.
Never use abrasive cleaners or harsh scrubbing pads.
Using Mineral Spirits (With Caution)
Mineral spirits are a petroleum-based solvent that can be effective at removing residue from finishes without being as harsh as acetone. They are often used to clean brushes and tools after painting. However, they can still damage some finishes if not used correctly or if left on too long.
Always ensure good ventilation when using mineral spirits.
- Ensure the area is well-ventilated.
- Dampen a soft cloth with a small amount of mineral spirits.
- Gently blot the stained area. Avoid rubbing.
- Work in small sections.
- Immediately follow with a clean cloth dampened with mild soap and water to remove mineral spirit residue.
- Rinse with plain water and dry thoroughly.
Mineral spirits are a step up from mild soap, and their use requires careful attention. They are best for tougher residues that haven’t responded to gentler methods. Always read the product label to ensure it’s suitable for your wood finish.
Restoring Damaged Finishes
If the nail polish remover has visibly damaged the wood finish, you might need to touch it up. This could involve a bit of furniture polish, a touch-up pen, or even a small refinishing project for deeper damage. For minor cloudiness on varnished surfaces, a good quality furniture polish can sometimes help restore the shine.
For more significant damage, like a stripped finish or a visible ring, you may need to consult a furniture restoration guide or a professional. The goal is to match the original finish as closely as possible. Small scratches or worn areas can often be blended in.
This is where patience and a keen eye for detail come into play.
Special Considerations for Different Wood Types
Not all wood is created equal. The species of wood and its inherent properties can influence how it reacts to spills and cleaning agents. Hardwoods are generally more durable than softwoods.
However, the finish is usually the most critical factor in protection.
When dealing with delicate or antique pieces, it’s always best to err on the side of caution. Research the specific type of wood and its finish before attempting any cleaning. If in doubt, a professional restorer can offer invaluable advice or services.
For everyday furniture, these methods should suffice.
Unfinished Wood
Unfinished wood is the most challenging to clean because the solvents penetrate directly into the grain. For fresh spills, immediate blotting is crucial. If a stain remains after blotting, you might need to lightly sand the area.
Start with fine-grit sandpaper and sand in the direction of the wood grain. Be careful not to sand too deeply, as this can create a noticeable dip.
After sanding, you may need to reapply a finish to the spot to match the rest of the surface. This could be a wood stain, oil, or protective sealant, depending on the original treatment. For deep stains that sanding doesn’t remove, sometimes a wood bleach can be used, but this is a more advanced technique requiring extreme care.
Laminate and Veneer
Laminate and veneer surfaces can be tricky. While they often have a durable top layer, they are made of thin materials that can be easily damaged by harsh chemicals or excessive moisture. Acetone can quickly break down the adhesive holding the veneer or damage the printed pattern on laminate.
For these materials, immediate blotting is paramount. Use the mildest cleaning agents possible, like a slightly damp cloth with a tiny bit of dish soap. Avoid saturating the surface.
If the spill has penetrated, it might be impossible to repair without professional help, as the underlying material can be compromised.
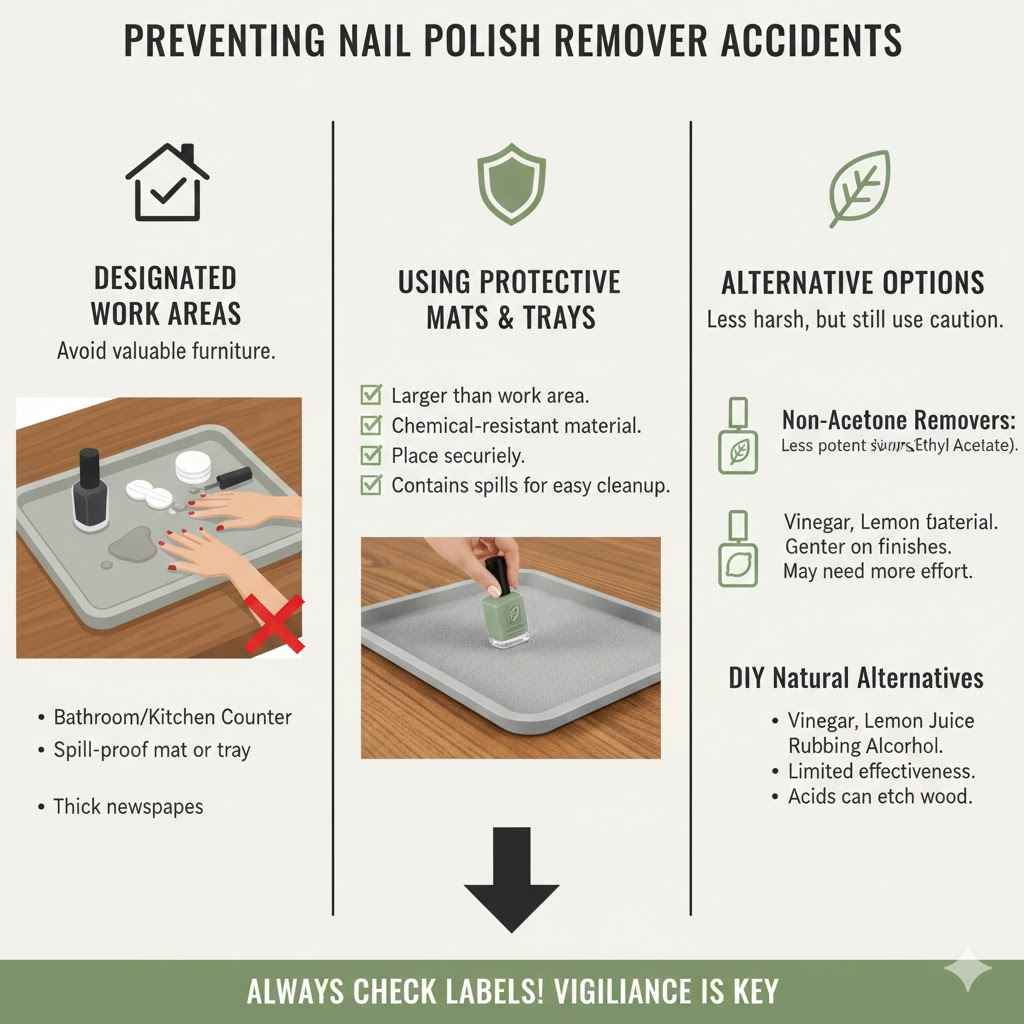
Preventing Future Nail Polish Remover Accidents
The best way to deal with nail polish remover spills on wood is to prevent them from happening in the first place. A little bit of foresight and planning can save you a lot of worry and potential damage to your treasured furniture. Think about where and how you use nail polish remover.
Creating a safe environment for tasks involving nail polish remover is simple. This involves designating specific areas and using protective barriers. These preventative measures are easy to implement and highly effective.
They ensure your wood surfaces remain in pristine condition.
Designated Work Areas
When you need to use nail polish remover, whether for cleaning or personal care, choose your location wisely. Avoid doing your nails over valuable wooden tables or furniture. Opt for areas that are easy to clean or can be protected, like a bathroom counter with a non-porous surface, a kitchen counter, or a workspace.
If you must be near wood furniture, set up a designated spill-proof zone. This involves using a tray, a mat, or a thick layer of old newspapers to catch any drips or spills. This small effort can prevent a lot of potential damage.
Think of it as a little insurance policy for your wood.
Using Protective Mats and Trays
A simple plastic mat or a large tray can be incredibly effective. Place it on the surface where you plan to perform the task. This creates a physical barrier between the nail polish remover and your wood.
It contains any spills, making cleanup much easier and preventing contact with the wood itself.
- Choose a mat or tray that is larger than the area you anticipate needing.
- Ensure the material of the mat or tray is resistant to the chemicals in nail polish remover.
- Place it securely on the surface before you begin.
- Carefully place your nail polish remover bottle and other supplies on the mat or tray.
- If a spill occurs, it will be contained on the mat or tray for easy disposal.
These protective items are inexpensive and reusable, making them a cost-effective solution for preventing damage. They are also great for protecting floors and other surfaces.
Alternative Nail Polish Remover Options
If you frequently use nail polish remover and are concerned about its harshness, consider exploring alternative products. While some alternatives may not be as effective as acetone-based removers, they can offer a gentler option for less stubborn polish or for users with sensitive hands and surfaces.
There are many brands offering non-acetone removers, which often use ingredients like ethyl acetate or propylene carbonate. Some natural or DIY options exist, though their effectiveness can vary. Always read labels and test any new product in an inconspicuous area.
Non-Acetone Removers
These removers are generally less potent than acetone-based versions. They still contain solvents, but they are often less aggressive. This means they are less likely to damage delicate wood finishes.
However, they may require a bit more soaking time or gentle scrubbing to remove polish effectively.
- Check the ingredient list for ethyl acetate, isopropyl acetate, or other similar compounds.
- These are typically considered milder than acetone.
- They are still solvents and should be used with caution around wood.
- Always blot any spills immediately.
- Non-acetone removers are a good compromise for those seeking a less harsh option.
While non-acetone removers are often marketed as safer, it’s important to remember that any solvent can potentially affect wood finishes. Vigilance and immediate cleanup are still essential.
DIY Natural Alternatives
Some people turn to natural alternatives for removing nail polish. These often involve ingredients like vinegar, lemon juice, or rubbing alcohol. While these can sometimes work for light nail polish, their effectiveness against tougher polishes can be limited.
Furthermore, acidic ingredients like vinegar and lemon juice can etch certain wood finishes if left on too long.
Rubbing alcohol (isopropyl alcohol) is a solvent and can be used cautiously. However, it’s still a good idea to use it sparingly and blot any spills immediately. For most effective and safe nail polish removal, especially around wood, a standard non-acetone remover is usually the most practical and reliable choice.
Frequently Asked Questions
Question: What is the fastest way to remove nail polish remover from wood?
Answer: The fastest way is to immediately blot up as much of the liquid as possible with a clean, dry cloth or paper towel. Avoid rubbing, as this spreads the spill.
Question: Can nail polish remover permanently damage wood?
Answer: Yes, especially if it contains acetone and is left on unfinished or poorly sealed wood. It can strip finishes, stain, or even warp the wood.
Question: Is it safe to use rubbing alcohol to clean nail polish remover from wood?
Answer: Rubbing alcohol is a solvent and can potentially damage wood finishes. Use it very cautiously, blot spills immediately, and rinse thoroughly with water afterward. Always test in an inconspicuous area first.
Question: What should I do if the wood finish looks cloudy after cleaning?
Answer: If the finish looks cloudy, it might have been slightly damaged or stripped. You can try applying a good quality furniture polish to see if it restores the shine. For deeper damage, touch-up or refinishing might be needed.
Question: How do I know if my wood furniture is sealed or unfinished?
Answer: Sealed wood usually has a smooth, sometimes glossy or satin, surface and a uniform color. Unfinished wood looks duller, feels more porous, and might have visible grain patterns that absorb liquids easily. If you’re unsure, assume it’s more vulnerable.
Summary
Learning how to remove fingernail polish remover from wood safely involves quick blotting, using mild cleaners like dish soap, and proceeding cautiously with tougher stains. Always consider the wood’s finish and act fast. Prevention with designated areas and protective mats is your best bet for keeping wood furniture looking great.