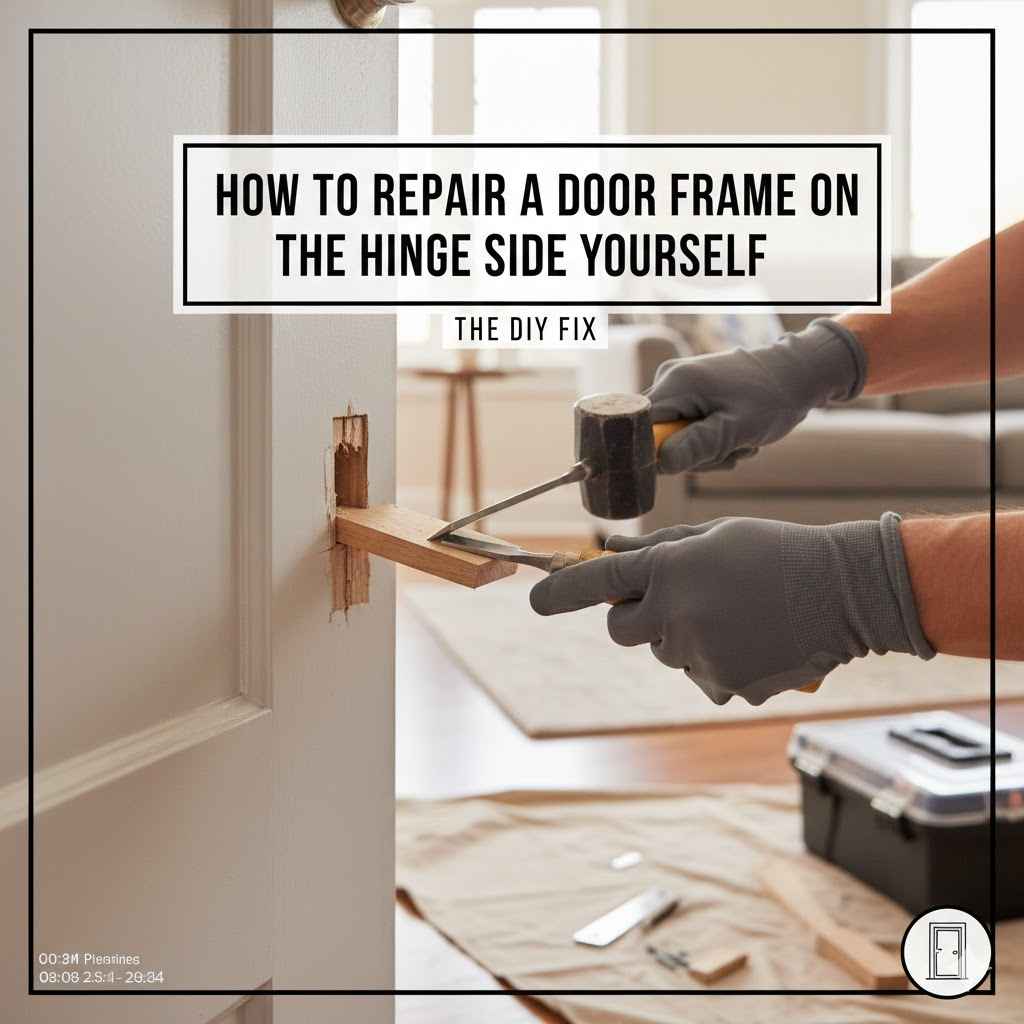
How to Repair a Door Frame on the Hinge Side Yourself
Cracked door frames are a common home repair problem. Fixing the spot where the hinges attach can seem hard, especially if you’re new to home improvement. Don’t worry, though! How to Fix a Broken Door Frame on the Hinge Side isn’t as tough as it looks. This guide will show you a simple, step-by-step method to get your door working properly again. We’ll make it easy to follow, and you’ll soon have a solid door frame. Let’s get started!
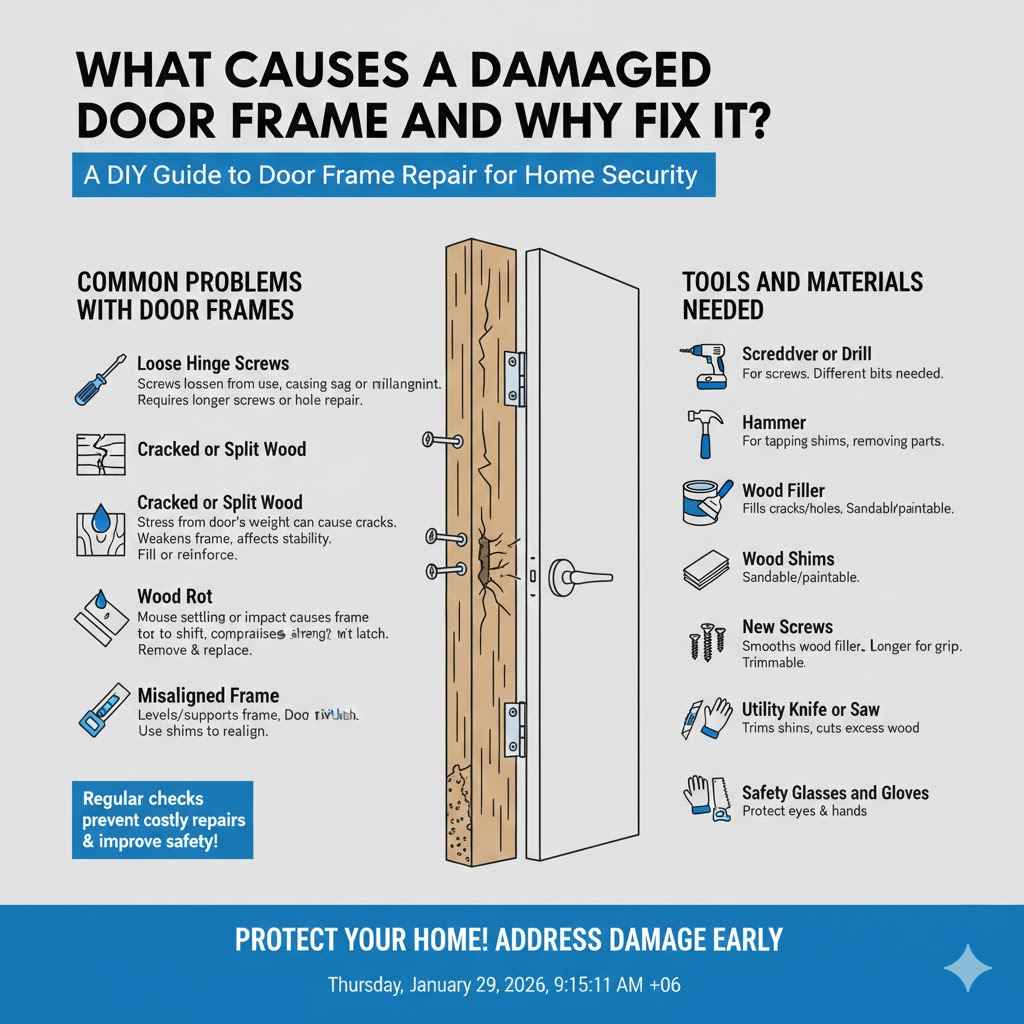
What Causes a Damaged Door Frame and Why Fix It?
Door frames, especially on the hinge side, take a beating. They’re constantly stressed by the weight of the door and the opening and closing motion. Over time, the screws that hold the hinges can loosen, and the wood around them can split or crack
. This makes the door sag, rub against the frame, or not close properly. Moisture, from humidity or leaks, can also cause wood rot, weakening the frame further. It’s important to know the signs of damage, like cracks near the hinges, loose screws, or the door feeling wobbly. Ignoring these issues can lead to bigger problems, like the door falling off the hinges, or making it hard to secure your home. Regular checks and repairs can prevent more costly repairs in the future, and improve safety and security. When your door frame is broken, it’s time to act.
Common Problems with Door Frames
Several issues frequently plague door frames, often concentrated on the hinge side. These problems can range from minor annoyances to serious structural weaknesses. Identifying the type of damage helps you determine the best repair approach. This knowledge can also help you predict what issues might arise in the future. Knowing the common culprits helps make your repair process a success. Here’s a breakdown:
Loose Hinge Screws: Over time, the screws that hold the door hinges can become loose because of the constant opening and closing of the door. This can lead to the door sagging or not closing properly. Simply tightening the screws might solve the problem, but sometimes you need longer screws or need to fill the holes.
Loose screws are a frequent issue. If the screw holes are stripped, meaning the wood no longer grips the screws, the door will not stay aligned. This can be addressed by using longer screws that reach undamaged wood, or by filling the holes with wood filler, toothpicks, or golf tees and then re-screwing the hinges. This prevents further damage and keeps your door working well.
Cracked or Split Wood: The constant stress from the door’s weight and use can cause the wood around the hinges to crack or split. This is especially true in older homes where the wood may be dried out or not as strong. These cracks weaken the frame and make it less stable.
Cracks can be superficial or deep, affecting the frame’s integrity. Small cracks can be filled with wood filler and repainted. Larger splits often require a more extensive fix, like reinforcing the frame with shims or even replacing the damaged section of wood. If left untreated, cracks can worsen and cause the door to detach or fail to provide a good seal.
Wood Rot: Exposure to moisture, either from leaks or high humidity, can lead to wood rot. This deteriorates the wood, making it soft and crumbly. Rot is a serious problem because it compromises the structural strength of the frame.
Wood rot is a serious issue that needs prompt action. It’s often indicated by discoloration or a spongy texture in the wood. If rot is present, the affected wood must be removed and
Misaligned Frame: Over time, the door frame might shift out of alignment due to settling of the house or damage from a forceful impact. This can cause the door to rub against the frame or not latch properly.
A misaligned frame causes issues with the door’s operation, making it difficult to close or latch. The frame must be checked for plumb (vertical) and level. Shims can be used to realign the frame until it is straight and the door functions smoothly. Correcting misalignment ensures that the door closes and seals correctly and prevents further stress on the hinges and frame.
Tools and Materials Needed
Before you begin repairing your door frame, it’s helpful to gather the tools and supplies needed. Having everything ready saves time and makes the project easier. Different repairs require different tools, so be prepared with the necessary items. Being prepared ensures you can tackle any problems you find. Here’s a list to get you started:
Screwdriver or Drill: You’ll need a screwdriver or a drill with different bits for removing and replacing screws. This is essential for working with the hinges and frame.
A screwdriver is ideal for delicate work, but a drill saves time, especially when using pilot holes. Make sure you have the right size bits for the screws. A drill with an adjustable clutch helps prevent over-tightening and stripping the screw heads. Consider a magnetic tip to keep the screws from falling.
Hammer: A hammer is useful for tapping in shims and removing any old parts. It’s also needed for driving nails if you are using them in your repair.
A claw hammer is helpful for pulling nails. Choose a hammer with a comfortable grip. Always wear safety glasses when hammering to protect your eyes from debris.
Wood Filler: Wood filler is great for filling small cracks and holes in the door frame. Choose a type that matches the color of your door frame or can be painted.
Wood filler is essential for smoothing out imperfections. Select a filler that is sandable and paintable. The type of filler depends on the repair. For small cracks, a simple filler works fine. For deeper holes, consider a two-part epoxy filler for more durability.
Sandpaper: Sandpaper is necessary for smoothing out any wood filler or rough edges before painting.
A range of sandpaper grits will be useful. Start with a coarser grit to remove any imperfections, then move to a finer grit for a smooth finish. Always wear a dust mask when sanding. Consider using a sanding block to make the process easier.
Wood Shims: Shims are crucial for leveling and supporting the door frame. They come in various sizes and are used to ensure the door fits and closes correctly.
Shims are wedge-shaped pieces of wood used to fill gaps. They come in different thicknesses, so you can adjust them. Use a utility knife to trim the shims to the right size. Shims are great for ensuring the frame is plumb and level.
New Screws: When replacing the hinges, you’ll need new screws. Choose screws that are the same length or slightly longer than the originals.
Use screws of the right length and type for the job. Consider using longer screws for better grip. Ensure the screws are the correct size to fit into the existing hinge holes. Using quality screws makes sure the repair lasts.
Utility Knife or Saw: Use these for trimming shims or cutting off excess wood.
A utility knife with a sharp blade is useful for trimming shims. A saw might be needed if you have to cut out sections of damaged wood. Be careful when using these tools and always cut away from your body.
Safety Glasses and Gloves: Safety first! Protect your eyes and hands when working with tools and materials.
Always wear safety glasses to protect your eyes from flying debris. Gloves protect your hands from splinters and chemicals. Having the right safety gear ensures your safety throughout the process.
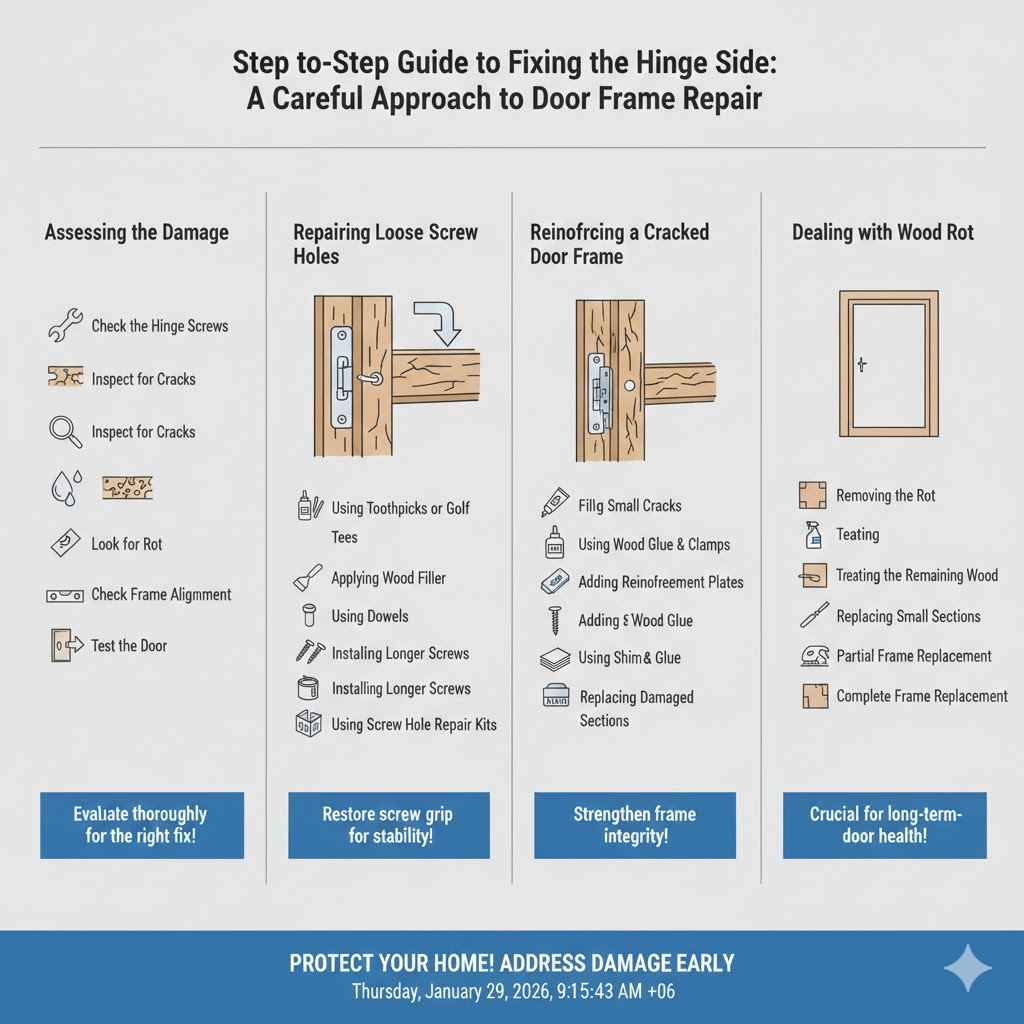
Step-by-Step Guide to Fixing the Hinge Side
Fixing a broken door frame on the hinge side involves a systematic approach. The process involves assessing the damage, making the necessary repairs, and ensuring the door functions correctly. By following these steps, you can restore the door frame. Remember to take your time and double-check your work as you go. This section breaks down the process in a clear, easy-to-follow sequence. Let’s start!
Assessing the Damage
Before beginning the repair, it’s vital to assess the damage to determine the extent of the problem. This assessment will help you select the right repair techniques and materials. Knowing the scope of damage prevents wasting time. You can make an informed decision on how to proceed. Here’s how to evaluate the situation:
Check the Hinge Screws: Examine the screws holding the hinges to the frame and the door. Look for screws that are loose, stripped, or missing.
Try tightening the screws with a screwdriver. If they spin freely, the holes are stripped. Missing screws need to be replaced. Note the size and type of the screws to get replacements.
Inspect for Cracks: Carefully look for any cracks in the wood around the hinge areas. Cracks can indicate that the frame is weakening.
Small cracks can be filled with wood filler. Larger cracks might require reinforcing the frame. Inspect the entire frame, not just the hinge area.
Look for Rot: Examine the wood for signs of wood rot, such as soft, spongy, or discolored areas. This is often found near the bottom of the frame, where moisture can collect.
If you find rot, gently probe the wood with a screwdriver. Rot must be removed and the area treated to prevent it from spreading. Wear gloves and a mask if you suspect rot.
Check Frame Alignment: Verify the frame’s alignment using a level. The frame should be plumb (vertical) and level.
Use a level along the sides and top of the frame. If the frame is not plumb or level, the door might not close properly. Note any areas that need adjustment.
Test the Door: Open and close the door several times to check for any binding or rubbing. This helps identify where the frame might need adjustment.
If the door rubs, examine where it contacts the frame. This may be caused by a misaligned frame or a warped door. Check for any areas that prevent smooth movement.
Repairing Loose Screw Holes
Loose screw holes are a common issue, and fixing them is a simple repair that makes a big difference. This involves reinforcing the existing holes to hold the screws securely. Several methods are available, and the best option depends on the severity of the damage. Here’s how to do it effectively. This ensures the hinges stay firmly attached and the door functions smoothly.
Using Toothpicks or Golf Tees: This is an easy fix for slightly stripped holes. Fill the hole with wood glue and then insert toothpicks or golf tees. Break off the excess flush with the frame.
This method fills the hole with wood, providing new material for the screws to grip. Make sure the toothpicks or tees fit snugly. Let the glue dry completely before re-screwing the hinge.
Applying Wood Filler: Wood filler is suitable for filling larger, stripped holes. Apply the filler, let it dry, and then pre-drill new pilot holes.
Fill the hole completely, slightly overfilling it. After the filler dries, sand it smooth. Re-drill the pilot holes before screwing the hinges back in. Wood filler provides a solid base for the screws.
Using Dowels: Dowels are small wooden pegs that can be inserted into enlarged holes. Drill out the hole to a size that fits the dowel. Glue the dowel in place, let it dry, and then trim flush.
Dowels provide a solid surface to reattach the hinges. Cut the dowel flush with the frame. Pre-drill the pilot holes before re-screwing the hinges. This offers a robust solution for more significant damage.
Installing Longer Screws: Sometimes, using longer screws can grab onto fresh wood that hasn’t been stripped. This is helpful if the damage is minor.
Measure the existing screws to determine the correct length. Select screws that are slightly longer. Make sure the longer screws do not protrude on the other side. This provides a quick fix when the damage is isolated to a shallow section.
Using Screw Hole Repair Kits: These kits are designed specifically for fixing stripped screw holes. They usually contain inserts and screws.
Follow the kit’s instructions for installation. This method provides a very durable solution for stripped holes. These kits give a solid grip for the screws. It is an effective solution to ensure screws stay in place.
Reinforcing a Cracked Door Frame
Cracks in the door frame can compromise its strength, so repairing them is important. Reinforcing a cracked frame makes it more stable and durable. There are a few different methods you can use, depending on the size and location of the crack. Choosing the right method is important for making sure the frame is strong and will last. Properly reinforcing a cracked door frame keeps your door functioning properly. Here’s what you can do:
Filling Small Cracks with Wood Filler: For minor cracks, wood filler is a simple solution. Clean the crack, apply the filler, and sand it smooth after it dries.
Wood filler fills the crack, making the frame look smooth. Make sure to use paintable wood filler that matches your door frame. This is a quick fix for surface cracks.
Using Wood Glue and Clamps: Apply wood glue to the crack and clamp the frame together. Wipe away any excess glue and let it dry. This is good for cracks that can be closed.
Clamping the frame ensures a tight bond. Remove the clamps after the glue dries completely. This helps to secure the crack and restore the frame’s integrity.
Adding Reinforcement Plates: Metal reinforcement plates can provide extra strength to a cracked frame. Place the plate over the crack and screw it in.
Reinforcement plates are a strong solution for cracks near the hinges. Choose plates that are the right size for your frame. Make sure the screws are the correct length. This provides an additional layer of support.
Using Shims and Wood Glue: Insert wood shims into the crack, adding wood glue for a strong bond. Trim any excess shims flush with the frame.
Shims are useful for supporting cracks. Ensure the shims fit snugly. Let the glue dry completely before removing excess shim material. This provides the frame with structural support and stability.
- Replacing Damaged Sections of Wood: If a crack is significant, it’s sometimes best to cut out the damaged section andMeasure and cut the new piece of wood carefully. Use wood glue and screws to attach the new piece. This offers the best fix when the damage is extensive. This completely restores the frame’s strength.
Dealing with Wood Rot and Frame Replacement
Wood rot is a serious issue that can significantly weaken a door frame. If you discover wood rot, it’s essential to address it immediately to prevent further damage. The extent of the rot determines the necessary repairs, which can range from removing small sections to replacing the entire frame. Addressing wood rot prevents structural collapse. This is important for the safety and functionality of your door. Here’s what you need to know:
Removing the Rot: Use a chisel or utility knife to remove all the rotten wood. Ensure you get rid of all the affected wood to stop the spread.
Remove all the affected wood carefully, making sure you get it all. Wear gloves and a dust mask. This is essential to prevent the rot from spreading.
Treating the Remaining Wood: Apply a wood preservative to the remaining wood to prevent future rot. Follow the product’s instructions carefully.
Wood preservative is designed to protect wood from moisture and rot. Apply the preservative evenly. Let it dry completely before proceeding with repairs.
- Replacing Small Sections: For small areas of rot, cut out the damaged wood andMake sure the new piece of wood is the same size and type as the original. This is a good way to repair isolated spots of rot. This provides a strong, durable repair.
- Partial Frame Replacement: If the rot is extensive, you may need to replace part of the door frame. This involves removing the damaged section and installing new wood.
- Carefully measure and cut the new frame pieces. Use wood glue and screws. This provides a complete repair and restores the integrity of the door frame.
- Complete Frame Replacement: In severe cases, where the rot has damaged a large part of the frame, a complete frame replacement is necessary. This involves removing the old frame and installing a new one.
- Remove the door and old frame carefully. Install the new frame according to the manufacturer’s instructions. This option is required when damage is too widespread. This creates a solid base for the door.
Frequently Asked Questions
Question: Can I fix a broken door frame myself?
Answer: Yes, in most cases, fixing a broken door frame is a do-it-yourself project. Simple repairs, such as tightening loose screws or filling small cracks, are very doable for beginners. For larger issues, like replacing a section of the frame, you might want to consider assistance if you’re not comfortable with the steps involved.
Question: What tools do I need to fix a broken door frame?
Answer: You’ll need basic tools like a screwdriver or drill, a hammer, wood filler, sandpaper, wood shims, a utility knife or saw, and safety glasses. Depending on the repair, you may also need new screws, wood glue, and wood preservative.
Question: How do I know if I need to replace the entire door frame?
Answer: You might need to replace the entire door frame if the damage is extensive, such as if there’s significant wood rot throughout the frame or if a large portion of the frame is split or broken. If a large part of the frame is damaged, a complete replacement is usually the best long-term solution.
Question: How can I prevent door frame damage in the future?
Answer: You can prevent damage by regularly checking and maintaining your door frame. Tighten loose screws, fill small cracks promptly, and address any moisture issues quickly. Consider applying a fresh coat of paint every few years to protect the wood. You should also ensure good ventilation to reduce moisture buildup.
Question: How much does it cost to fix a broken door frame?
Answer: The cost varies greatly depending on the extent of the damage. Small repairs, like tightening screws or using wood filler, can cost very little, just the price of the materials. More extensive repairs, like replacing a section of the frame or the entire frame, will cost more. The price depends on the materials and if you hire someone to do the work.
Final Thoughts
Fixing a broken door frame on the hinge side is a task that’s achievable with some effort and the right approach. Starting with identifying the problem, gathering the necessary tools, and following the correct steps can make the process simpler than it seems. Whether it’s fixing loose screws, filling cracks, or replacing damaged wood, each step brings your door closer to its original state. Remember to pay attention to details like wood filler, screws, and wood preservatives. This helps ensure that the door operates smoothly and effectively.
Your door frame’s repair not only improves your home’s appearance but also strengthens security and structural integrity. Take the time to evaluate the issues, follow the steps provided, and don’t be afraid to ask for help if needed. With a little determination, you can successfully How to Fix a Broken Door Frame on the Hinge Side, boosting both the look and functionality of your home.