How to Replace a Door Knob: A Step-by-Step Guide for Homeowners
Hey there! If you’ve ever looked at a wobbly, outdated, or broken door knob and thought, “I need to fix that,” you’re in the right place. Replacing a door knob might sound like a job for a handyman, but trust me, it’s something you can tackle yourself with a little patience and the right tools. I’ve swapped out plenty of door knobs in my home, and I’m excited to share everything I’ve learned to make this process smooth and stress-free for you. Whether you’re upgrading for style, improving security, or fixing a knob that’s seen better days, this guide will walk you through every step. Let’s dive in and get that door knob looking and working like new!
Why Replace a Door Knob?
I remember the first time I decided to replace a door knob. The old one was loose, scratched up, and just didn’t match the vibe of my freshly painted living room. There are plenty of reasons to swap out a door knob. Maybe yours is outdated, or it’s sticking and making it hard to open the door. Sometimes, it’s about security—older knobs might not have the sturdy locks we need today. Or maybe you just want a fresh, modern look to match your home’s style. Whatever the reason, replacing a door knob is a quick and affordable way to make a big difference. Plus, it’s a project you can feel proud of when it’s done!
Tools and Materials You’ll Need
Before we get started, let’s gather everything you’ll need. I learned the hard way that having all your tools ready saves a lot of frustration. Here’s what I recommend:
| Item | Purpose |
|---|---|
| New door knob set | The replacement knob, including latch and strike plate. |
| Phillips screwdriver | For removing and tightening screws. |
| Flathead screwdriver | Helpful for prying off old parts or aligning pieces. |
| Measuring tape | To check door thickness and backset (distance from edge to knob center). |
| Allen wrench (if included) | Some knobs need this for tightening set screws. |
| Chisel (optional) | For adjusting the strike plate or latch if they don’t fit perfectly. |
| Hammer (optional) | To tap the chisel gently if adjustments are needed. |
| Cleaning cloth | To wipe down the door and keep things tidy. |
When picking a new door knob, make sure it matches your door’s thickness (usually 1-3/8 to 1-3/4 inches) and the backset (typically 2-3/8 or 2-3/4 inches). I once bought a fancy knob only to realize it didn’t fit my door, so double-check the packaging or ask at the hardware store. You’ll also want to decide between a passage knob (no lock, for closets or hallways), a privacy knob (with a lock, for bedrooms or bathrooms), or an entry knob (keyed, for exterior doors).
Step-by-Step Guide to Replacing a Door Knob
Now, let’s get to the fun part—actually replacing that door knob! I’ve broken this down into clear steps based on my own experience. Follow along, and you’ll have a shiny new knob in no time.
Step 1: Remove the Old Door Knob
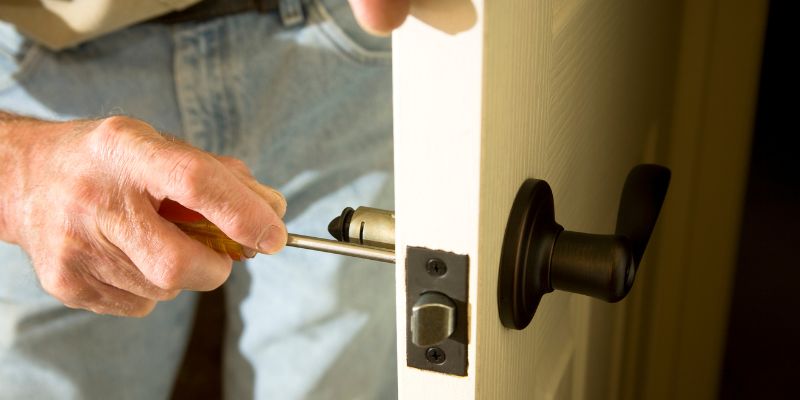
First things first, you need to take off the old knob. Start by opening the door so you can access both sides. Look for two screws on the interior side of the knob (the side inside the room). Grab your Phillips screwdriver and loosen those screws. Sometimes, they’re hidden under a decorative cover plate, so you might need to pop that off with a flathead screwdriver. I’ve had knobs where the cover was stuck, so be gentle but firm.
Once the screws are out, the interior and exterior knobs should pull apart easily. If they don’t, check for a small slot or hole on the knob’s shaft. You might need to press a pin or use an Allen wrench to release a catch. Pull the knobs off, and you’ll see the latch mechanism inside the door. Remove the two screws holding the latch in place, and slide it out. If it’s stubborn, wiggle it a bit or use your flathead screwdriver to pry it gently.
Step 2: Clean and Inspect the Door
With the old knob gone, take a moment to clean the area. I like to wipe down the door with a damp cloth to remove dust or grime. Check the hole where the latch was and the strike plate on the door frame. If there’s any damage, like splintered wood or misaligned holes, now’s the time to fix it. I once found a door where the latch hole was too shallow, so I used a chisel to deepen it slightly. If you need to do this, go slow and test-fit the new latch to avoid removing too much wood.
Step 3: Install the New Latch
Your new door knob set will come with a latch mechanism. This is the part that slides in and out to catch the strike plate and keep the door closed. Insert the latch into the hole on the edge of the door, making sure the curved side faces the direction the door closes. For example, if your door swings into the room, the curve should face the room. This ensures the door closes smoothly.
Line up the latch’s faceplate with the edge of the door, and secure it with the provided screws. I’ve found that tightening these screws by hand first helps prevent stripping. If the faceplate doesn’t sit flush, you might need to chisel out a small recess. Use your chisel and hammer carefully, removing just a little wood at a time.
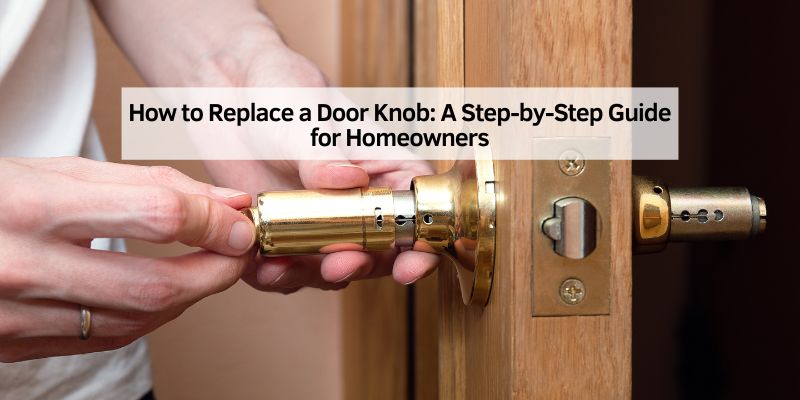
Step 4: Attach the New Door Knob
Now, let’s install the knob itself. Your new set will have two halves—one for the interior and one for the exterior. The exterior side usually has the keyhole (for entry knobs) or a plain design (for passage or privacy knobs). Slide the exterior knob into the hole, aligning its spindle (the square rod) with the latch mechanism. Then, place the interior knob on the other side, making sure the spindle connects both pieces.
Secure the knobs with the screws provided. Most sets use two long screws that go through the interior knob and thread into the exterior knob. Tighten them evenly to avoid wobbling. If your knob has a set screw (often needing an Allen wrench), tighten that too. I once skipped this step, and the knob kept slipping—don’t make my mistake!
Step 5: Install or Adjust the Strike Plate
The strike plate is the metal piece on the door frame where the latch catches. Your new knob might come with a new strike plate, or you can reuse the old one if it fits. Line up the strike plate with the latch, close the door, and check if the latch slides into the hole smoothly. If it doesn’t, you may need to adjust the strike plate by loosening its screws and shifting it slightly. In one of my projects, I had to file down the strike plate’s hole a bit to make it align perfectly. Use a metal file or chisel if needed, but be precise.
Secure the strike plate with its screws, and test the door again. Open and close it a few times to ensure the latch catches without sticking.
Step 6: Test and Troubleshoot
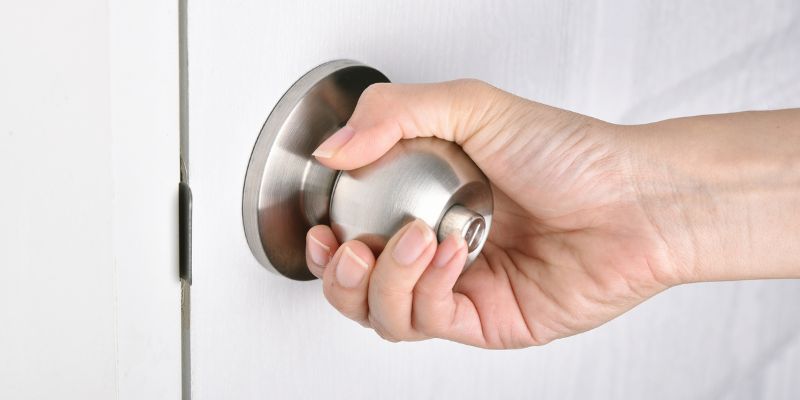
You’re almost done! Turn the knob, lock and unlock it (if it has a lock), and open and close the door several times. The knob should turn smoothly, and the latch should move without resistance. If it feels stiff, check that all screws are tight and the latch is aligned with the strike plate. I’ve had to loosen and reposition the latch a couple of times to get it just right.
If you’re installing a keyed entry knob, test the key to make sure it locks and unlocks easily. Privacy knobs often have a push or turn lock—test that too. If anything feels off, go back and double-check each step. Patience here saves headaches later!
Choosing the Right Door Knob for Your Home
Picking a door knob isn’t just about function—it’s also about style. I’ve spent hours at the hardware store debating finishes like brushed nickel, matte black, or classic brass. Think about what matches your home’s vibe. For example, modern homes look great with sleek, minimalist knobs, while traditional homes might call for ornate designs. Also, consider the knob’s function:
- Passage Knobs: No lock, perfect for closets or hallways.
- Privacy Knobs: Lockable without a key, great for bedrooms or bathrooms.
- Entry Knobs: Keyed for security, ideal for front or back doors.
Check the packaging for terms like “ANSI Grade” for security. Grade 1 is the most secure, but Grade 2 or 3 is fine for most homes. I always make sure the knob feels sturdy in my hand—cheap ones tend to wobble after a while.
Common Mistakes to Avoid
I’ve made my fair share of mistakes replacing door knobs, so let me save you some trouble. First, don’t assume all knobs are universal. Measure your door’s thickness and backset before buying. Second, don’t overtighten screws—it can strip them or crack the knob. Third, don’t skip testing the latch alignment. A misaligned latch makes the door hard to close, and it’s annoying to fix later. Finally, if you’re replacing an exterior knob, make sure the lock is high-quality. I once cheaped out on an entry knob, and it felt flimsy after a few months.
Maintaining Your New Door Knob
To keep your new knob looking and working great, give it some love now and then. I wipe mine down with a damp cloth to remove fingerprints, especially on shiny finishes like chrome. If the knob gets loose, tighten the screws right away to prevent wobbling. For keyed knobs, a drop of lock lubricant (like graphite powder) once a year keeps the mechanism smooth. Avoid using oil-based sprays—they attract dust and gunk.
Why I Love This DIY Project
Replacing a door knob is one of those projects that feels so satisfying. It’s quick (usually under an hour), doesn’t cost much (most knobs are $10-$50), and instantly upgrades your home. Every time I walk past a door with a knob I’ve installed, I get a little proud. Plus, it’s a skill you can use again and again—every home has doors, after all!
Conclusion
There you go—you’re now ready to replace a door knob like a pro! I hope this guide has shown you that it’s not as tricky as it seems. With a few tools, a bit of patience, and the right knob, you can transform any door in your home. Whether you’re fixing a wobbly knob, upgrading for security, or just refreshing your space, this project is a win. So grab that screwdriver, pick out a stylish new knob, and get to work. You’ll be amazed at how much a small change can make. Got questions? Check out the FAQs below, and feel free to share your door knob success stories with me!
Frequently Asked Questions
What tools do I need to replace a door knob?
You’ll need a Phillips screwdriver, a flathead screwdriver, a measuring tape, and possibly an Allen wrench (if your knob has set screws). A chisel and hammer are handy if you need to adjust the latch or strike plate. Your new knob set will include the latch and screws.
How long does it take to replace a door knob?
For most people, it takes about 30-60 minutes. If it’s your first time or you run into issues like a misaligned latch, it might take a bit longer. I usually set aside an hour to be safe.
Can I replace a door knob without a locksmith?
Absolutely! Replacing a door knob is a straightforward DIY project. You don’t need a locksmith unless the lock is complex or you’re dealing with a high-security system. Follow the steps above, and you’ll be fine.
How do I know if a new door knob will fit my door?
Check your door’s thickness (usually 1-3/8 to 1-3/4 inches) and the backset (2-3/8 or 2-3/4 inches from the edge to the center of the knob hole). The knob’s packaging will list compatible measurements. Measure before you buy to avoid surprises.
What’s the difference between a passage, privacy, and entry knob?
A passage knob has no lock and is used for closets or hallways. A privacy knob has a lock (usually a push or turn button) for bedrooms or bathrooms. An entry knob has a key and is used for exterior doors like your front door.
How do I fix a door knob that doesn’t latch properly?
If the latch doesn’t catch, check the alignment of the latch and strike plate. Loosen the strike plate screws and shift it slightly, or deepen the latch hole with a chisel. Test the door after each adjustment until it closes smoothly.